

Learning how to make a Discord server is surprisingly easy. You can get set up with a server within a few minutes and the whole process is entirely free.
Once you have your Discord server, you can invite your friends, set permissions, and customize your text and voice channels.


Don’t worry if you’re inexperienced with Discord, this guide will make sure you know everything important about setting up a server.
How To Make a Discord Server
Whether you’ve installed the Discord Android or iPhone app, have the desktop app, or you’re using the browser version, creating a Discord server follows the same steps.

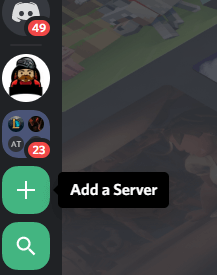
Start by selecting the + sign on the left side of the Discord user interface. On mobile, you must tap the three lines at the top left of the screen to access this panel.

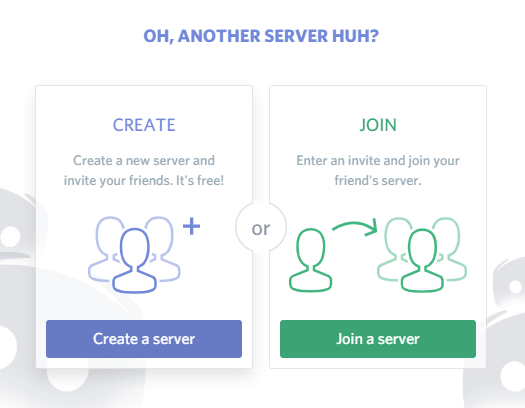
This is the add a server option. Once you’ve clicked or tapped it, select the create a server option.

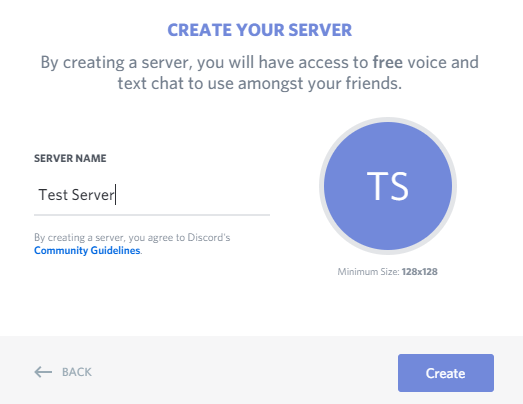
Next, give the server a name. You can also click the circle with your server name initials to choose a featured image for the server. Click create once you’ve finished with your name and featured image.

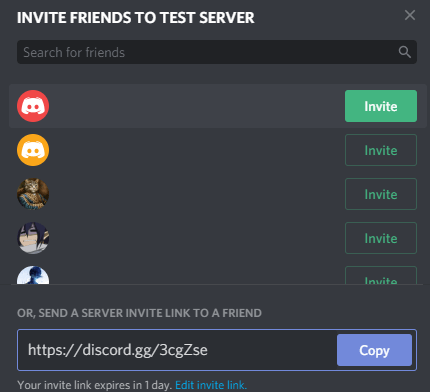
You’ll now be asked to send out invites to your friends. You can do this later, but if it’s a server just for friends, it’s great to start now. You can click to immediately invite any friends on your friends list. If a friend isn’t on your friends list, you will need both the friend’s Discord username and their tag. An example would be – Discord Username#0343.
After that, you will probably want to make some channels. There are two types of channels in Discord. You have text channels and voice channels. A text channel can be viewed like a separate tab within your server and will save any messages sent there for later viewing regardless of who is online. A voice channel is different.
When you click it, you’ll join that voice channel and will be able to communicate with anybody also in that channel. You’ll have to leave a voice channel once you’ve finished talking by clicking the disconnect button at the bottom of the left side panel.

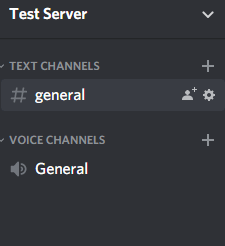
To create a new channel, you can click the + buttons under the voice and text channel sections on your Discord server. Alternatively, you can click the edit button on the automatically created general channels to change their name.
How to Add New Users and Manage Permissions

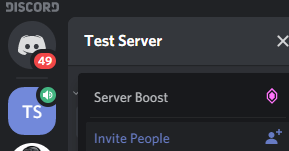
If you need to invite others again, click your server name in the left panel. On mobile, you must tap the three stacked lines before the panel will appear. Next, click Invite People. You can now invite people directly again.

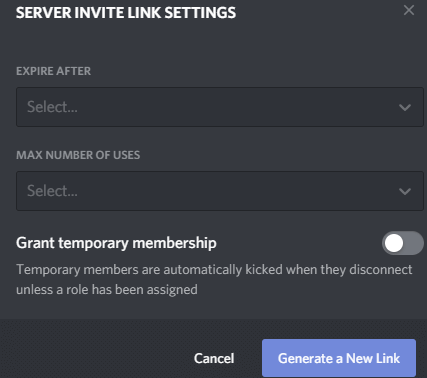
Alternatively, you can copy and paste the provided link. Anybody that uses that link will get an instant invite to join your server. If you click the edit invite link button you can control how many uses the link has before it expires, or how long it has. This could be useful for restricting who has access to your server.
It’s safe to just use the server as it is once you’ve made a Discord server if it’s just you and a few friends, but if you want to use your server with a larger audience or to chat with people you may trust less, you should create roles and permissions.

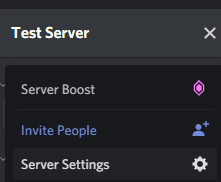
To do this, click the button to the right of your server name on the left side panel. On mobile, you’ll need to tap the three menu button again before you’ll be able to see this panel. Next, click server settings. On the new page that appears, click Roles.

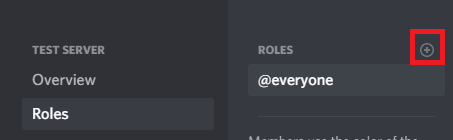
On the Roles page, click the + button next to Roles. Give the role a name and a color – they will appear as this color when they send messages in the text channel. You can now scroll through the list to give this particular role different permissions. For example, you can choose whether this role can kick other members, use the @everyone role to notify all members, or create custom invites to the server to send to others.
You may want to create a role for your closest friends so that they can have full control over the server when you’re offline, or a new role for untrusted users so that you can restrict access to what they see.
To give a user a role, simply right click their username in the right side panel. This panel is attached to the screen on the browser and desktop versions. On mobile, you can bring up the right side panel by swiping left from the right edge of your display.

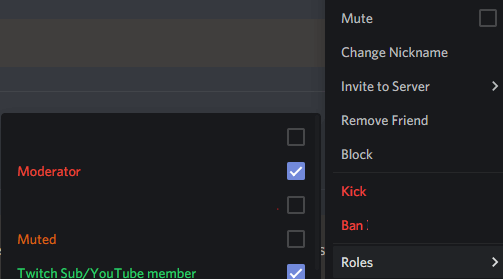
On desktop, right click a username in the list and hover over the roles section. You can click to assign them to any roles. On mobile, you must tap a user, then tap manage user. After, you’ll see the option to add or remove this user to any role.
If you want to restrict access to some text or voice channels, you must also assign roles to those channels. To do this, click the edit cog button next to a channel. On mobile, you must tap the channel name first, and then tap edit channel.

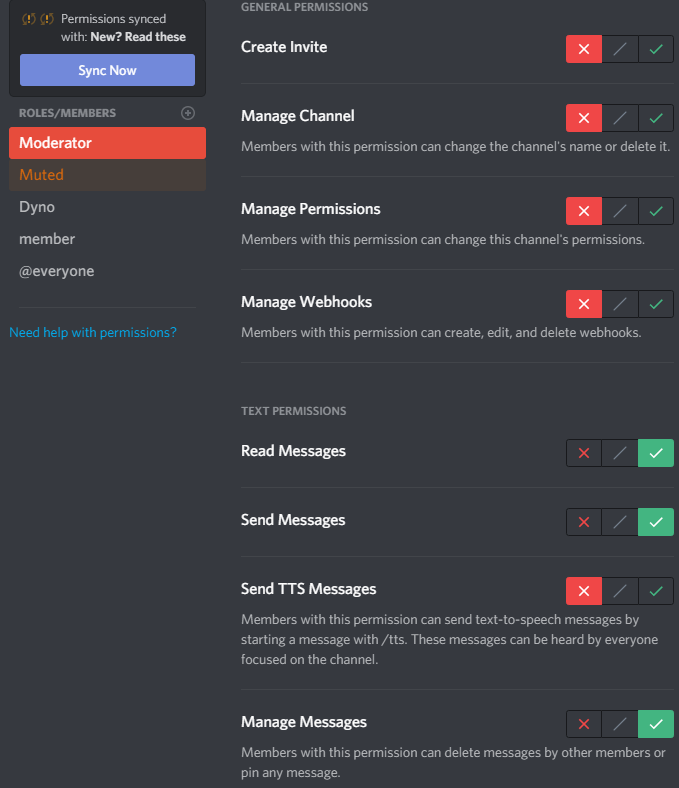
For text channels, you must click on each role individually and set the read messages and send messages permissions. To do this, click or tap the red cross, green tick, or gray slash to get the required results. A green tick means that role can access that permission, a red tick means they can’t access it. A gray slash will mean it will take whatever permissions are default for that role type. (Either an administrator or non administrator role.)

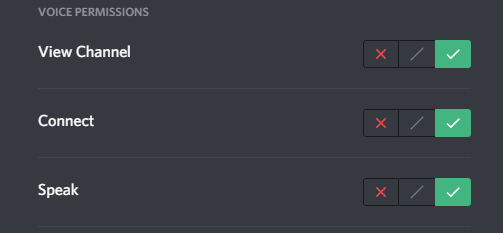
You can do the same for voice channels, but the permissions are slightly different. You’ll want to change the permissions for view channel, connect, and speak for each role.
Summary
Hopefully this article has helped you to learn how to make a Discord server. You should now also know how to manage users and channel permissions within your server. Need any more help? Why not leave a comment in the section below and we’ll try to help.