

There are several really great email services out there, and some of them even let you schedule emails. A scheduled email is a message you can send in the future; just write the message in advance and set up the email delay so that they won’t go out until the day and time you specify.
If you’re the type to write emails but forget
to send them on time, and they just sit in your drafts folder for far too long,
sending an email at a specific time in the future might be exactly what you
need. Or maybe you have something to say but it isn’t relevant for a few more
days; just schedule the message to be sent at the perfect time.
Most of us can probably find a use for
scheduling emails. Fortunately, some of the biggest names in email providers
support the feature.


Note:
Outlook.com, Yahoo, ProtonMail, and probably some other email providers don’t
include the option to schedule emails from their respective webmail sites.
However, you can still set up scheduled emails with an offline email client as
described at the bottom of this page.
Schedule Emails on Gmail
Scheduling a Gmail message to be sent later is
as easy as selecting the Schedule send
option.
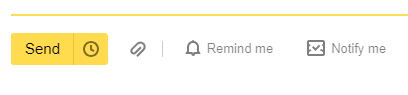
Step 1: Select the down arrow next to Send
and choose Schedule send. You can do
this from any compose box, whether you’re writing a new email, replying to one,
or forwarding the message.


Step 2: Pick one of the suggested times or select Pick date & time to customize when the email should go out. You
can choose any date on the calendar and optionally define the exact time that
the email should be delivered on that day.

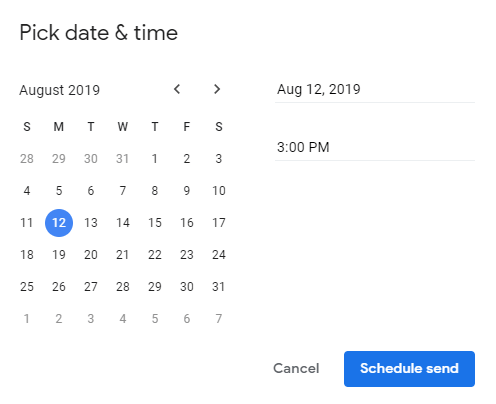
Step 3: Press Schedule send to
queue the email for sending.
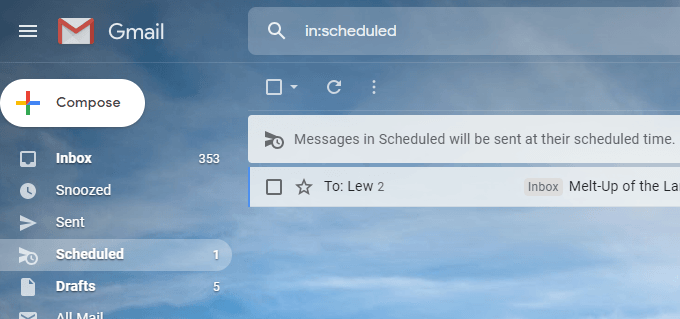
Gmail stores not-yet-sent emails in the Scheduled folder, which you can access
from the left pane just under the “Sent” folder. The date the email will be
sent is shown on the far right, but you can open the email and read the line at
the very bottom of the message to see the exact date and time.

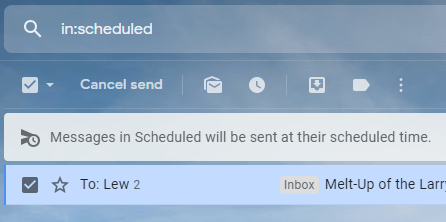
To cancel a scheduled email in Gmail, open the
message from the Scheduled folder and choose Cancel send. To cancel multiple scheduled emails at once, select
them from the list of scheduled emails and then hit the cancel button at the
top.

Schedule Emails on
Yandex.Mail
The “delay sending” feature in Yandex.Mail us
used to send an email at a later date.
Step 1: When writing an email, select the small clock icon next to Send at the bottom of the screen.

Step 2: On the pop-up, press the word today
and then choose when the email should be sent. The drop-down next to the date
selector is how you can change the time of date that the email will be sent.

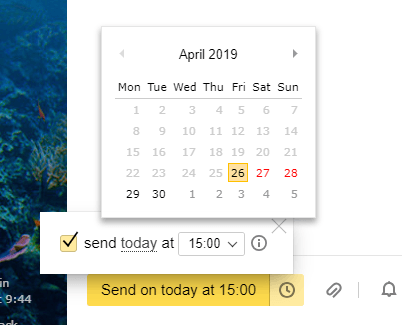
Step 3: Ensure that you’ve addressed the email, and then press the big yellow
send button to schedule it.


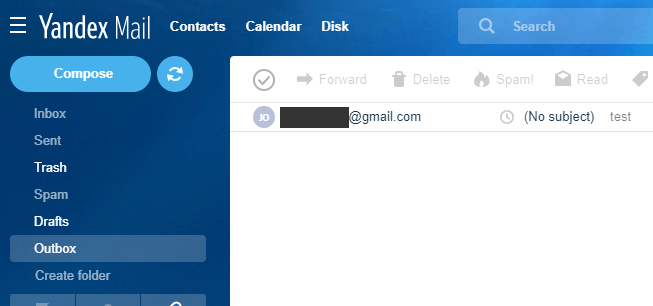
Yandex.Mail stores scheduled emails in the Outbox folder. You can open the
scheduled email there to change the text in the message; just press the send
button when you’re finished editing and it will return to the same folder to
await being sent.

To edit when the scheduled email will be sent,
open that particular message and repeat the steps above, pressing send again to
save the new date/time. Or, to undo the scheduled send so that you can send it
right away, uncheck the box in the pop-up during Step 2 and just hit Send.
Schedule Emails on
GMX
GMX is another popular email service that lets
you send emails at a specific date and time.
Step 1: Press the clock icon next to Send.

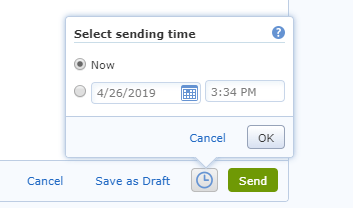
Step 2: Select the second bubble to choose when to send the email. Use the
built-in calendar to select a day of the week, and then adjust the time to the
right if you want to change the time the email will send.
Step 3: Press OK to save the
changes. You’ll see the scheduled time appear next to the clock icon.

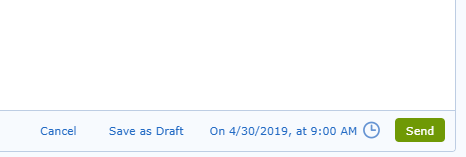
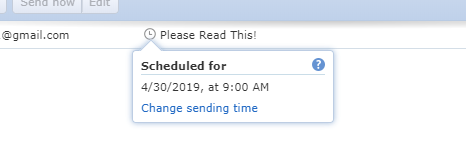
The scheduled email in GMX is stored in the Outbox folder where you can edit it at
any time before the sent time. To change or cancel the time the email will be
sent, locate it in the Outbox folder, press the clock icon, and choose Change sending time.

Schedule Emails
With Thunderbird
Using an email program like Thunderbird to
send emails on a schedule is really helpful because it doesn’t matter what
email service you use; it works for all of them. If you can set up your email
in Thunderbird, then you can use the delayed send feature.
For example, you can use Thunderbird to
schedule Yahoo emails, to schedule emails from Outlook.com, or to pick exactly
when to send an AOL Mail email…even though none of those websites have native
scheduling support.
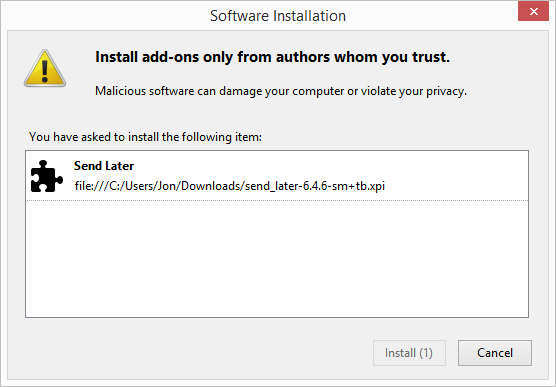
Thunderbird doesn’t come with a scheduled send feature by default, but you can easily add it with the Send Later add-on.
Step 1: Download the Send Later add-on from the link above.
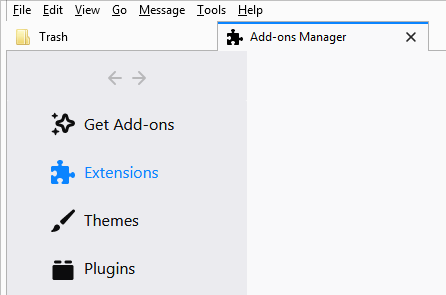
Step 2: Go to Tools > Add-ons in Thunderbird.
Step 3: Drag the extension file directly into the left pane of Thunderbird
where it lists Get Add-ons, Extensions, Themes, and Plugins.

Step 4: Select Install Now on the
installation prompt.

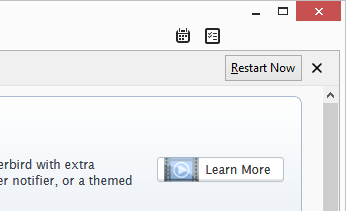
Step 5. Restart Thunderbird be selecting Restart
Now or by closing the program and then reopening it.

Step 6: Write the email you want to send later.
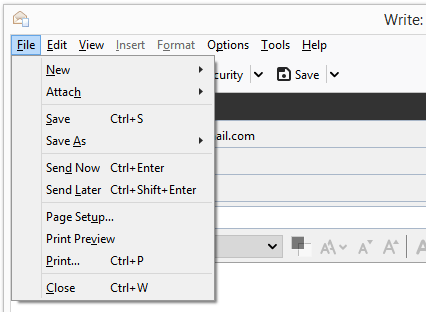
Step 7. Instead of pressing the normal Send button, go to File > Send Later.

Step 8: Fill out the details for when to send the email. You can even
schedule the email to be sent on a recurring basis by selecting one of the Recur options and completing the values
towards the bottom of the prompt.

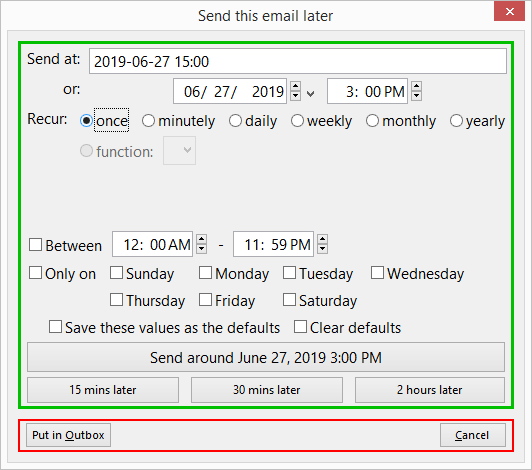
Step 9: Choose Send around
<date>.
You can edit or cancel the yet-to-be-sent
email in Thunderbird by locating it from the Drafts folder.
Tip:
Some of the options you can change for the Send Later add-on for Thunderbird
include making the regular Send button the same as Send Later (so you don’t
accidentally send a message now that you meant to schedule) and changing
keyboard shortcuts.