If you use Google via a Google account, your searches will be automatically saved and linked to your account. The new features, announced in a blog post, give you additional options to handle these searches for privacy reasons.
Automatically delete searches from Google
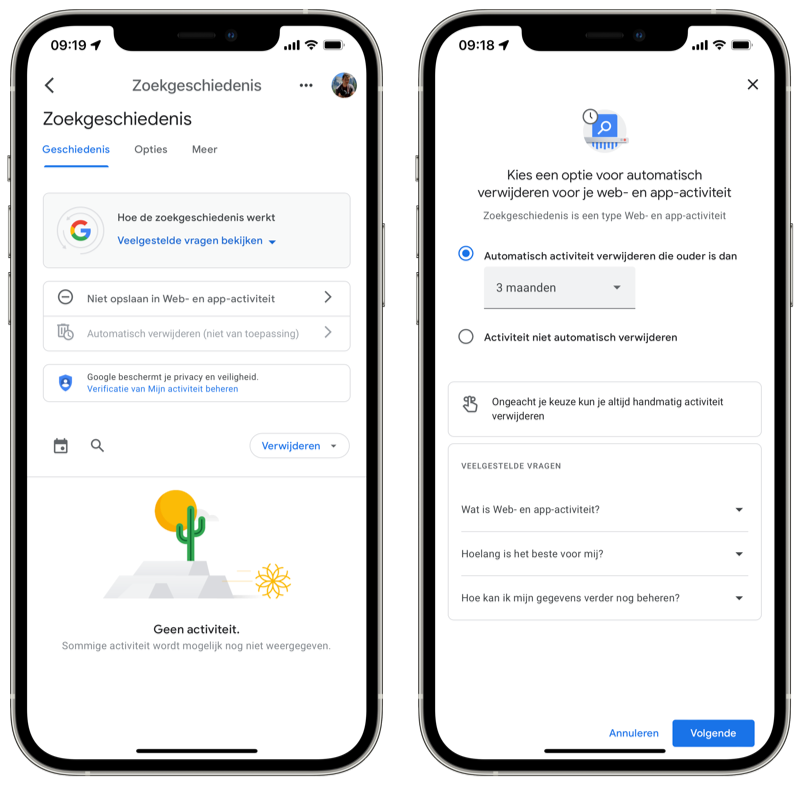
Google announces that users can set their web and app activity (read: searches) to be automatically cleared from within the Google app. By default, this is set to 18 months, but users can also choose 3 or 36 months. For new accounts, the feature is automatically turned on. This function is already available in the Google app for iOS.
You can already see this in the Google app: a button to quickly delete all activity from the last 15 minutes. Handy, because then you don't have to worry about things you might not want to delete. You probably remember what you did in the past 15 minutes.


Note: when you delete your Google searches, your browser history from Safari, for example, remains. If you really want to delete your history everywhere, do this manually in your browser. You can read how to delete your Safari history on your iPhone in our tip. If you use iCloud, you don't have to do it on your iPad and Mac as well.
Protecting Google searches with a password
Another announcement from the blog post is to better secure your search history. When you share a device, anyone can access your search history without any problems. That's why Google adds an extra layer of security. You now have the choice to enter your password or two-factor authentication before accessing your history.
You'll find this feature, along with auto-delete, in the Google app. Tap your profile picture in the top right and select Search history. All options are now on your screen.
The best way to ensure your privacy is to completely disable saving of your searches. The best way to do this is on your computer by going to your Google account activity. Here you will find all kinds of data that Google stores about you. Here you have the option to disable it yourself.