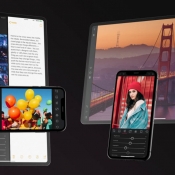
With the iPhone you can take HDR photos, where light and dark parts of the photo come into their own. The latest development is Smart HDR and in this tip we explain everything about it.
HDR Photos on iPhone and iPad
HDR stands for High Dynamic Range and means that photos with light and dark areas come into their own better. Advanced algorithms are used to optimize a photo, including Deep Fusion. How can you best use your iPhone camera to take beautiful HDR photos? And what is Smart HDR then? Read on!
- What is HDR?
- Take HDR photos
- Adjust lighting
- Devices
- HDR apps
li>
Unfortunately, it is no longer possible to disable (Smart) HDR in the current iOS versions. As a result, photos sometimes get an unnatural effect. To get around this, you can take a Live Photo or a RAW photo (not ProRAW).
HDR photography: what is it?
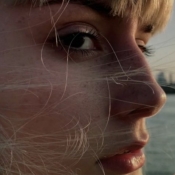
If you are outside on a sunny day, with the naked eye there are always parts that are in the shade and parts that are brightly lit by the sun. In cloudy weather, the light is filtered, so you will see the least differences in light intensity. The human eye can adapt to that wide variation in light intensity, but the camera sensor cannot. That is why HDR photography takes several photos of the same scene, with different exposure settings each time. These two or more photos are then merged into one photo.
With Smart HDR, the camera takes many more photos, namely 9 photos. Smart HDR is present on newer iPhones since the iPhone XR (2018) and is thanks to the Neural Engine that is in the A12 Bionic chip (and newer). A lot of computing power is involved here to take the most optimal photo: 1 trillion* calculations are performed per second to combine multiple photos into one whole.
*We mean here 1 trillion, so ten to the 12th power. This is 1000 times more than the English ‘billion’.
See also 

What is Smart HDR on the latest iPhones and how do you use it?
Learn how Smart HDR works, the smarter HDR feature on recent iPhones. With Smart HDR, your photo becomes even more beautiful with more detail in shadows and a better balance between light and dark parts of a photo. That is how it works.

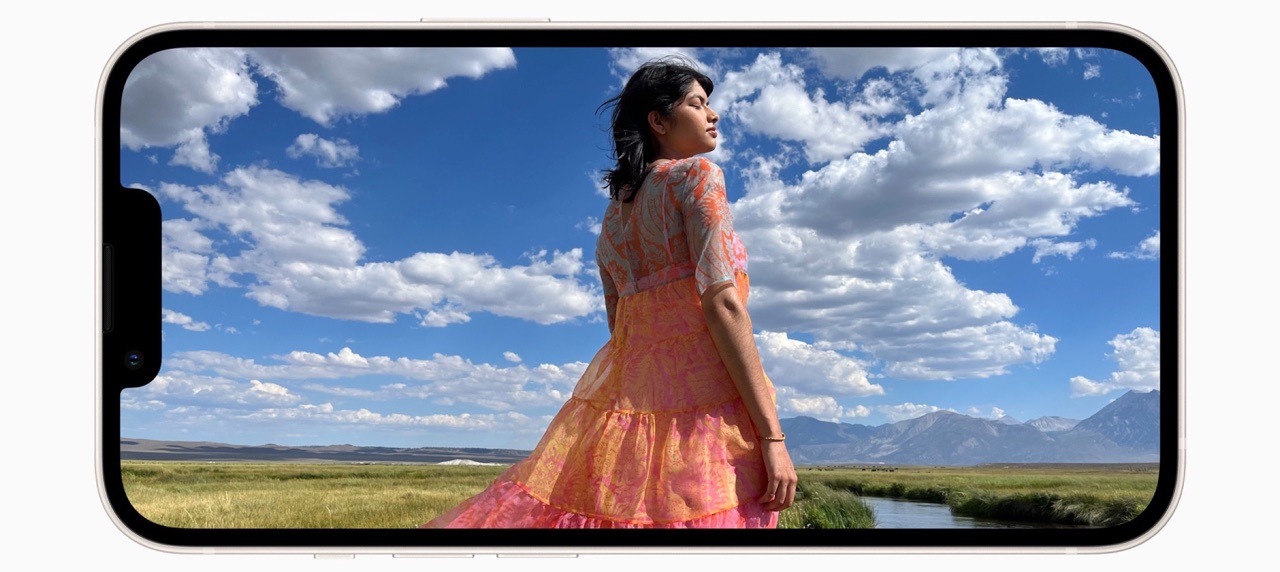
You could also correct light and dark parts of a photo manually in post-production, for example in Photoshop. Professional photographers call this “bracketing”. But the iPhone can do it for you automatically. The iPhone takes multiple photos and captures each part of the scene with the best possible lighting and the highest level of detail.
Create HDR photos on iPhone
Enabling HDR on the iPhone depends on the iPhone camera and the iOS version on your device. Currently, it is usually not possible to disable HDR.
You can not disable HDR on the iPhone 13 series and newer and also not on the iPhone SE 2022 and newer.< /p>
You can turn off HDR on the following devices:
- iPhone 12 models
- iPhone 11 models
- iPhone SE 2020
- iPhone XR
- iPhone XS (Max)
- iPhone X
- iPhone 8 (Plus)< /li>
To do this, go to Settings > Camera. Then turn off HDR or Smart HDR. On older devices this option is called Auto HDR.

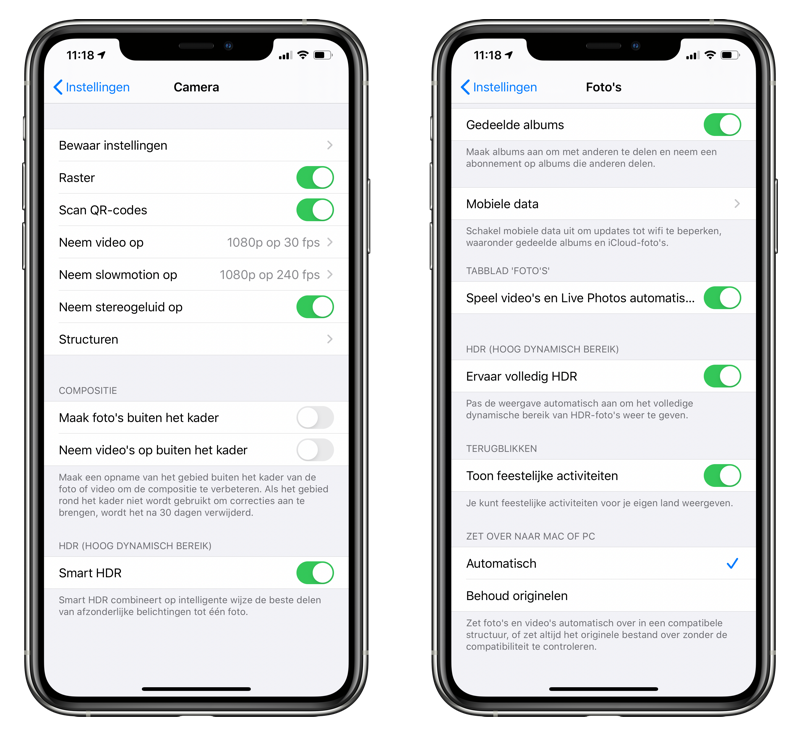
For viewing HDR photos there is a separate switch:
- Open the Settings app on your iPhone or iPad.
- Go to Photos.
- Turn on the switch at Experience full HDR.
This ensures that photos can be seen in optimized HDR display on your device. If this button is not visible on your iPhone, the function is not supported. If you view a photo in full HDR, it may be that a photo looks a bit unnatural and overly colored. If you send the iPhone to a friend who doesn't have a suitable Apple device, the photo may look a bit faded to that person.
Older iOS versions:
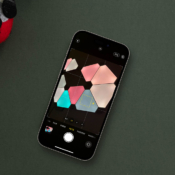
In versions prior to iOS 13, you'll find the toggle in the Camera interface, as shown below. While taking the photo, tap the HDR icon at the top. Choose whether to enable HDR automatically, on or off.


These older iOS versions allow you to save two versions of a photo: a normal photo and an HDR photo. You can discard one of them later.
Is the HDR button not visible in the Camera app or Settings? You can, because Apple no longer offers the option to disable HDR on newer devices – and not everyone is happy about that.
Change exposure in HDR photos
The HDR function often ensures that a photo looks much nicer, although the colors can also become a bit more unnatural. If the exposure is still not quite to your taste, there is an extra trick possible. By tapping the screen while taking a picture, you ensure that the camera focuses on that part. It is not only about focusing, but the camera also adjusts the exposure accordingly. This way you can get a clearer image of an extra dark part that is not clearly visible. You can also dim a too bright part in the photo in this way.
See also 

Here's how to adjust photo exposure on iPhone and iPad
While taking a photo with your iPhone, you can manually adjust the exposure. This way, a slightly too dark photo will still look good. In this tip you can read how to adjust the exposure of photos on the iPhone before and after in the standard Camera app.
HDR: on which iPhones and iPads?
The HDR function was already introduced in iOS 4.1. That means it works on almost all iPhones, even if you're still using an iPhone 4. On the iPad, HDR photography from the iPad Air 2 is supported.
For Smart HDR you need an iPhone XR or newer, for example an iPhone 11. It is also present on the iPhone SE 2020 and newer.
See also 


What is Smart HDR on the latest iPhones and how to use it you it?
Learn how Smart HDR works, the smarter HDR feature on recent iPhones. With Smart HDR, your photo becomes even more beautiful with more detail in shadows and a better balance between light and dark parts of a photo. That is how it works.
HDR apps for iPhone
You don't need an extra app to use the iPhone's HDR function. But it can be useful. There are all kinds of apps that can create HDR-like effects with your photo. They often contain some extra functions, for example for merging photos, filters and more.
Some examples:
- Halide Mark II (Free, iPhone/iPad/Watch + IAP, iOS 14.0+) – Editor's favorite, created by Dutchman Sebastiaan de With. Do you doubt whether HDR is the right option? Then Halide can take two photos: one with Smart HDR and Deep Fusion and one in RAW.
- Darkroom: Photo & Video Editor (Free, iPhone/iPad/Mac + IAP, iOS 14.0+ ) – This app has also won several awards and was designed by the Dutchman Jasper Hauser. For editing your HDR photos.
- ProCamera. Pro Photo and Camera ($19.99, iPhone/iPad/Watch + IAP, iOS 14.1+) – Pro Camera has a special HDR mode they created with partner Ittiam Systems. According to the makers, this is the best HDR you can get on iOS. Requires an in-app purchase.
- Camera+: Pro Camera & Editor (Free, iPhone/iPad/Watch + IAP, iOS 15.0+) – A lot of people use the Camera+ because it’s versatile app. Of course, it also has a good HDR function.
- ProCam 8 ($11.99, iPhone/iPad/Watch + IAP, iOS 11.3+) – Another great feature-rich camera app.< /li>
- Snapseed (Free, iPhone/iPad, iOS 12.4+) – Should it be free? Then you can also visit the free Snapseed app from Google.
See also 

Best Photo Editing Apps on iPhone and iPad
Photo Editing on iPhone and iPad iPad is becoming more and more accessible. In this list you will find the best photo editing apps for iOS, from Darkroom and Lightroom to Pixelmator and Photoshop Fix. Which photo editing app is best for you?