Today's HomePods have a temperature and humidity sensor. You can use it to perform automations with HomeKit. We explain it in this tip.
The temperature sensor can be used if you install the HomePod 16.3 (beta) software. This update will be available to everyone from the end of January. The temperature and humidity sensor were already hidden in the HomePod mini and will be activated by the software update. With the HomePod 2023, both sensors can be used immediately after adding them to your smart home. But how do you use them for automations? You can read that here!
- Which devices?
- Measure temperature with HomePod
- Create automations with temperature
Which devices are suitable?
The HomePod must have software update 16.3 beta, but that does not apply to the iPhone or iPad you use. You can also consult the temperature of the HomePod and make automations with an iPhone that is still running iOS 16.2. It is therefore also suitable for housemates who are still on an older version. Of course you need an iPhone with iOS 16.3 beta to be able to update the HomePod.
Measuring temperature with HomePod
Reading the temperature with the HomePod is very easy: just ask Siri! With the question “What is the temperature in the living room?” you will see immediately. When you're near the HomePod, simply ask “What's the temperature here?”.
You can also look up the temperature in the Home app:
< ol>

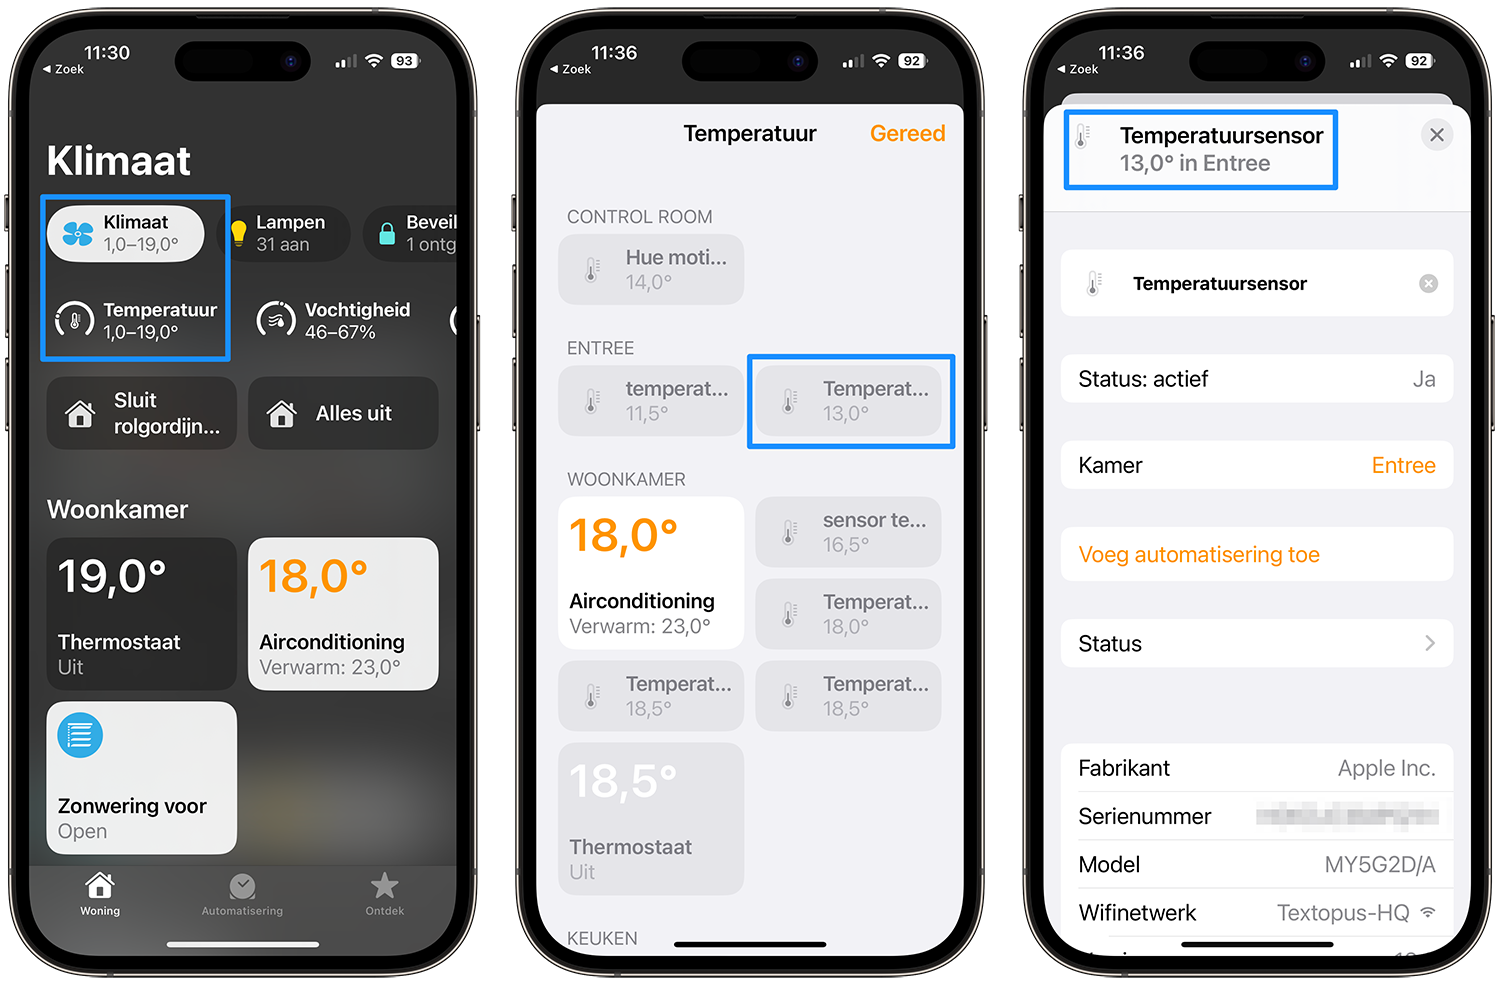
In our case we are dealing with two temperature sensors, a Philips Hue motion sensor and a HomePod mini. By tapping each item you can see which device it is: the HomePod lists the Apple brand, serial number and type of HomePod.
Create automations with temperature
It will of course be more fun if you also make automations with the temperature. You then no longer need special sensors, such as the aforementioned Philips Hue sensor.
- Open the Home app and choose the room where the HomePod is located, for example ‘Entrance’.
- Tap Temperature at the top of the screen.
- Tap the desired sensor (if you have more than one).
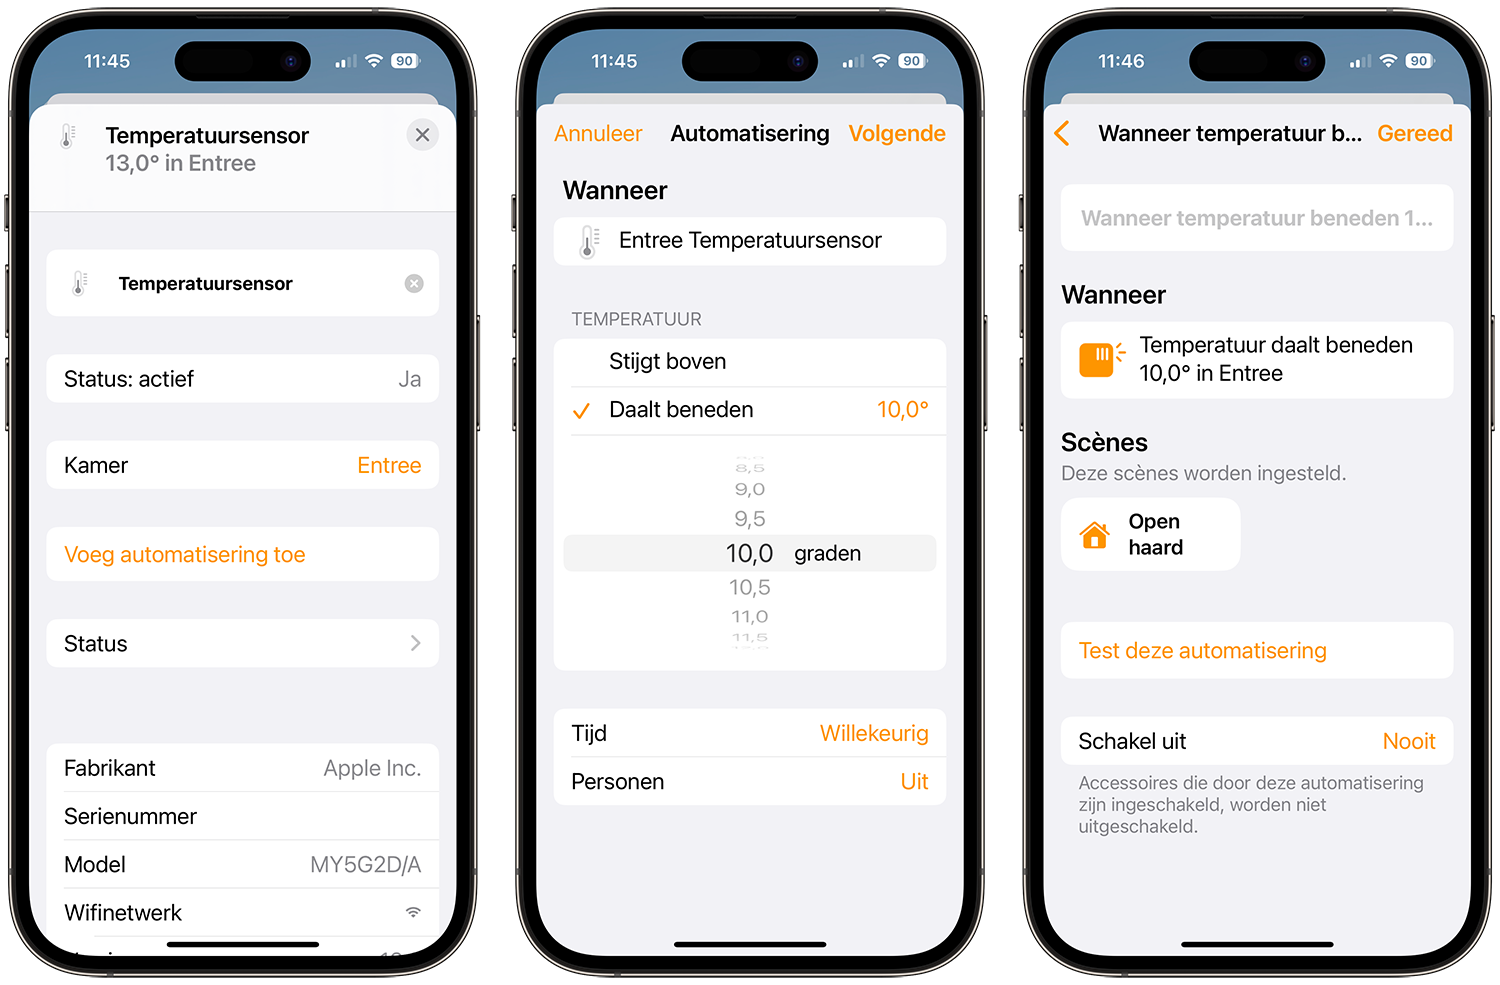
- Tap Add Automation.
- Indicate at what temperature an action should follow. You can also add rules based on time or people.
- Tap Next.
- Choose the scene you want to trigger or the action you want to start.

Finished! You can now enjoy automatic actions based on temperature and don't need special HomeKit sensors for climate. This in turn saves the purchase of a special sensor, such as the Aqara TVOC climate sensor or the Netatmo indoor module. That makes a difference, because such a special climate sensor is often pricey and for a few tens more you can have one disguised as a smart speaker. gif” />
To measure air quality with HomeKit sensors: this is how you do it
Clean air is important to feel comfortable indoors. In this tip we explain how you can use air sensors and HomeKit to ensure that the air indoors does not contain too much CO2 and volatile particles.
Of course you can follow the same steps for the humidity in a room: you can check what the humidity is and run an automation based on that. The sensor is not suitable for detecting leaks. For this you need a HomeKit water sensor,