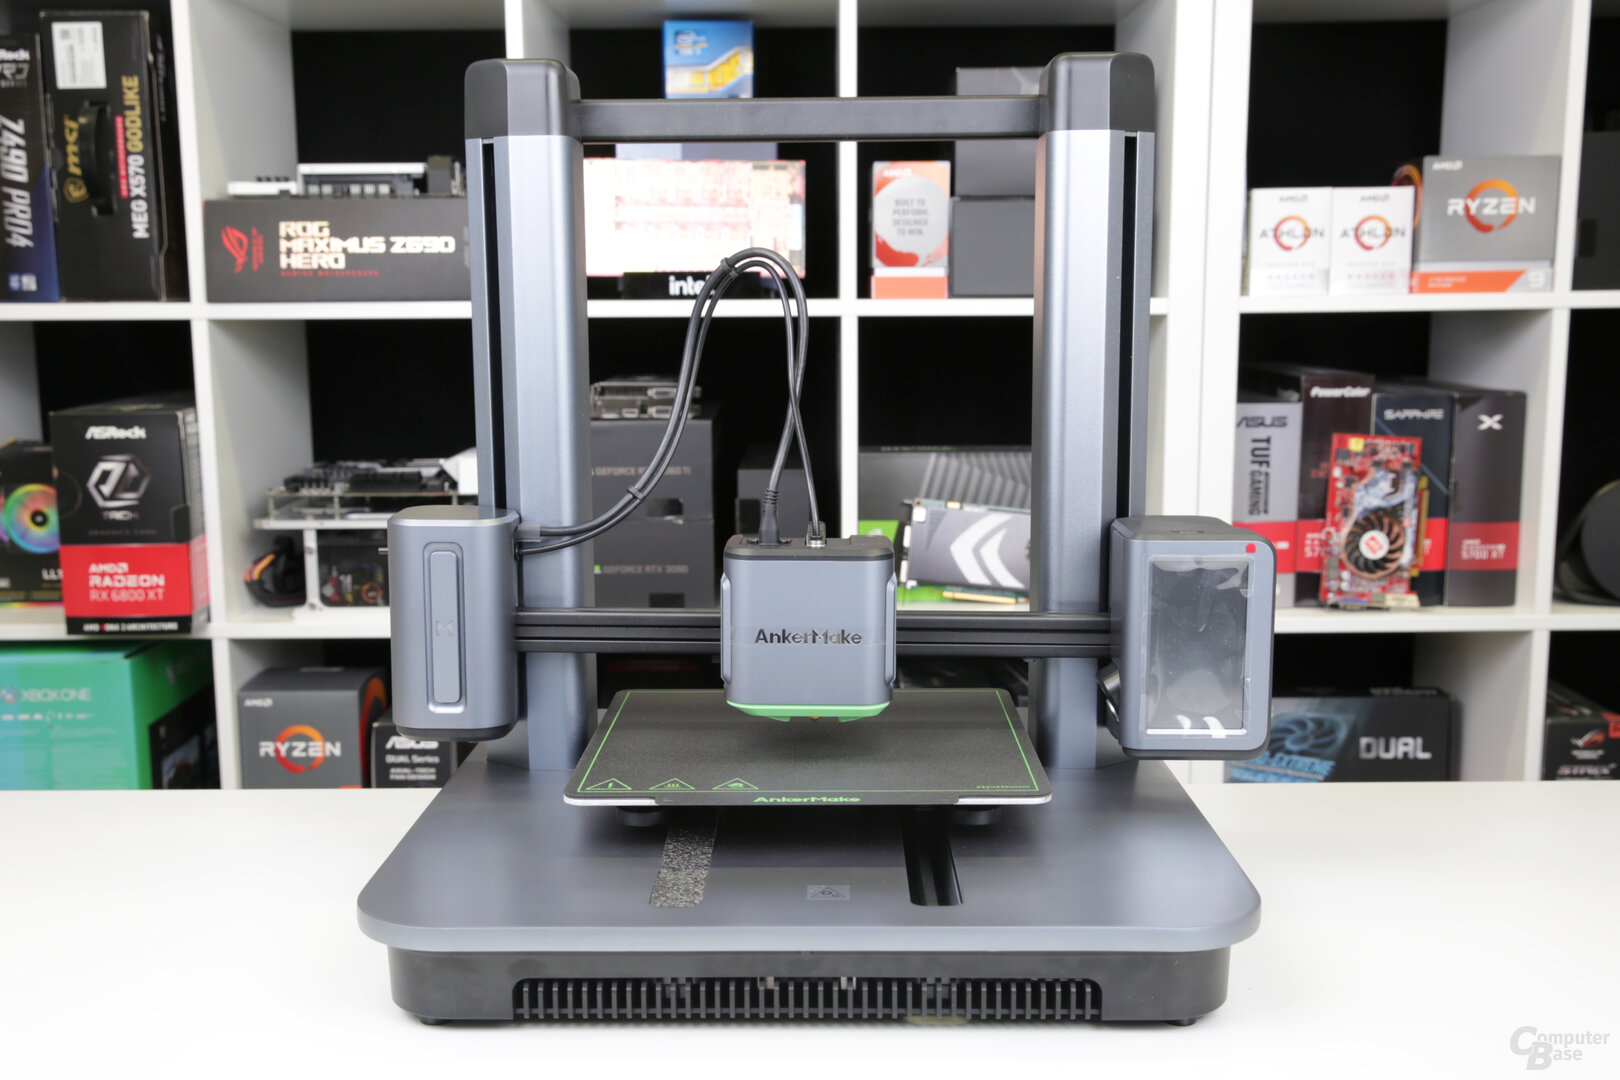
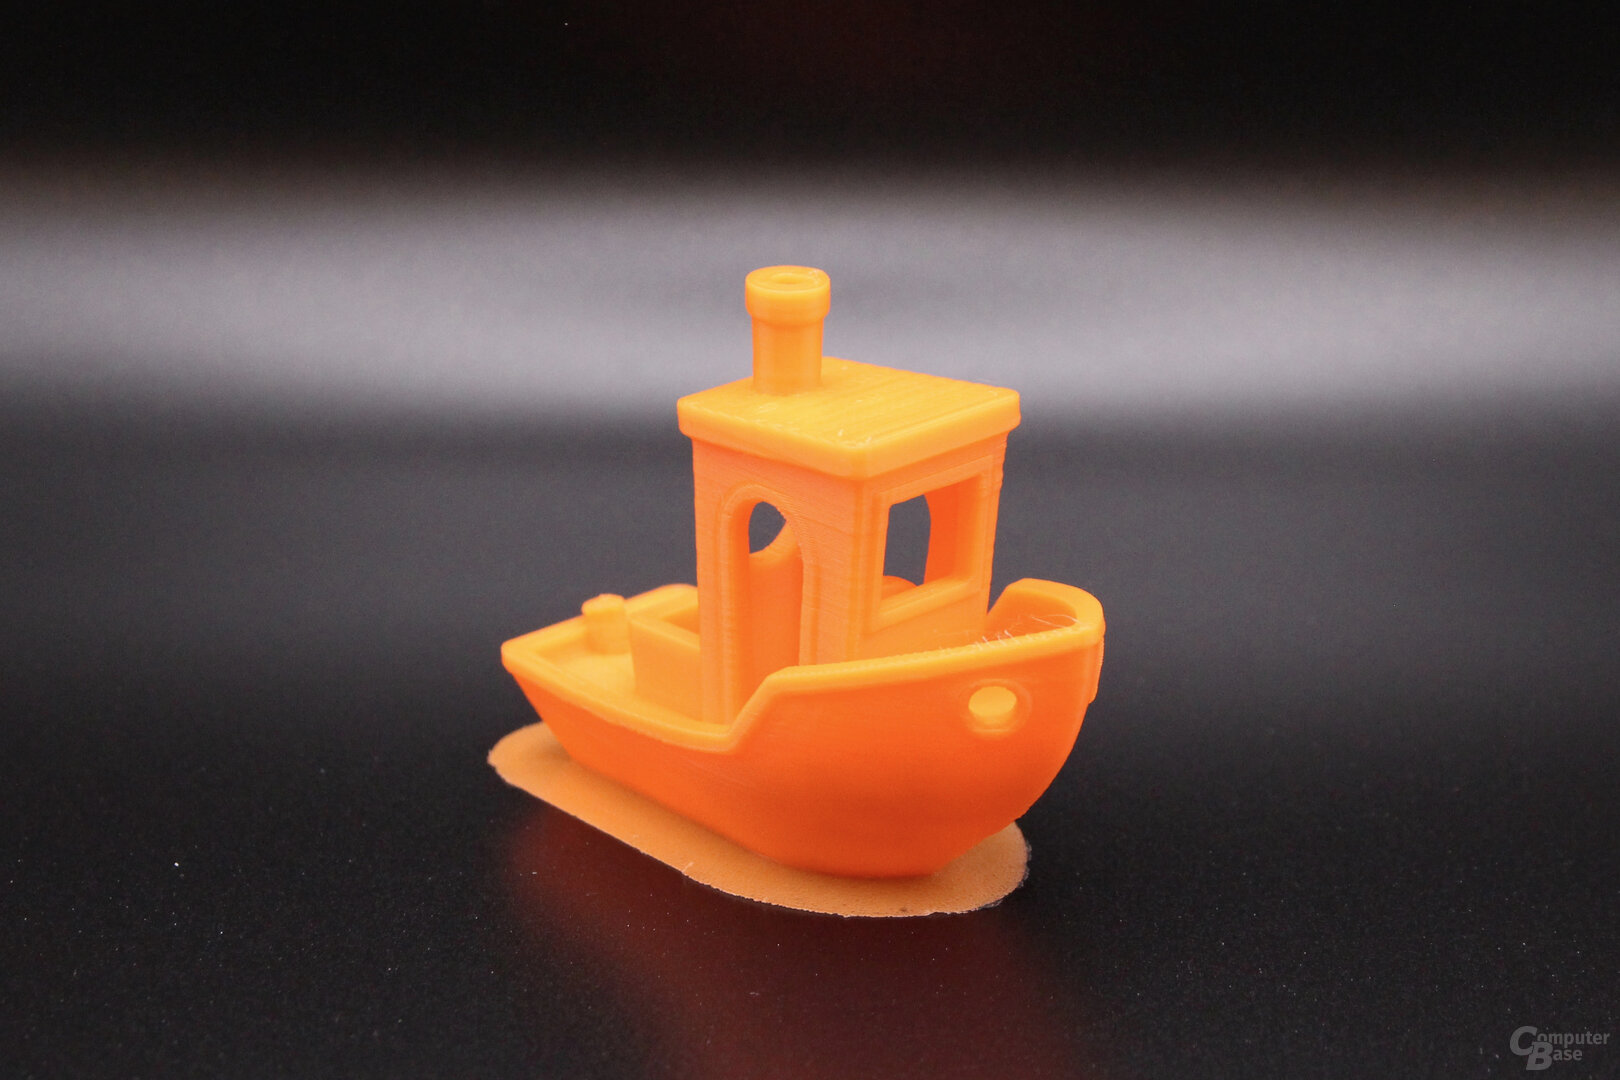
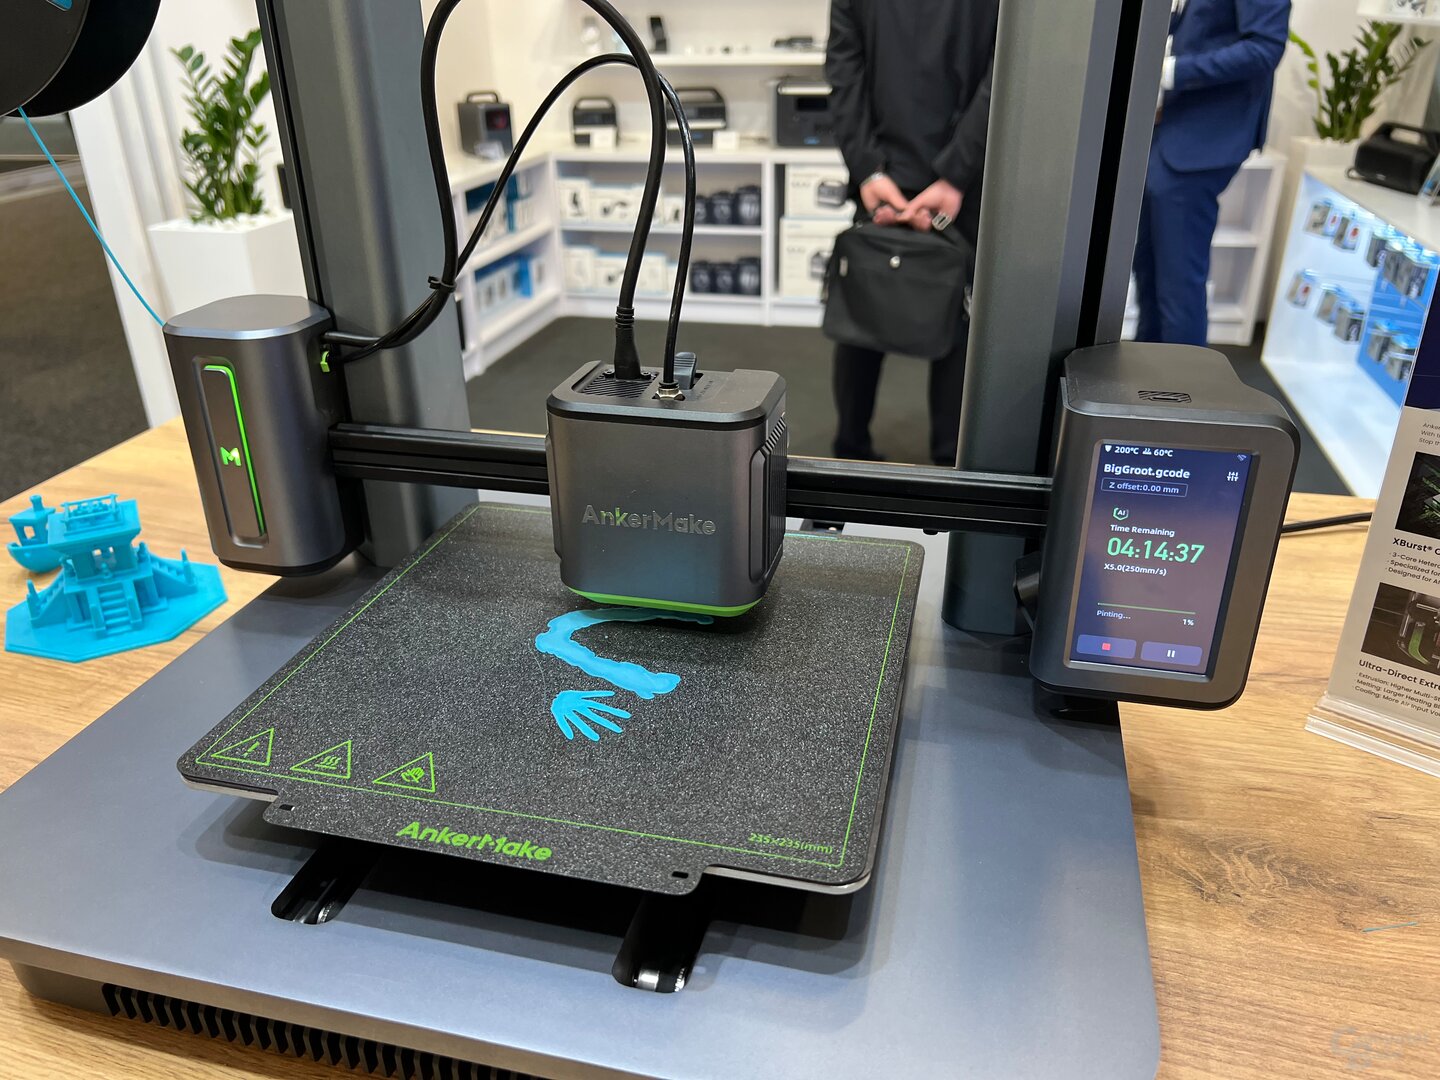
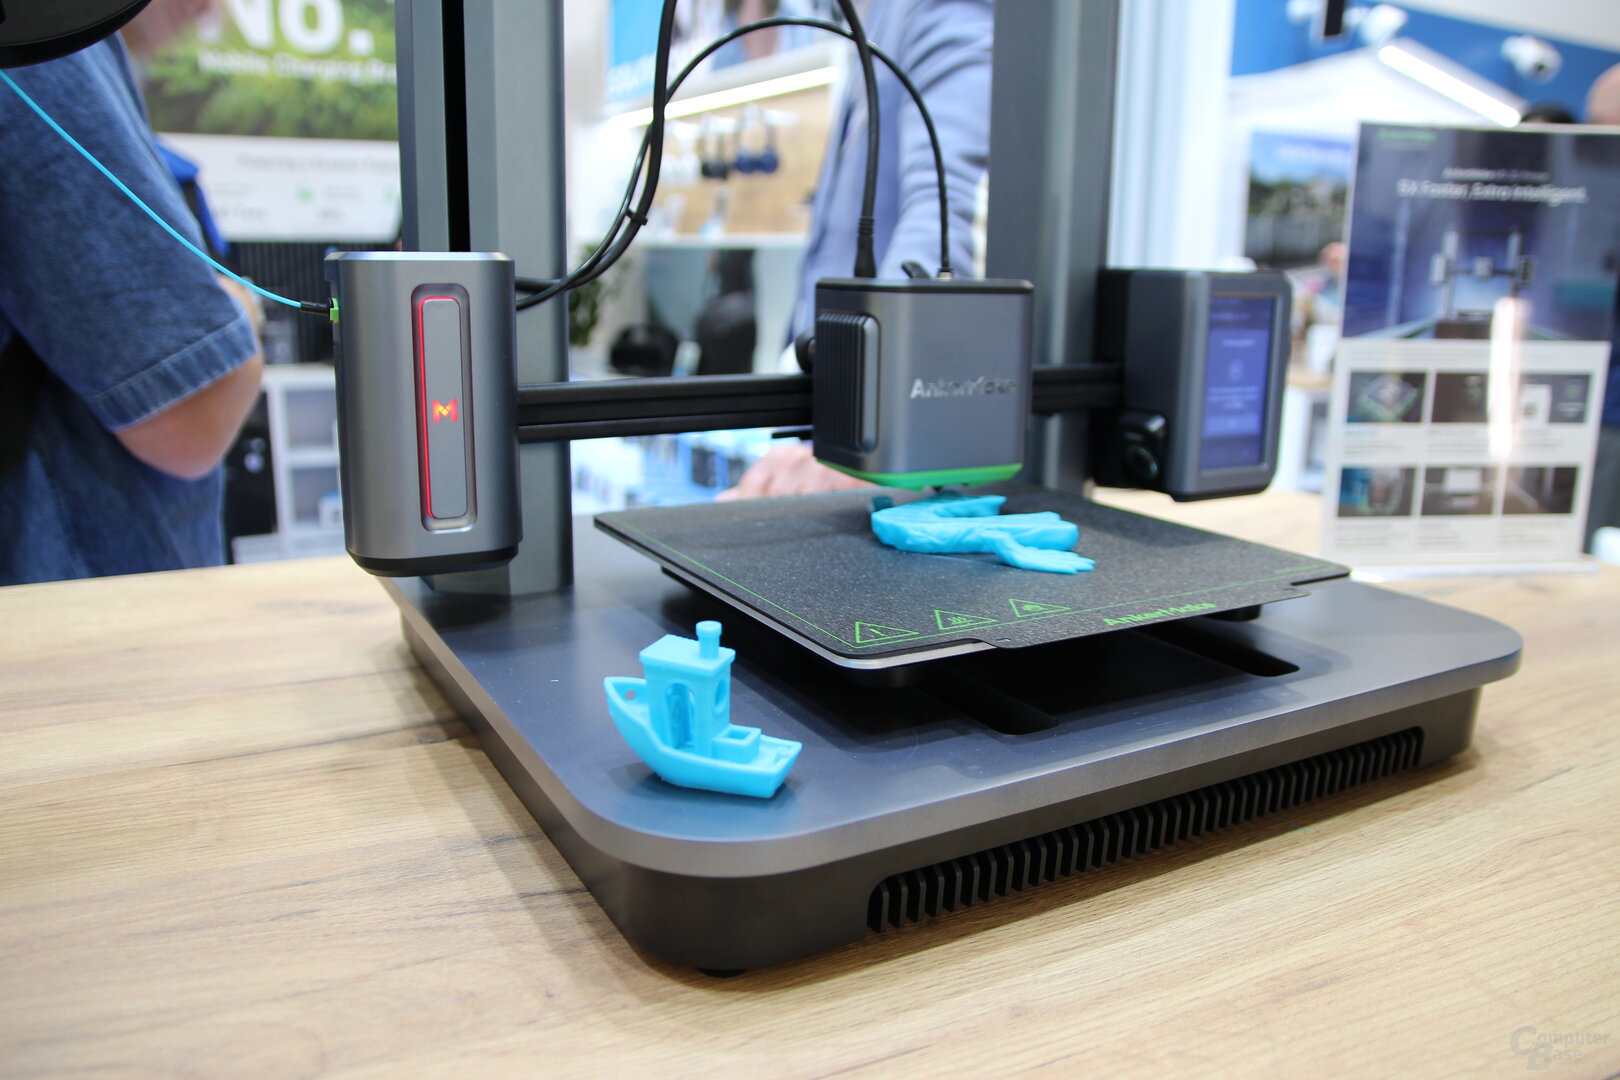
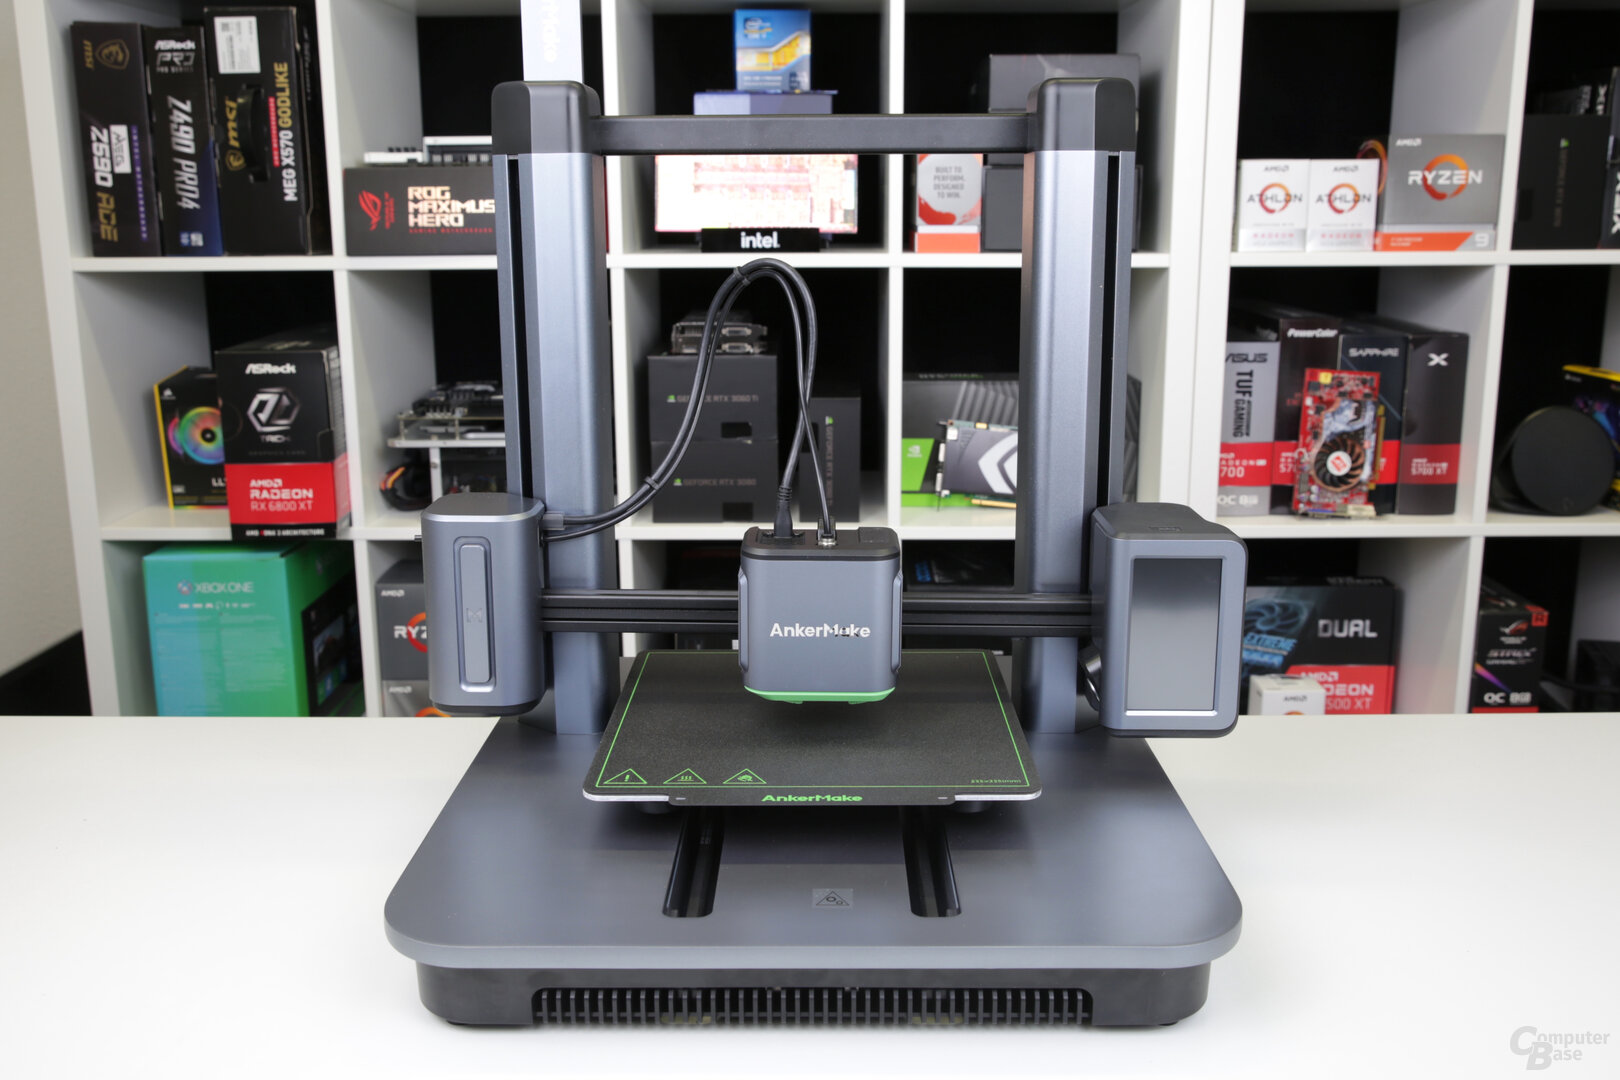
The AnkerMake M5 aims to make 3D printing faster and less error-prone. With WLAN, app connection, camera, error detection, aluminum housing and, above all, extremely fast printing with very good results at the same time, it does indeed set new impulses.
Table of contents
- Presale starts today
- Even the assembly is easier
- Setup via smartphone app
- The M5 uses a direct extruder
- All details about the AnkerMake M5
- Display, USB-C, WLAN and LEDs
- Print five times faster
- Print bed with 235 × 235 × 250 mm
- PLA, ABS, PETG and TPU
- Marlin firmware
- 350 watts and TMC stepper motor
- AI camera for live image and error detection
- Frequent warnings even for minor errors
li>
- AnkerMake slicer: Cura with extras
- Cura can also be used
- The AnkerMake smartphone app
- Printing experiences with the M5 in practice
- The M5 slows down with critical overhangs
- Filament detection reveals a design weakness
- ABS without a housing is a challenge< /li>
- Noisy fans always run
- Camera angles not always optimal
- The print quality of the AnkerMake M5
- 3DBenchy and Autodesk x Kickstarter Geometry
- Better prints, even at full speed
- Almost no stringing
- If you want, you can further optimize
- But there are also problematic models
- Speed and quality are excellent
- Conclusion
- The advantages and disadvantages
< li>Multicolor prints with AnkerMake V6 Color Engine
With the AnkerMake M5, Anker wants to take the topic of 3D printing even further out of the niche and give new impetus to the promise that 3D printers for the home will change lives. The AnkerMake M5 relies on a sometimes much faster printing process than conventional 3D printers, WiFi, a camera for monitoring the print from a smartphone, AI for error detection, dual Z motors and a stylish design with an aluminum alloy housing and without dangling cables. The topic should clear up prejudices and make the 3D printer more interesting for non-enthusiasts who have not yet dared to tackle the subject due to the obstacles.
Presale starts today
Features and features that many 3D printers can only be achieved through upgrades have made the AnkerMake M5 the most successful crowdfunding campaign of any 3D printer on Kickstarter to date, with more than 11,300 backers. Shipments to backers, who could purchase it starting at $599, have now begun. Pre-sale starts today for all those who have held back on Kickstarter. Delivery of the new orders is scheduled to start on December 12th. In the USA, the AnkerMake M5 costs 799 US dollars before taxes.
In Germany, the AnkerMake M5 can be pre-ordered from today at 3 p.m. for 849 euros. In addition to the 3D printer, there is a small roll of filament for the first prints, detailed instructions, a replacement hotend and replacement nozzles and a tool set for assembly and maintenance.
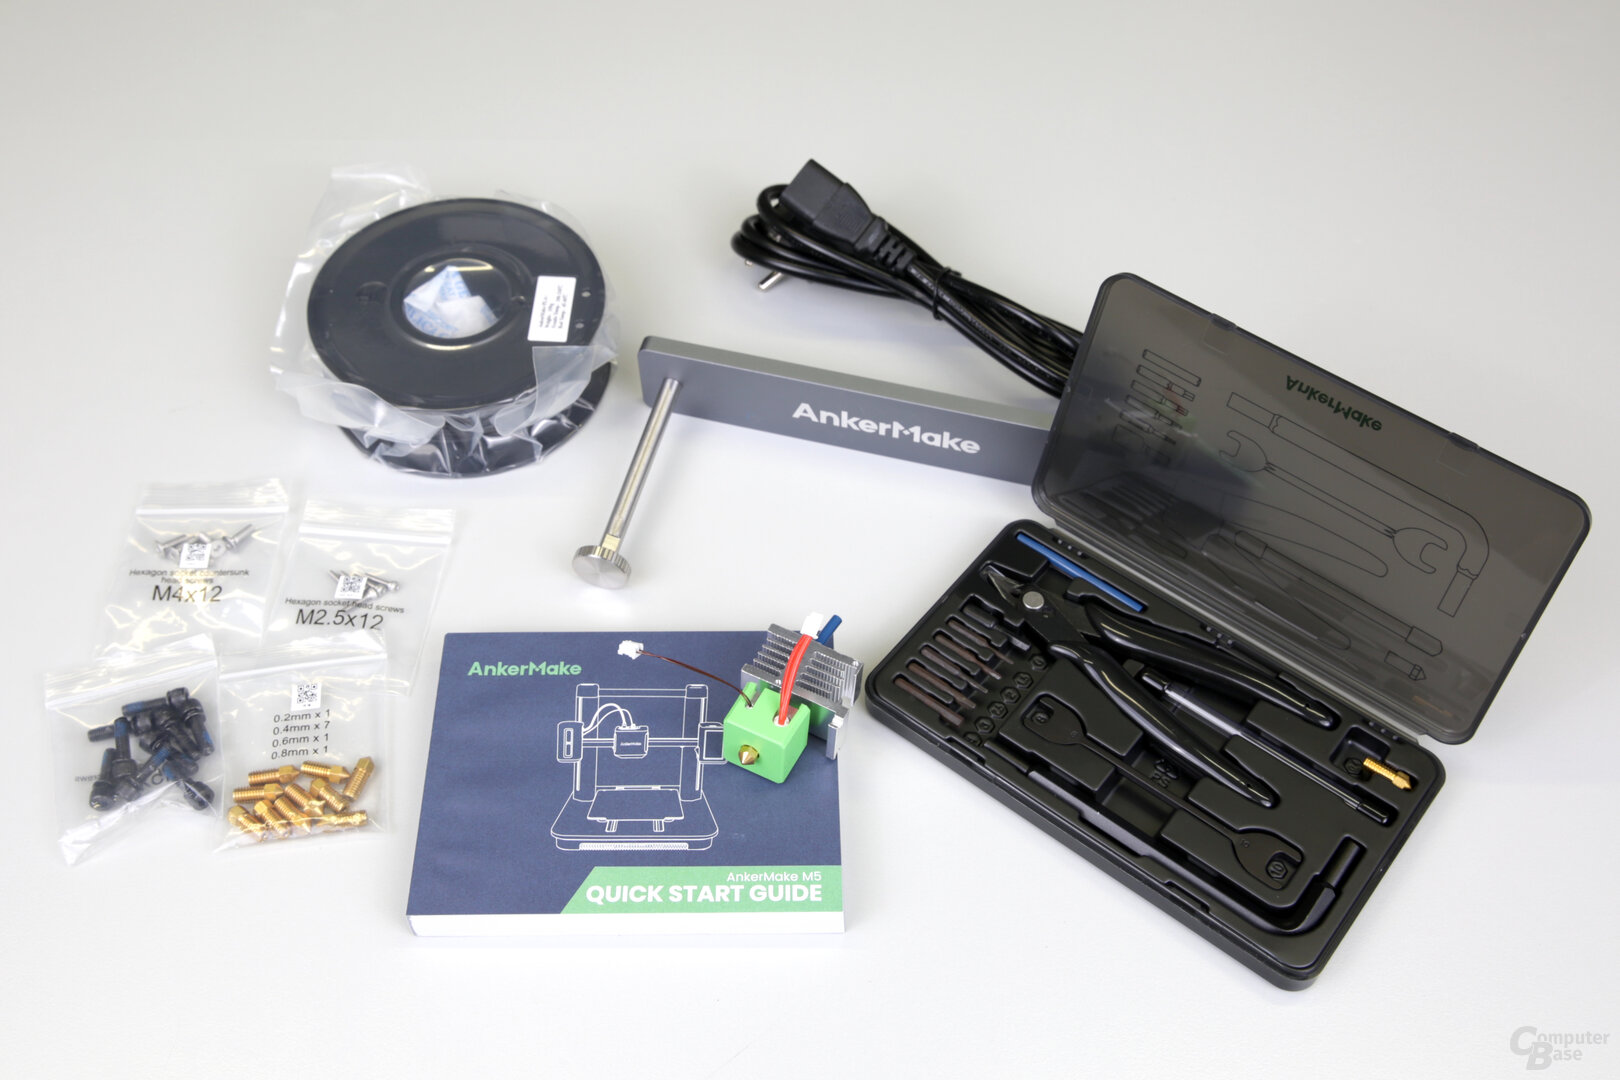 AnkerMake M5: The extras included< /figure>
Even the assembly goes easier ways
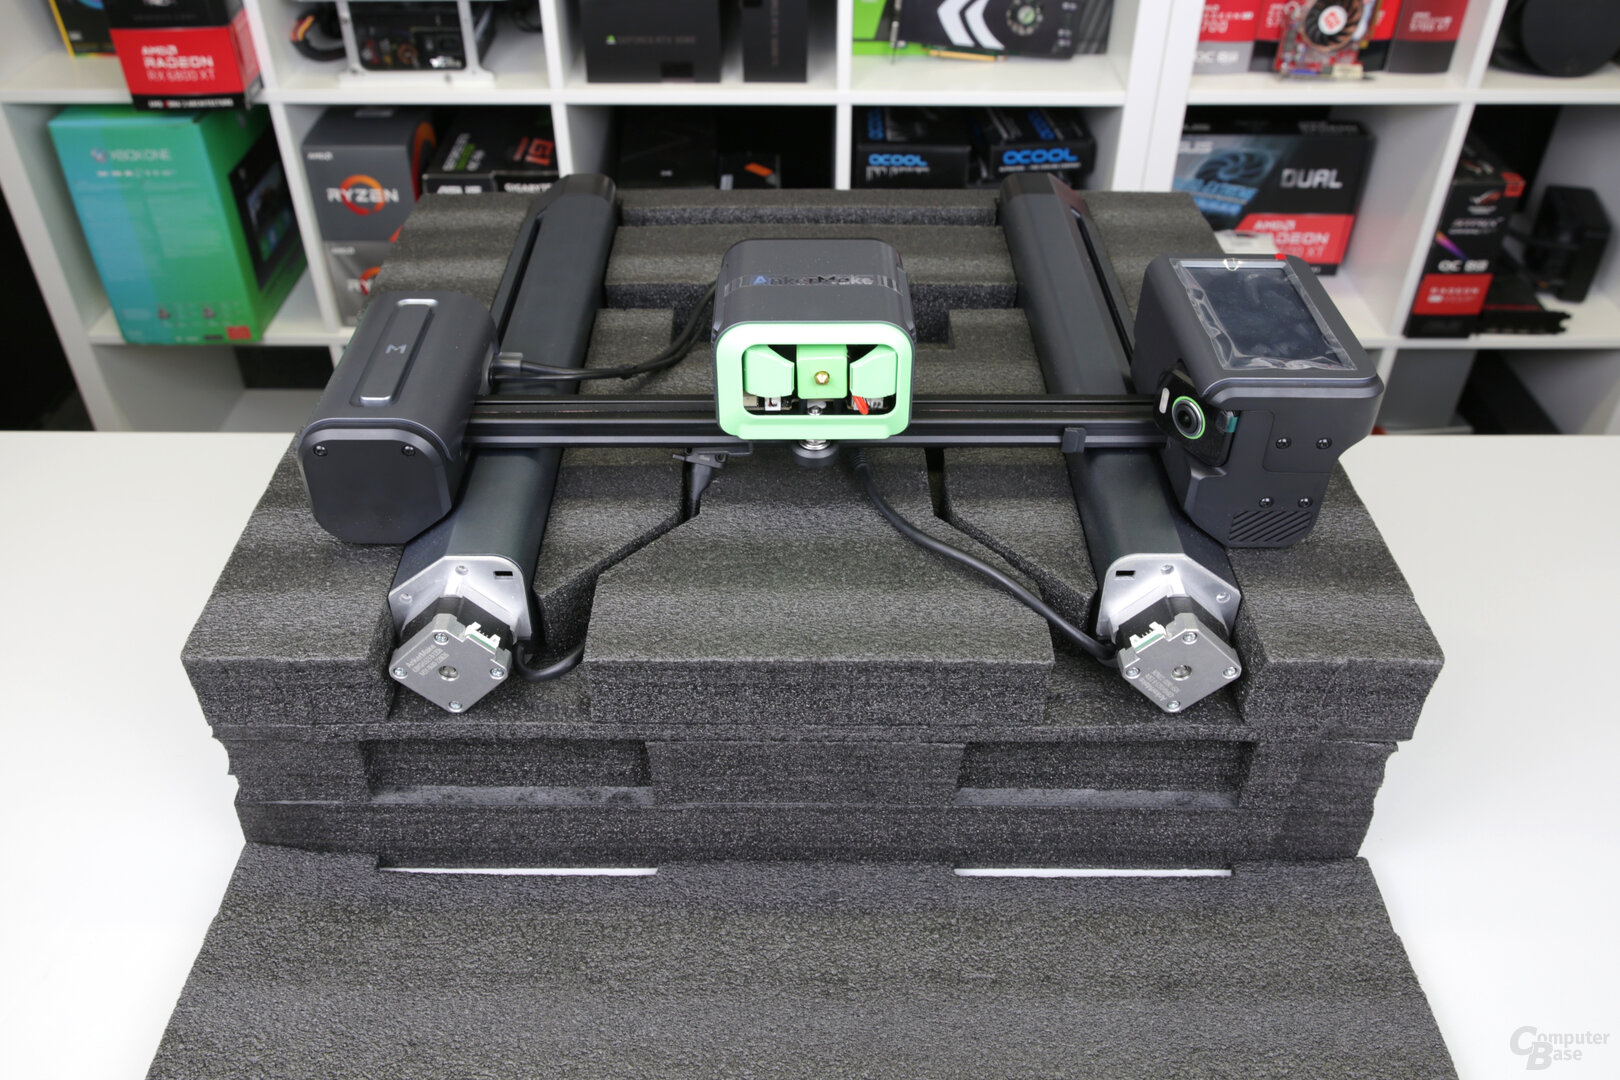
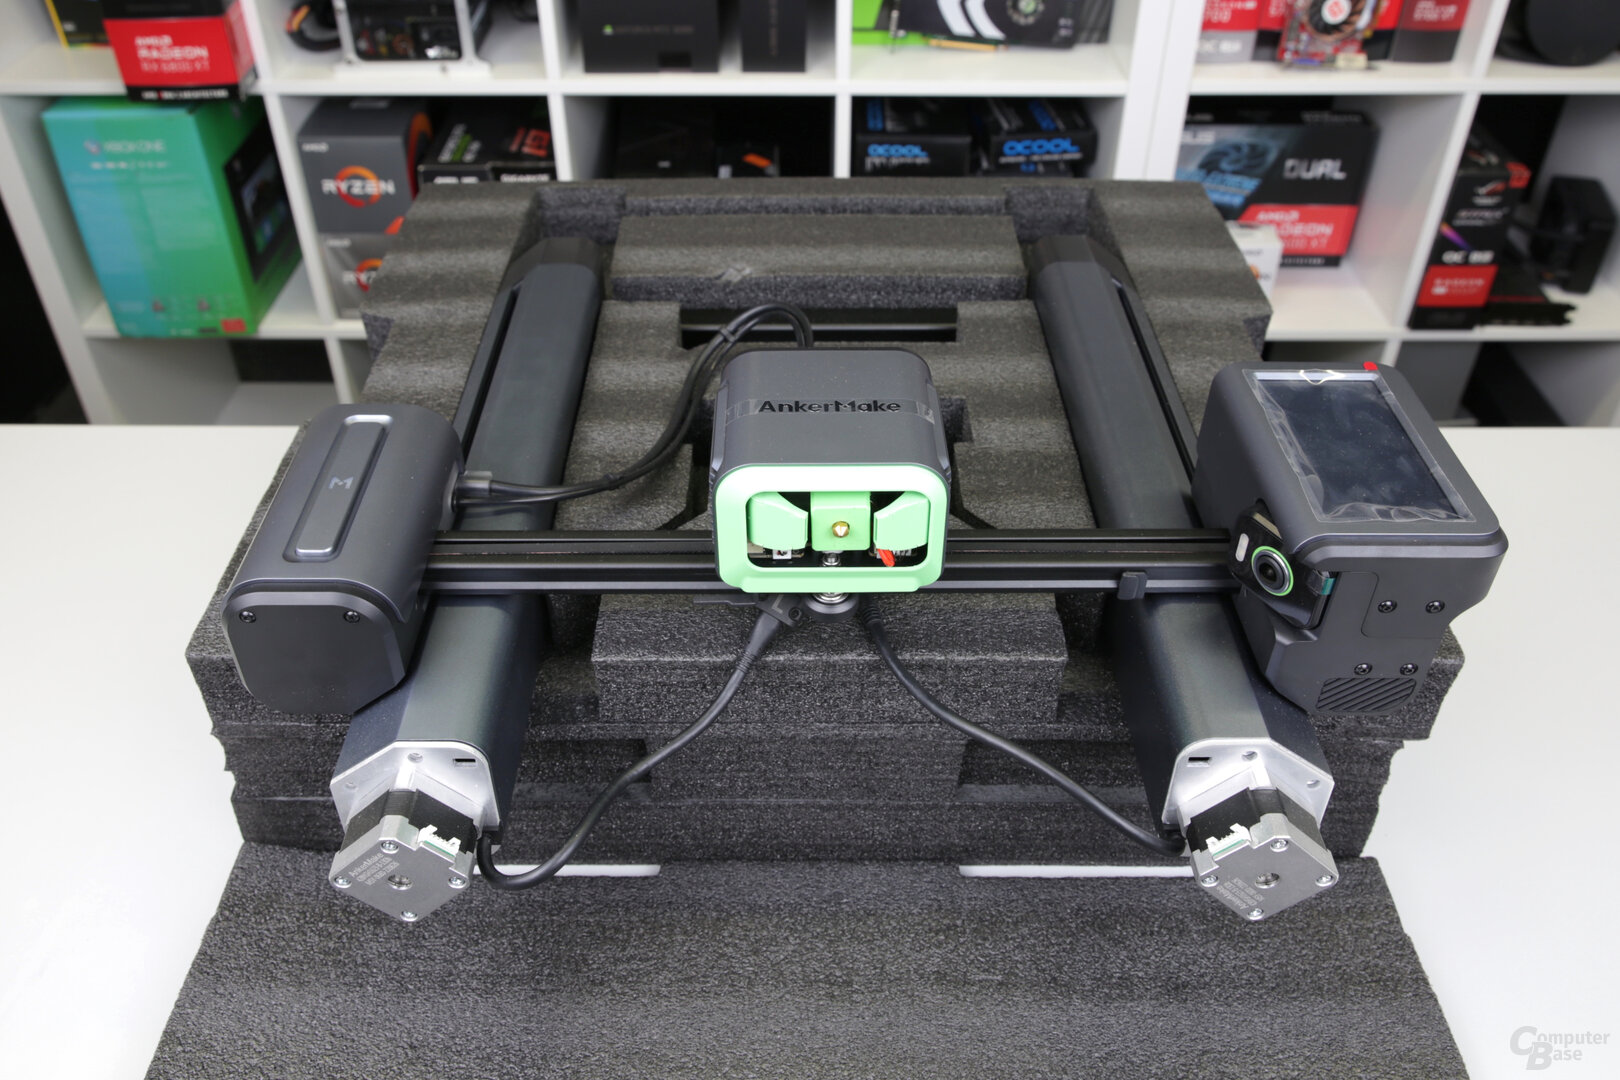
The first thing to do after purchasing a new 3D printer is assembly. Here the customer now has the choice of basically all manufacturers to decide on individual parts, so that the 3D printer has to be completely assembled, which usually takes several hours, or to rely on prefabricated sets in which the base, the printhead and frame are already assembled. This simplifies assembly considerably and is the right choice for anyone who is not familiar with the subject in detail.
However, Anker tries to simplify this process even further by making the packaging design part of the product experience and construction. Not only do the hardware parts interlock here, but the packaging also serves as a custom-fit support, so that you can actually set up the AnkerMake M5 yourself within around 15 minutes.
-
 The assembly of the AnkerMake M5 is very well thought out
Image 1 of 2
 The assembly of the AnkerMake M5 is very well thought out
The assembly is very well explained step by step in the instructions and begins with assembling the upper structure including the printing unit and base. The base fits exactly into the frame placed on the foam of the packaging, so that these parts can be easily screwed to the underside of the solid aluminum base.

The assembly of the AnkerMake M5 is very well thought out
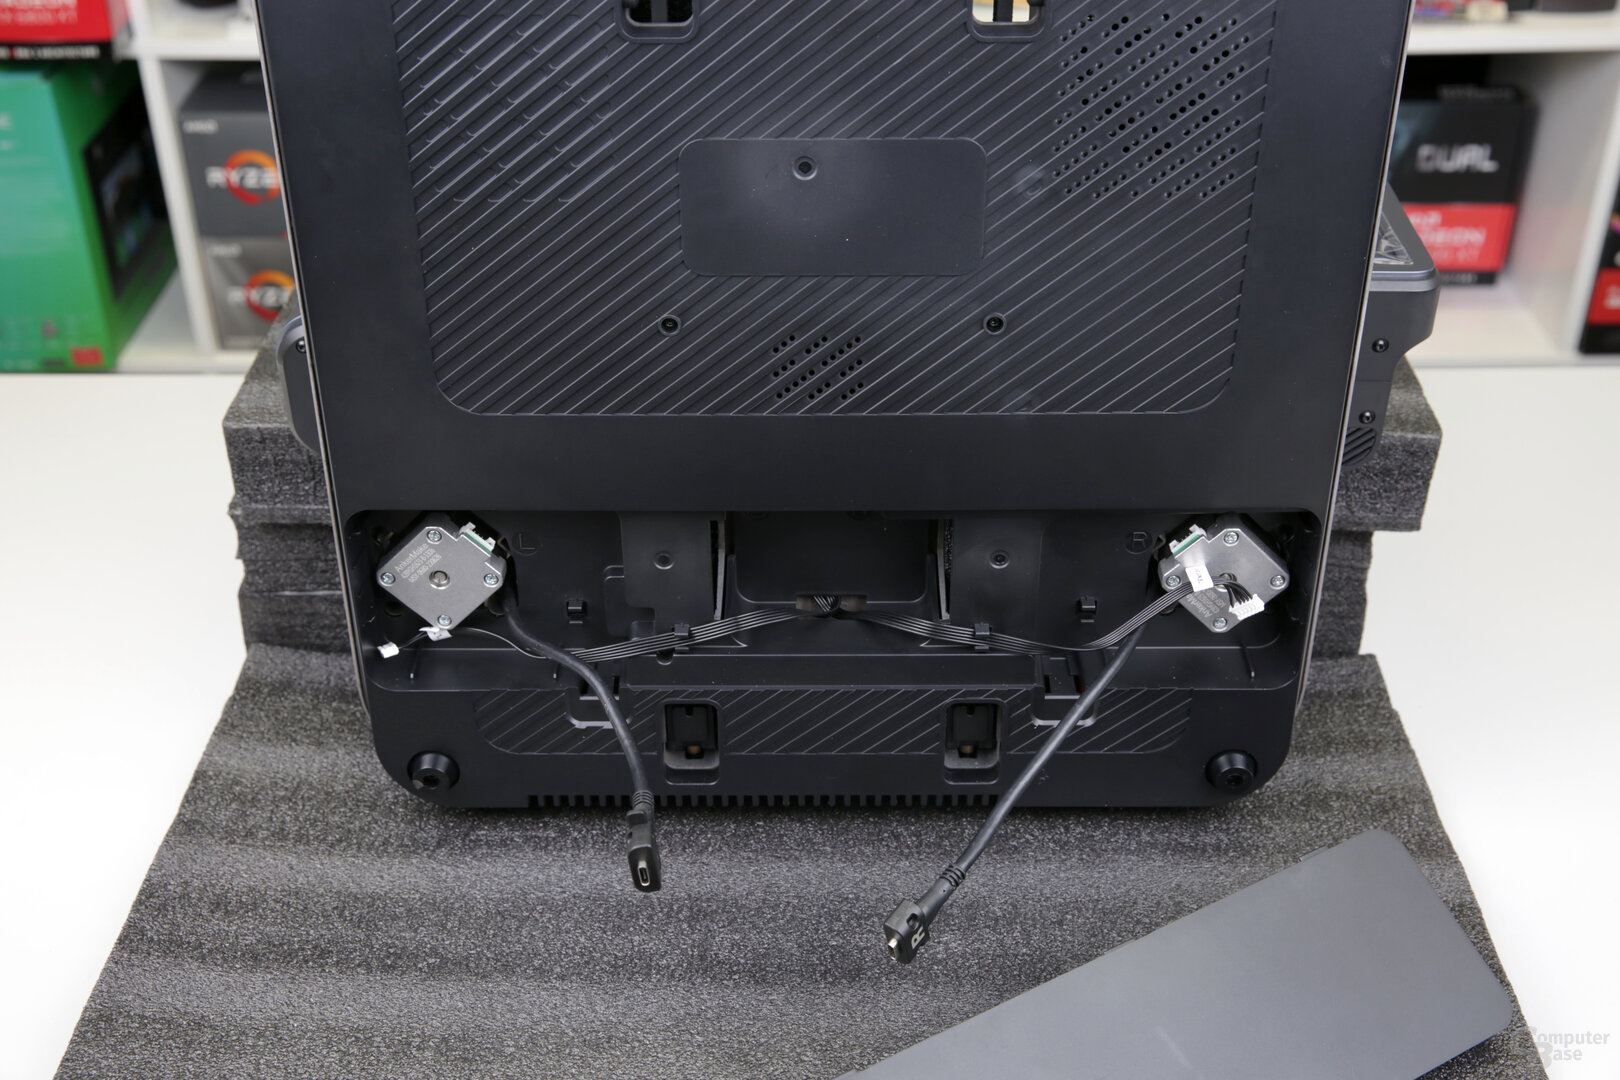
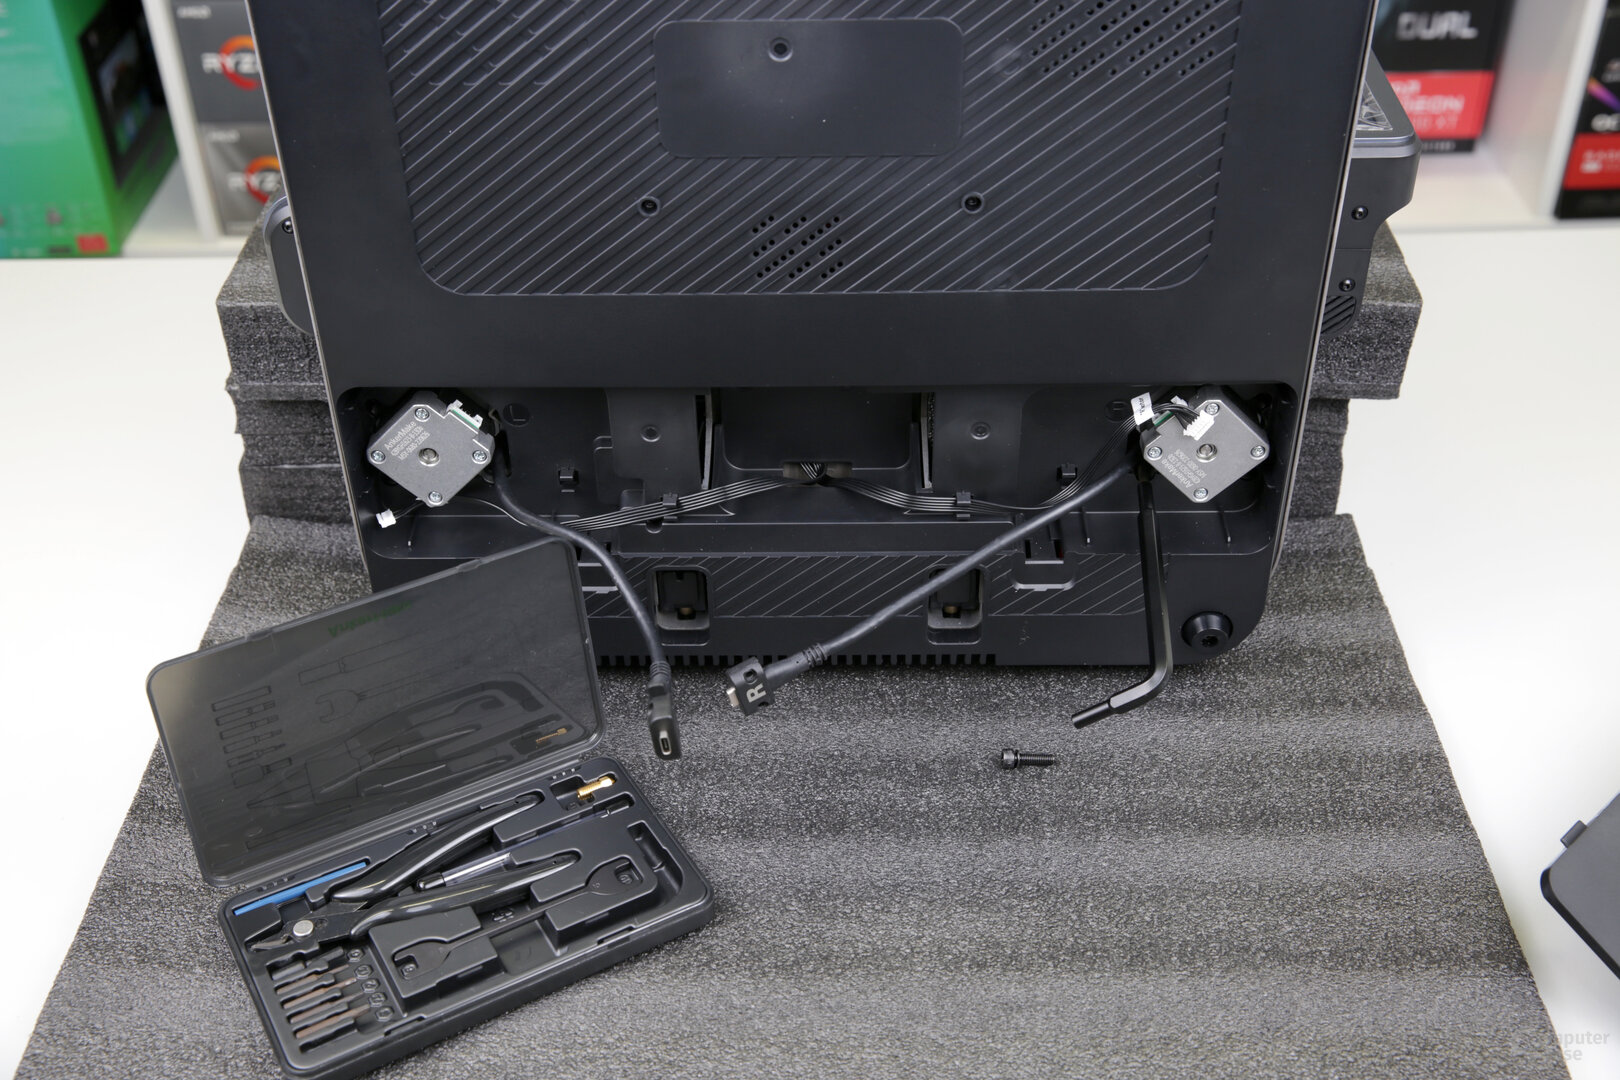
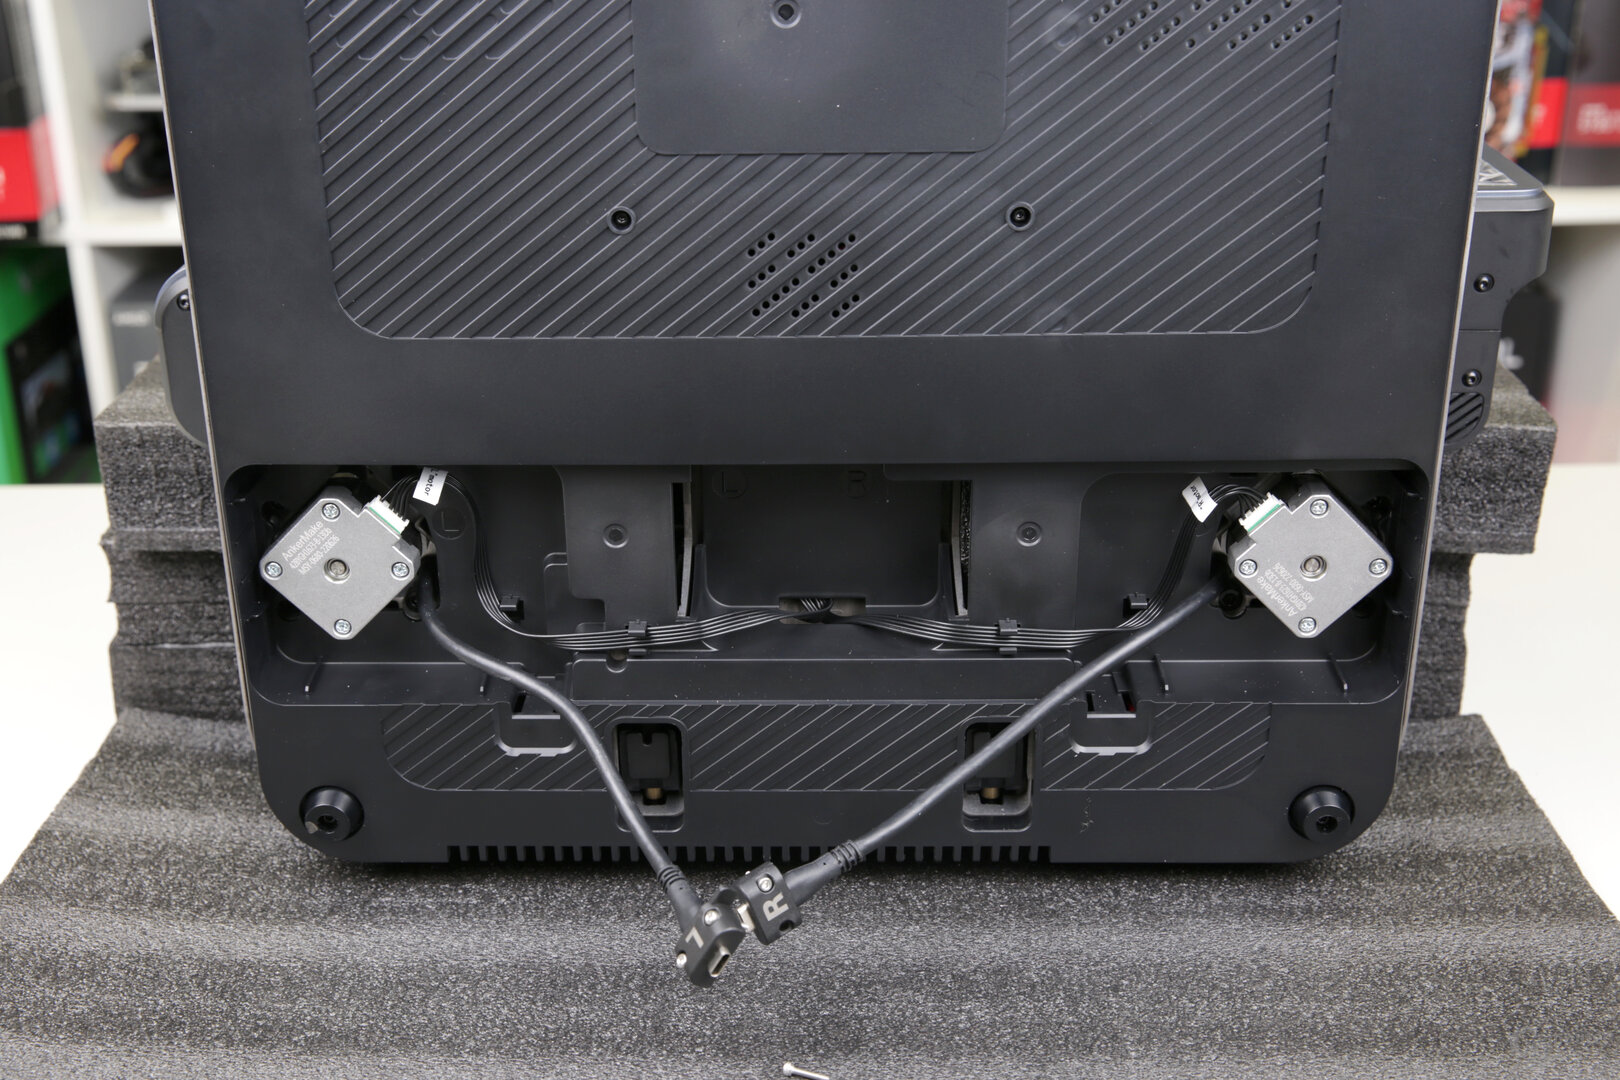
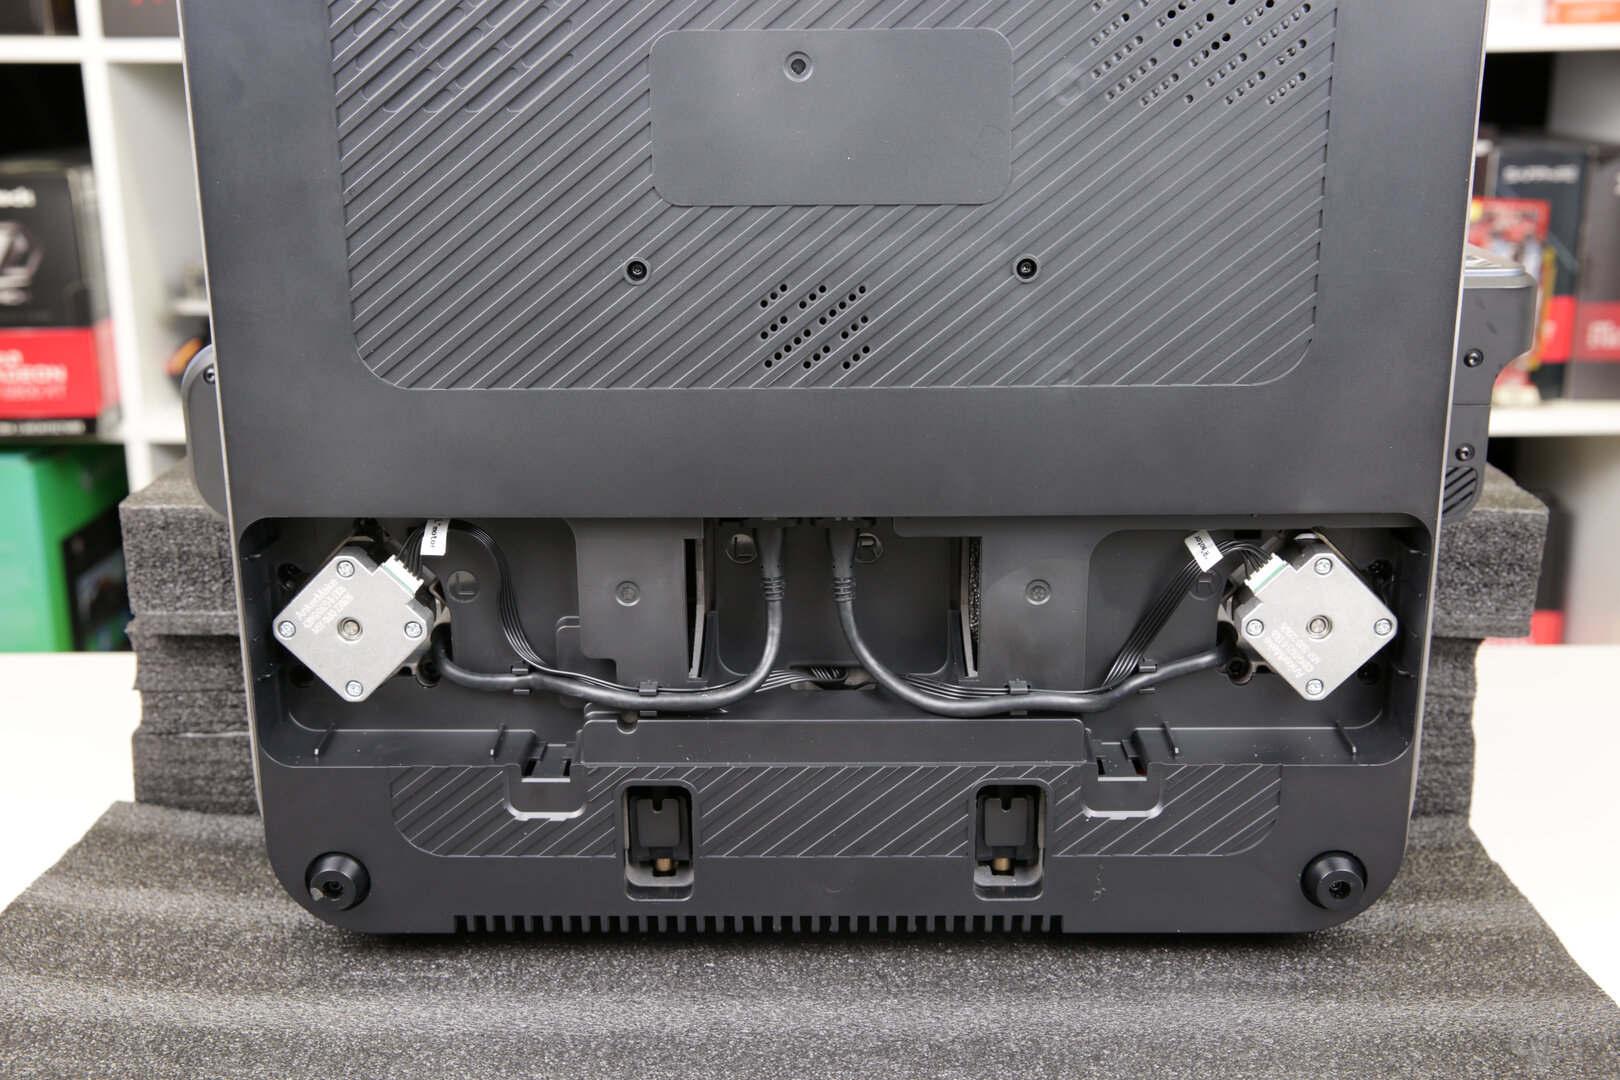
However, it is also not possible without connecting the motor cables. The cables preconfigured in the base must be plugged into the ports of the frame and the USB-C cables connected to the base. They are screwed together so that they cannot come loose later. With a total of four cables, this step is complete and the M5 can be placed on the base to mount the filament holder.
 AnkerMake M5: Only the filament holder is missing
The filament holder can be attached to the left side of the frame in two positions: facing up or facing to the side. The position does not matter for the print. Above all, it should be chosen according to the place. It must be considered whether the AnkerMake M5 is to be used later in a housing in order to prevent the components from cooling down too quickly and the resulting warping, especially with ABS.
 AnkerMake M5: Lateral position for the filament holder
 AnkerMake M5: Upper Position for the filament holder
The assembly of the AnkerMake M5 is already completed by connecting the power cable and switching on via the switch on the back. The 3D printer is then set up.
Setup via smartphone app
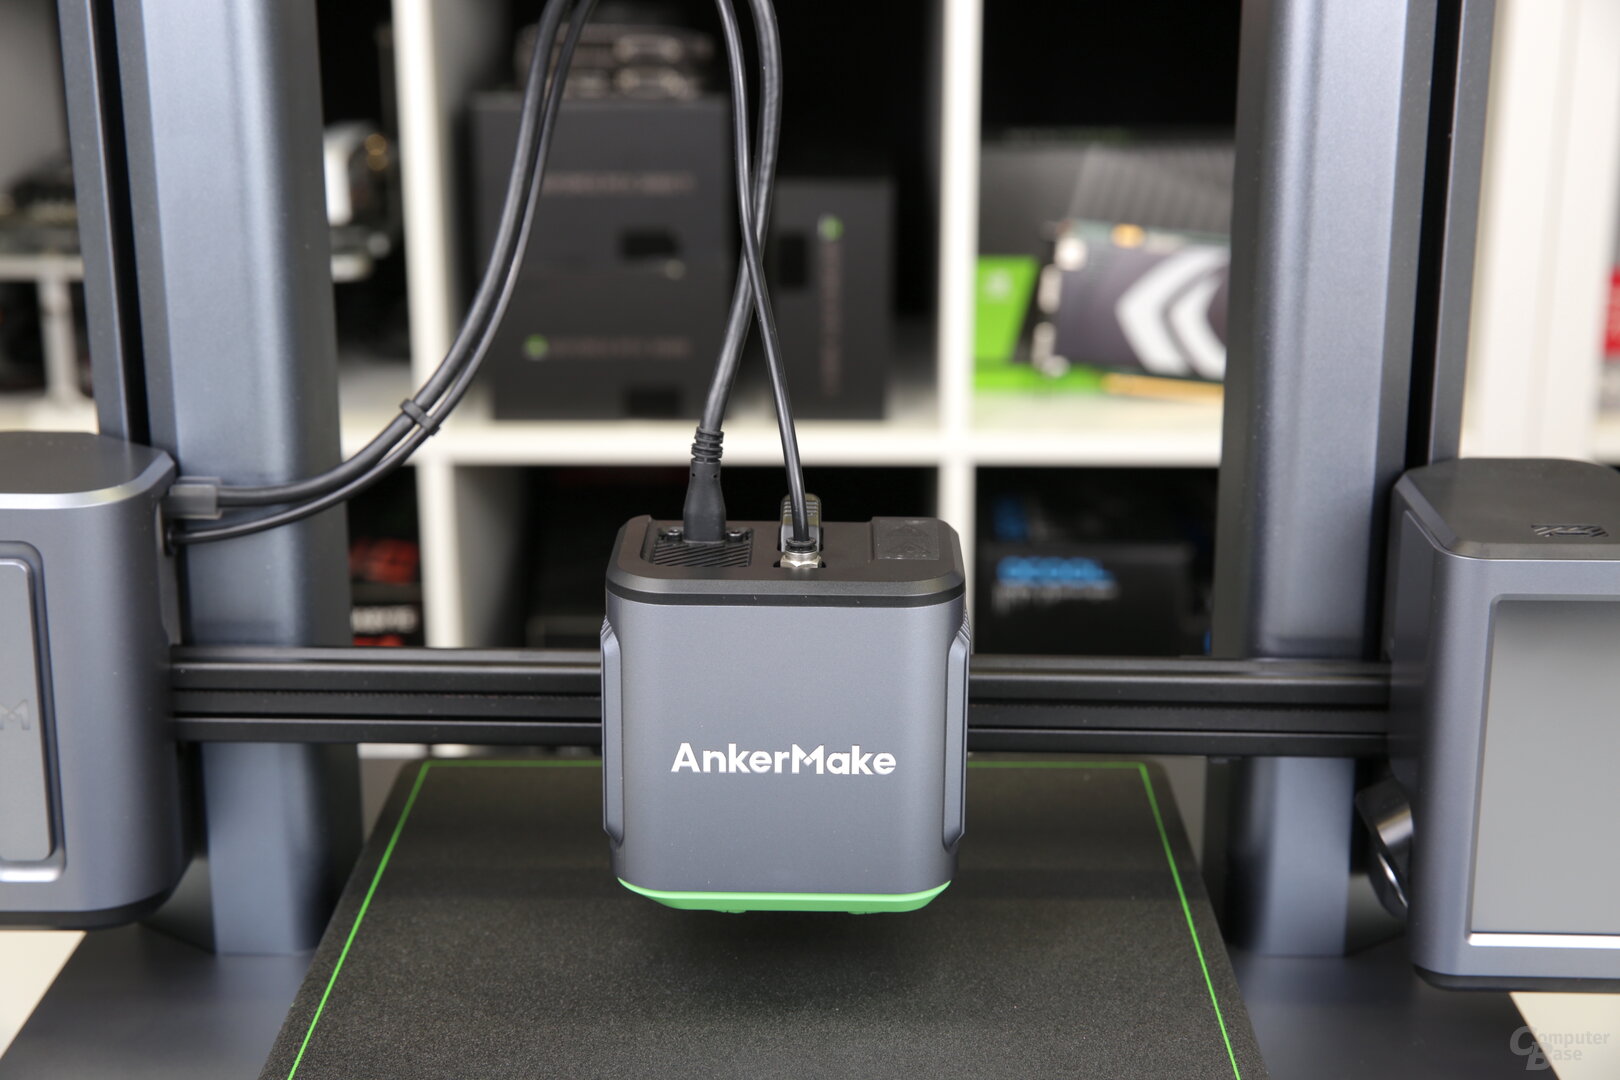
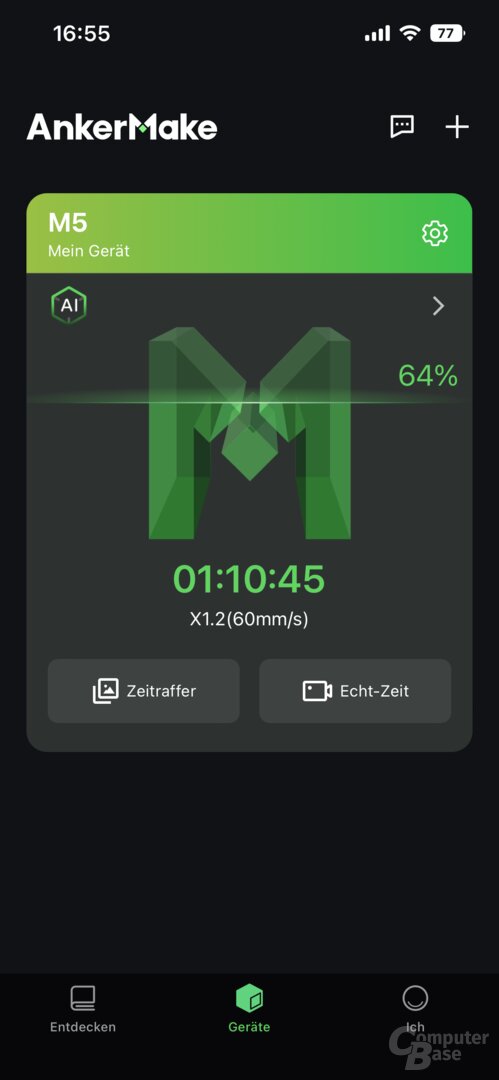
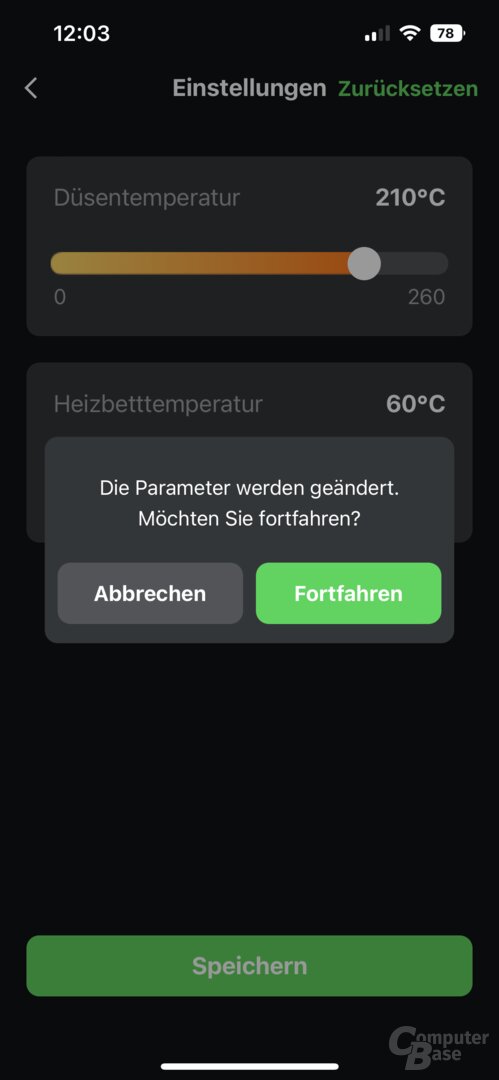
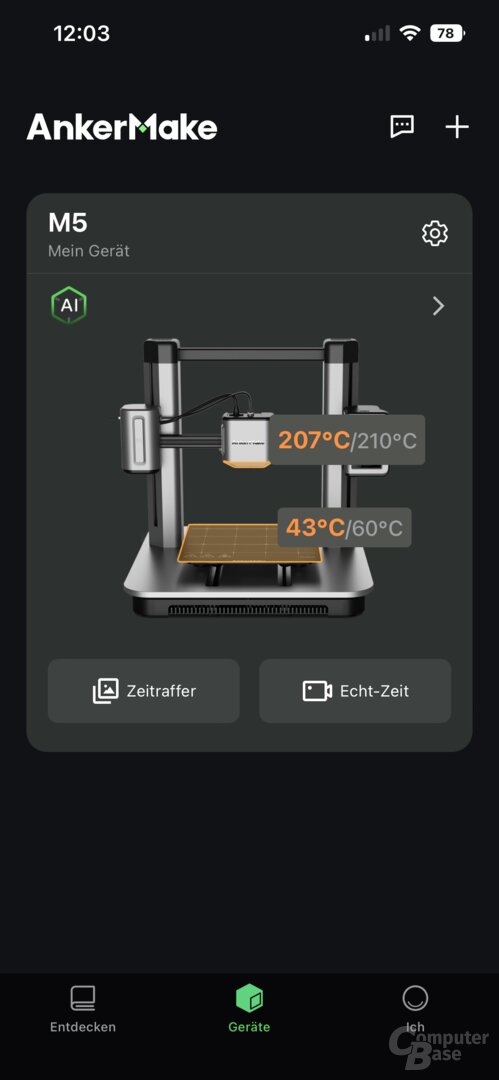
After selecting the language via the display, the smartphone can be connected to the M5 via Bluetooth and the AnkerMake app. The app is available for Android and iOS. The app assigns a name to the printer and configures the WLAN so that the M5 can now be monitored and controlled via the network and the Internet connection while on the go. In addition, firmware updates are possible directly via the device and 3D models can be sent from a PC directly from the slicer software via WLAN to the 3D printer. The USB-C connection for external storage media does not necessarily have to be used to transfer the print models.
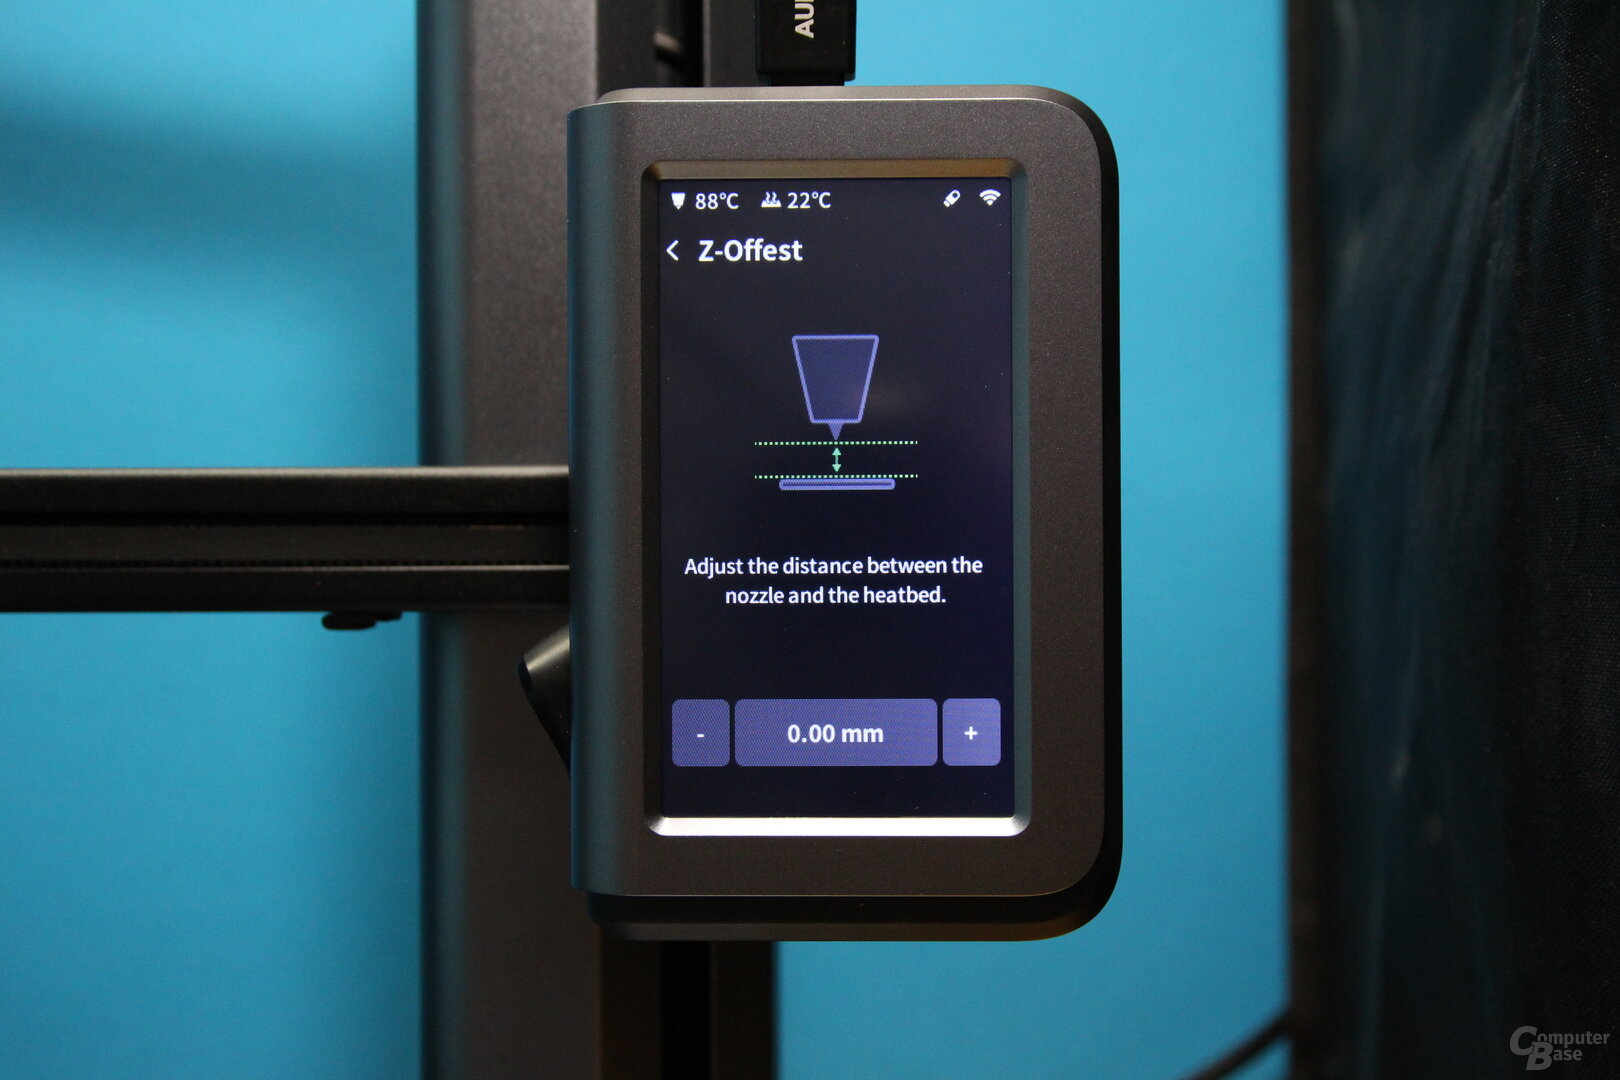
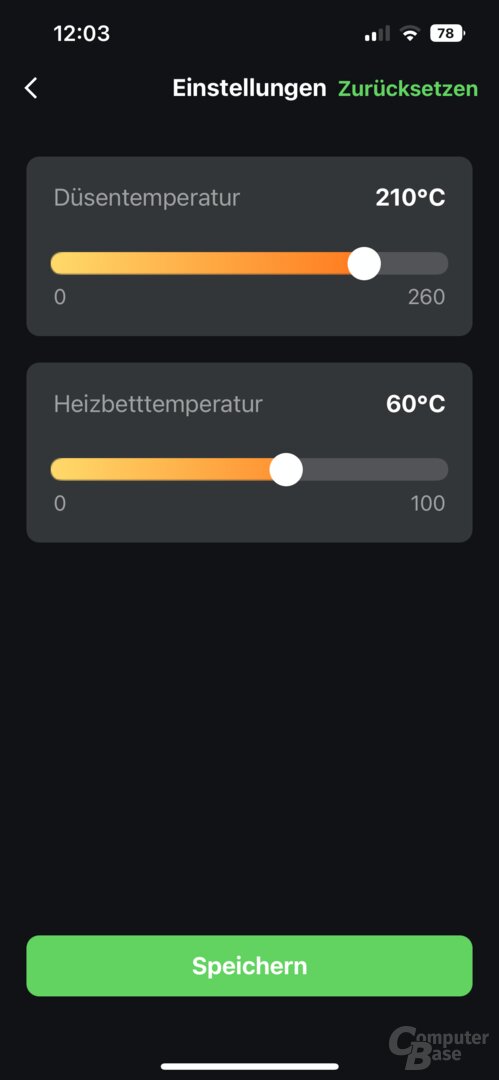
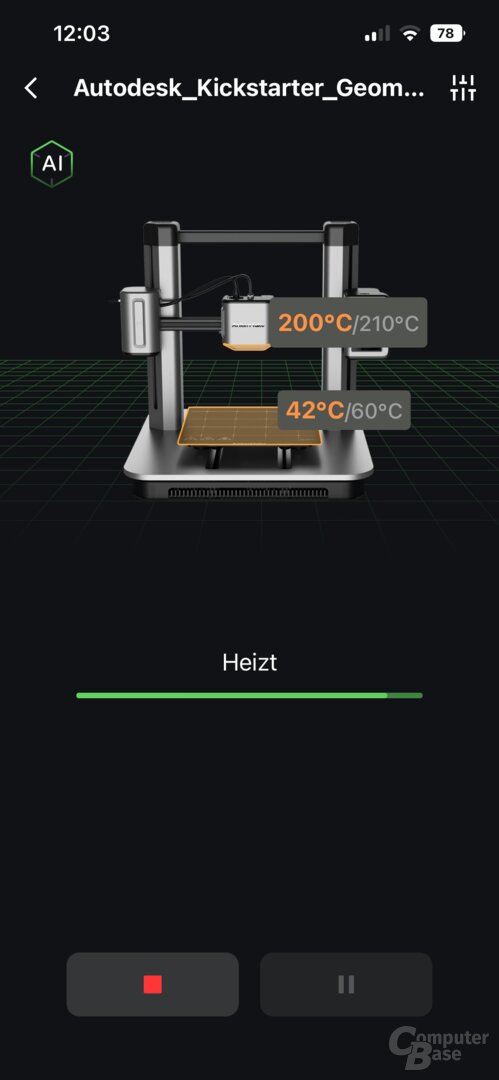
But the setup is not yet complete when you connect the app. The heating bed must then be leveled so that the distance between the nozzle and the heating bed is correct. The AnkerMake M5 does this fully automatically with auto-leveling at 49 points on the print bed. In order to be able to print, the filament roll is now placed on the holder and the 1.75 mm thick filament is guided through the filament detection to the extruder through a hose.
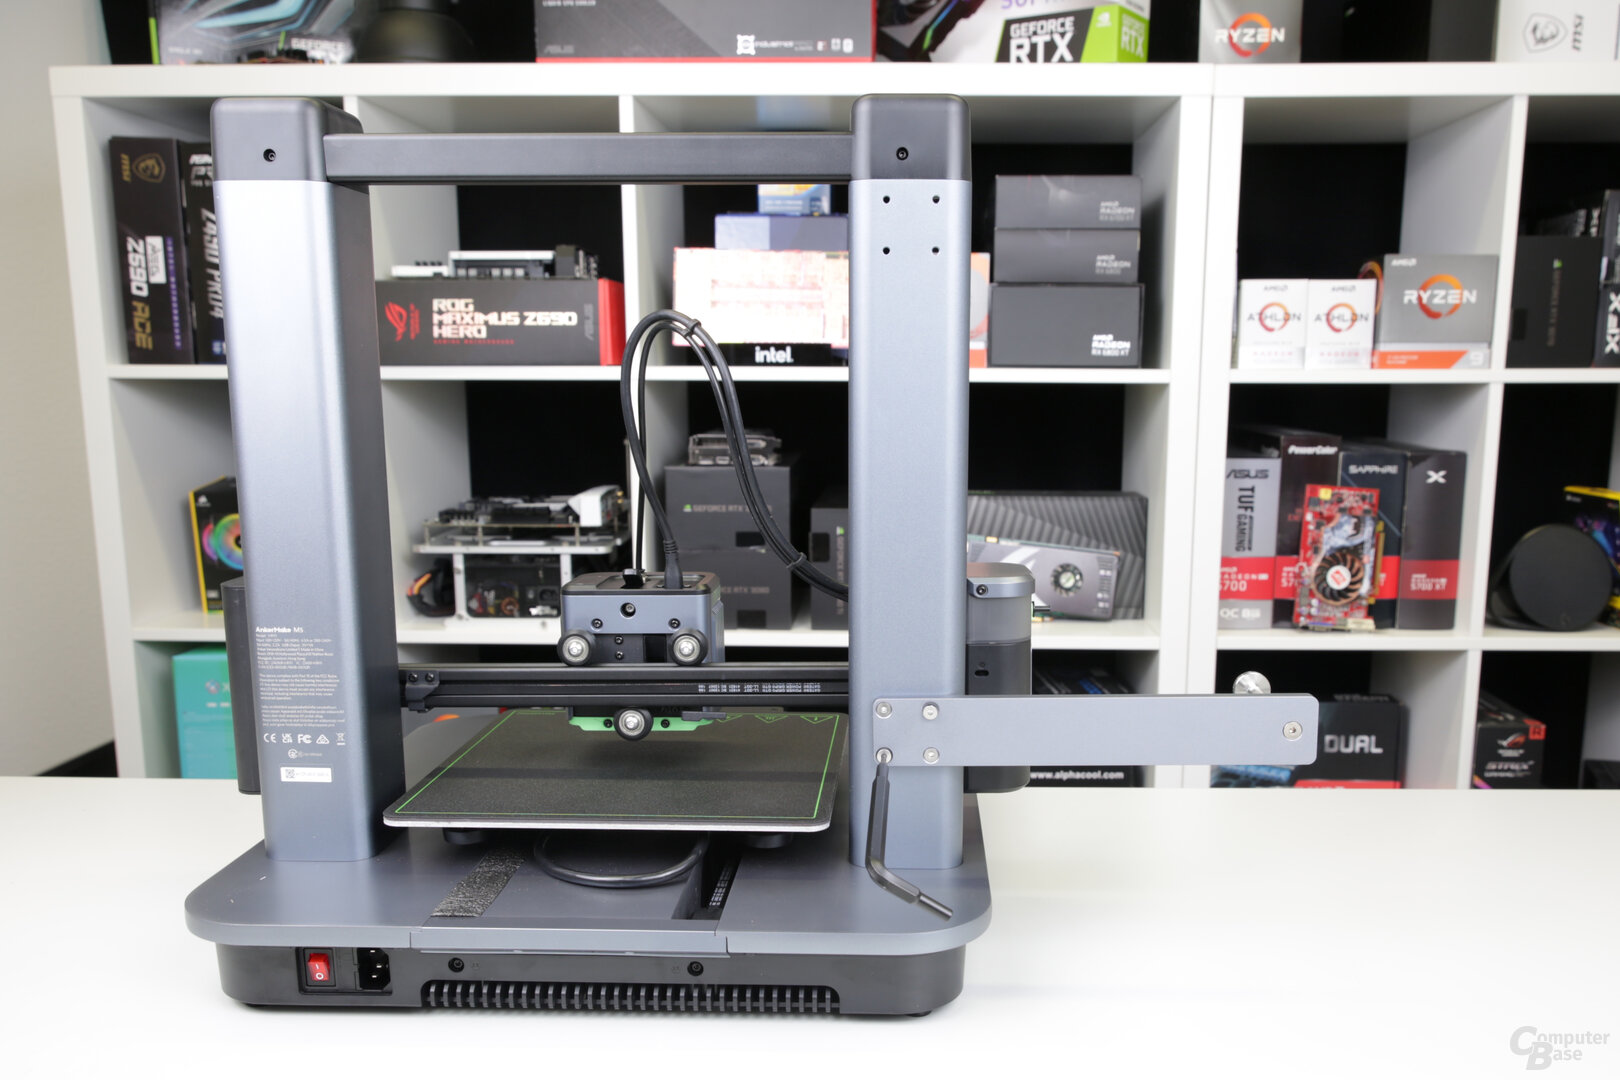
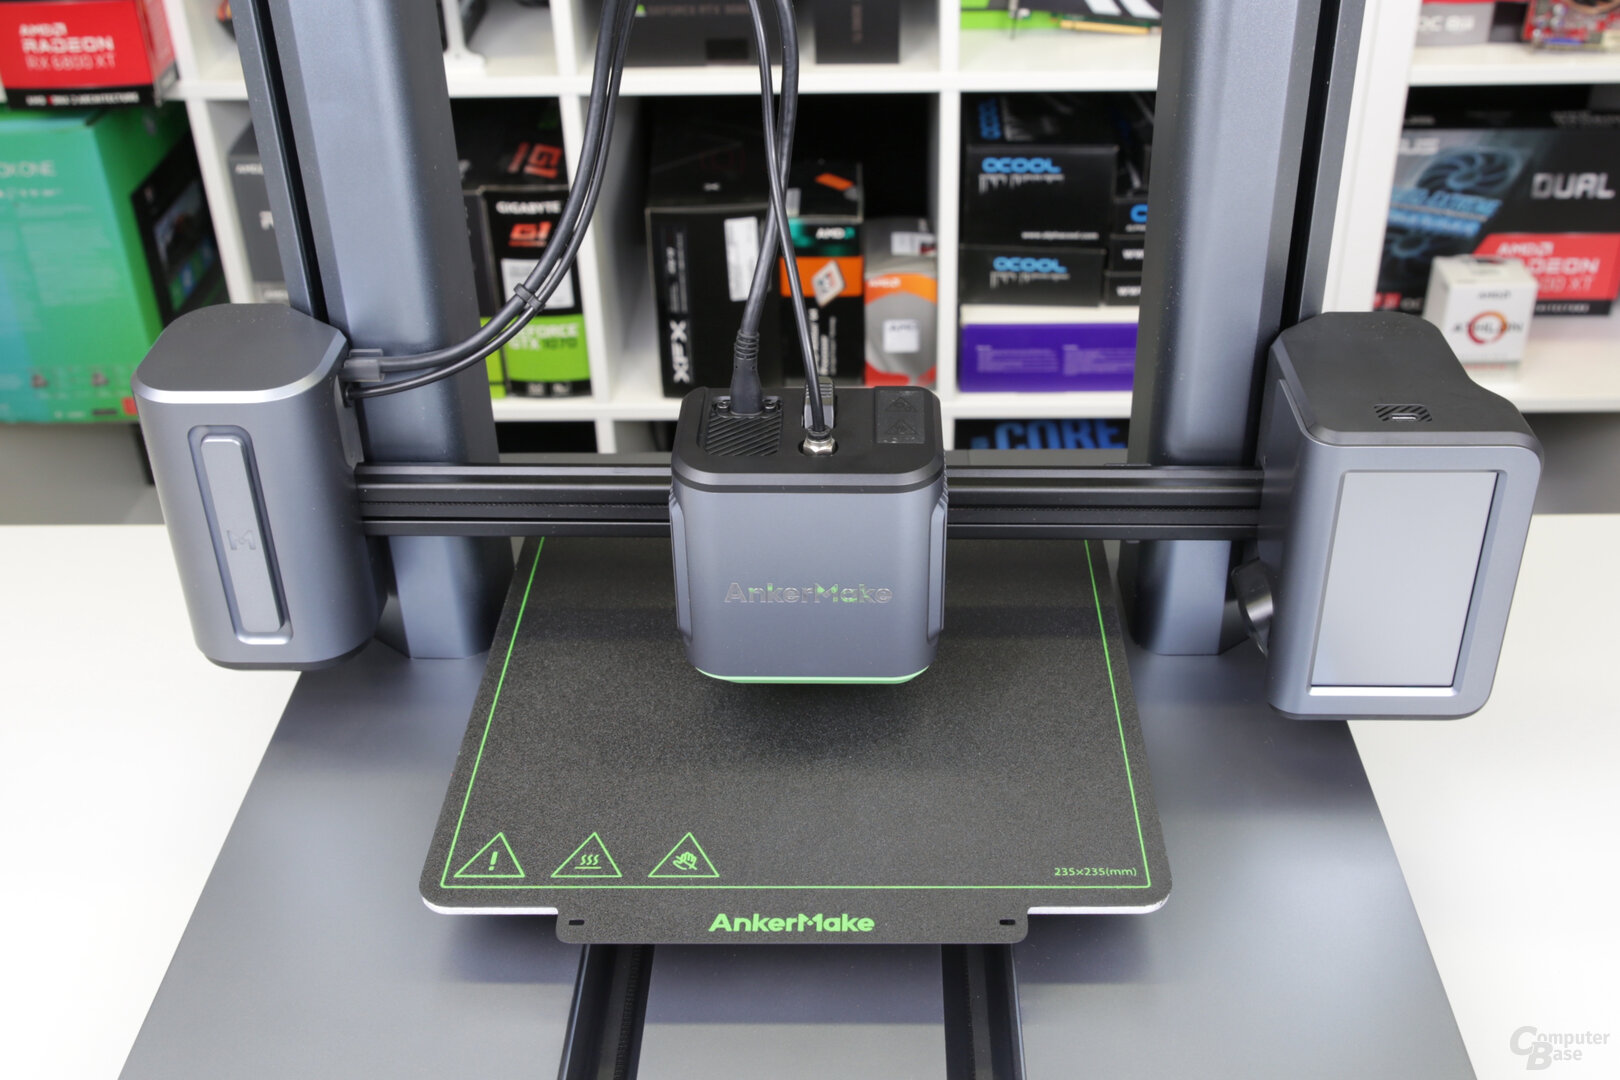
The M5 uses a direct extruder
This is where a first peculiarity of the M5 comes into play, because although it is a direct extruder and not a Bowden extruder, the filament is guided in a tube. However, there is no reason to worry that it will get caught again and again and get stuck in the hose. Once the filament has reached the extruder, the button is pressed to be able to insert it into the gears. This worked reliably without exception in the test.
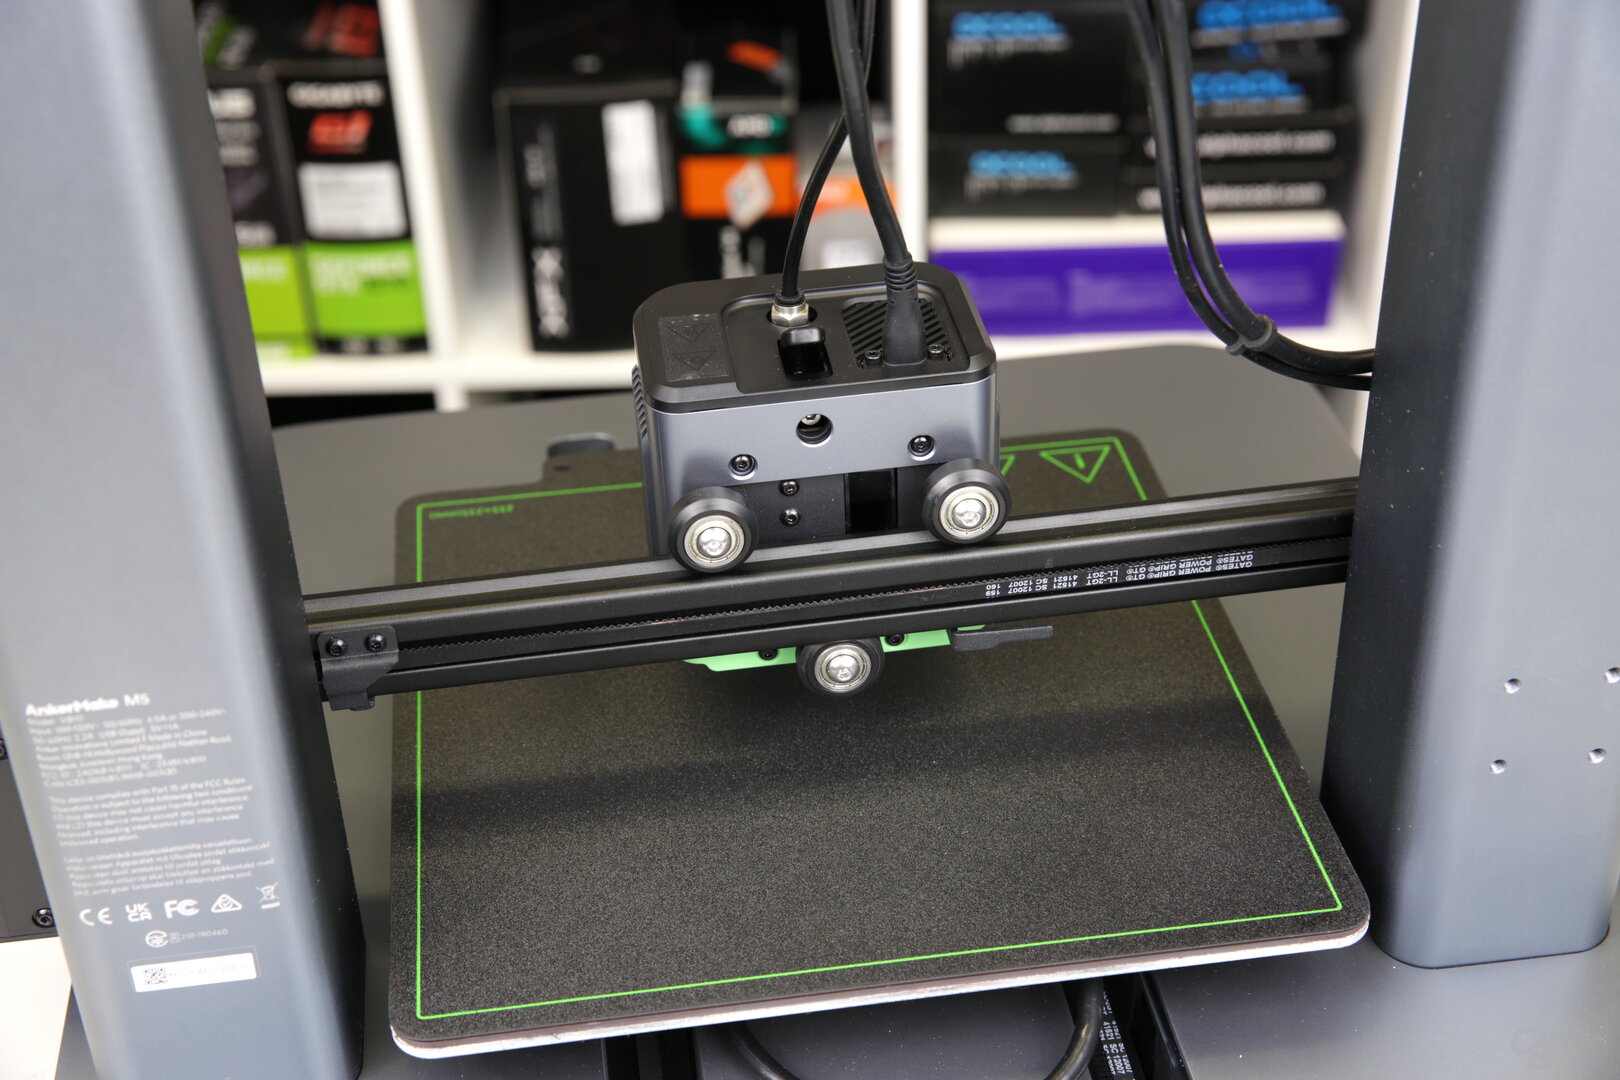
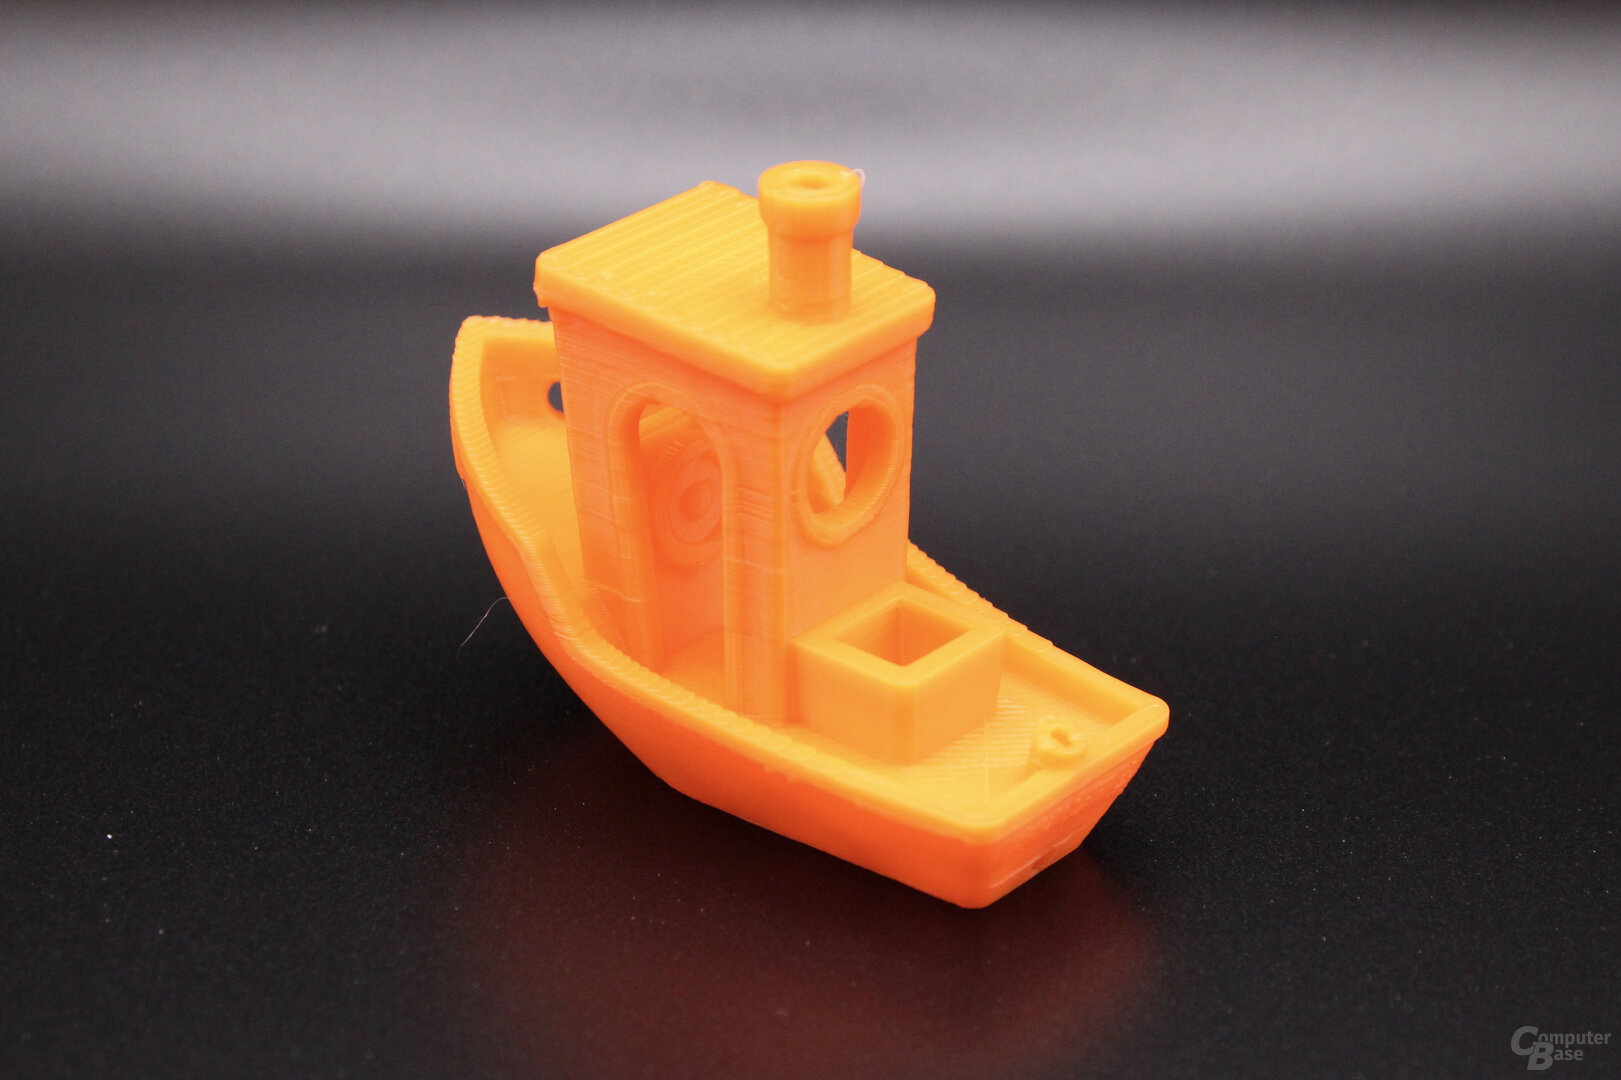
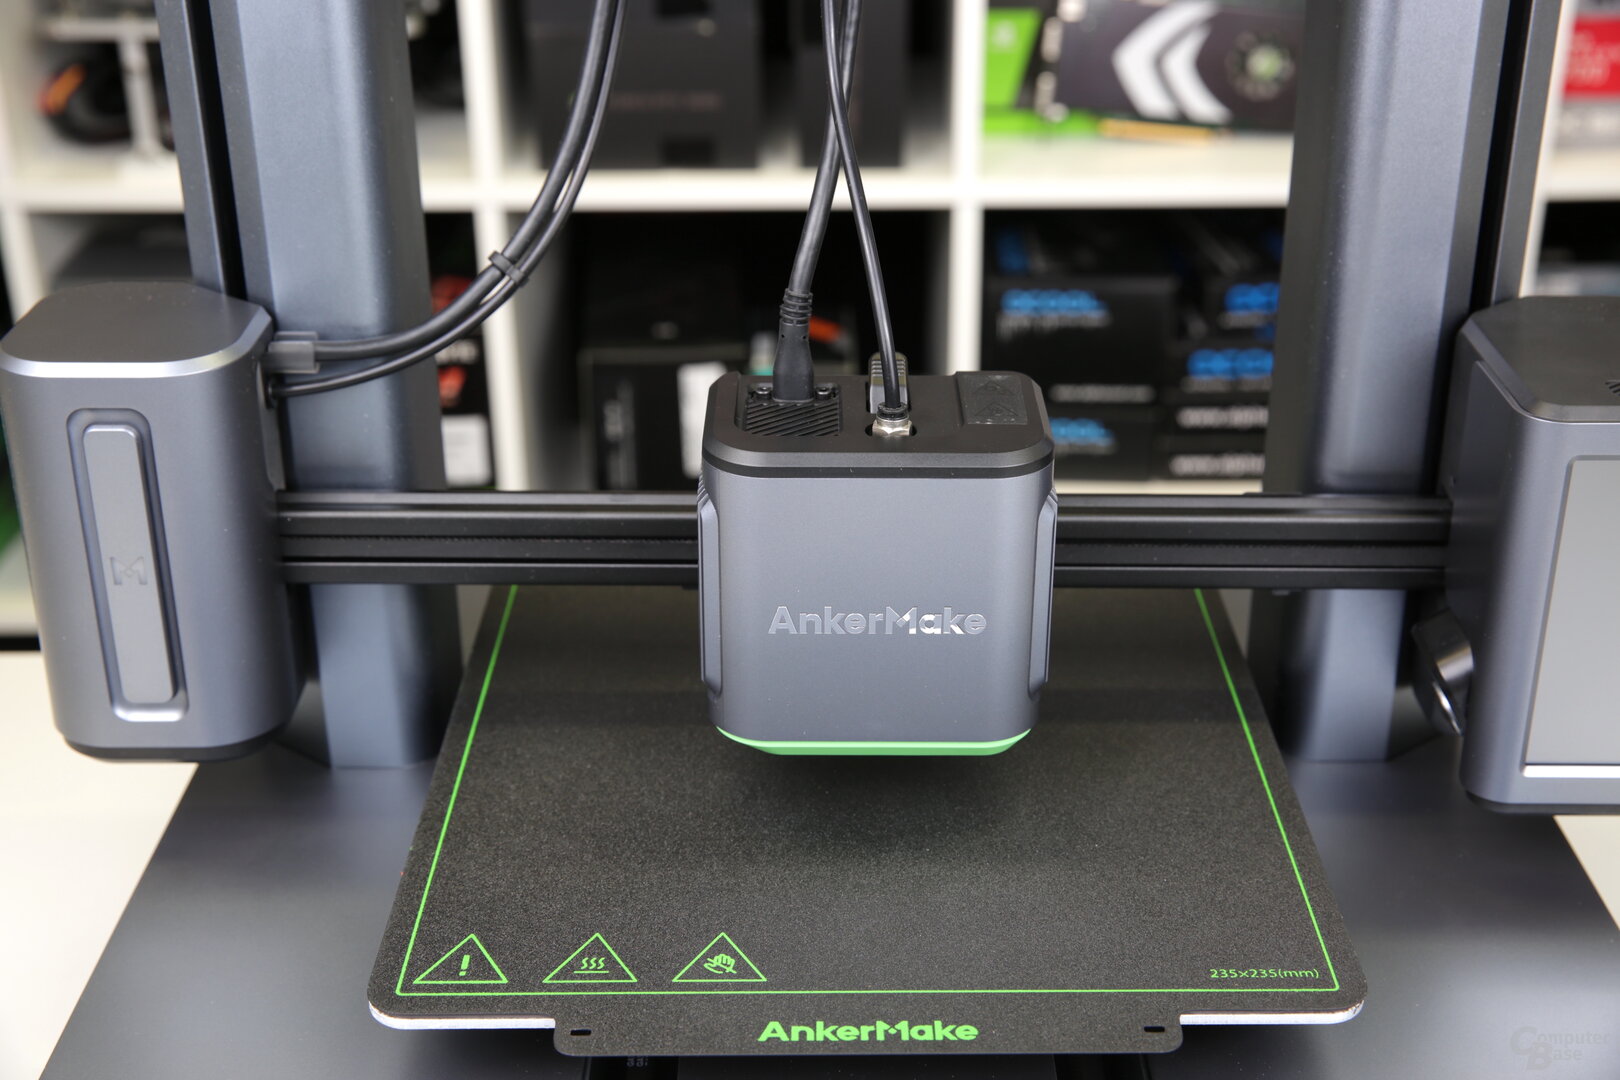
 AnkerMake M5: The printhead with direct extruder, hotend and nozzle
A direct extruder sits just above the hotend, where the filament is heated and melted, and pushes the filament straight to the nozzle. The components are all combined into one print head. This has the advantage that extrusion is easier, the retraction, i.e. the retraction of the filament during movements without pressure, is faster, a weaker motor is sufficient and the selection of filaments that can be used is usually larger. However, the complexity of the printhead, its maintenance and its weight increase. A Bowden extruder, on the other hand, is separate from the hotend and first pushes the filament through a hose to the hotend. Visually, the structure of the M5 is reminiscent of this principle, but the extruder is not on the side of the axis, but directly on the hotend despite the hose.
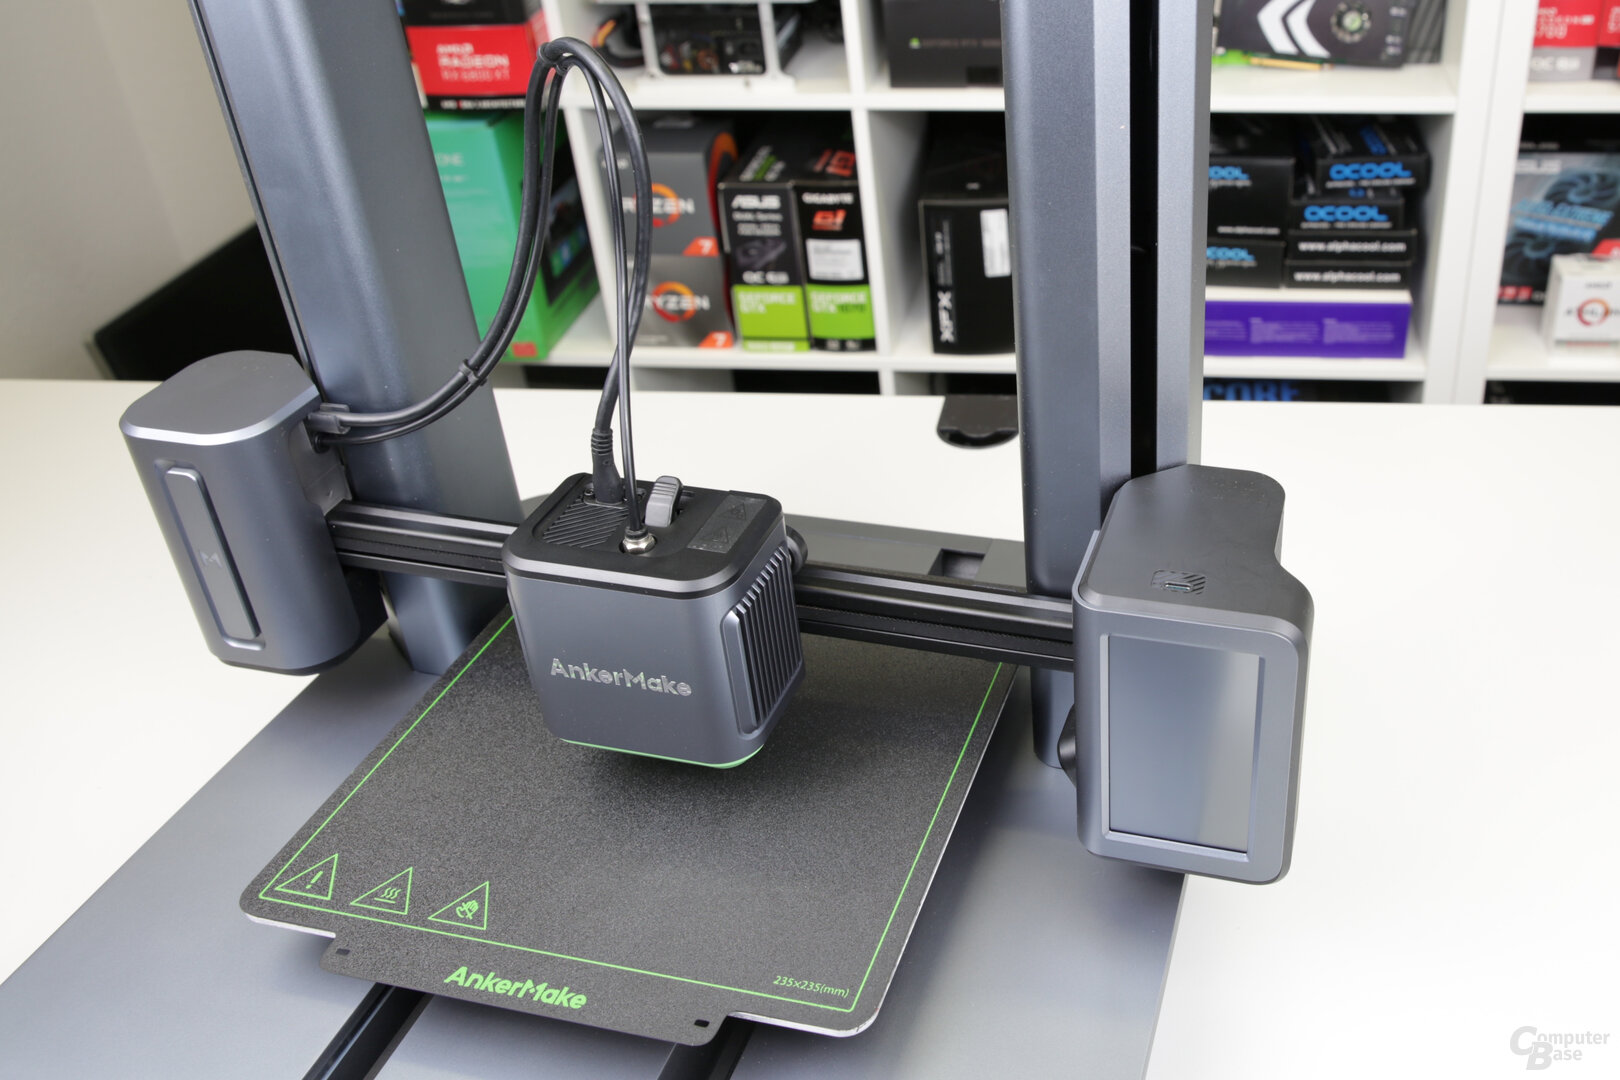
 AnkerMake M5: Filament detection, print head and touch display
Now the 3D Start printing already, because Anker supplies two test models on the internal memory of the M5. But first, the technical details and the software should be examined in more detail.
All details about the AnkerMake M5
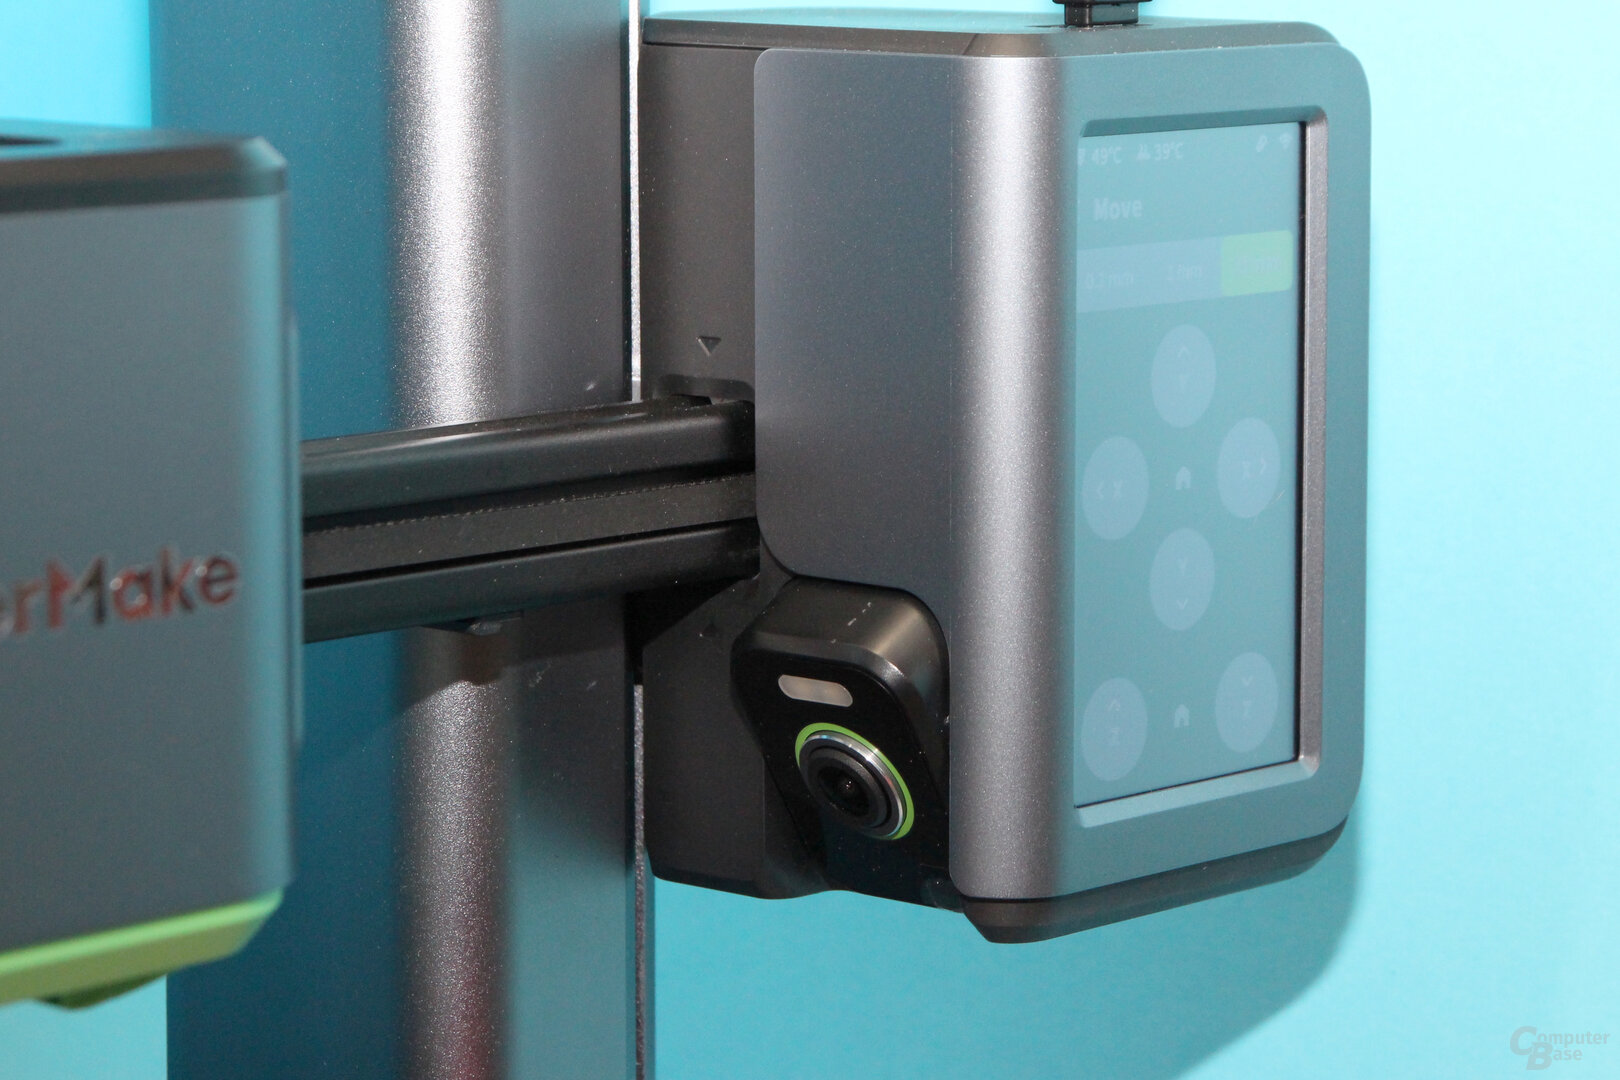
Display, USB-C, WLAN and LEDs
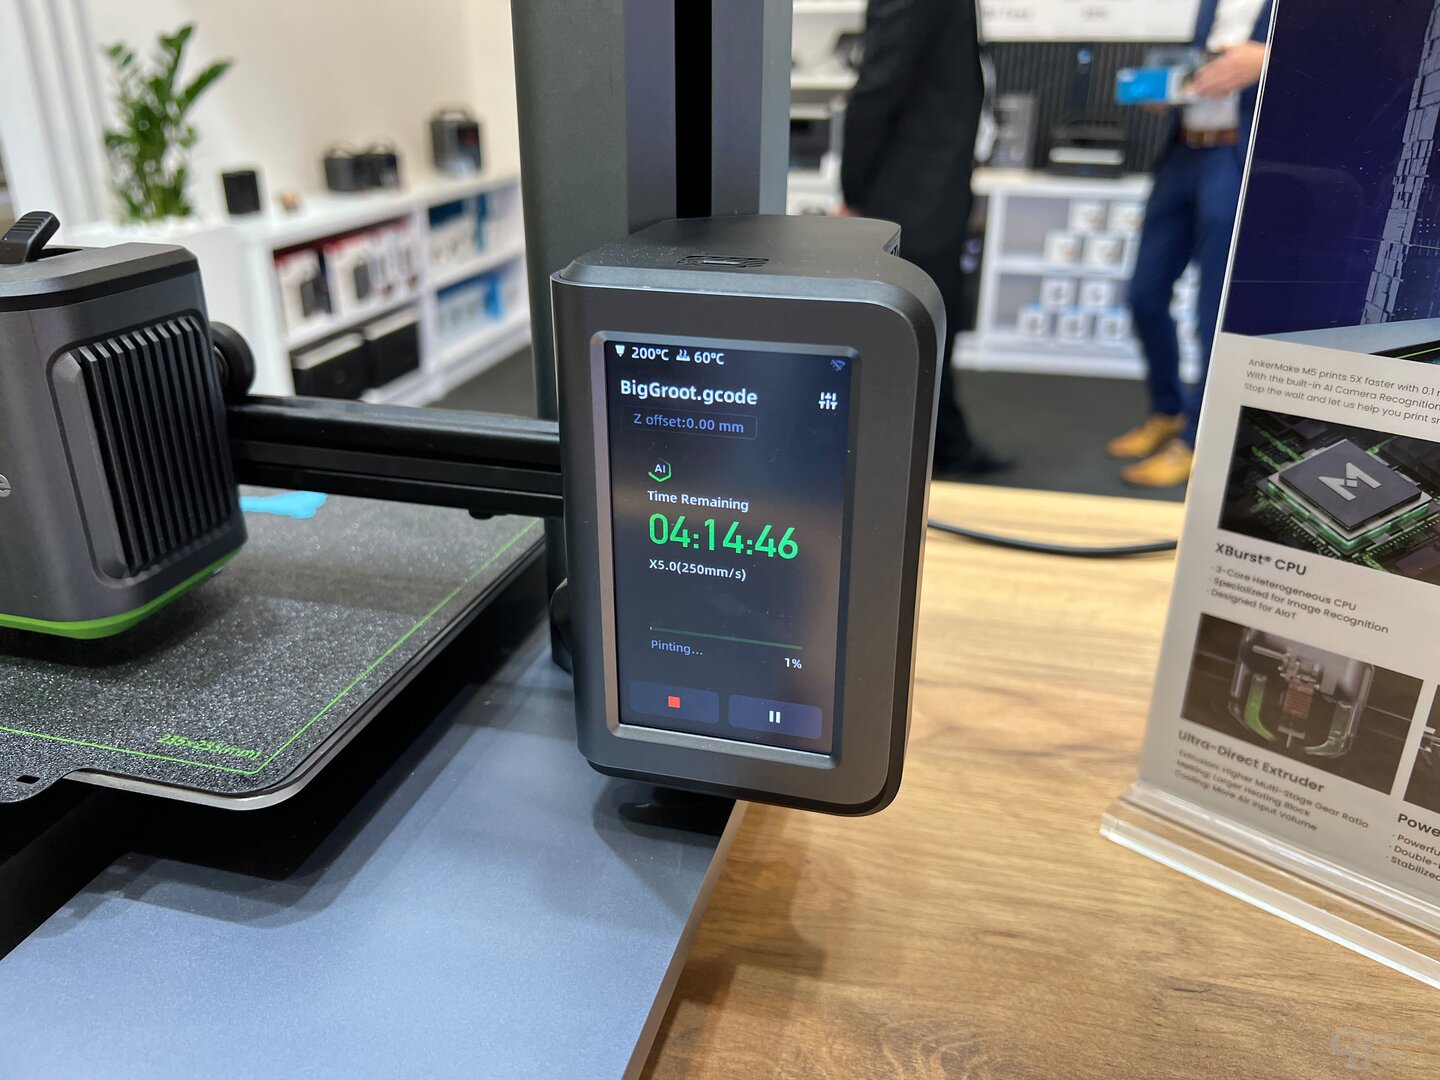
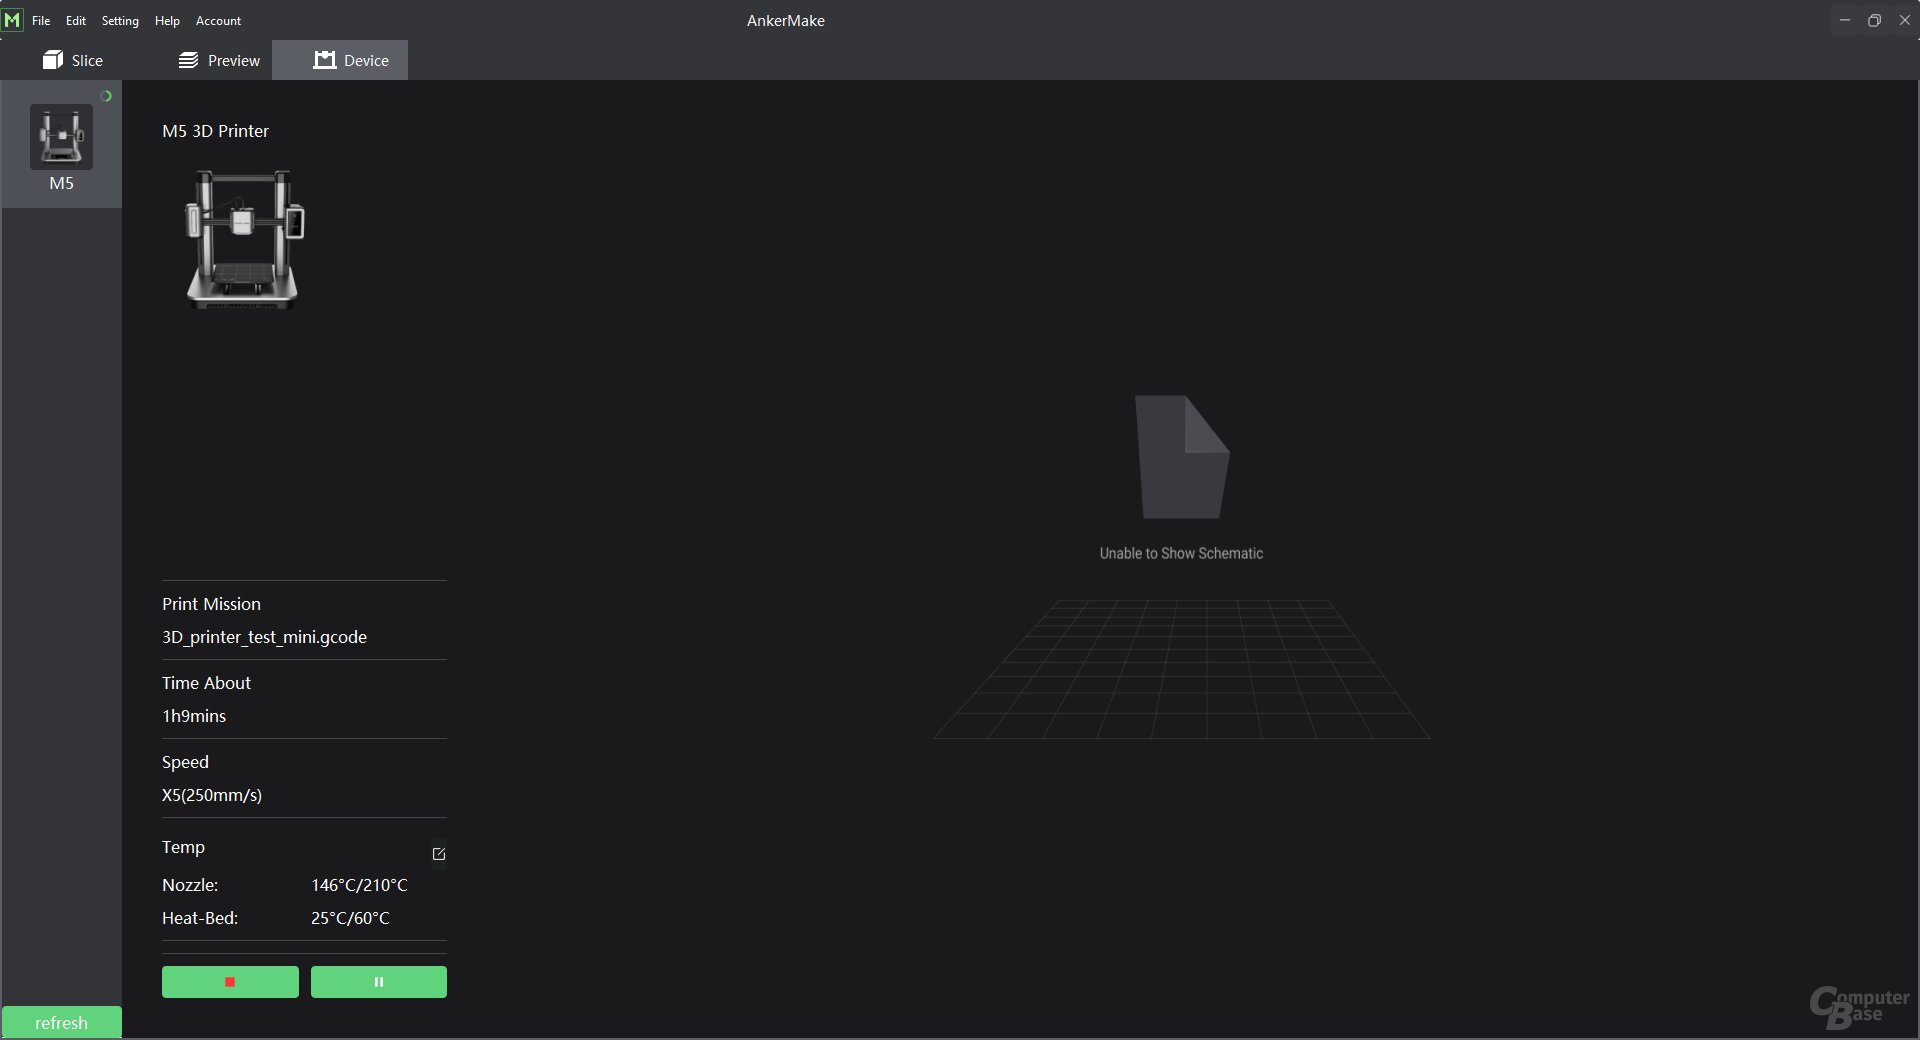
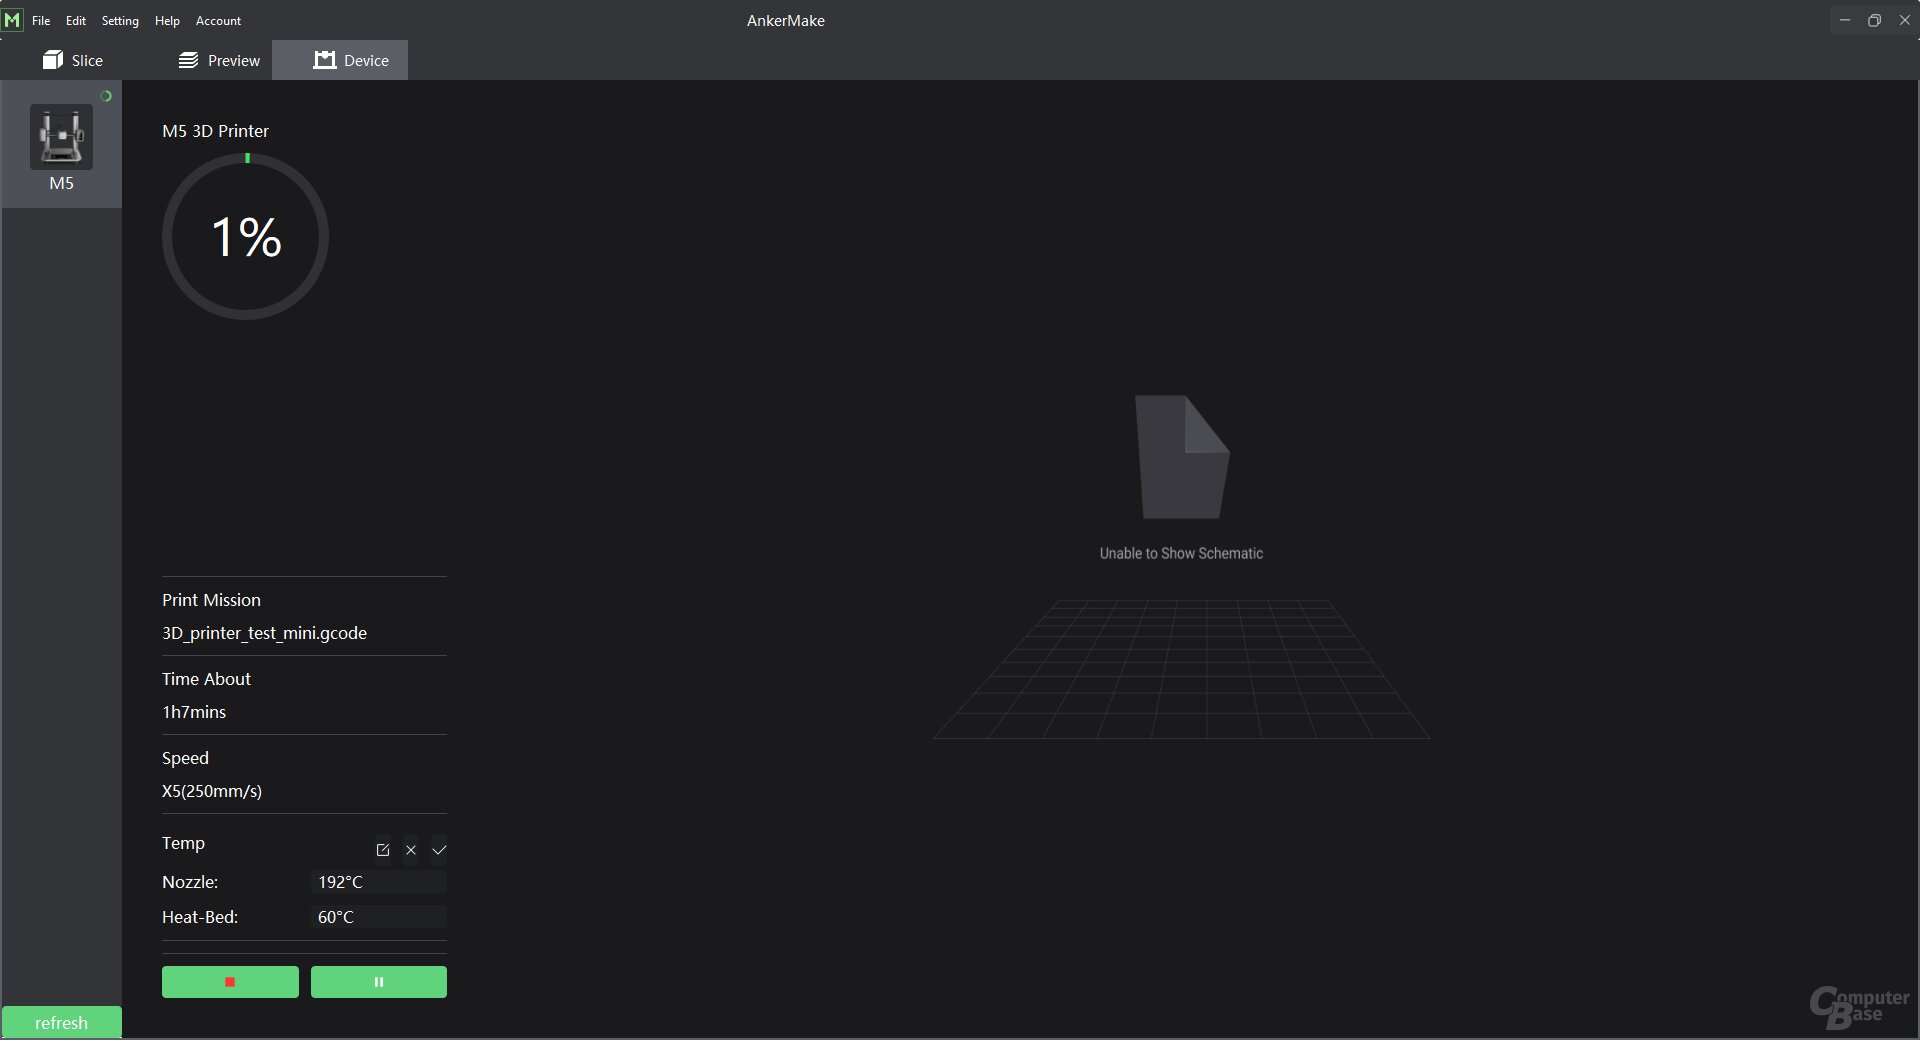
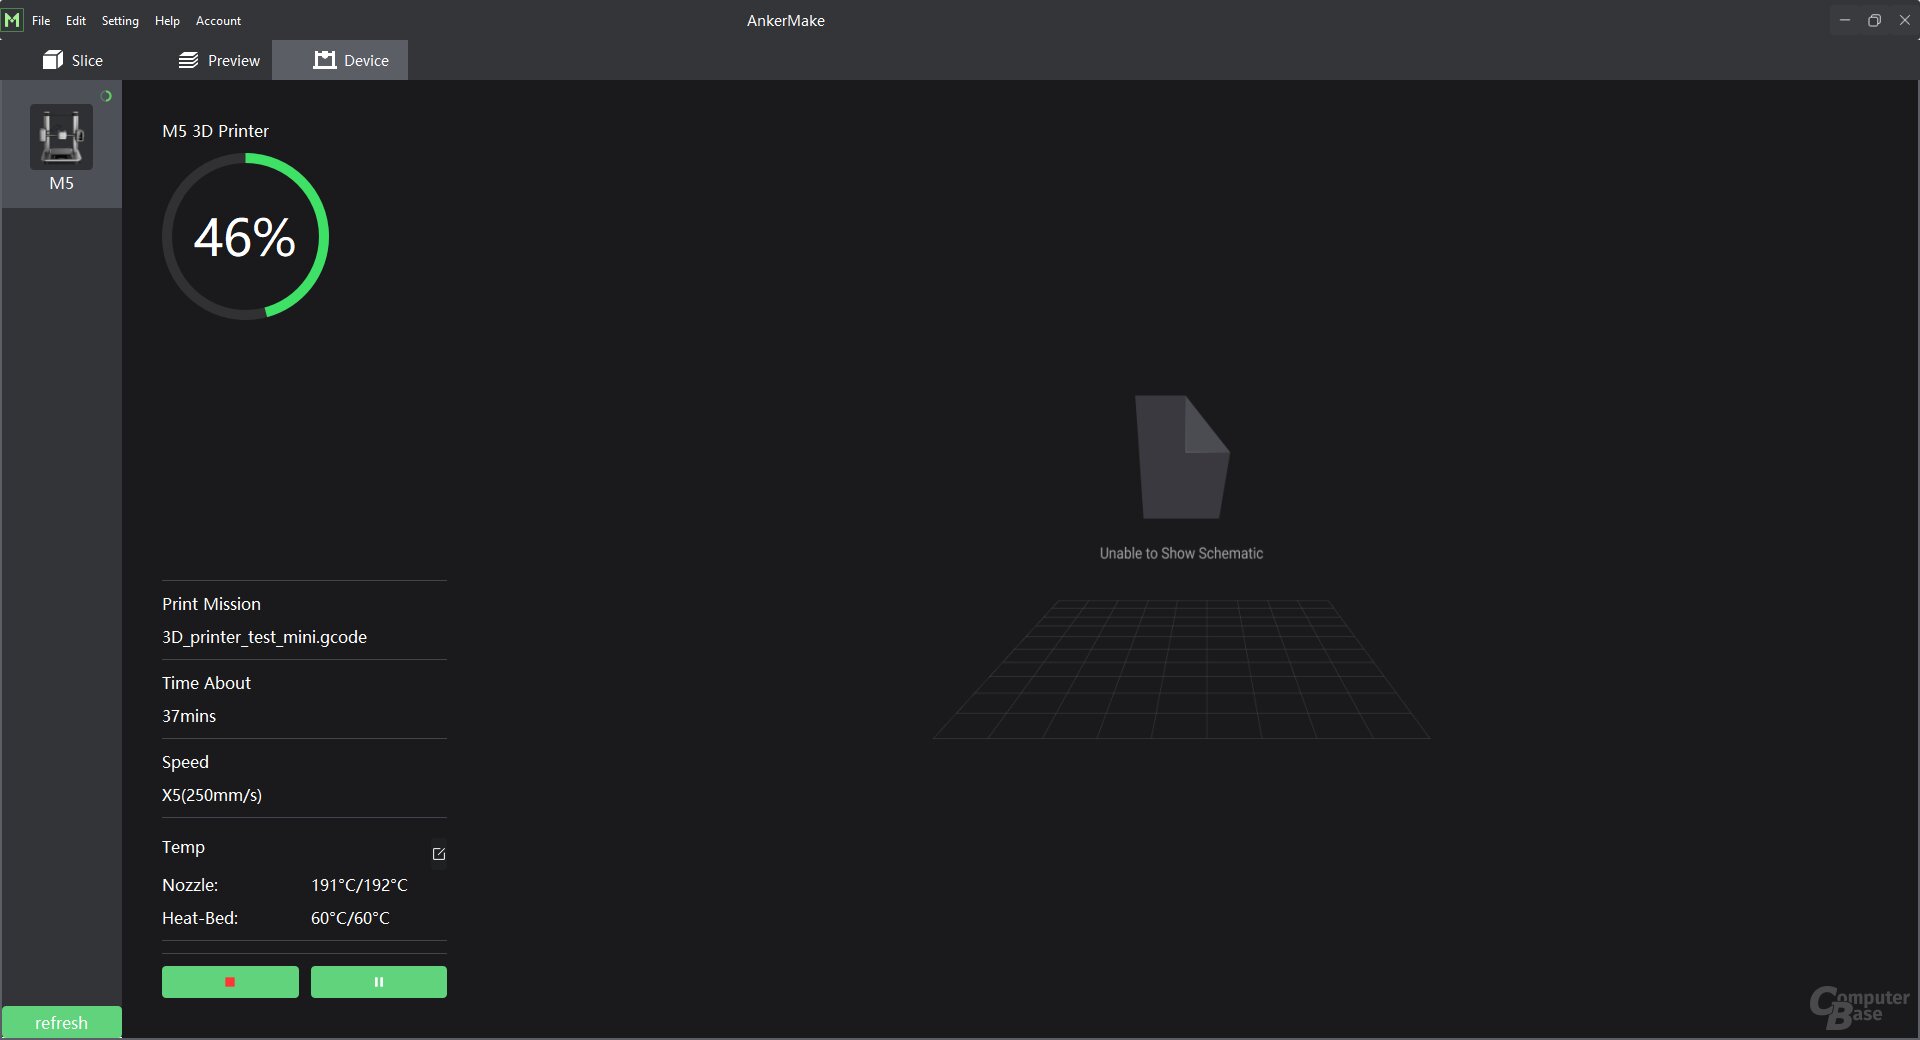
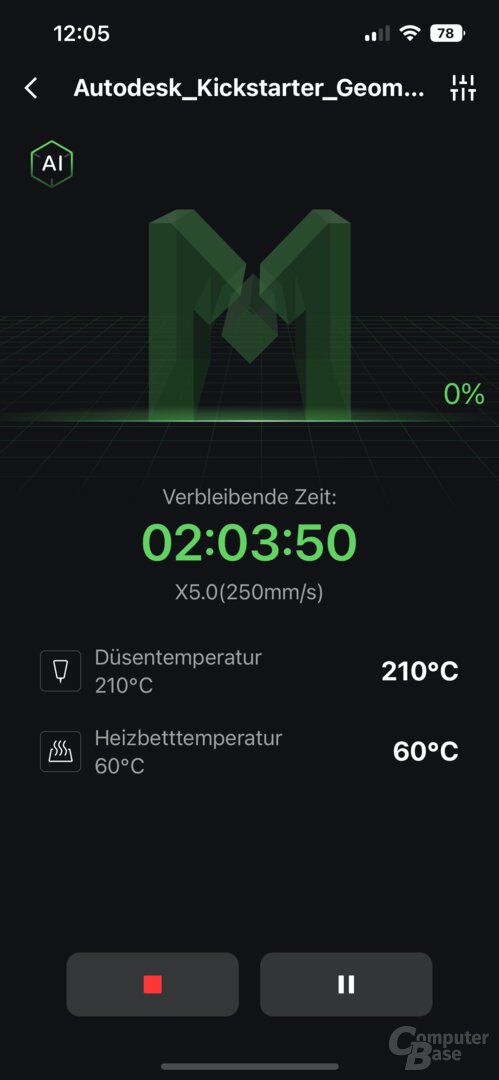
As already briefly mentioned, the AnkerMake M5 has a 4.3-inch touch display. Many settings can be made directly on the device, starting printing from USB or the internal memory, pausing or stopping an active print or updating the firmware. It is also possible to manually recycle or extrude the filament, preheat the components or move the print head. Furthermore, the display always shows the remaining printing time during the printing process, which in fact corresponds to the result.
-
 AnkerMake M5 3D printer
Image 1 of 36
 AnkerMake M5 3D printer
 Touch display of the AnkerMake M5
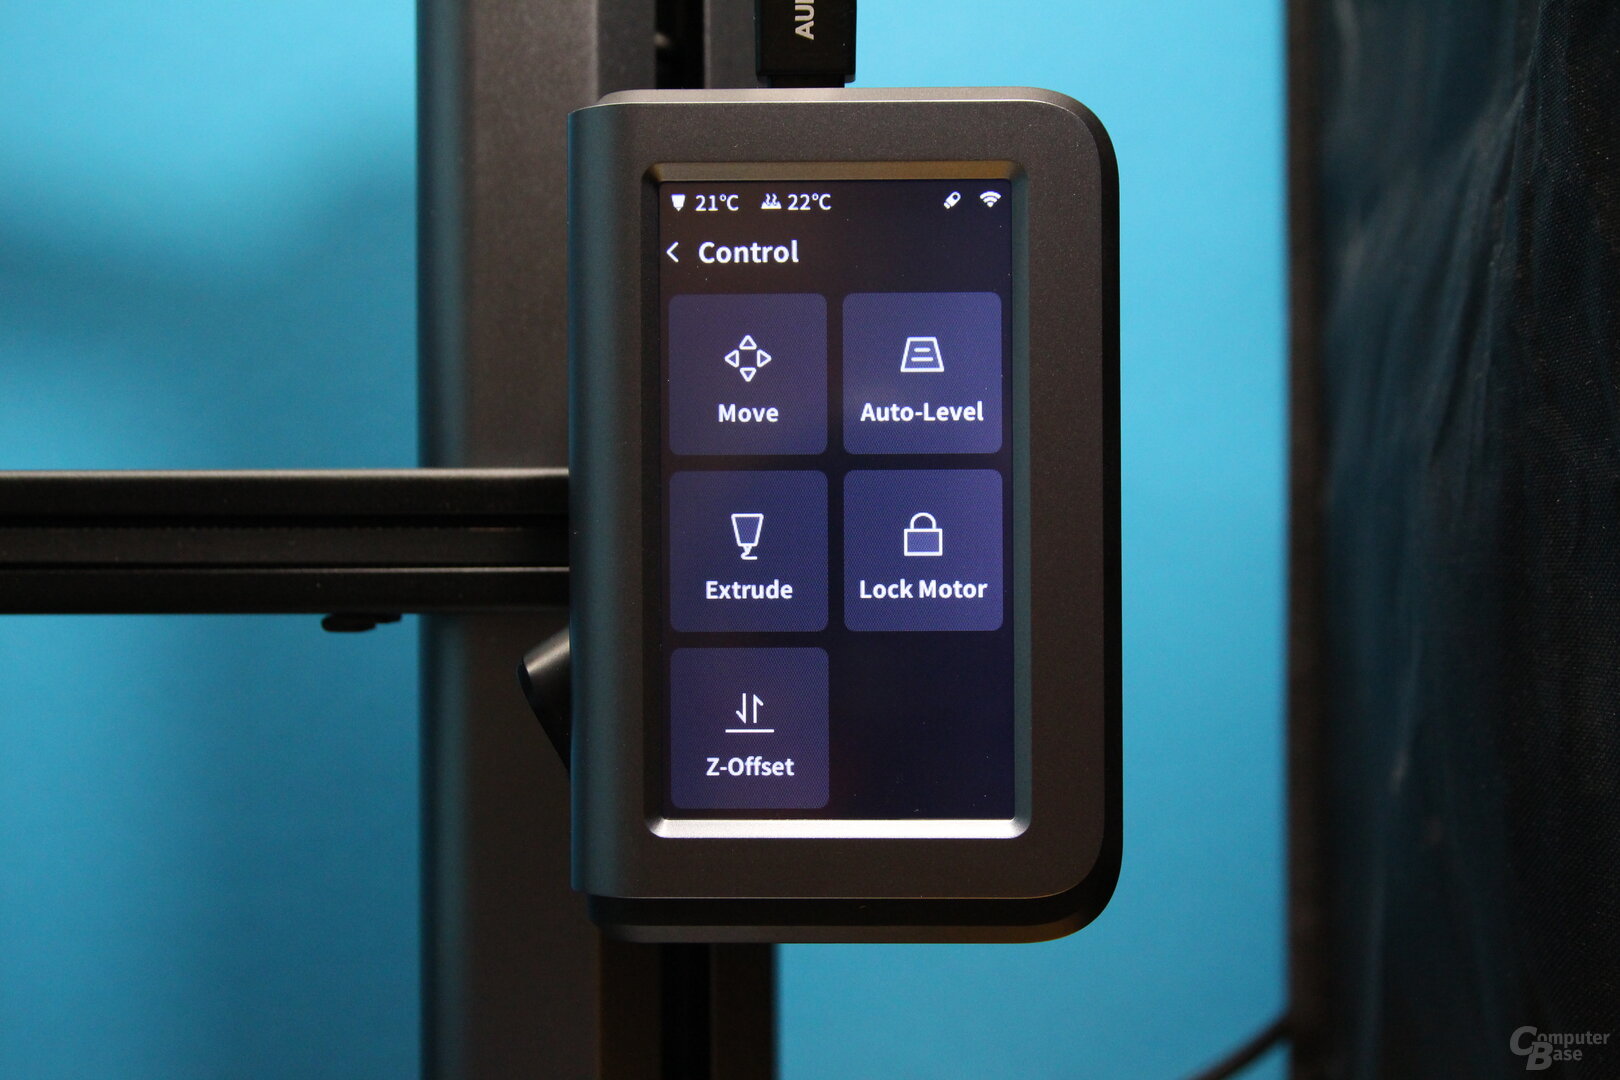 Touch display of the AnkerMake M5
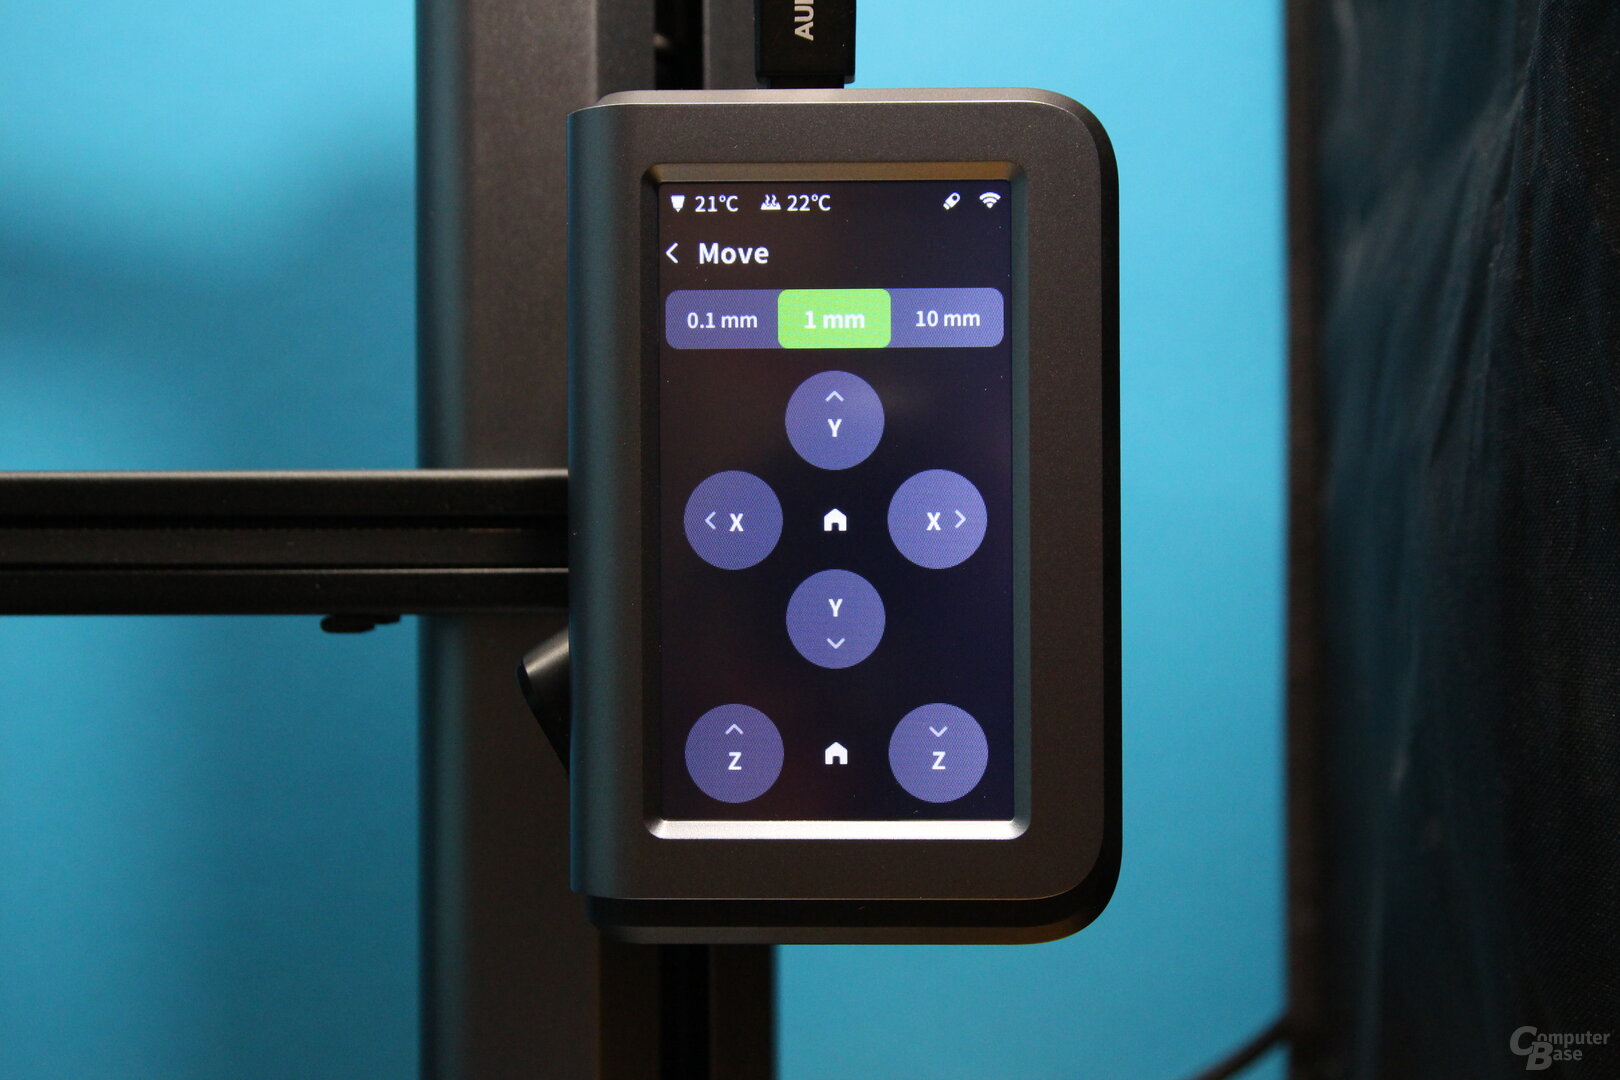 Touch display of the AnkerMake M5
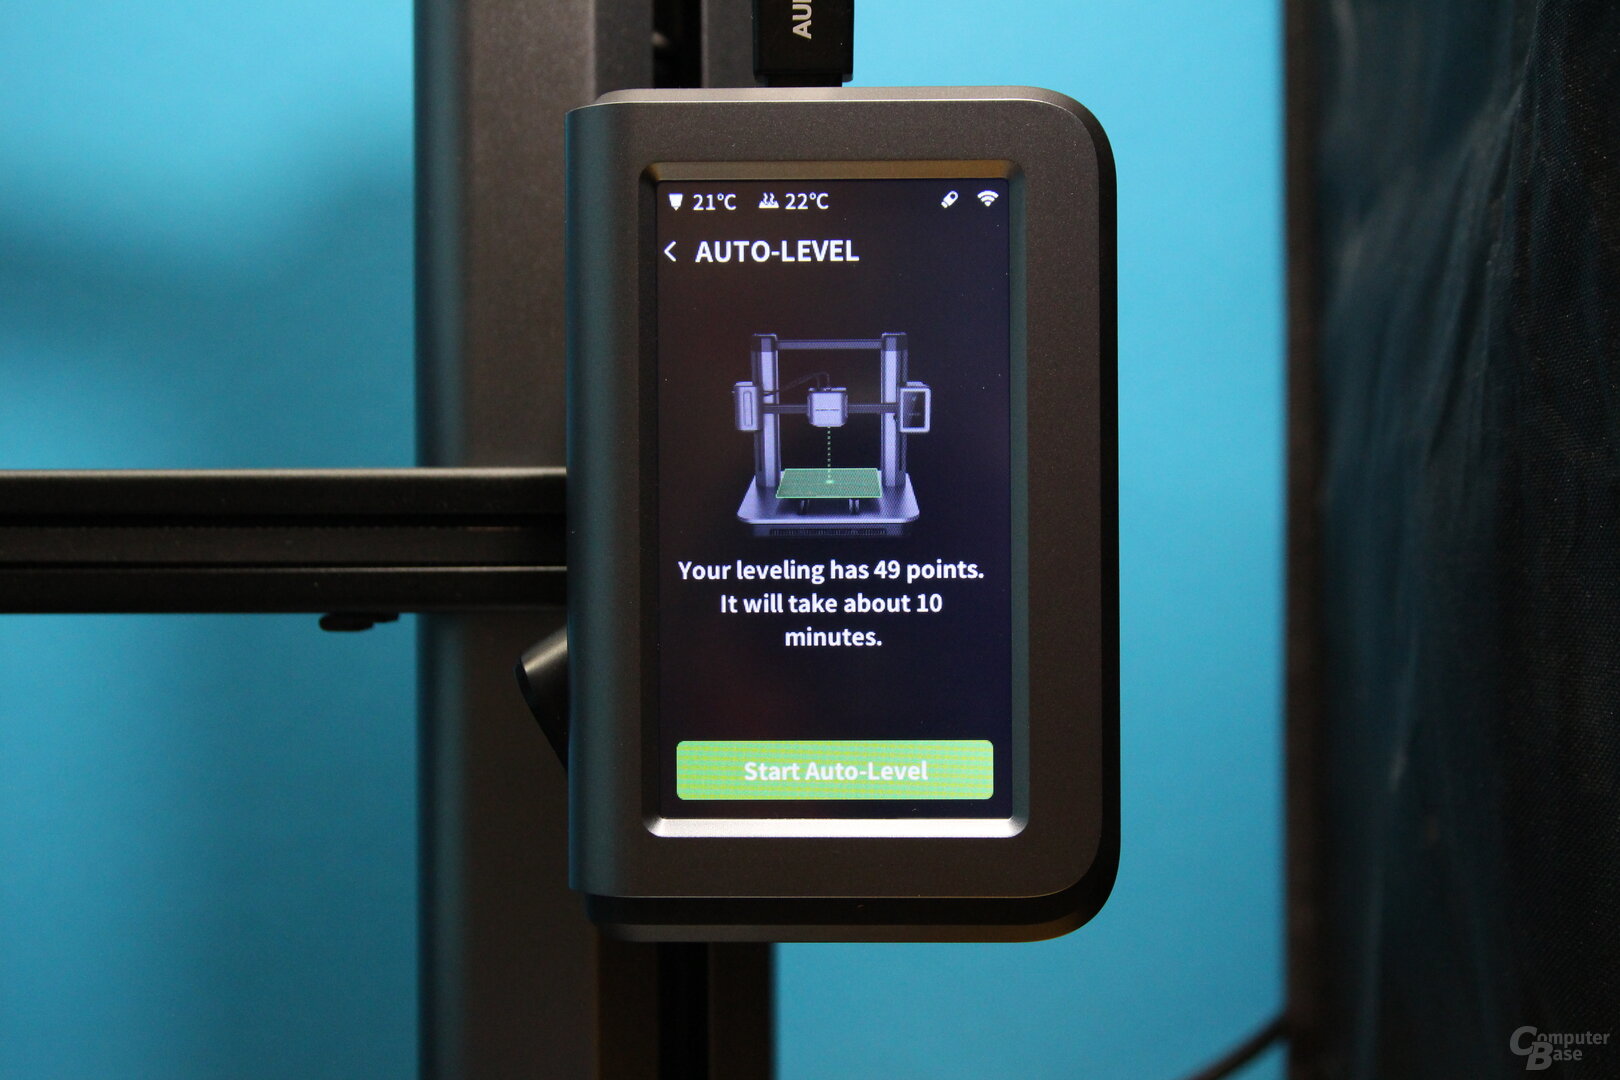 Touch display of the AnkerMake M5
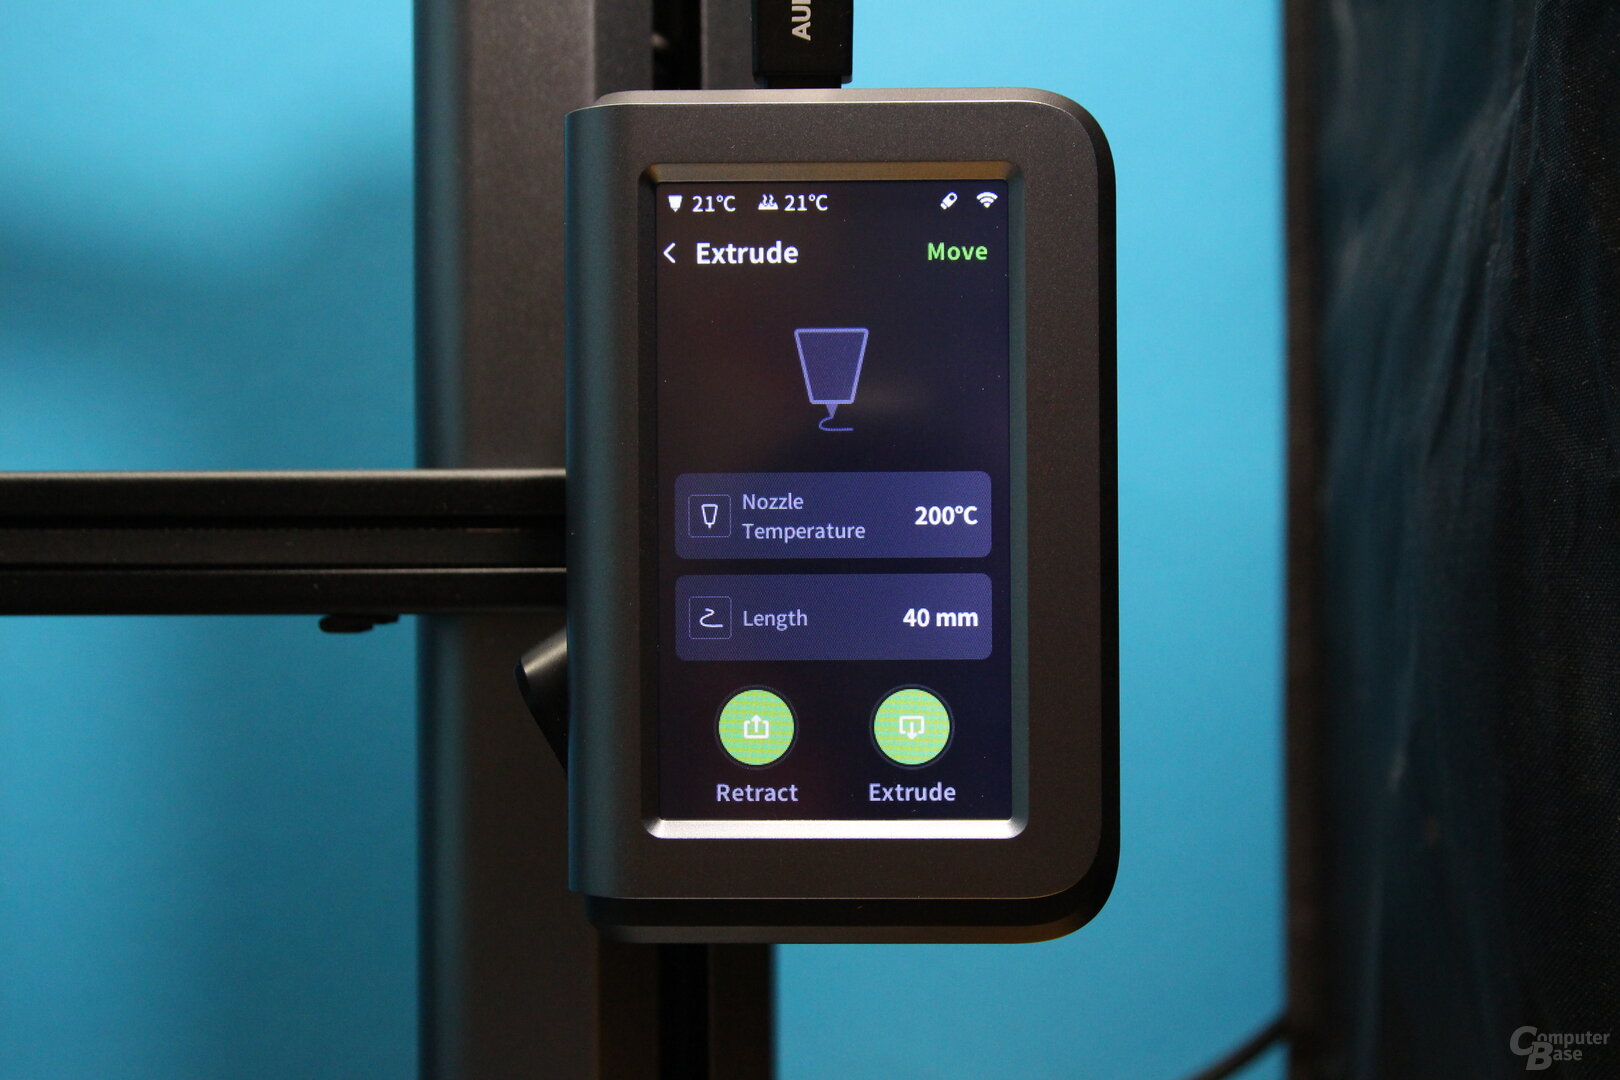 Touch display of the AnkerMake M5
 AnkerMake M5 touch display
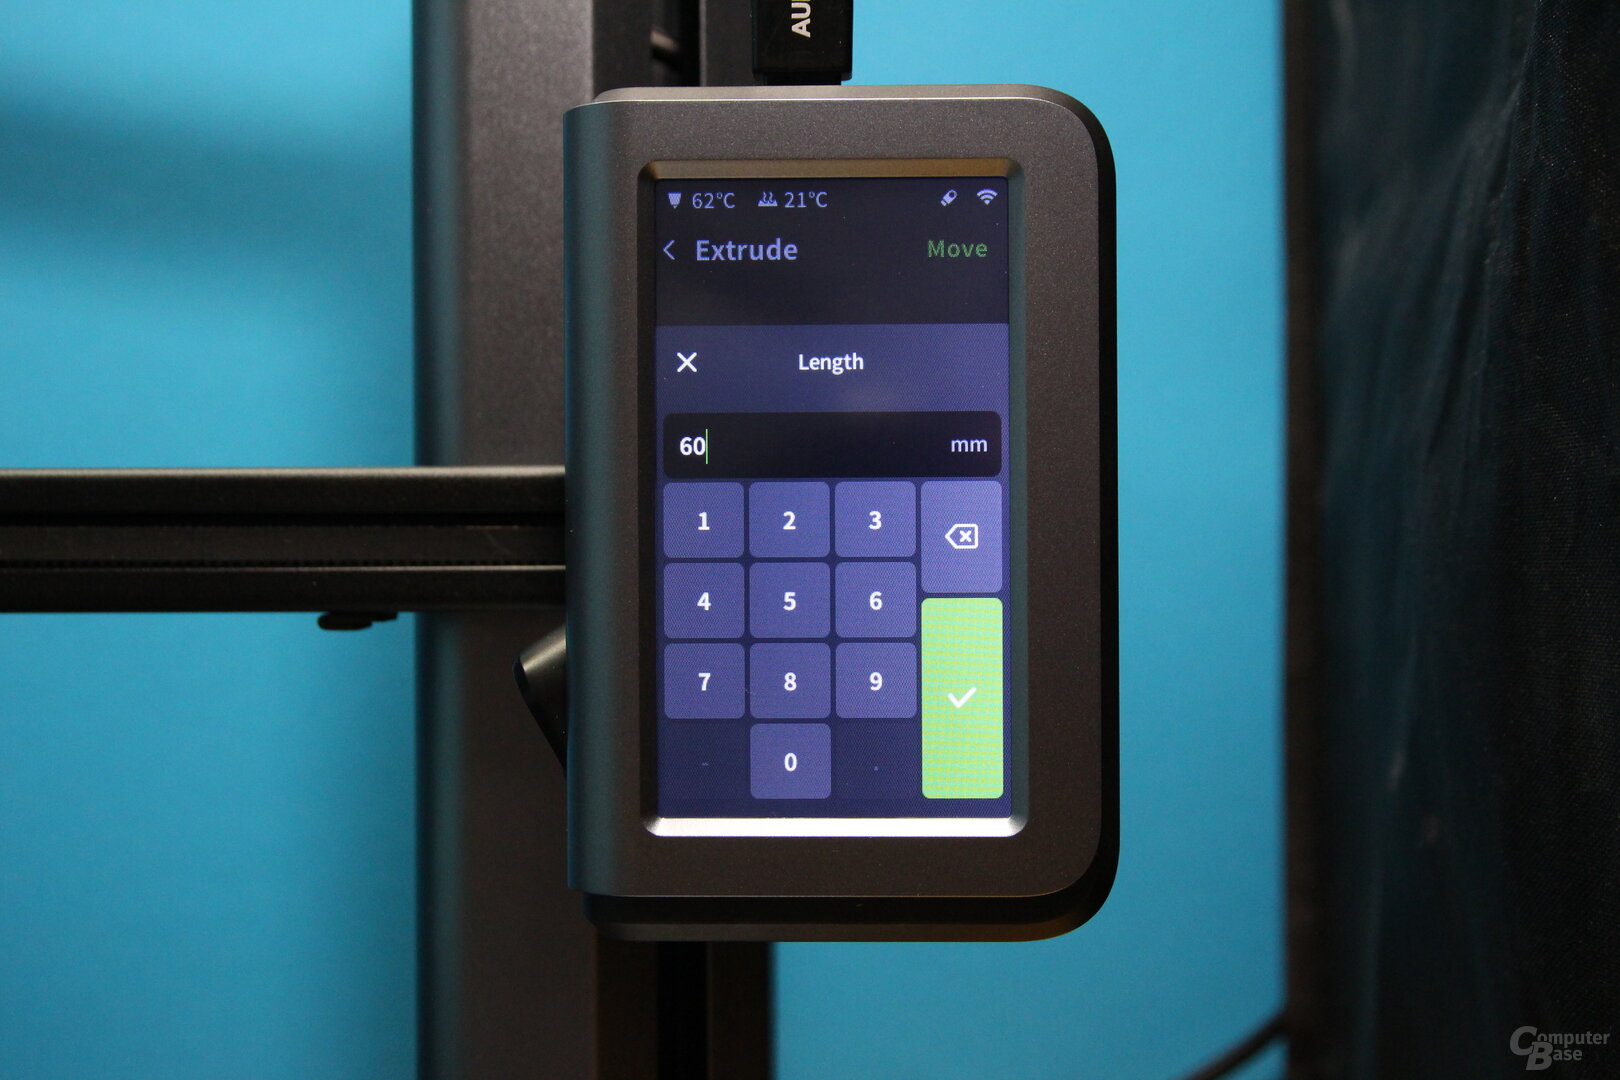 Touch display of the AnkerMake M5
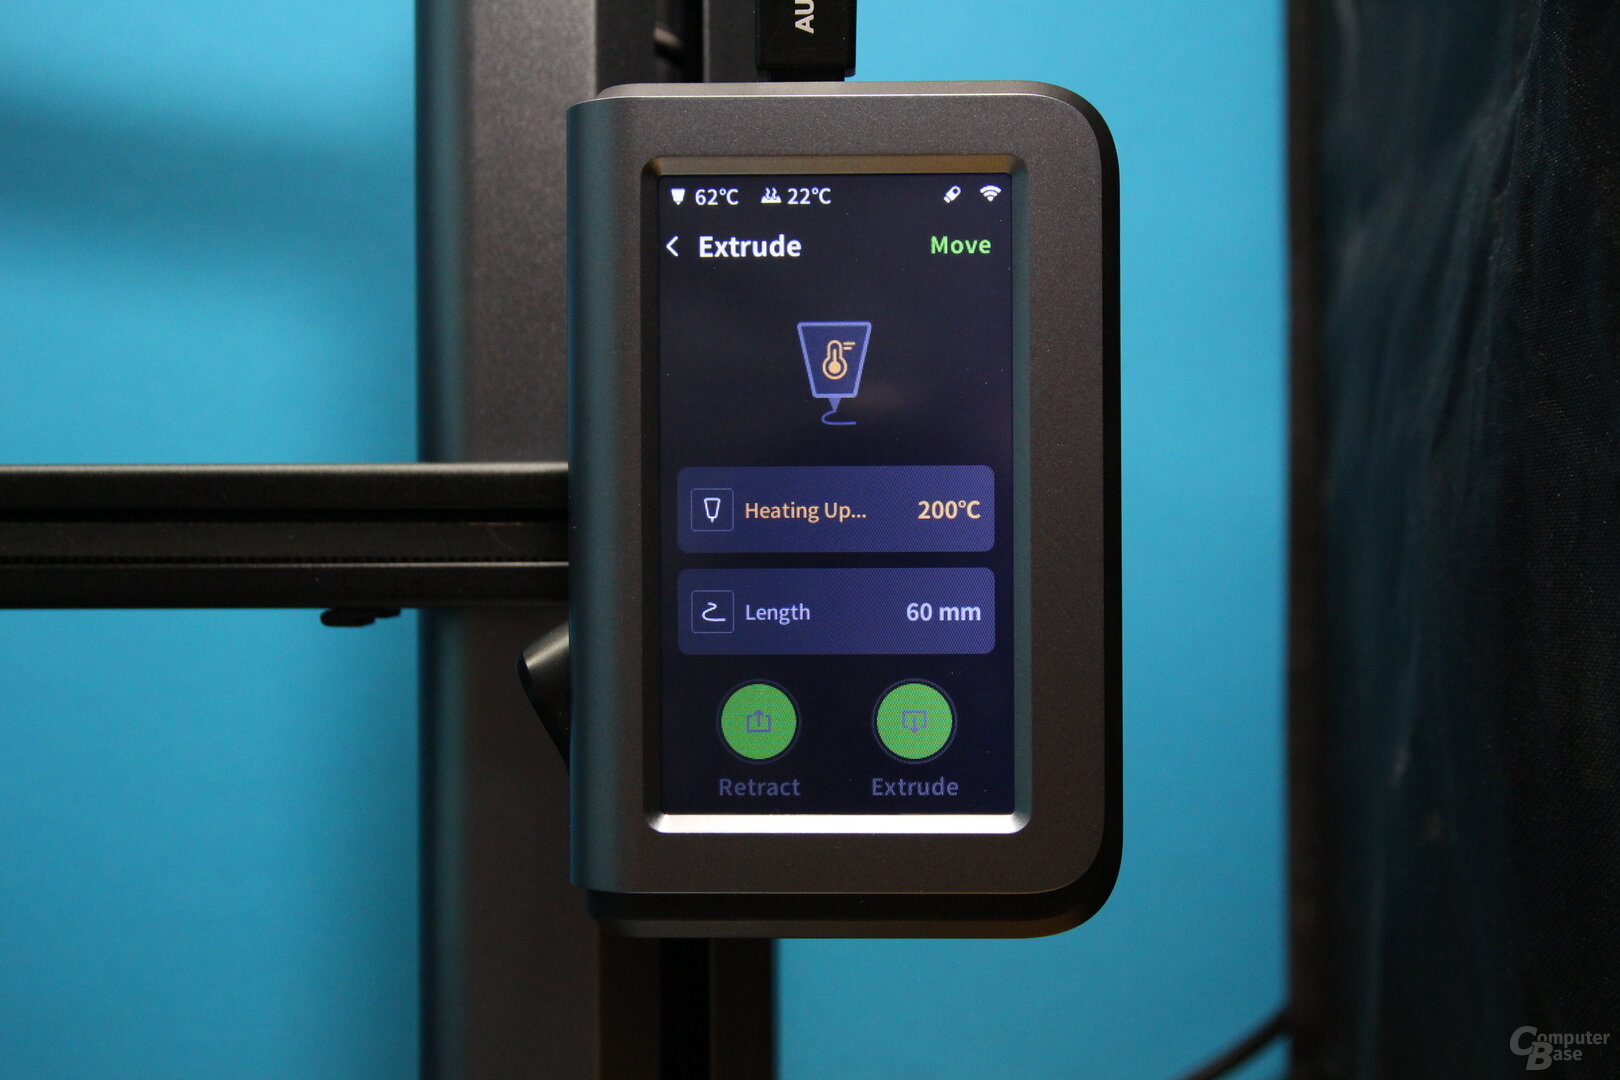 Touch display of the AnkerMake M5
 AnkerMake M5 touch display
 Touch display of the AnkerMake M5
 AnkerMake M5's touch display
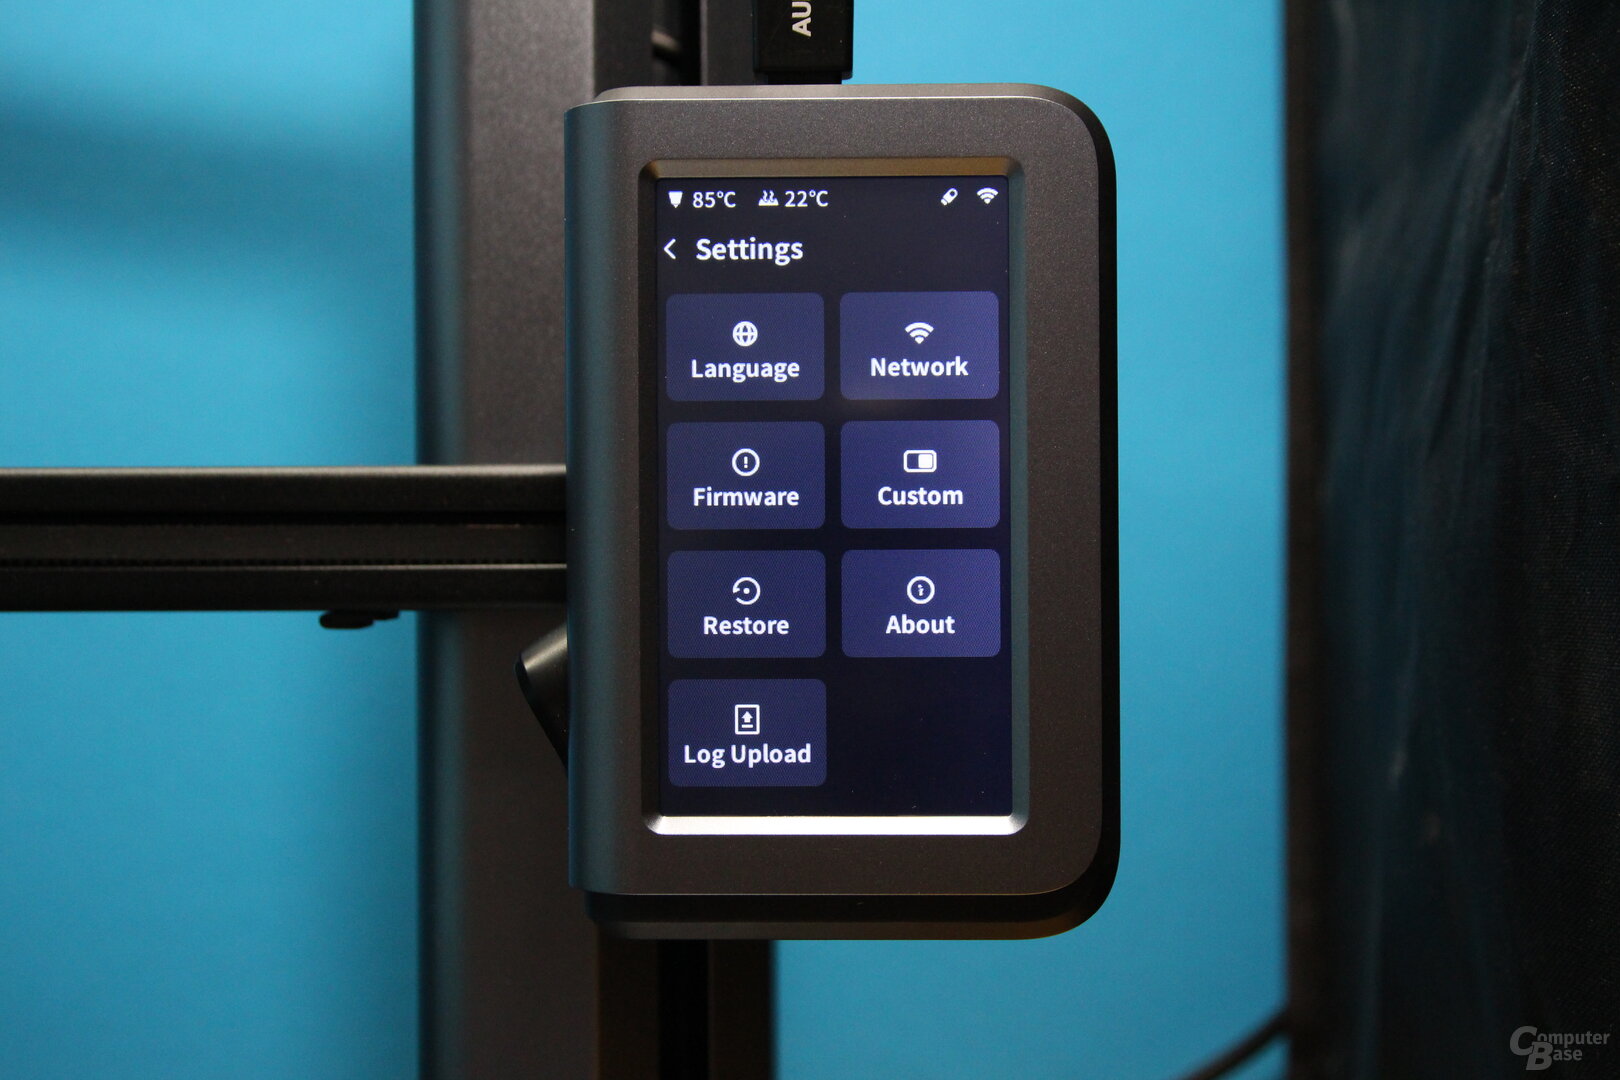 Touch display of the AnkerMake M5
 Touch display of the AnkerMake M5
 AnkerMake M5's touch display
 Touch display of the AnkerMake M5
 Touch display of the AnkerMake M5
 AnkerMake M5's touch display
 Touch display of the AnkerMake M5
 Touch display of the AnkerMake M5
 AnkerMake M5's touch display
 Touch display of the AnkerMake M5
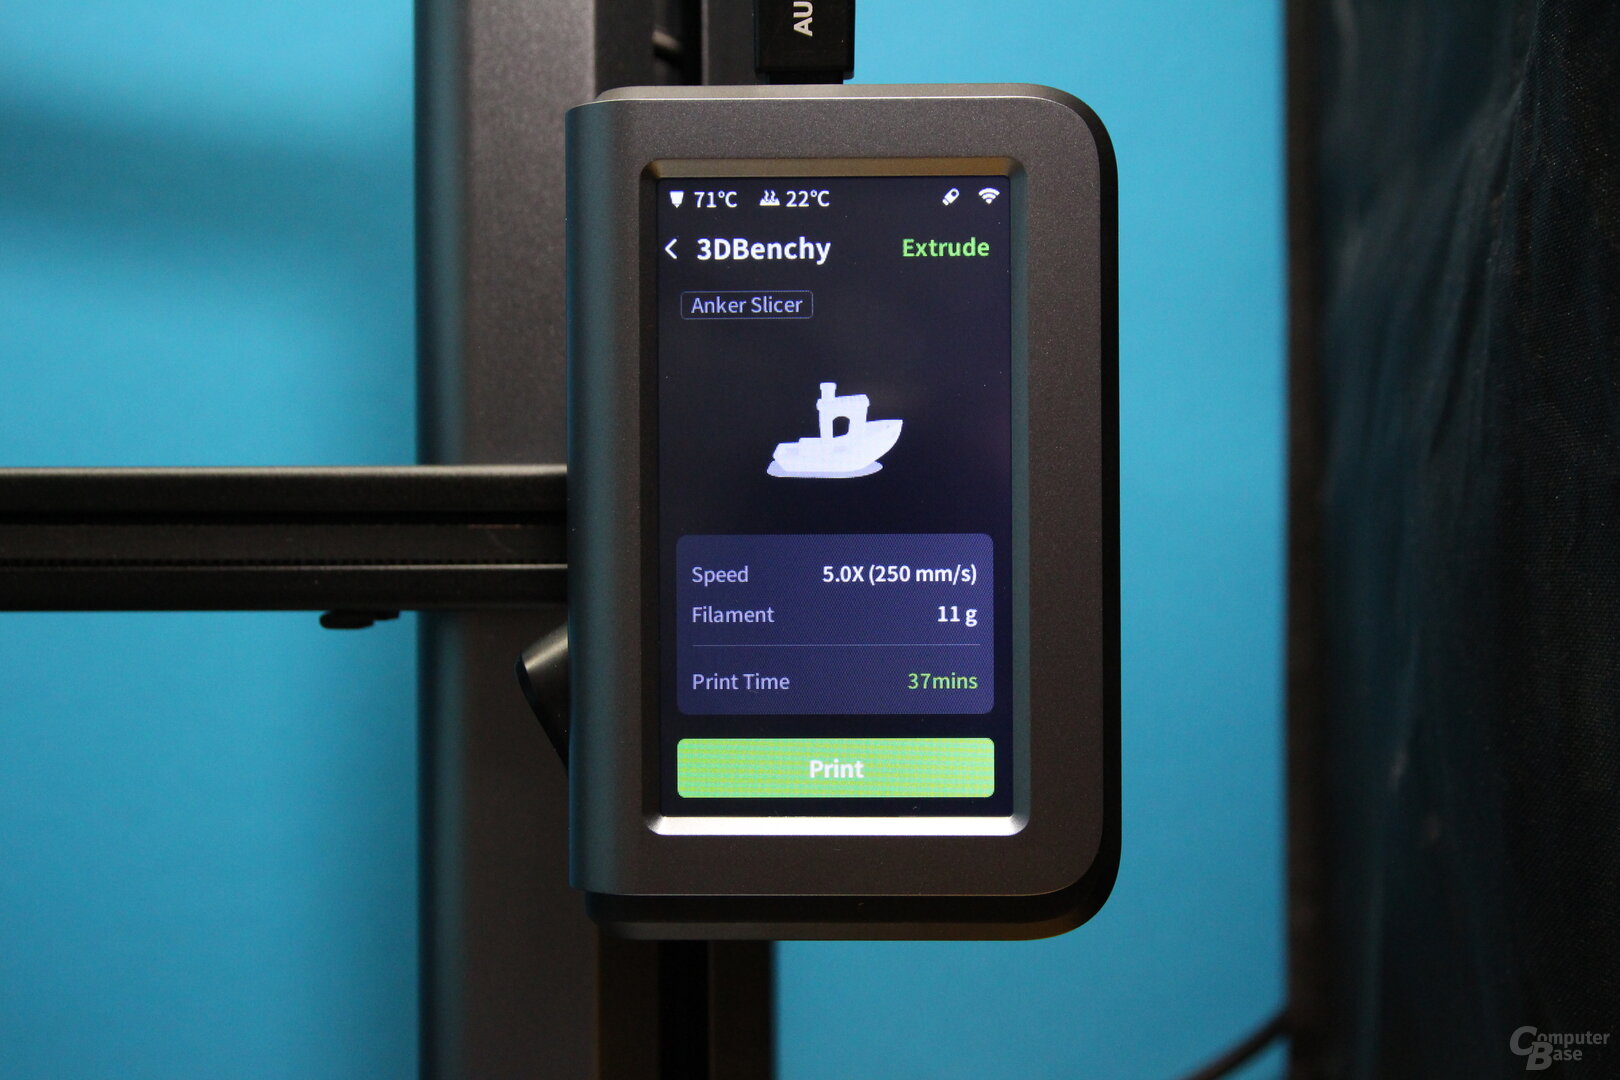 Touch display of the AnkerMake M5
 AnkerMake M5's touch display
 Touch display of the AnkerMake M5
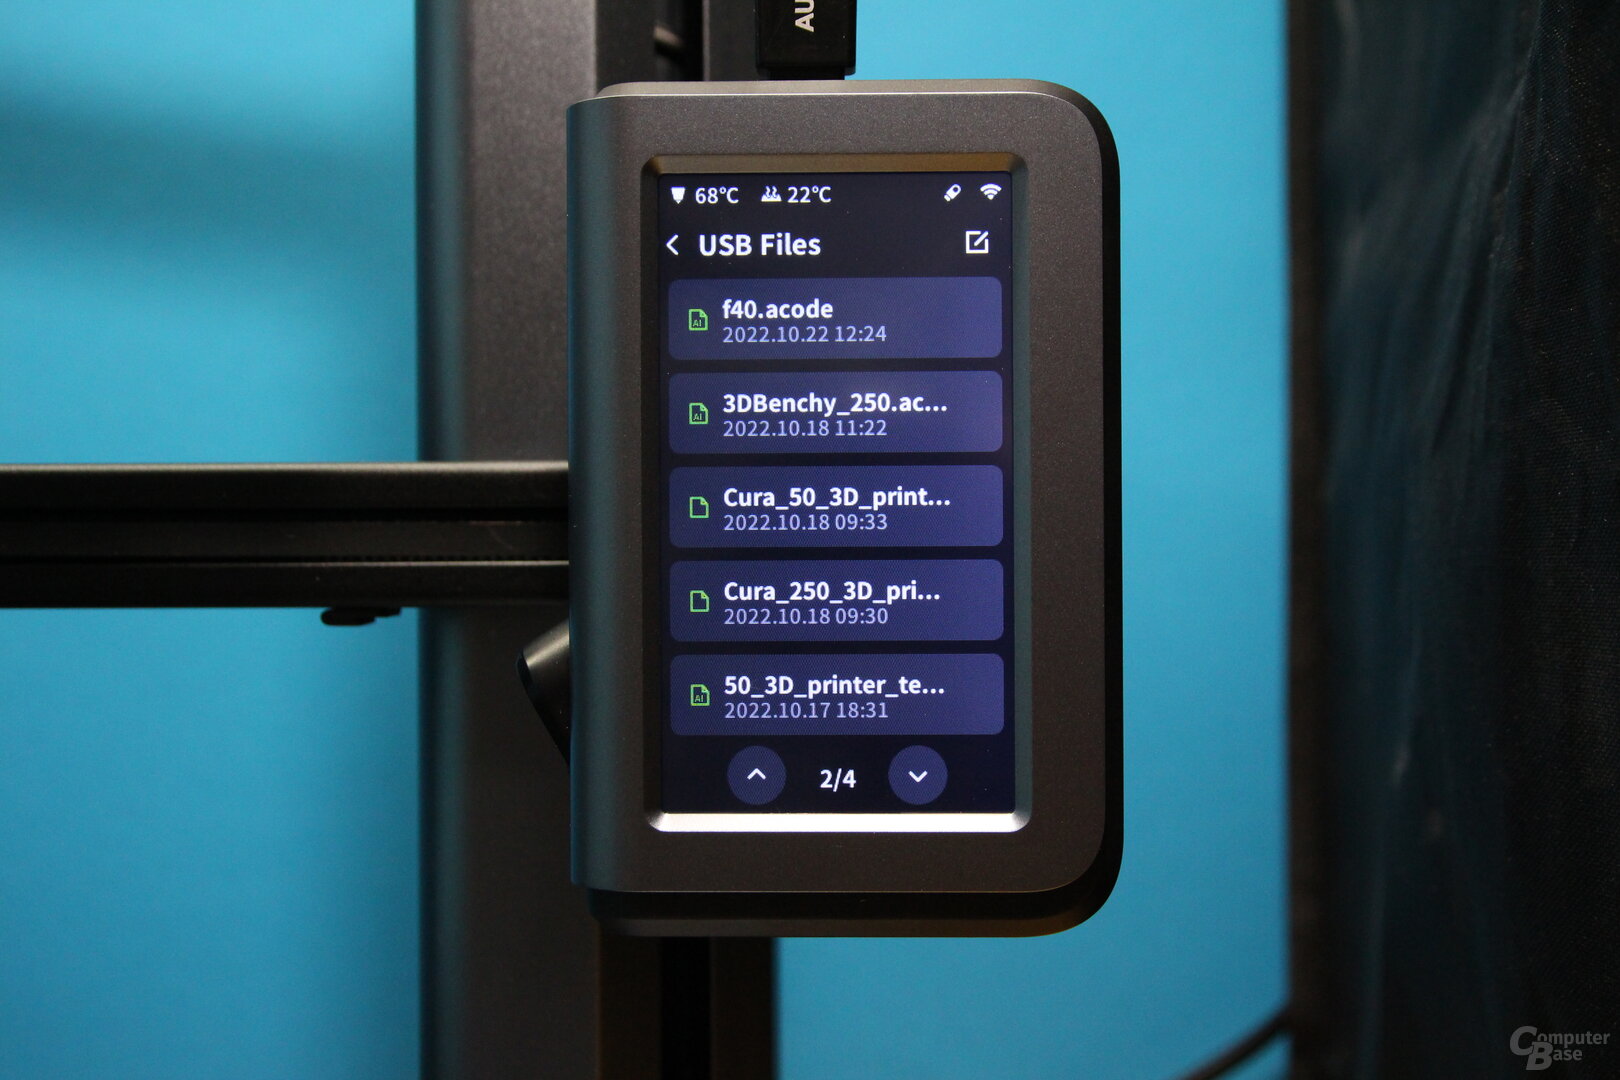 Touch display of the AnkerMake M5
 AnkerMake M5's touch display
 Touch display of the AnkerMake M5
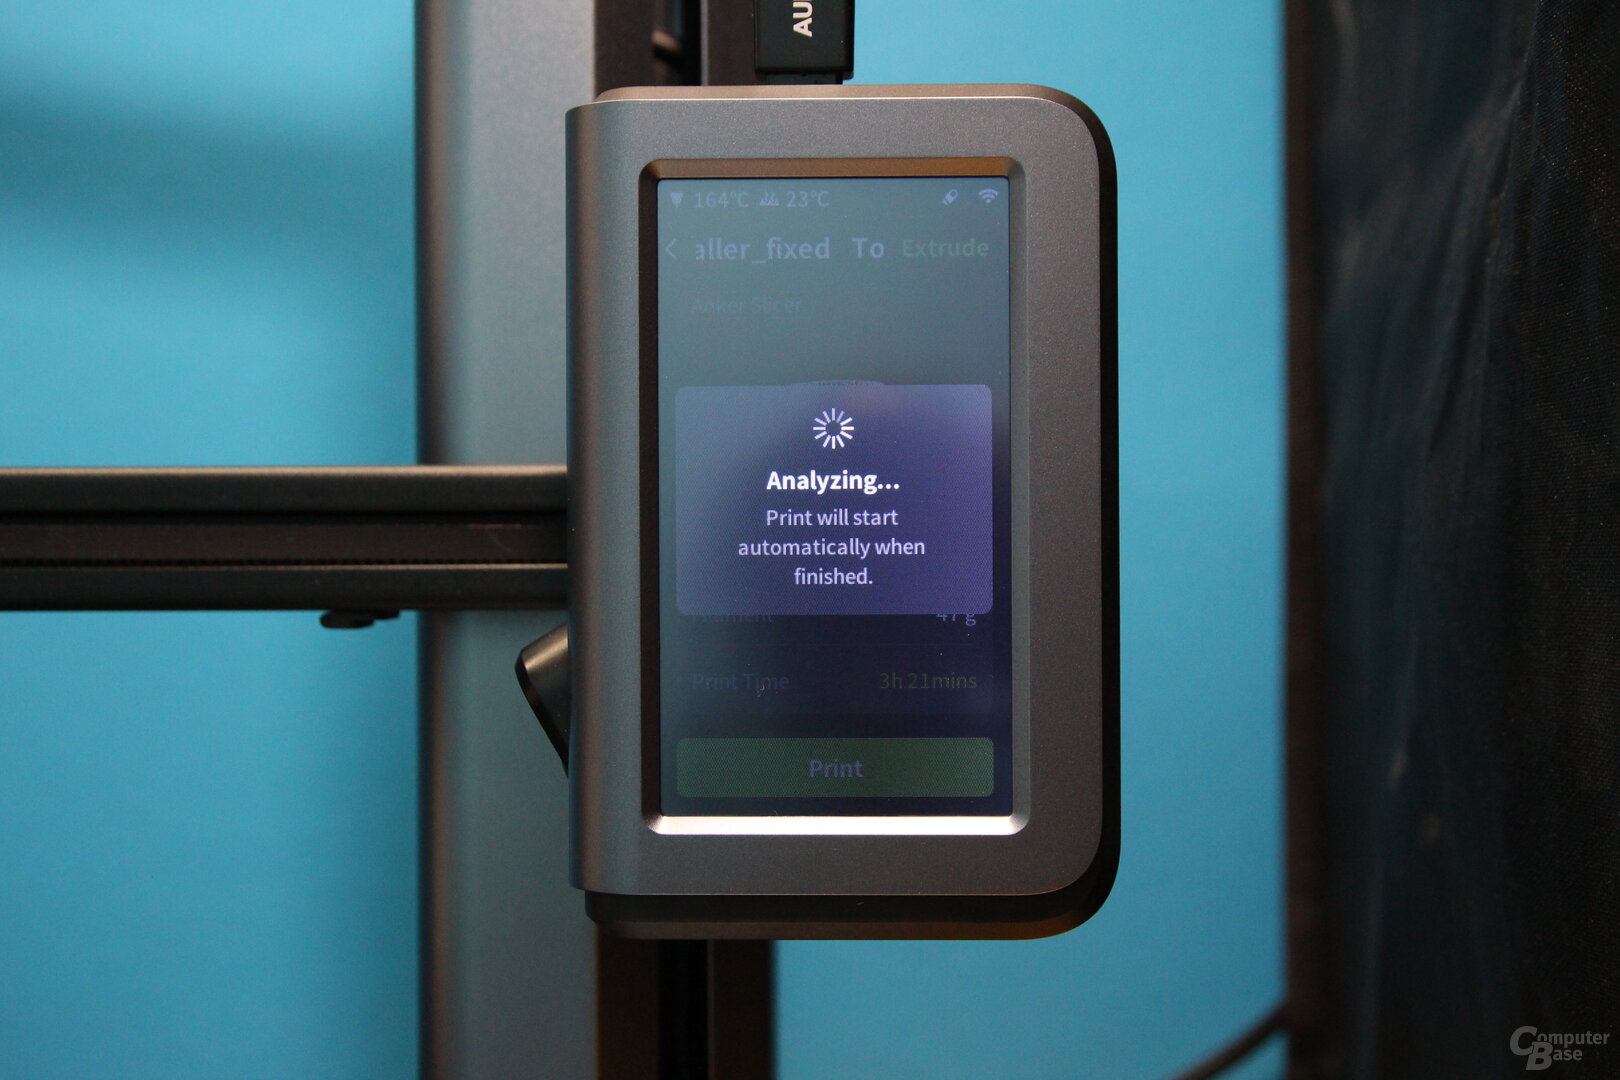 Touch display of the AnkerMake M5
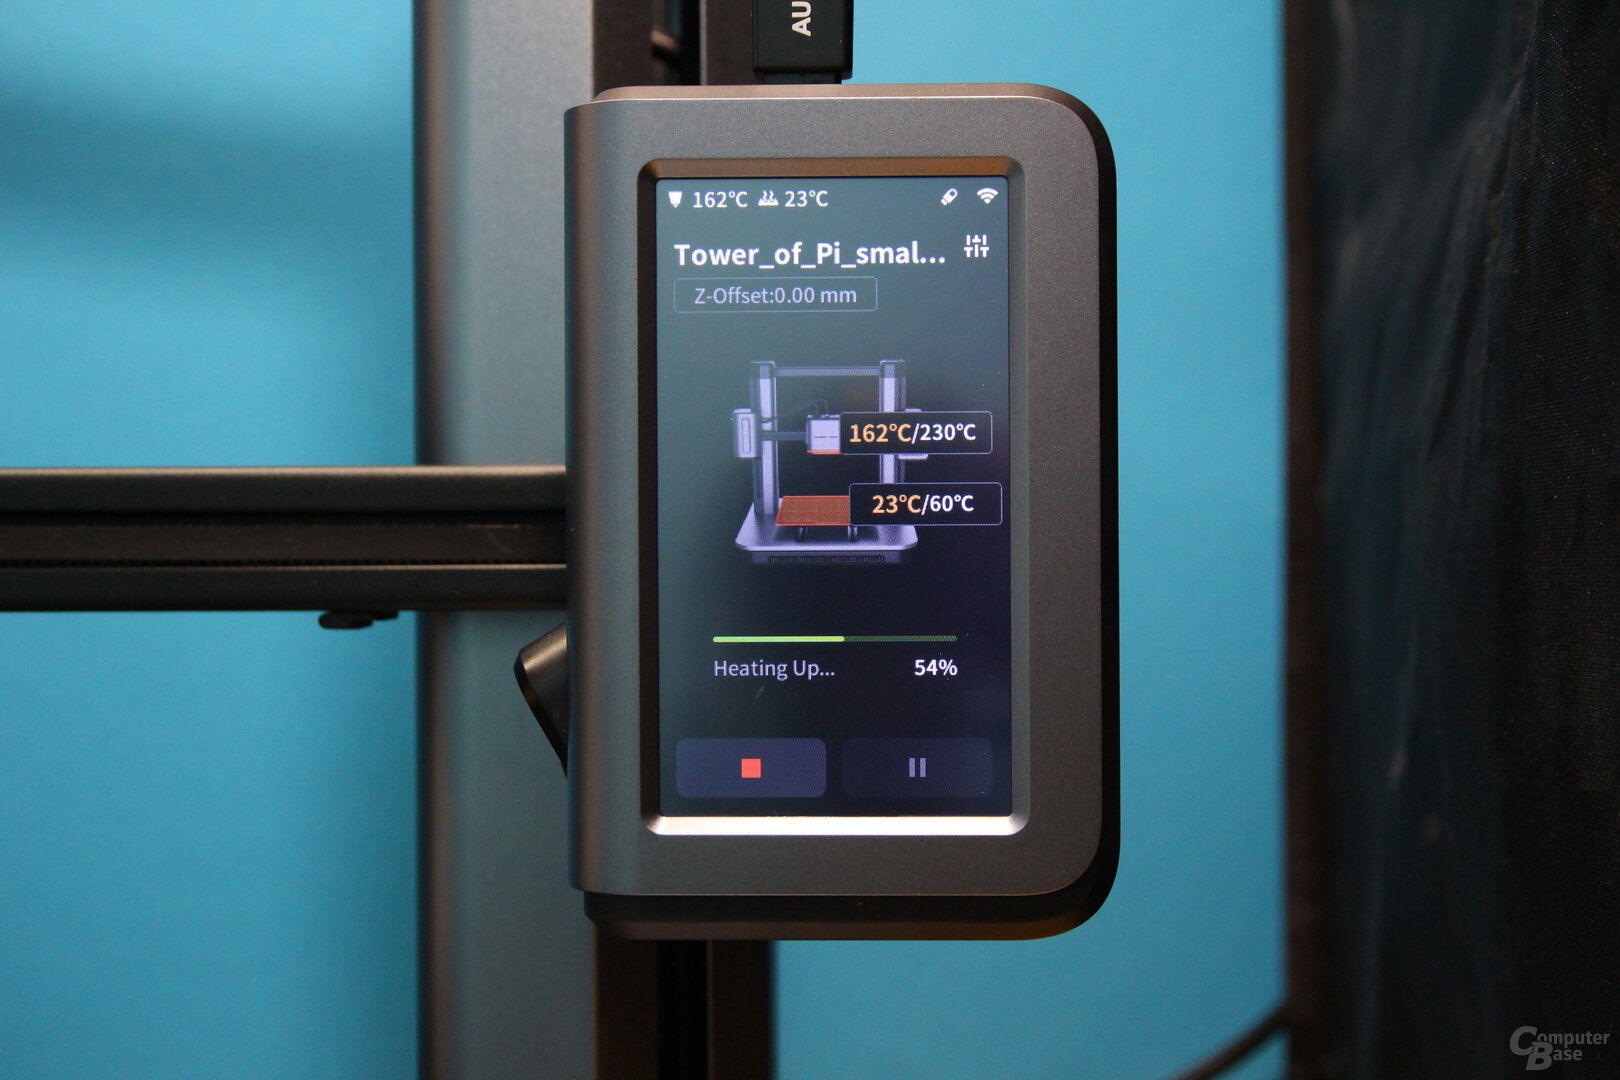 AnkerMake M5's touch display
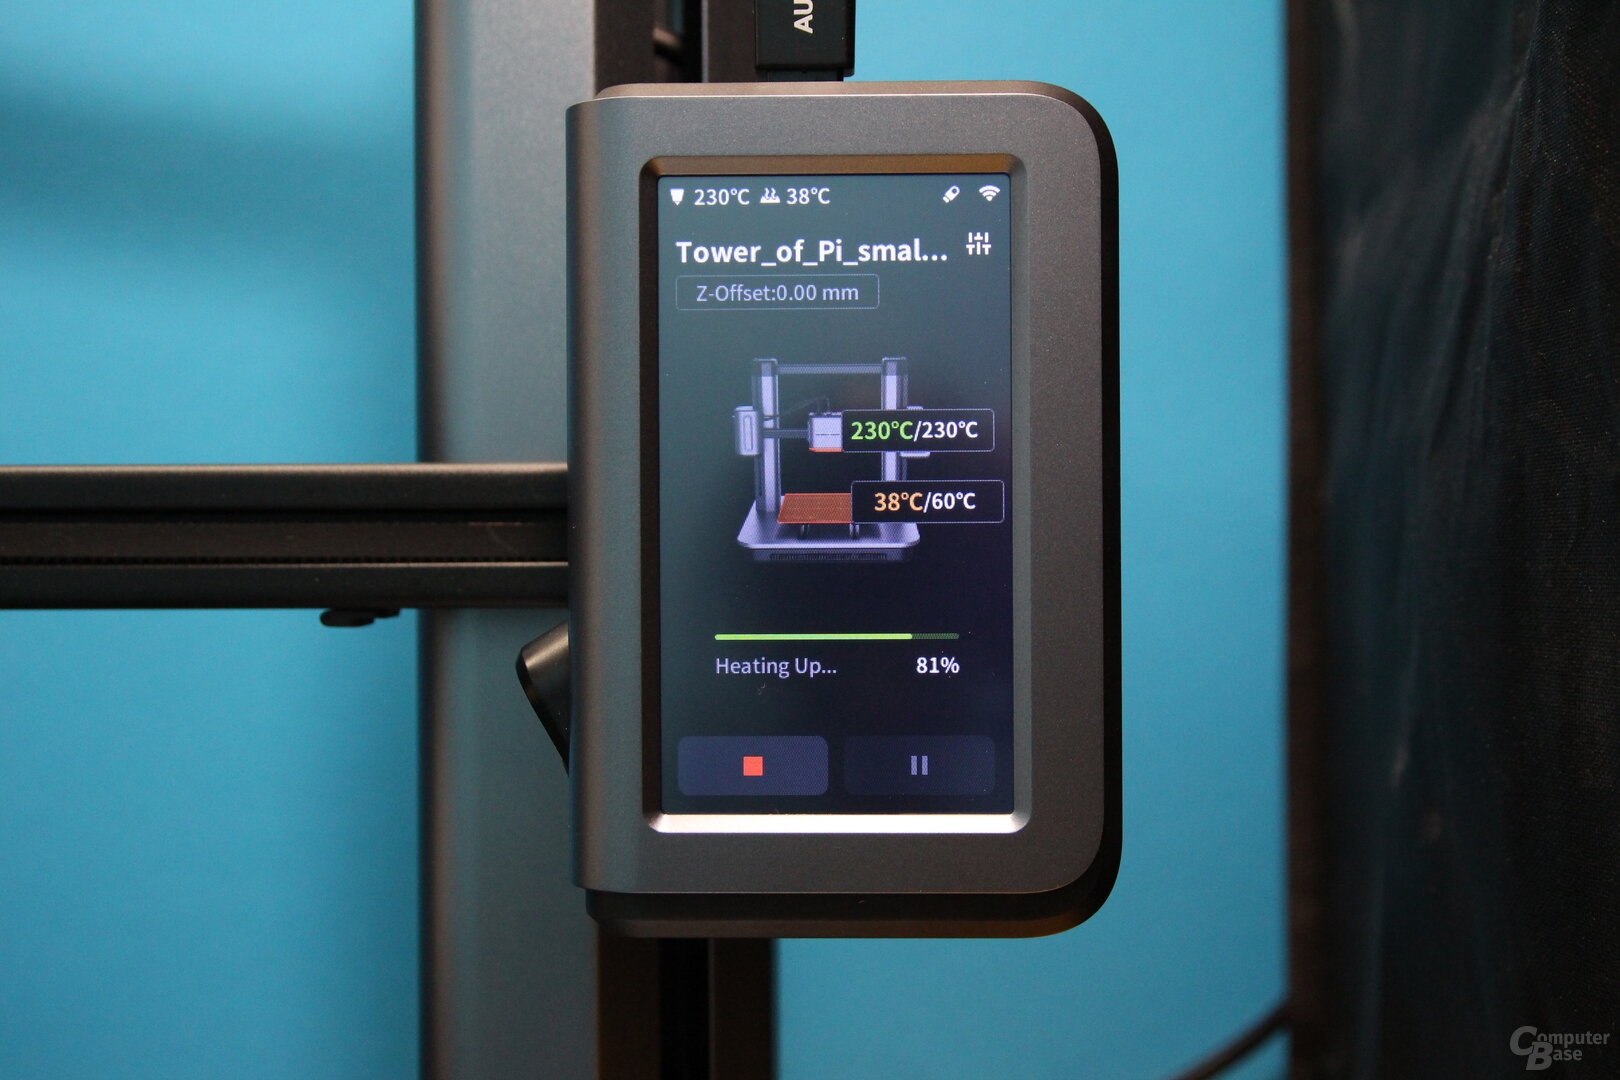 AnkerMake M5's touch display
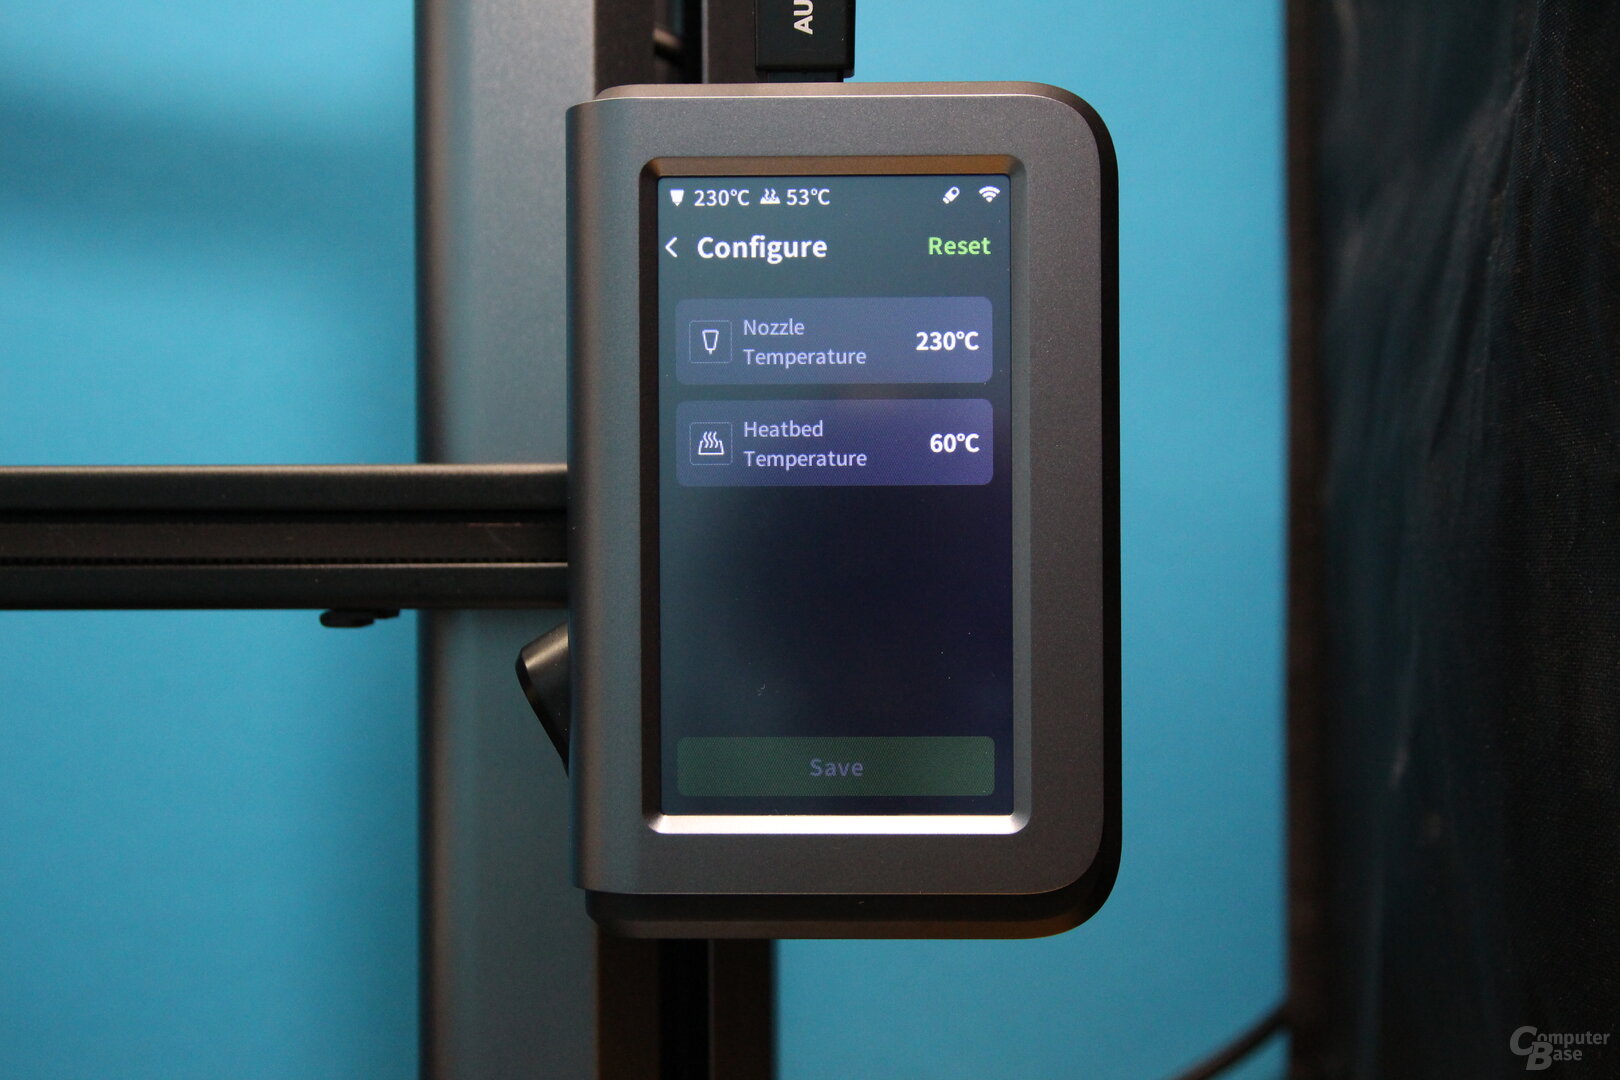 Touch display of the AnkerMake M5
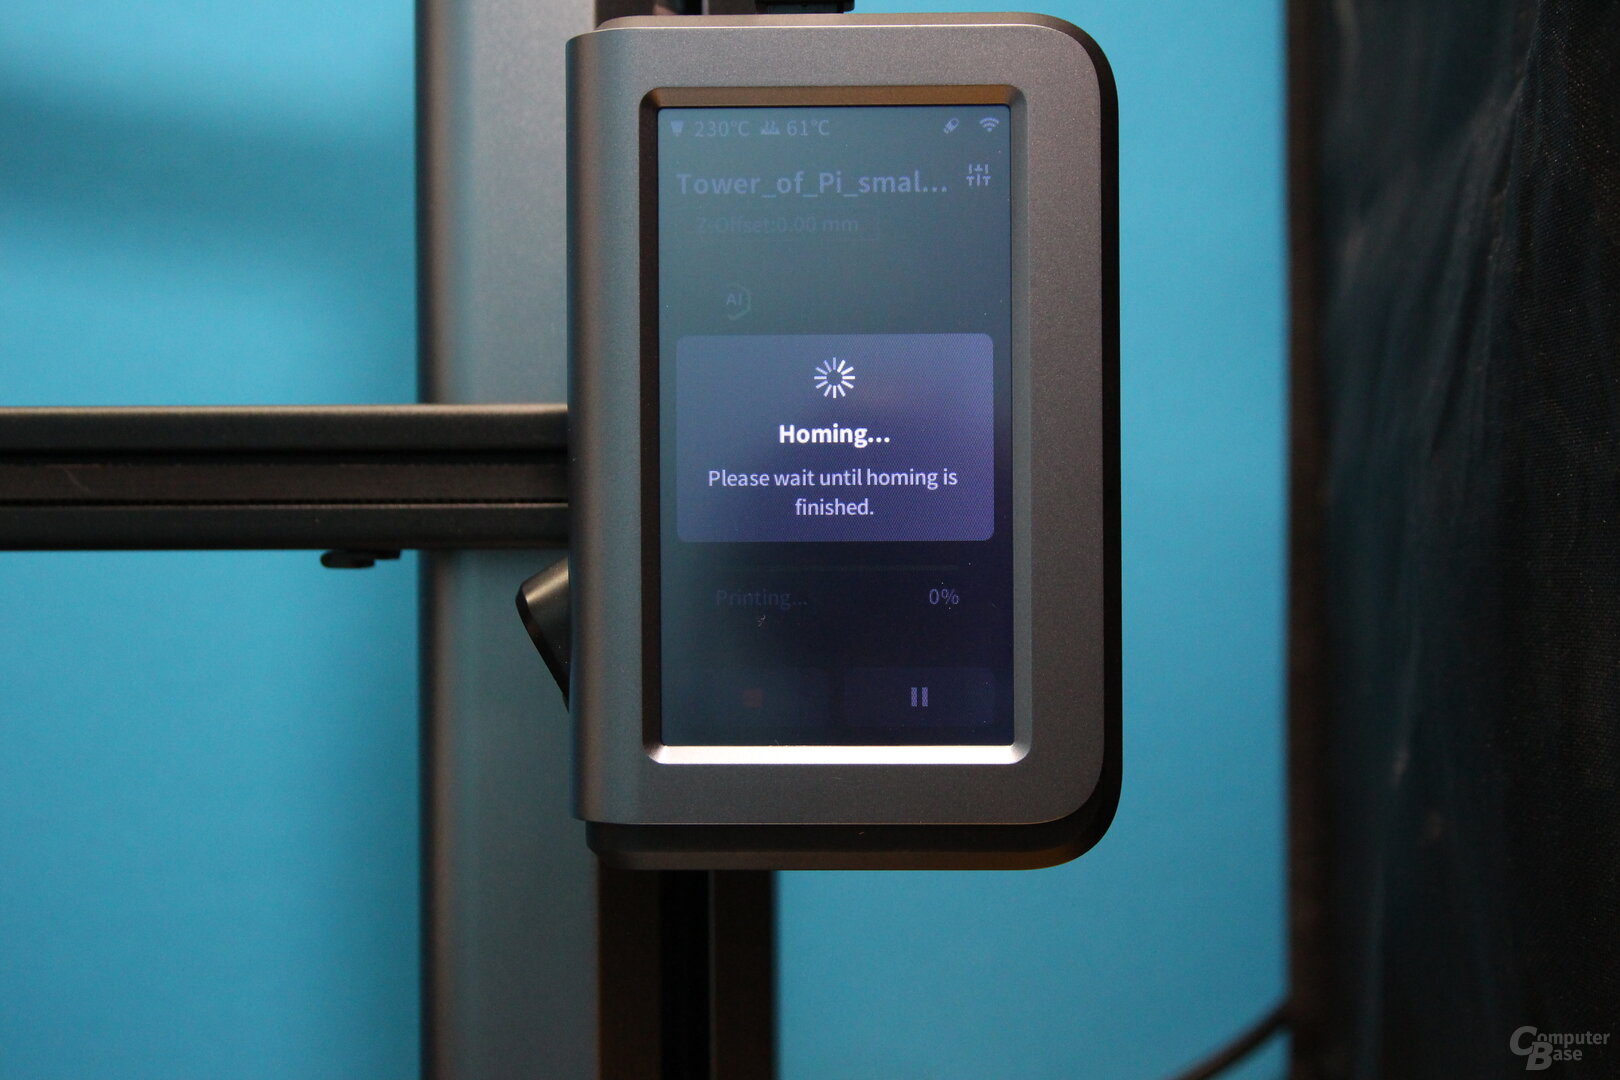 AnkerMake M5 touch display
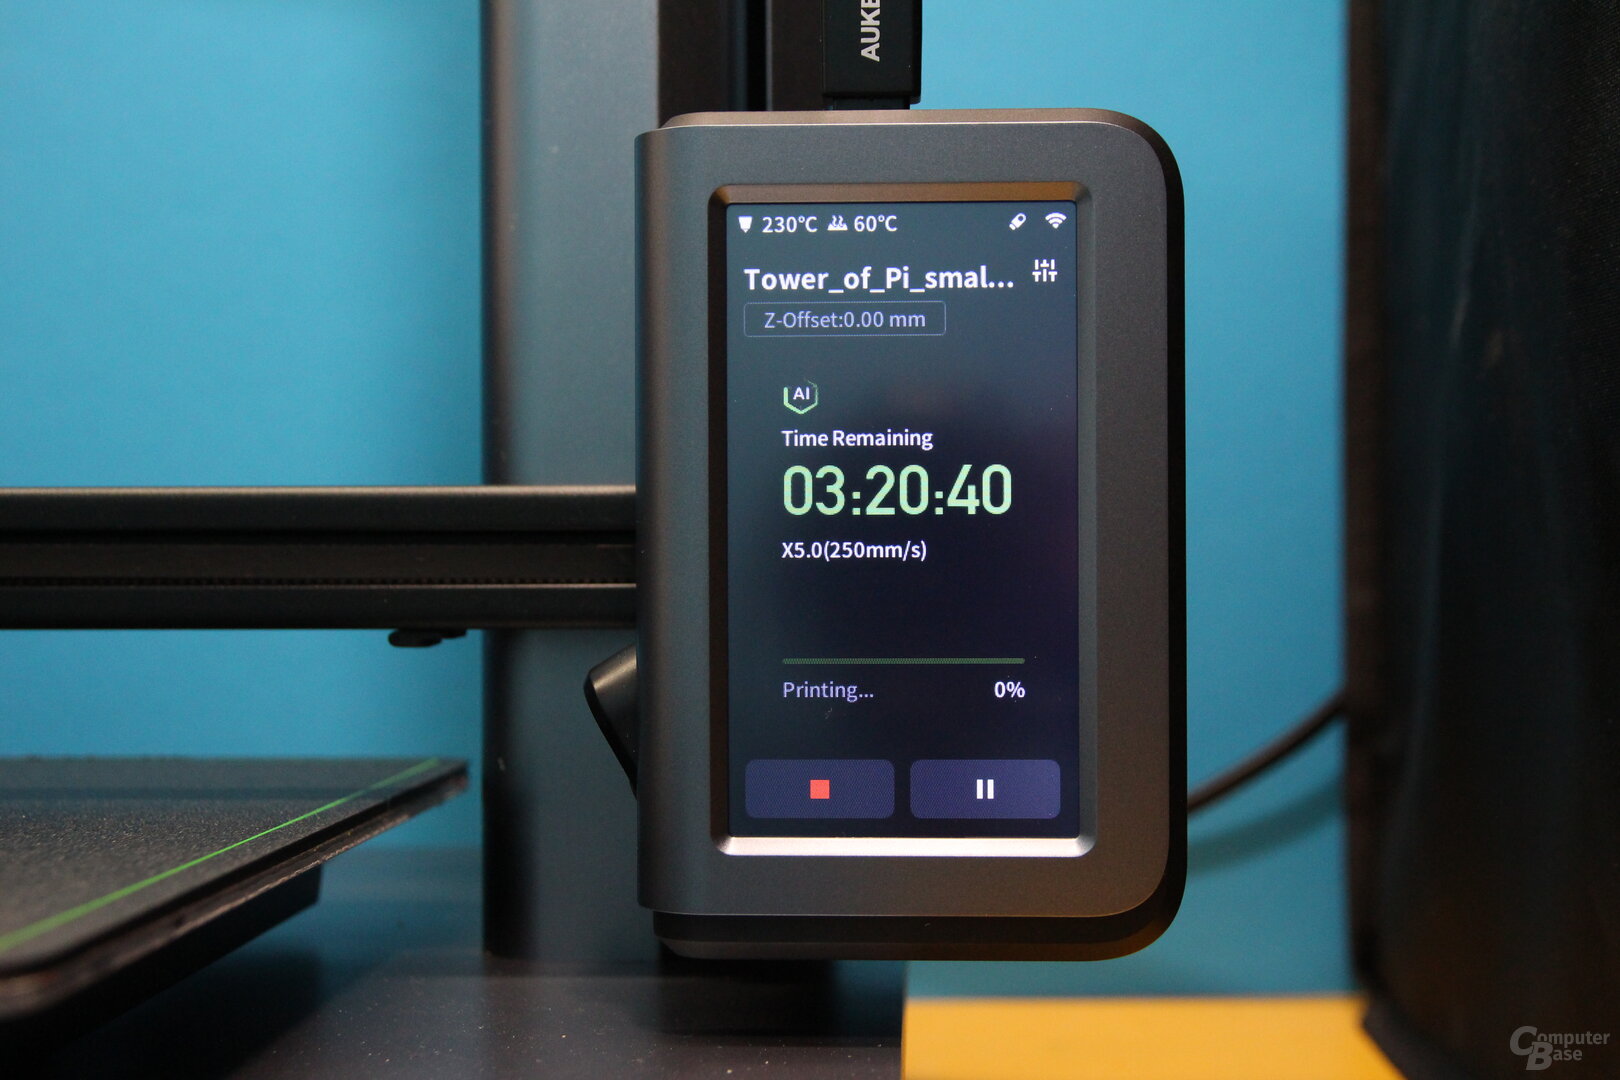 Touch display of the AnkerMake M5
The LED in the left filament feeder shows the status of the printer. If it is green, it is printing with no problems detected. If it is slowly flashing orange, the printer is heating up. If it flashes red, a problem has been detected.
Print five times faster
The AnkerMake M5 offers a print speed of up to 250mm per second, which, mind you, is considered the standard print speed for this 3D printer, while most everyday devices operate at a print speed of 50mm/s. A Creality Ender 3 S1 Pro, which is often used as a comparison object in this test, allows a maximum print speed of 150 mm/s. At 2,500 mm/s², Anker also relies on high values for acceleration in order to lose as little time as possible for the distances between printed objects. For more accurate printing, it uses dual synchronized Z-axis guidance.
-
 AnkerMake M5: The print head mount < /figure>
Image 1 of 3
 AnkerMake M5: Filament detection, print head and touch display
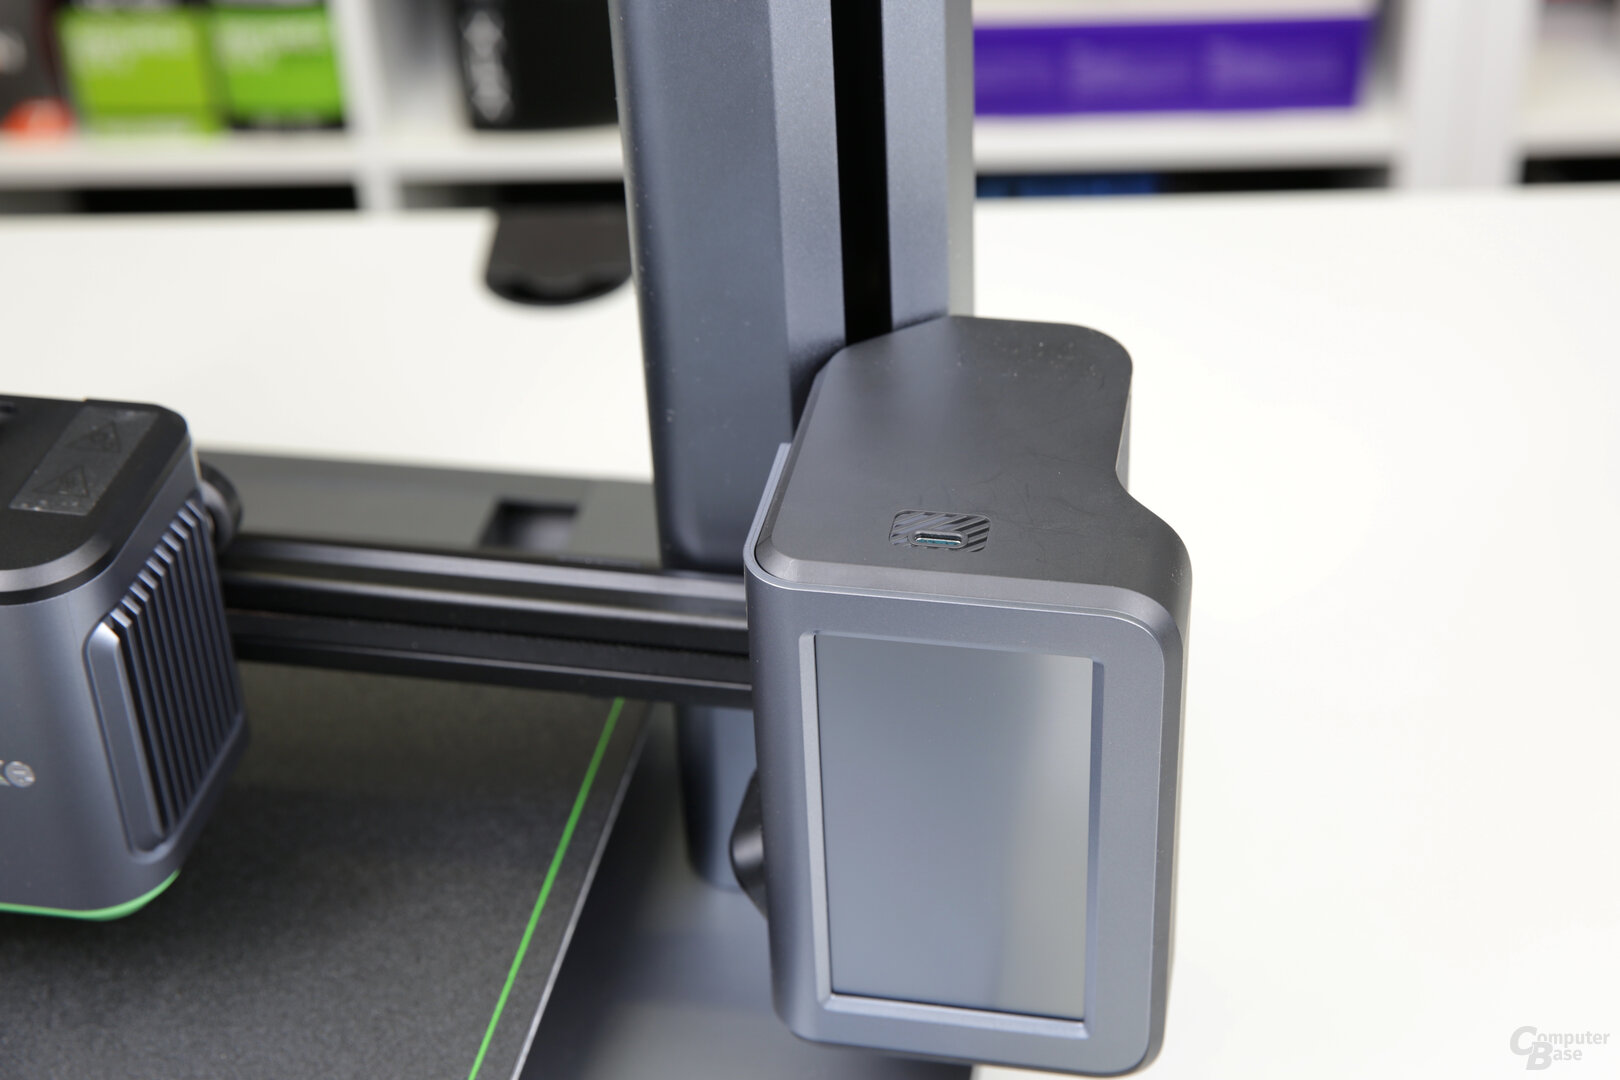 AnkerMake M5
Print bed with 235 × 235 × 250mm
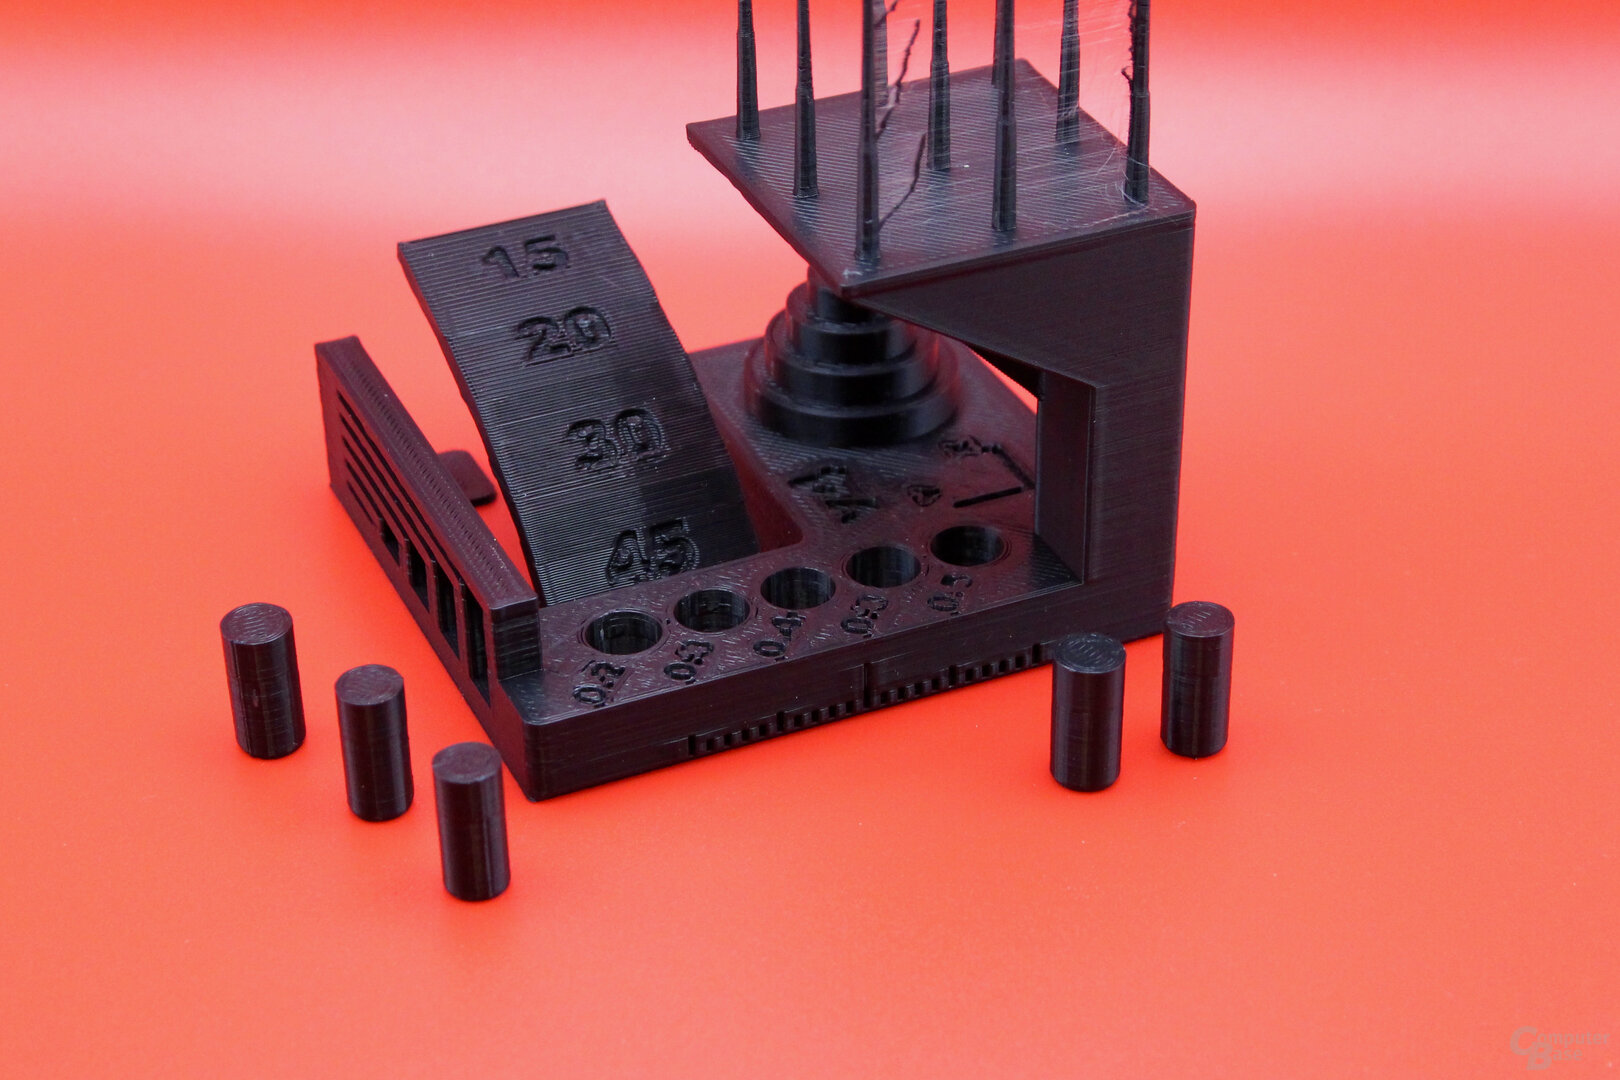
The printing accuracy of the AnkerMake M5 is 0.1 mm, the diameter of the supplied printing nozzle is 0.4 mm. The PEI-coated print bed with 7×7 auto-leveling offers an area of 235 × 235 mm. Prints can be a maximum of 250mm high. With these dimensions, the AnkerMake M5 is not one of the 3D printers with the largest print bed, but it is slightly larger than, for example, the popular Creality Ender 3, where prints can be a maximum of 220 × 220 × 250 mm. The M5's magnetic heating plate offers very good adhesion and holds firmly to the print bed. Models can be easily detached by detaching and slightly bending.
 AnkerMake M5: Magnetic print bed and two Y-axis belts
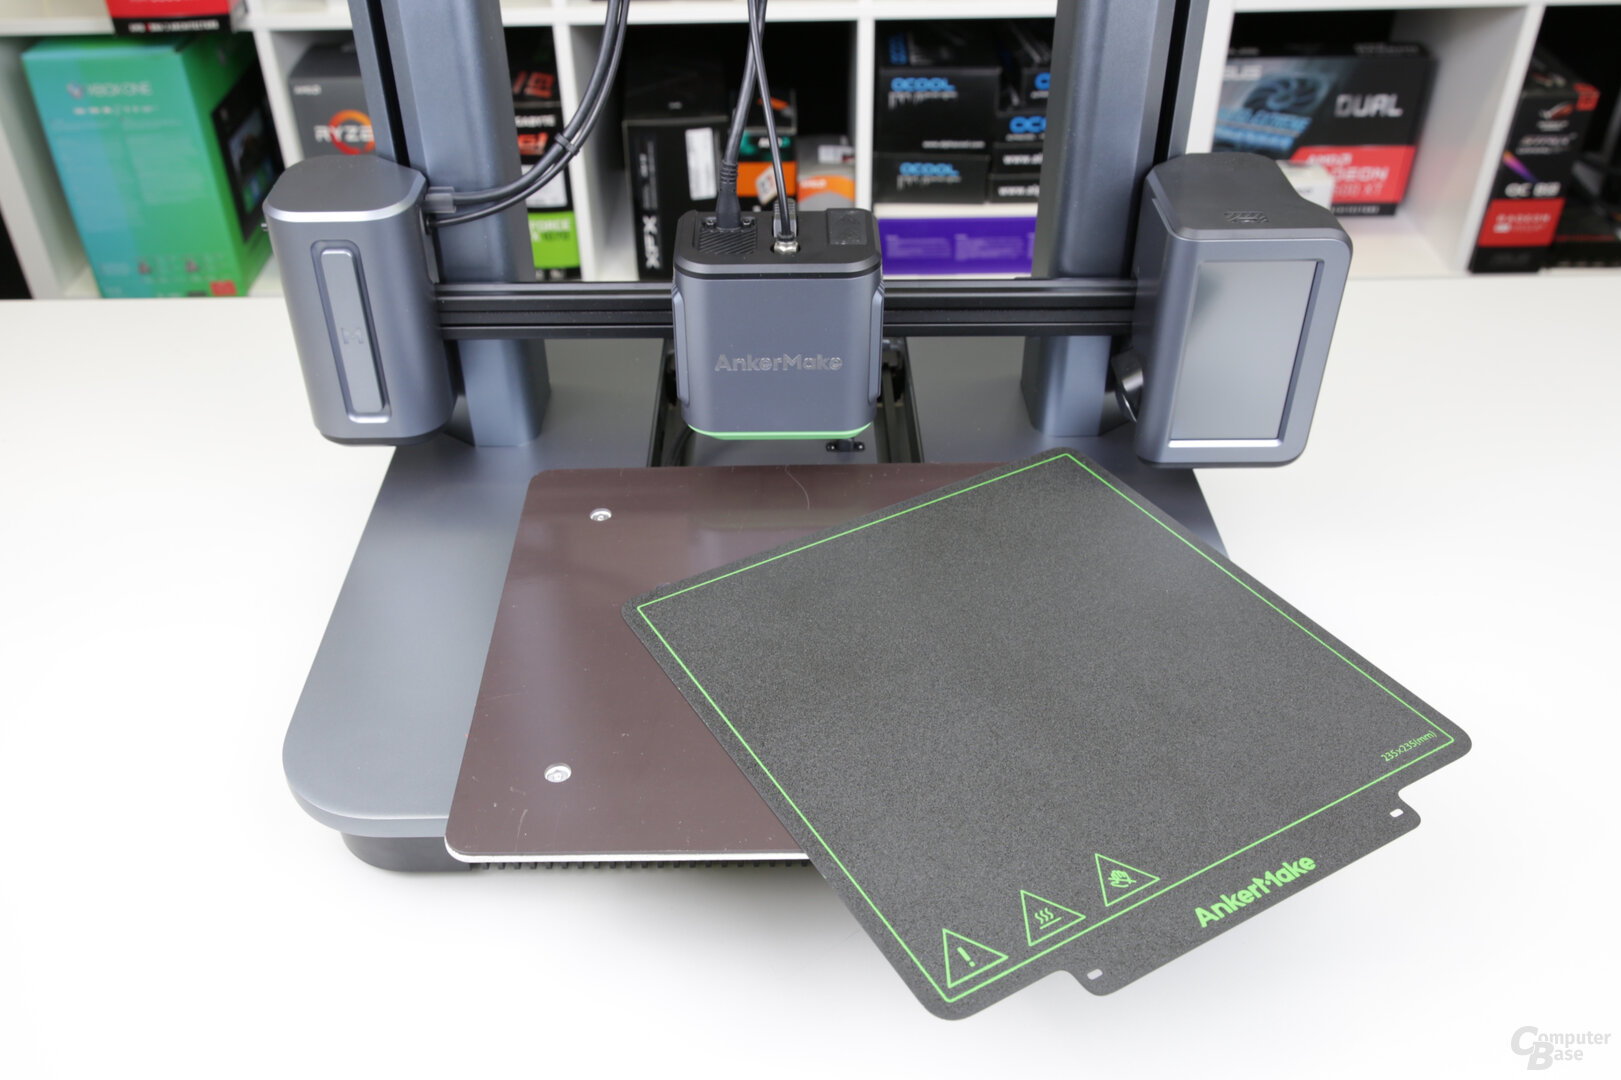 AnkerMake M5: Magnetic Print Bed
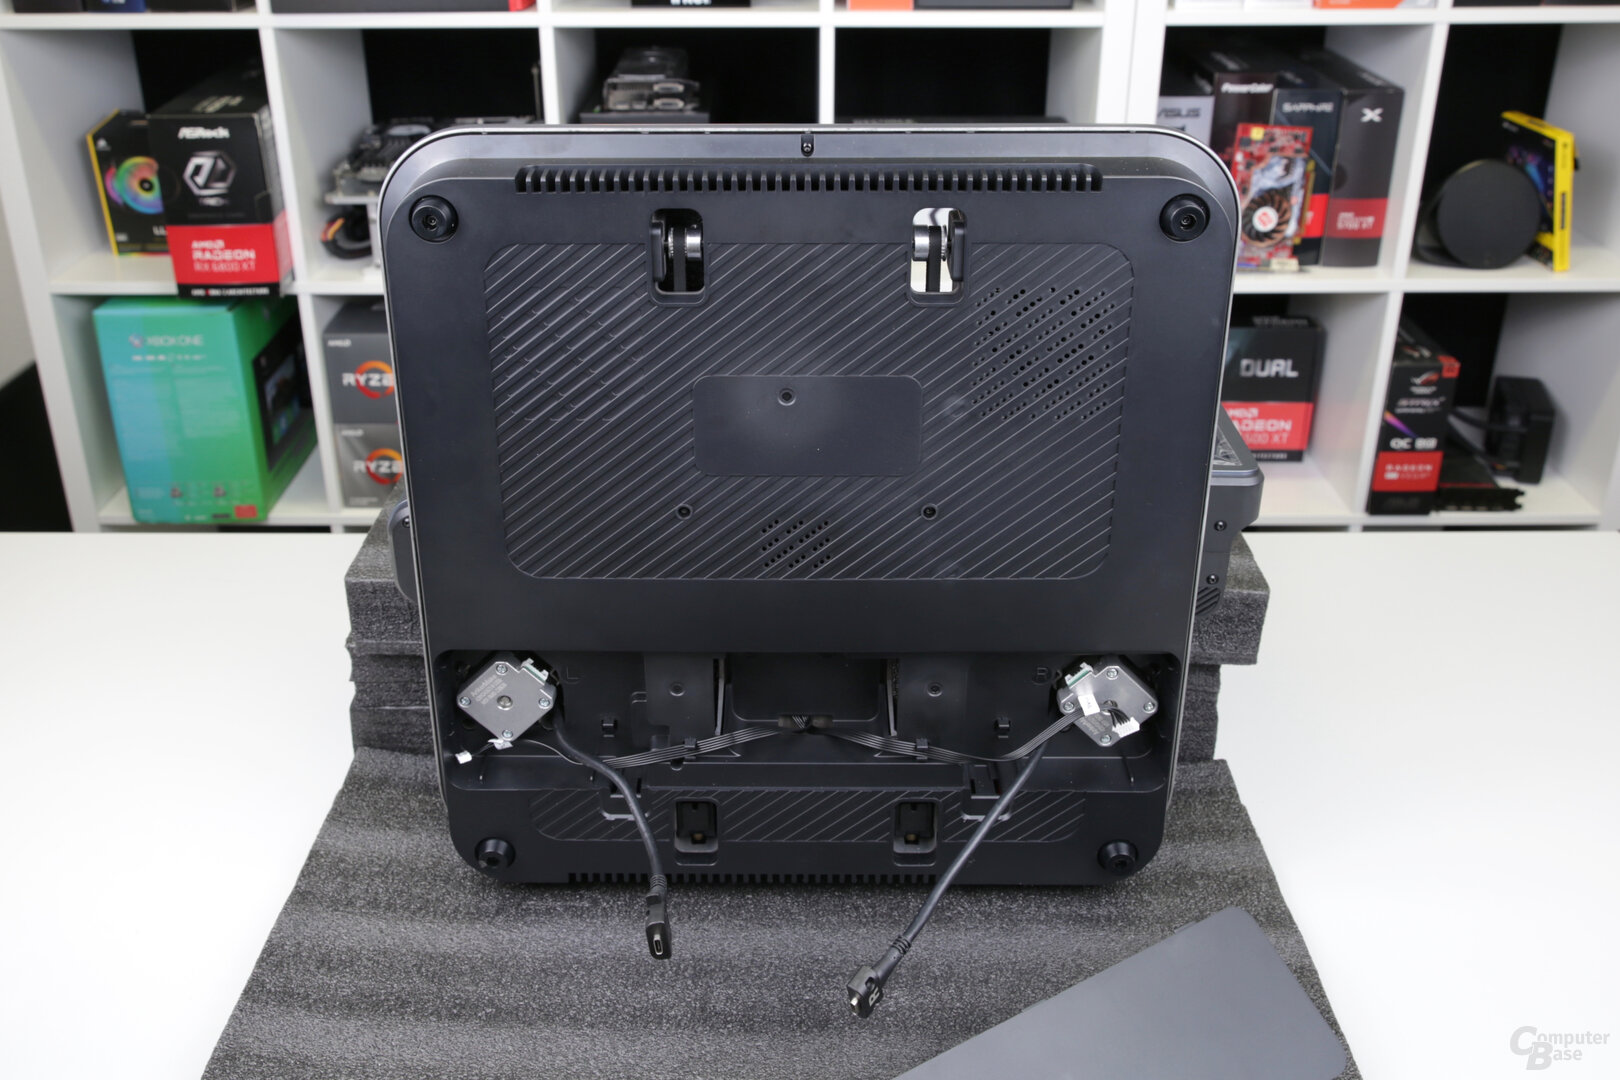
The AnkerMake M5 measures 502 × 438 × 470 mm without filament holder and weighs 12.4 kg. The high weight is also due to the massive use of aluminum in the base and is also appropriate given the forces that arise during fast movements.
PLA, ABS, PETG and TPU
PLA, ABS, PETG and TPU are supported as printing material – a good selection that is sufficient for almost everyone. A Creality Ender 3 S1 Pro offers a little more freedom with PLA, ABS, PVA, TPU, PETG, PA and wood. The print bed can be heated up to 100 °C to prevent warping. The maximum extruder temperature of the 60 watt hot end is 260 °C. With these two values, the M5 is below the Creality Ender 3 S1 Pro. The latter has 110 and 300 °C in this point, so a little more flexibility because it relies on an all-metal hot end. The AnkerMake M5, on the other hand, uses a hot end with a PTFE hose that would melt at temperatures above 260 °C. Even if there are cases where the 260 °C of the M5 hotend is not enough, ABS can in principle also be printed with the AnkerMake M5 if it is printed at 235 or 240 °C. Demanding ABS-PC filament, which requires 280 °C, is not an option.
 AnkerMake M5
In order to prevent stringing, i.e. the pulling of threads between components, the M5 relies on a closed cooling system consisting of two fans, whose airflow exits via small outlets directly next to the nozzle, so that components should be cooled quickly. Speaking of nozzles: The AnkerMake M5 supports nozzles with a diameter of 0.2, 0.4, 0.6 and 0.8 mm and they can be exchanged with the supplied tool.
Marlin firmware
The CPU is the Ingenic X2000 IoT application processor with two CPU cores at 1.2 GHz and an MCU core with 240 MHz is used. Like many 3D printers, the AnkerMake M5 uses the open source firmware Marlin.
350 watt and TMC stepper motor
The power supply unit of the M5 has an output of up to 350 watts – during the heating process, the connected measuring device shows around 300 watts of power consumption in the test, and around 100 to 120 watts during the printing process. TMC2209 are used as stepper motor drivers. The Y-axis is driven with a stepper motor and two belts hidden as far as possible in the base.
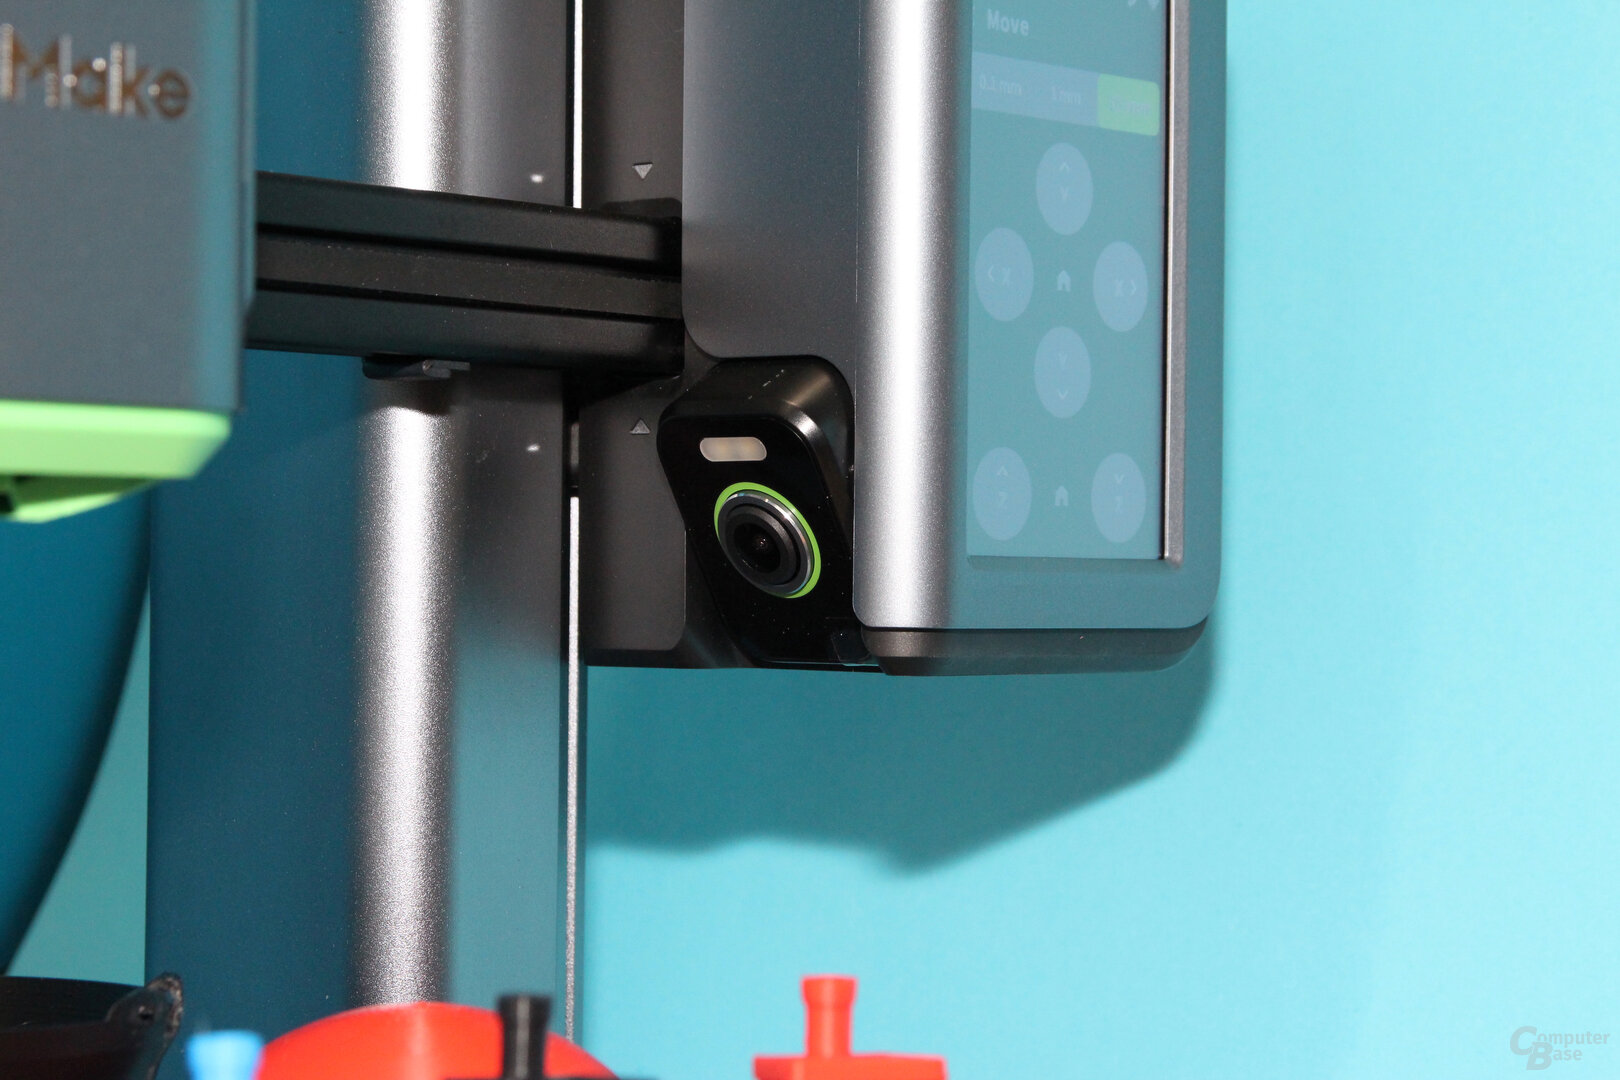
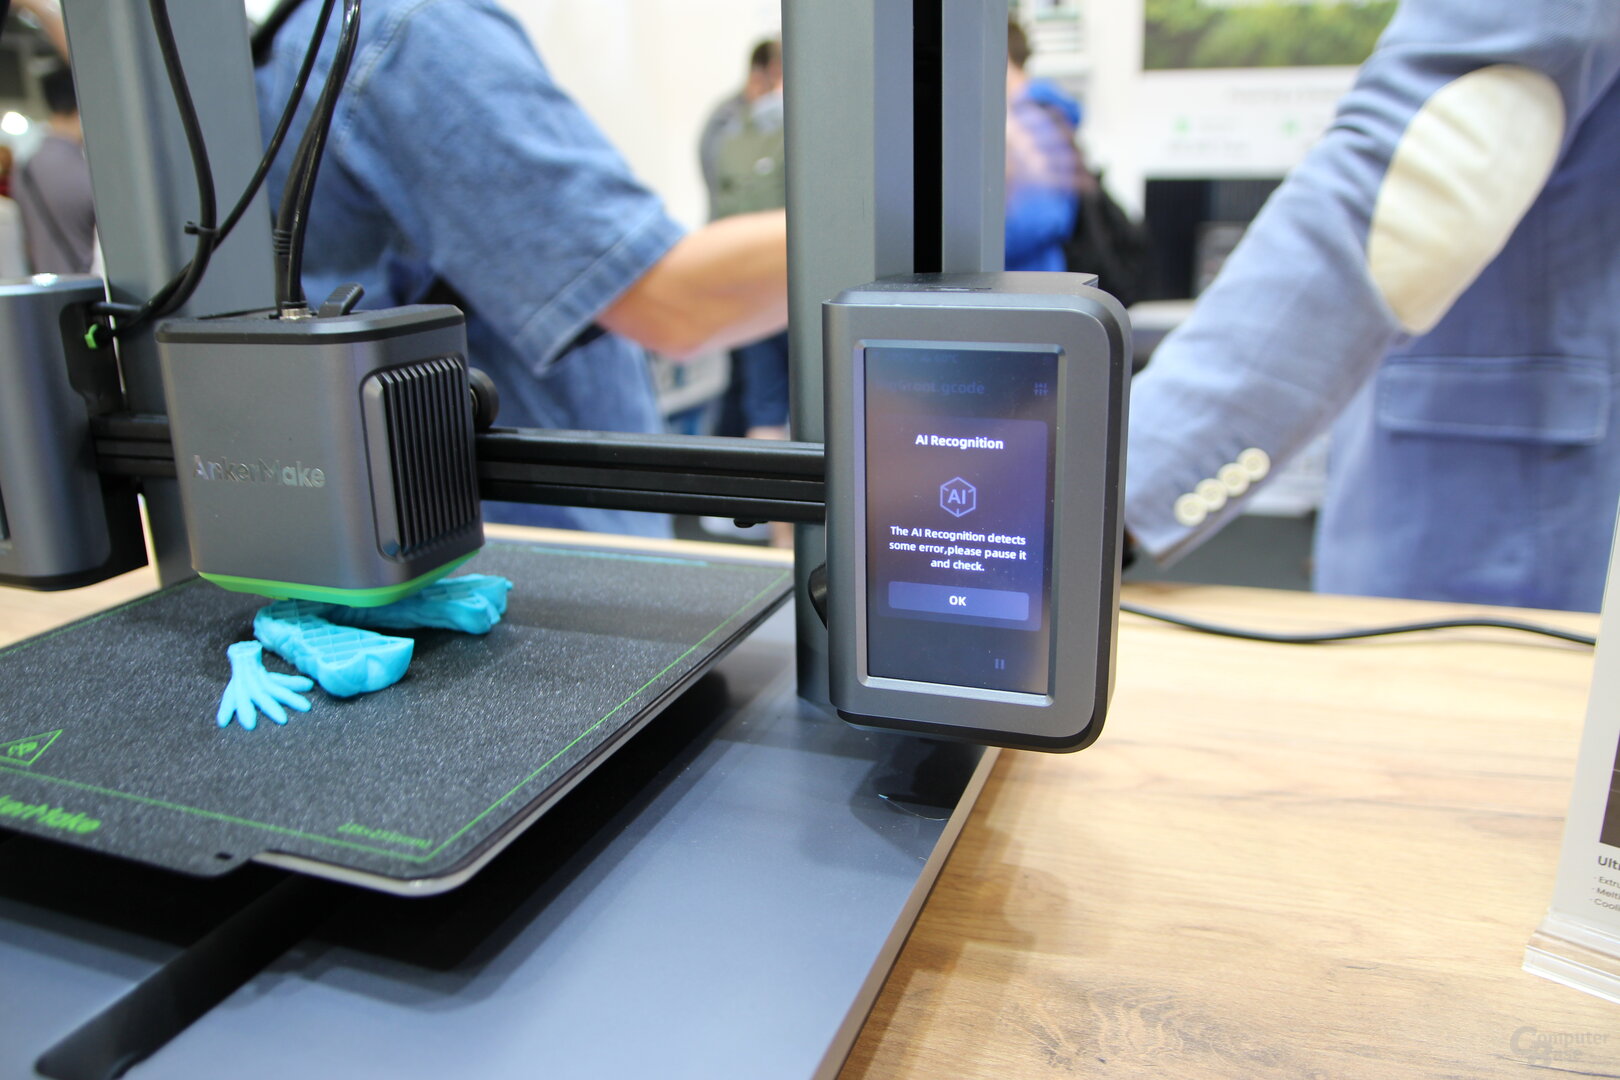
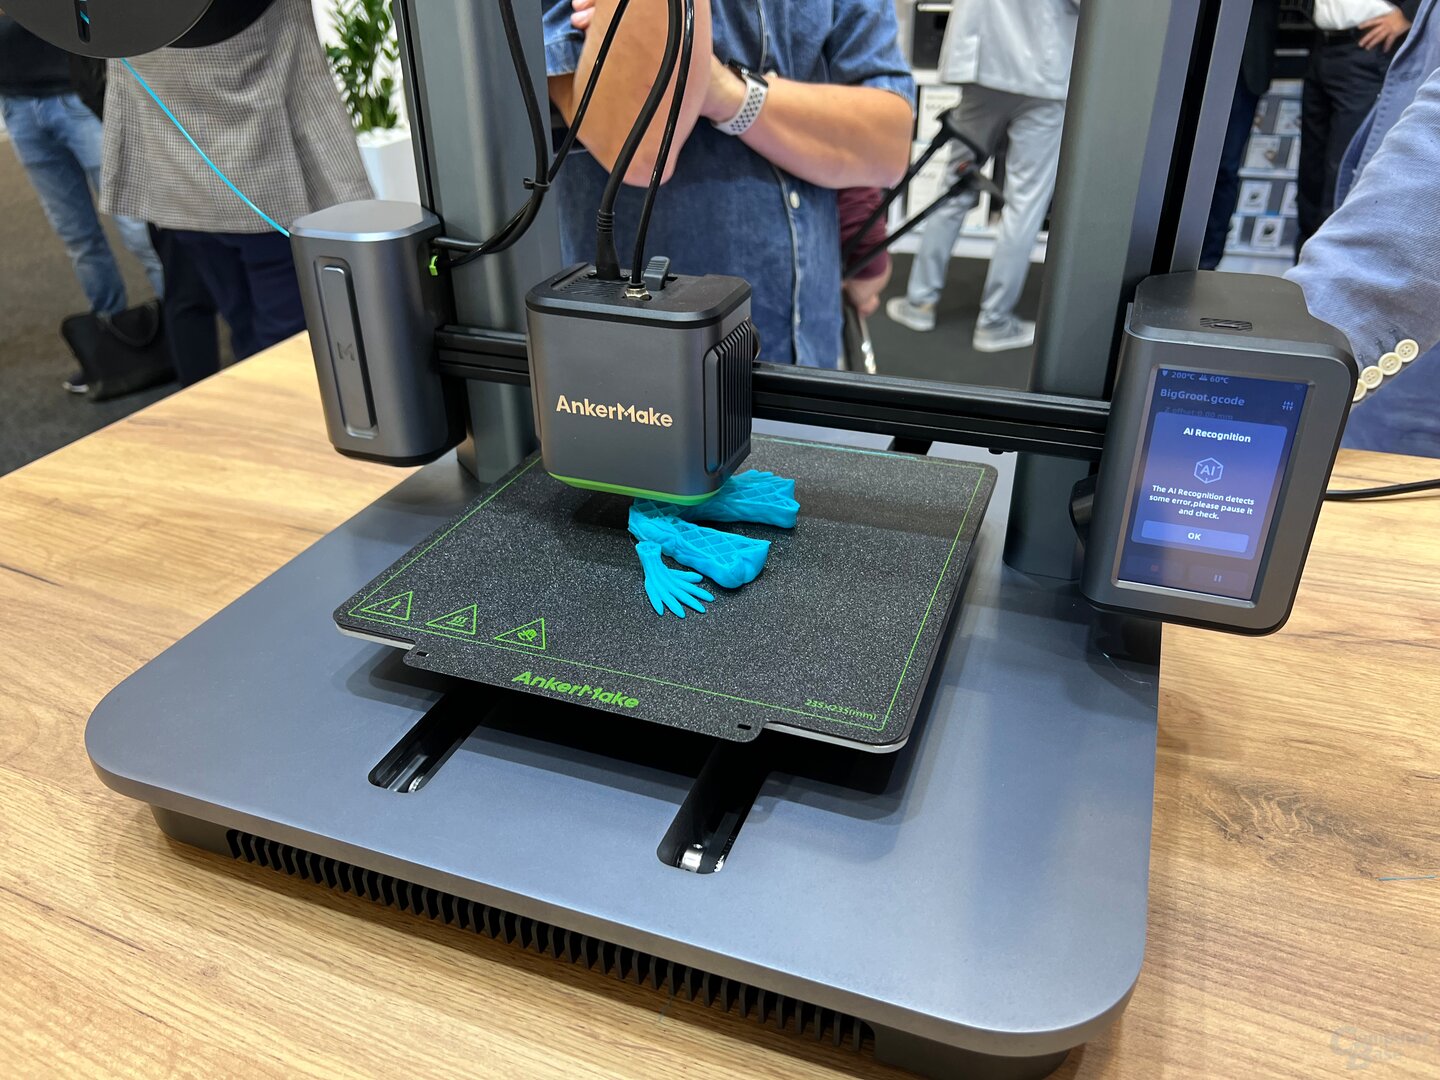
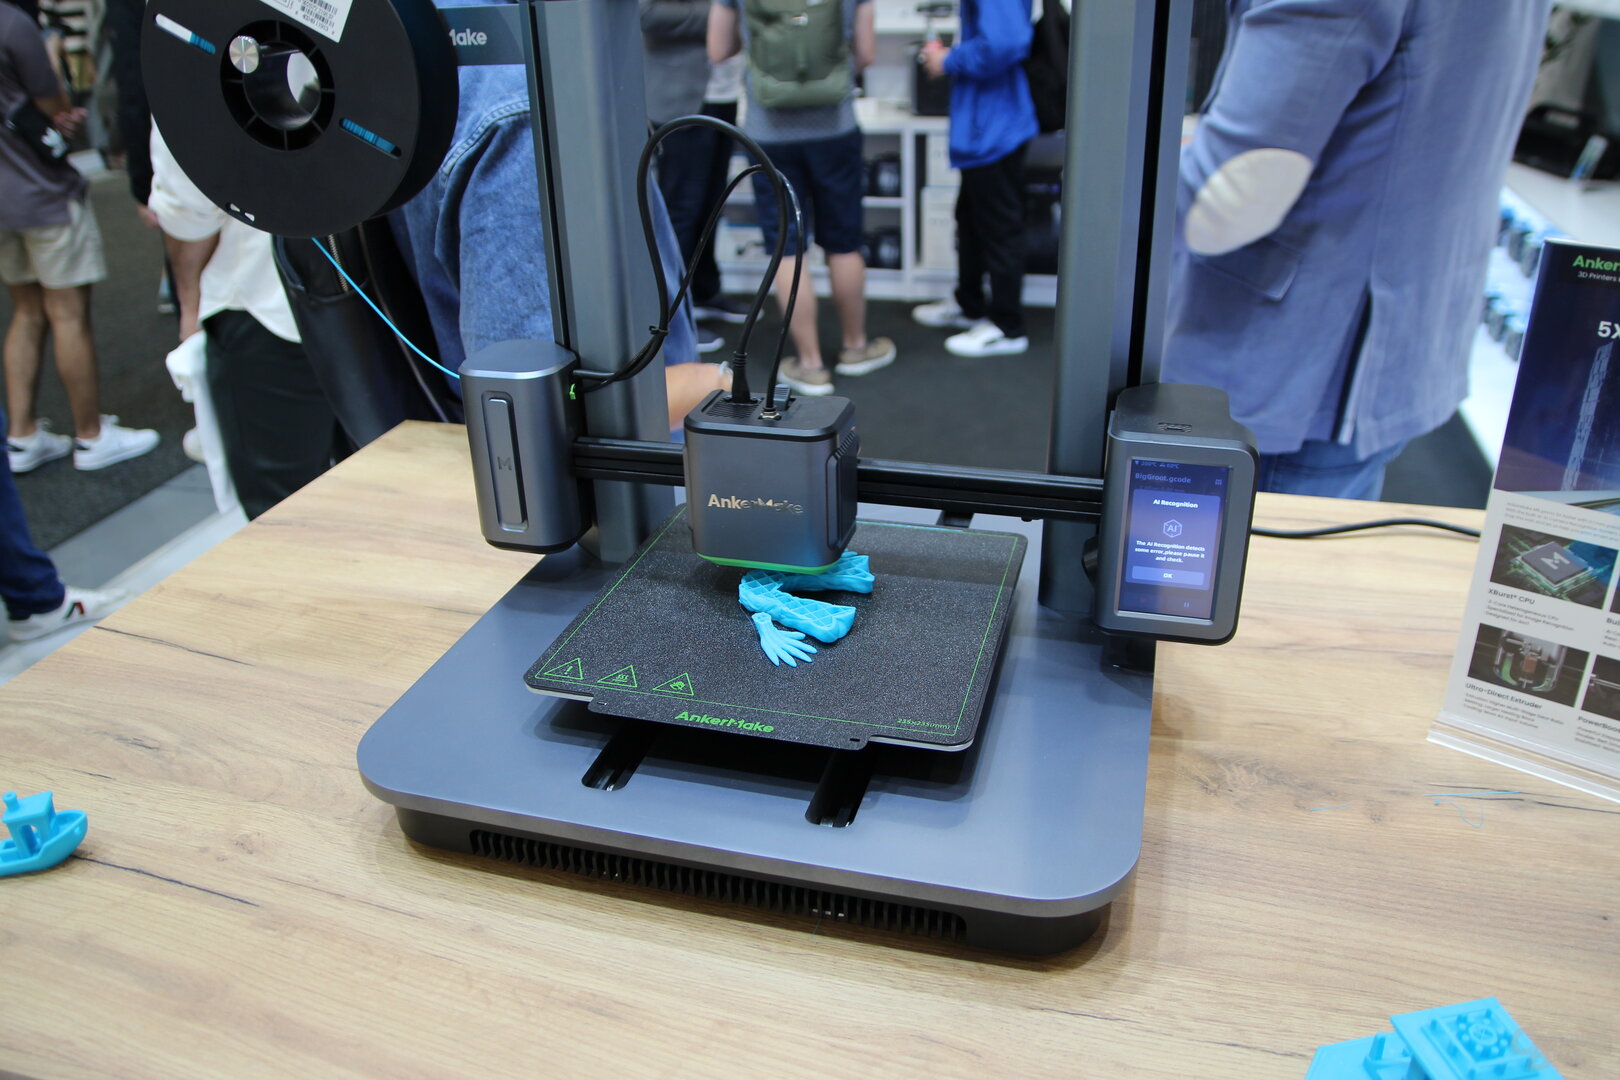
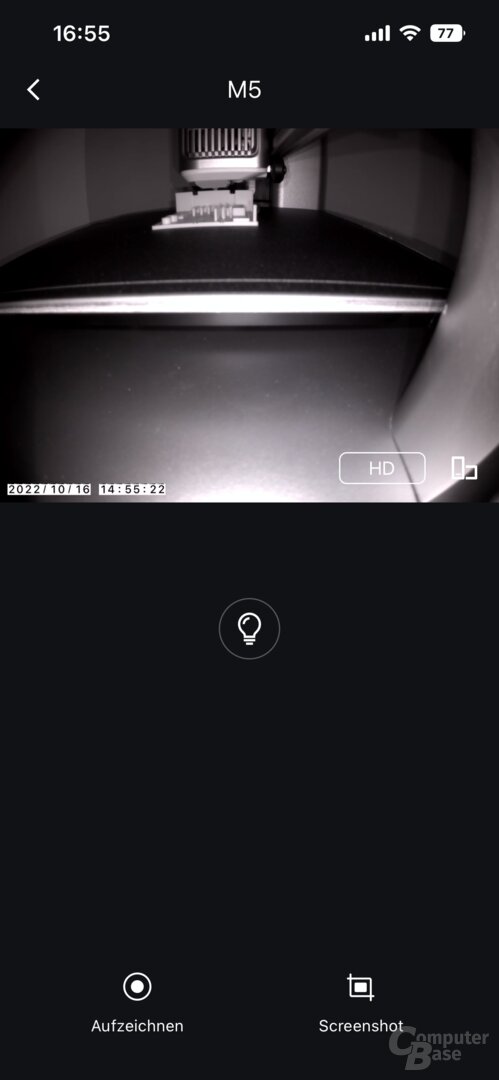
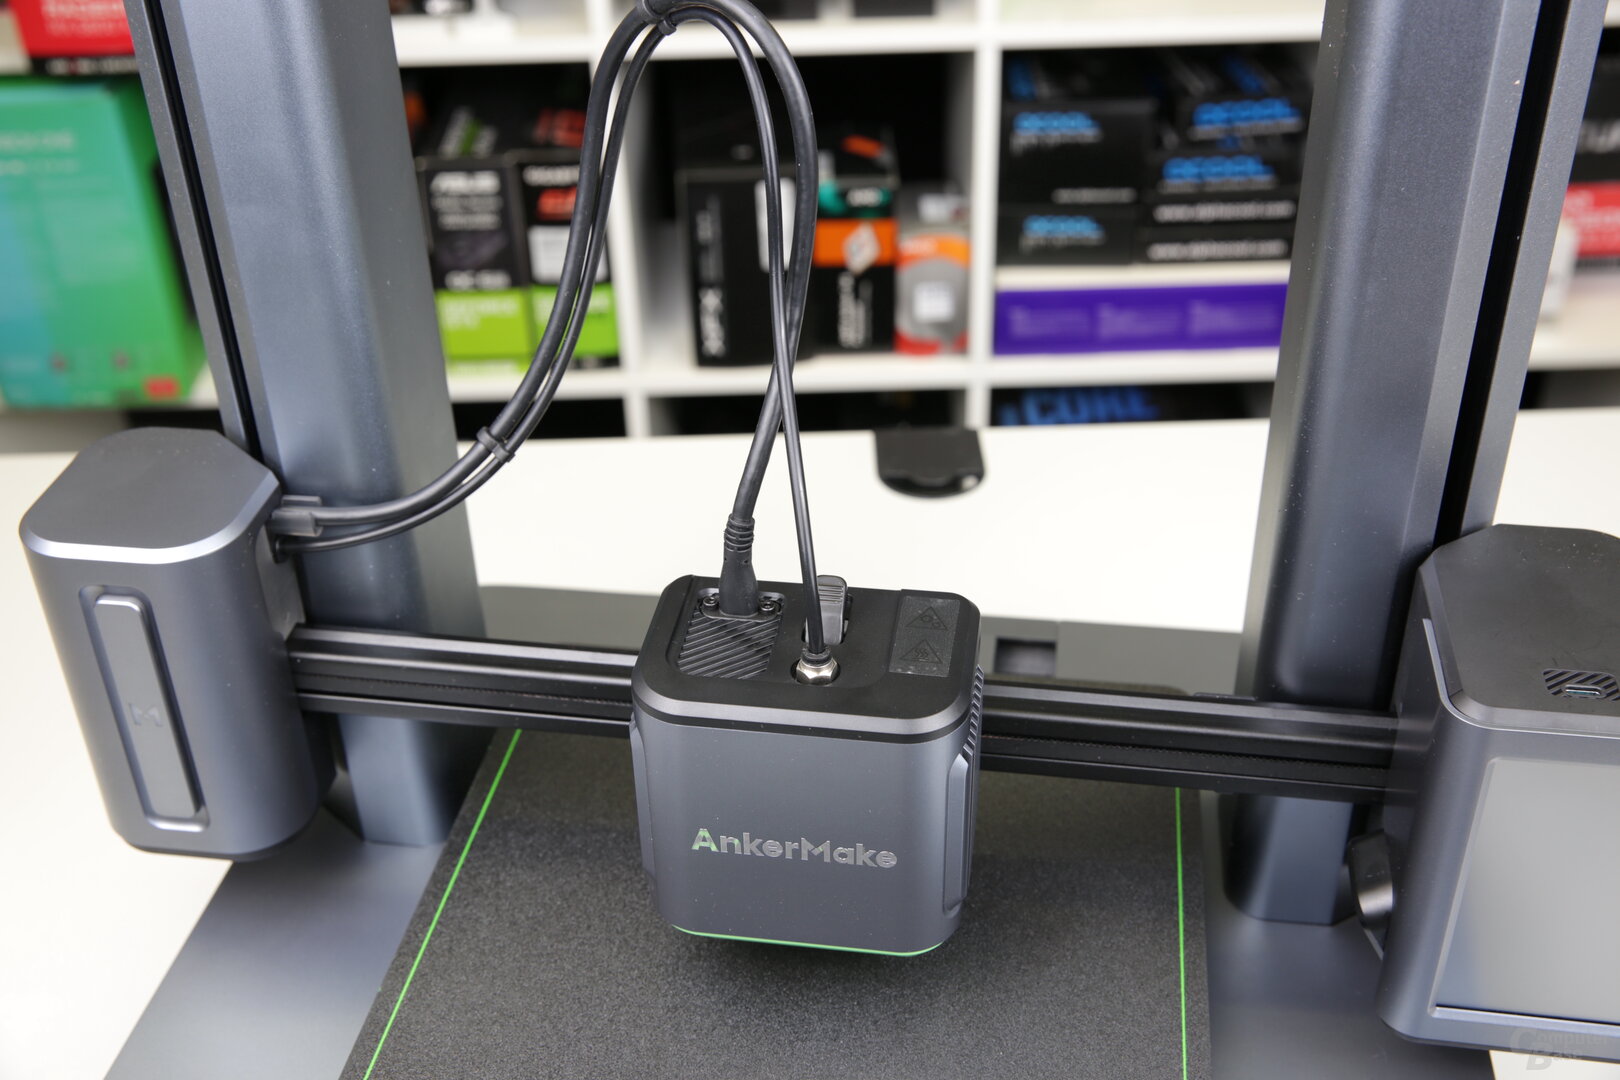
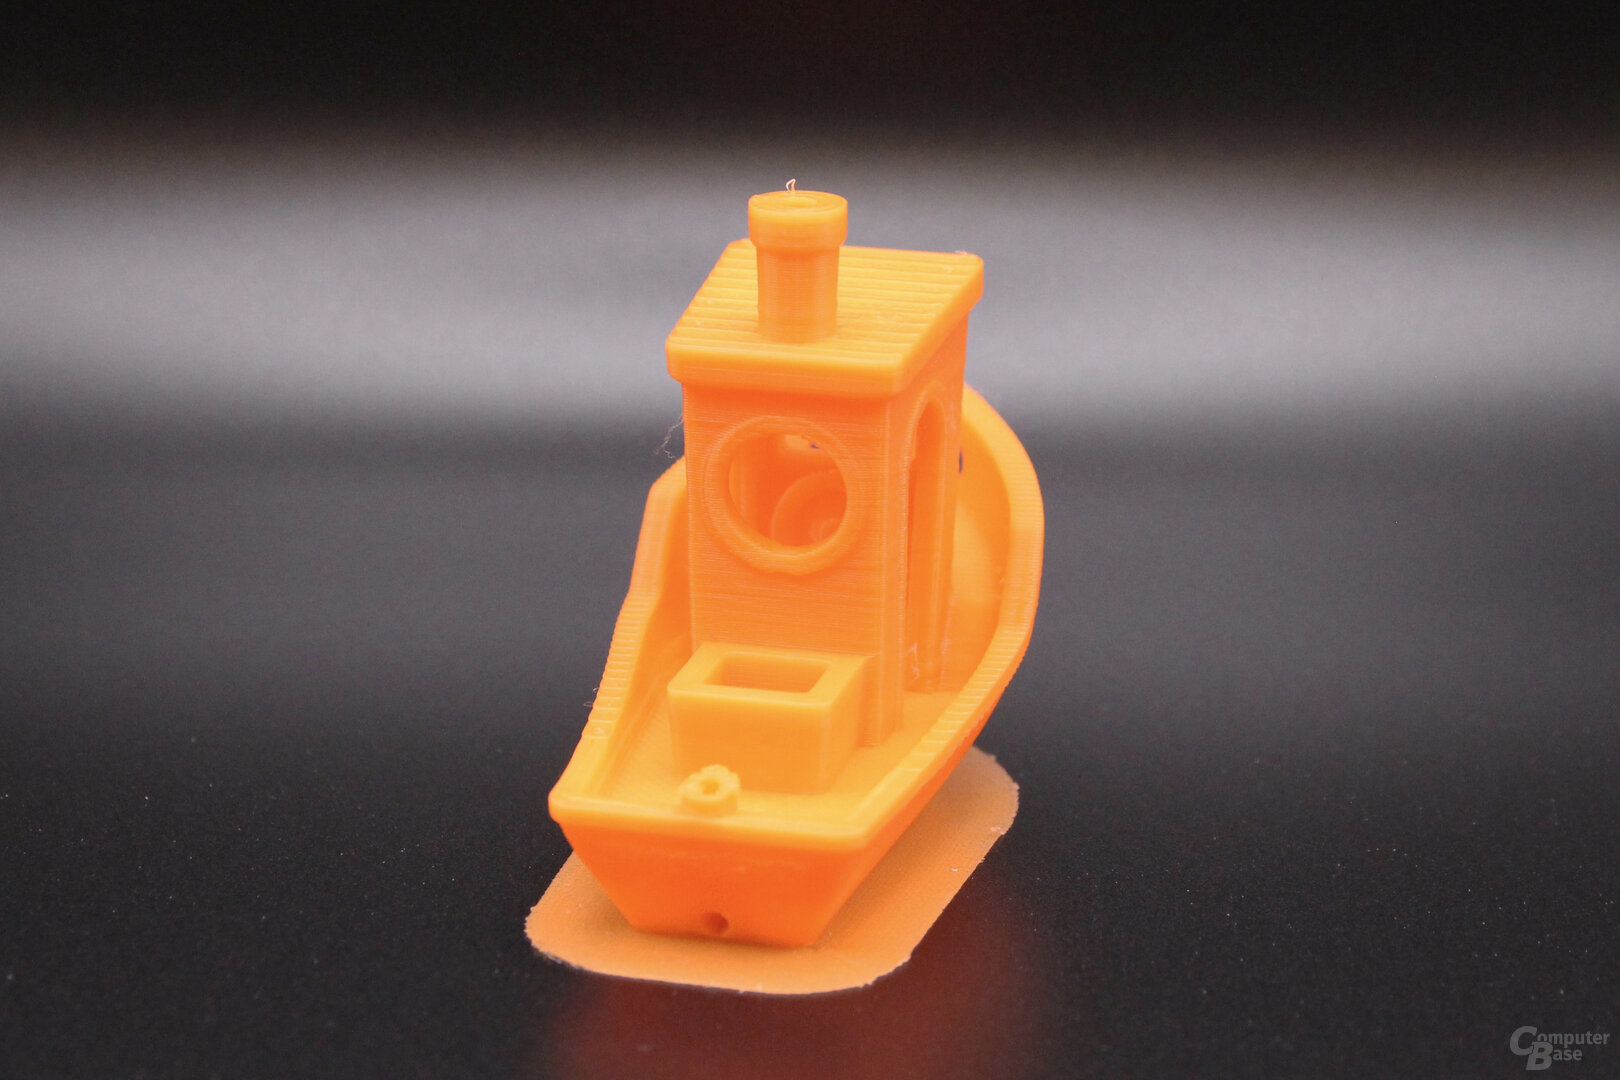
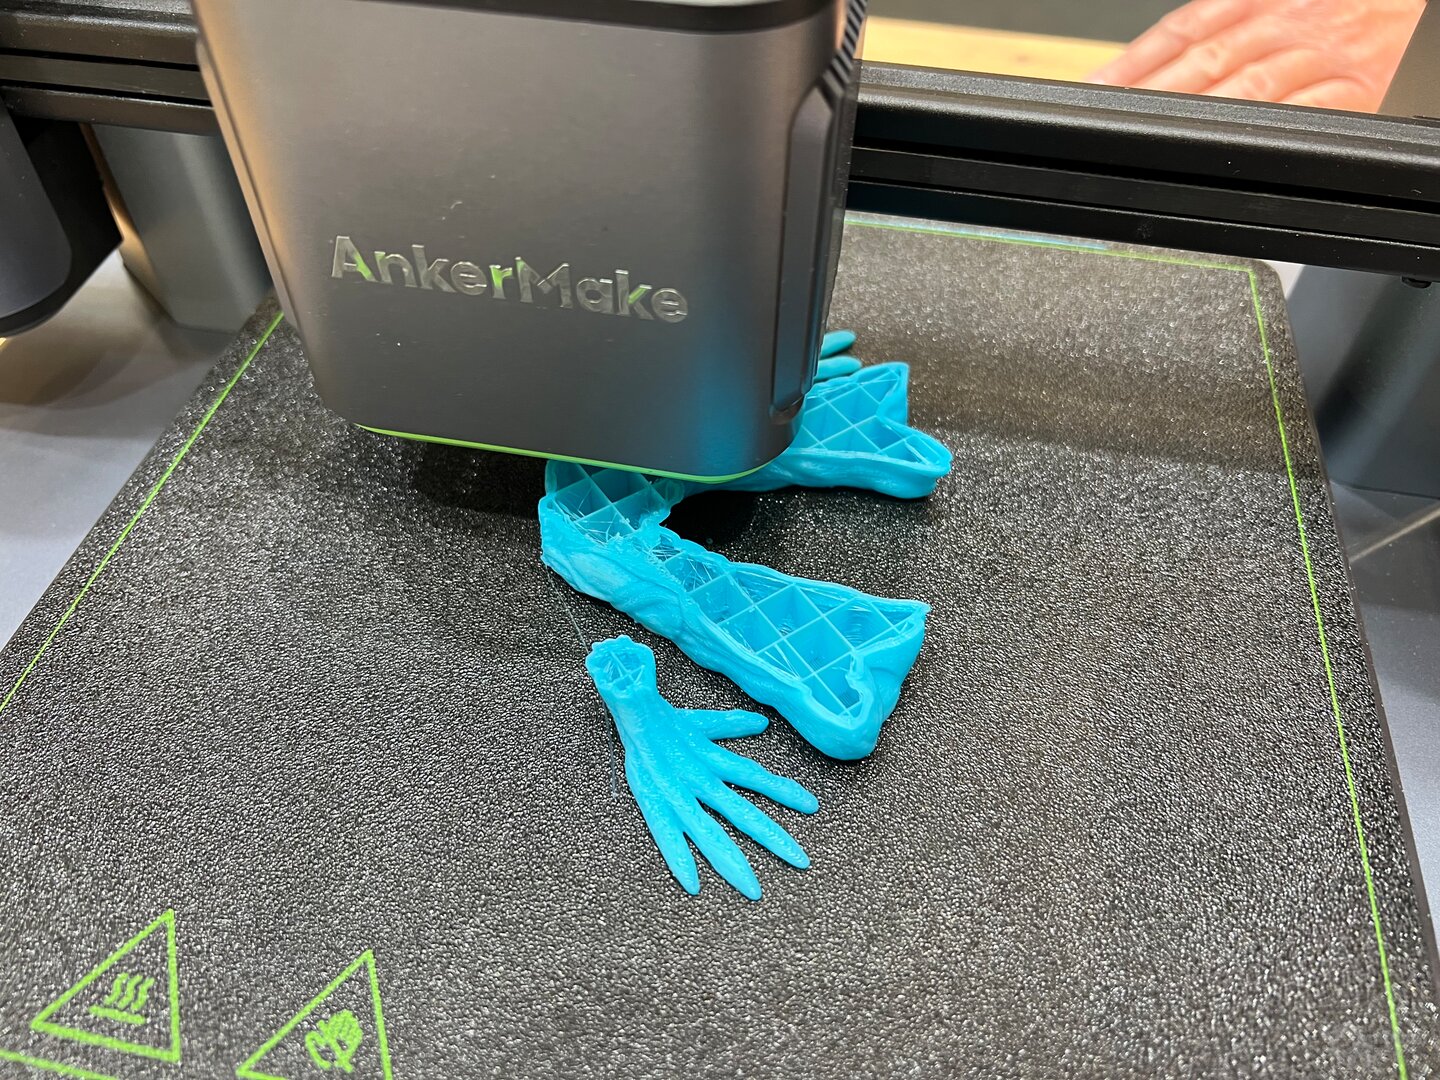
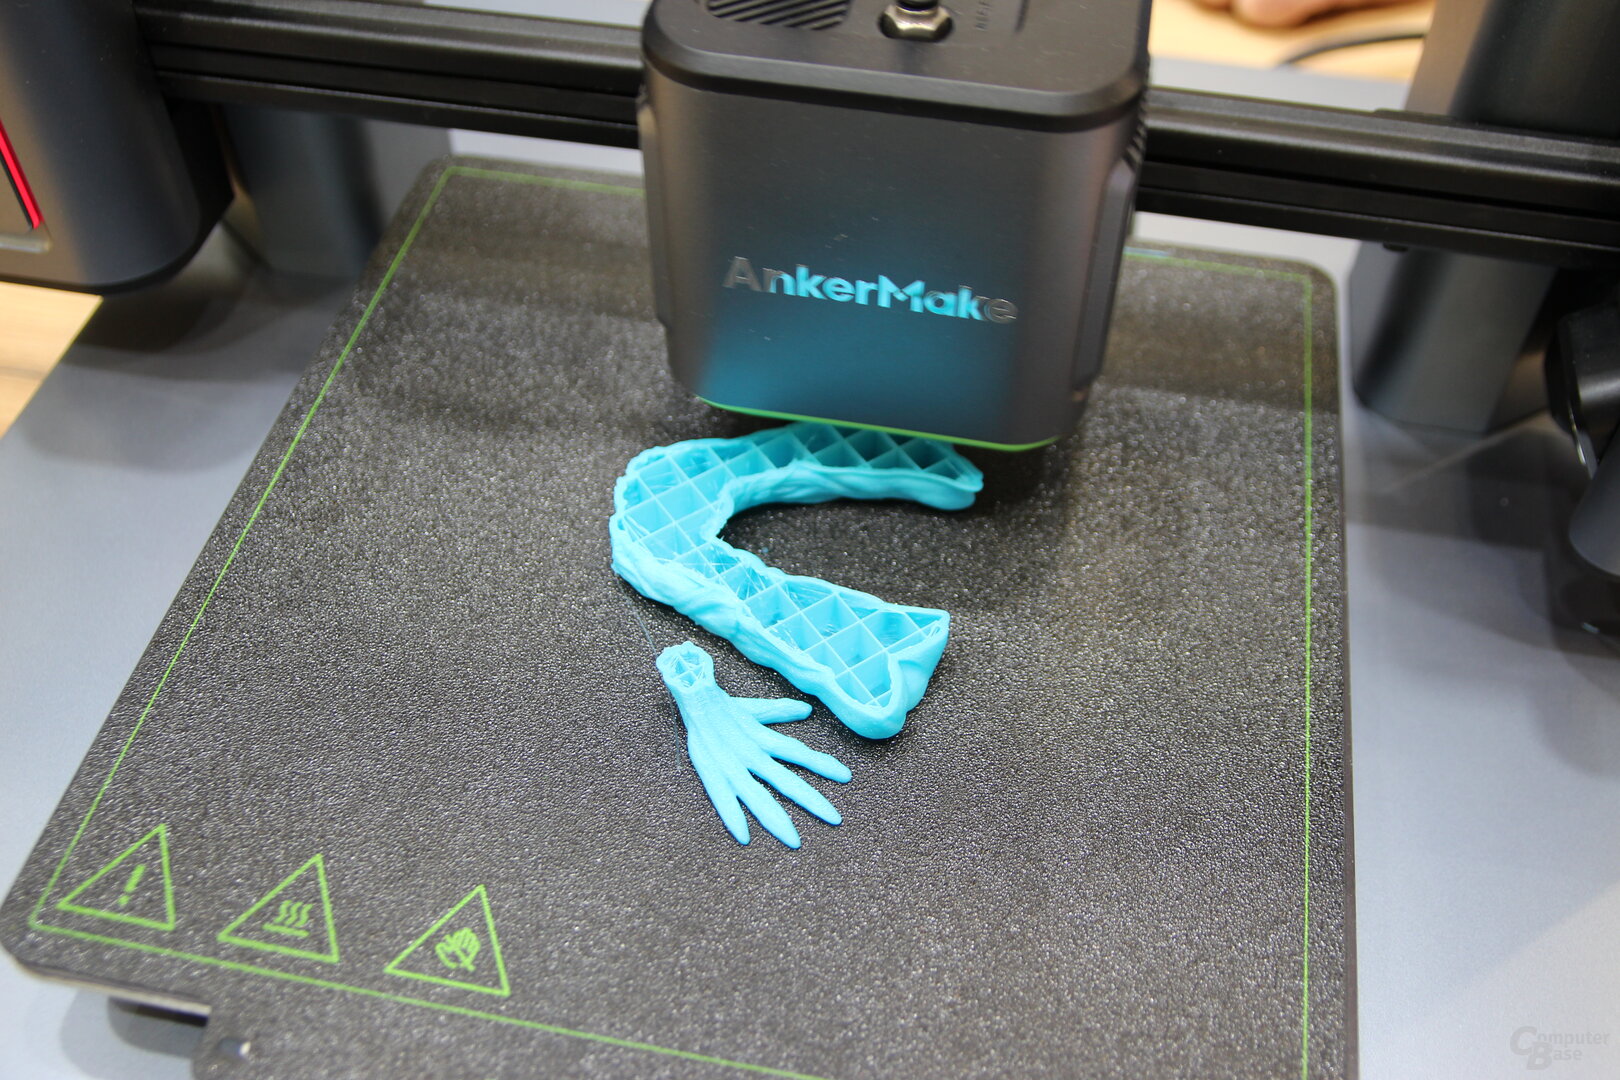
AI camera for Live image and error detection
The AnkerMake M5 also has a 1080p camera with infrared night vision, which uses artificial intelligence to not only detect printing errors and problems by generating a 3D model before printing, which is compared with the created model during printing. If a problem is detected, it is alerted acoustically, by a red LED strip in the left frame and by app notification. The M5 does not need to be connected to the internet for the detection as it is purely local.
-
 AnkerMake M5 : The camera for live video, time-lapse and AI error detection
Image 1 of 2
 AnkerMake M5: The camera for live video, time-lapse and AI error detection
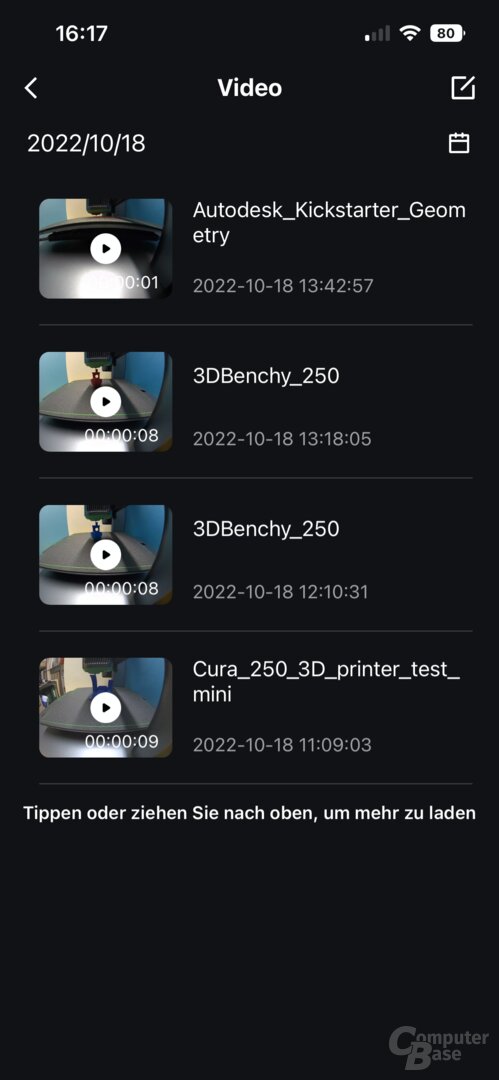
The camera also gives the user a constant view of the printing process via an app (720p) and for each print a time-lapse video of the printing process is created at 30 frames per second in 1080p (1,440 × 1,080 pixels) and uploaded to the cloud, where 1 GB is available to the user and from which the time-lapse recordings can be downloaded for a maximum of 15 days, depending on the number of prints. This does not work without an app and an account with Anker. If the printer is in a dark room, LED lighting for the camera can be activated via the app. If a problem is detected and even during an unproblematic printing process, the user can pause the print at any time in order to examine the object and decide whether the print should be canceled or continued.
The error detection based on the generated AI model only works if the official slicer software from AnkerMake is used, which generates the file format acode instead of gcode. If another slicer such as Cura is used, the error detection is not active, but the user can check at any time via the camera whether there is an obvious problem.
-
 AnkerMake M5: Automatically detects printing problems
Image 1 of 4
AnkerMake M5: Automatically detects printing problems
Frequent warnings even for minor errors
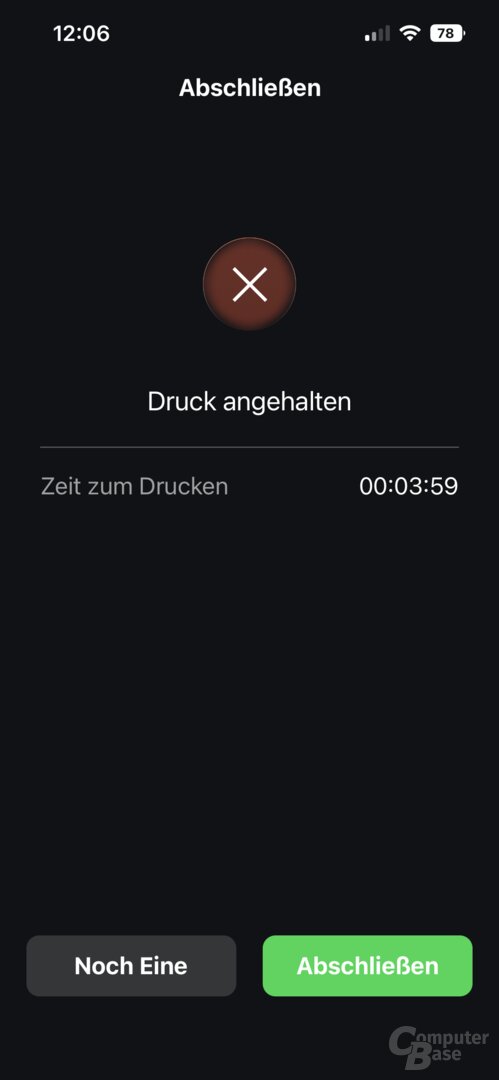
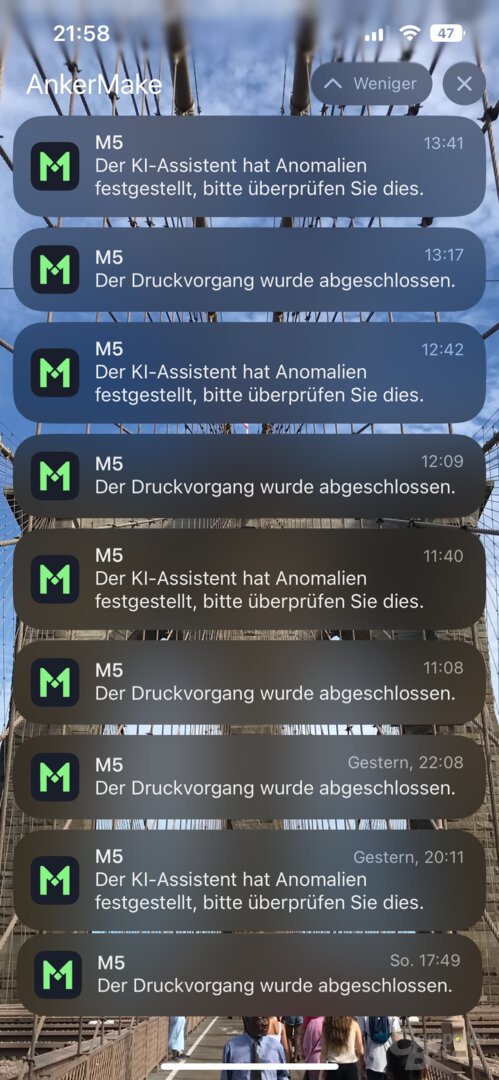
In the test, anomalies were found in the error detection for a large number of models that were printed at maximum speed. As a rule, these were only minor imperfections that do not justify the termination of the print. But a printed object that has fallen over, broken support posts and spaghetti threads due to a lack of adhesion of the layers were also reliably reported, so that action could be taken quickly before an unnecessarily large amount of filament was wasted. On the one hand, the notifications on the smartphone save you having to constantly look and go to the 3D printer when time-consuming models are being printed. On the other hand, the error detection is currently reporting marginal imperfections a bit too often.
Even a power failure doesn't upset the M5 and the print can be continued after the power supply has been restored.
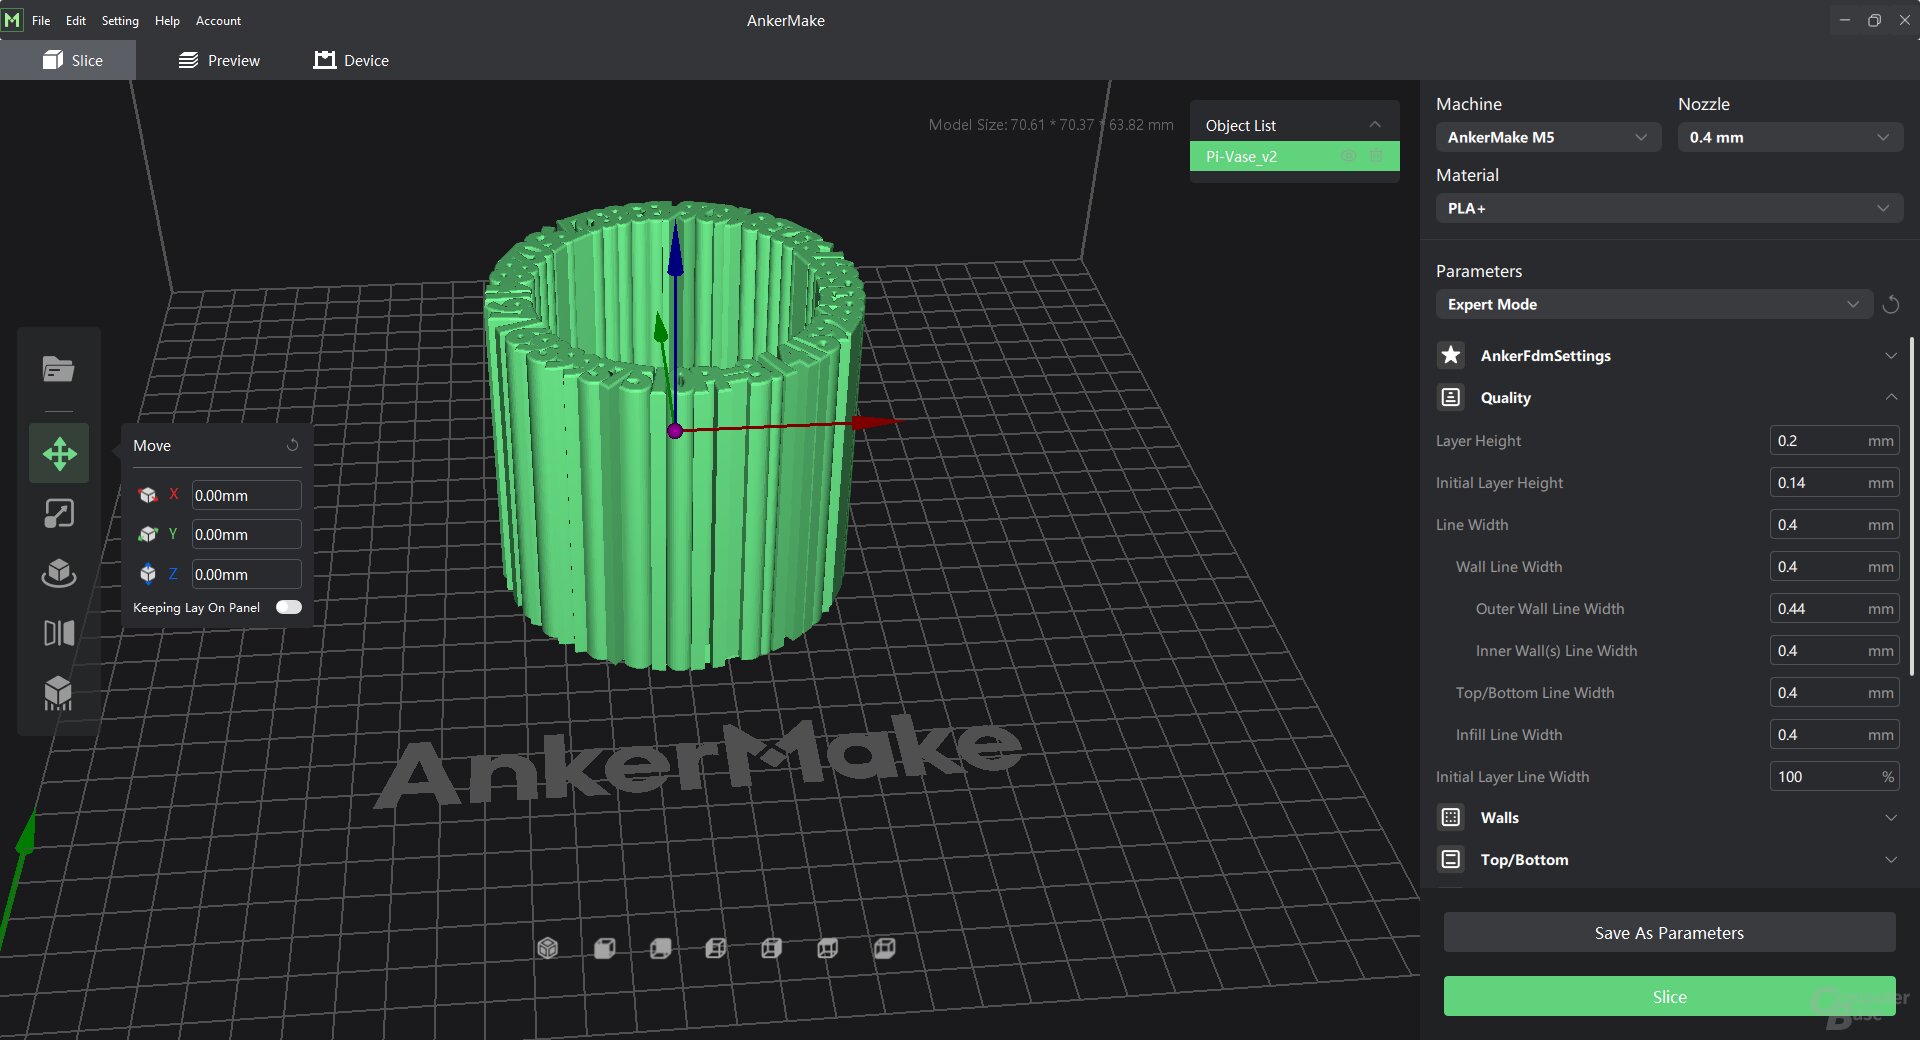
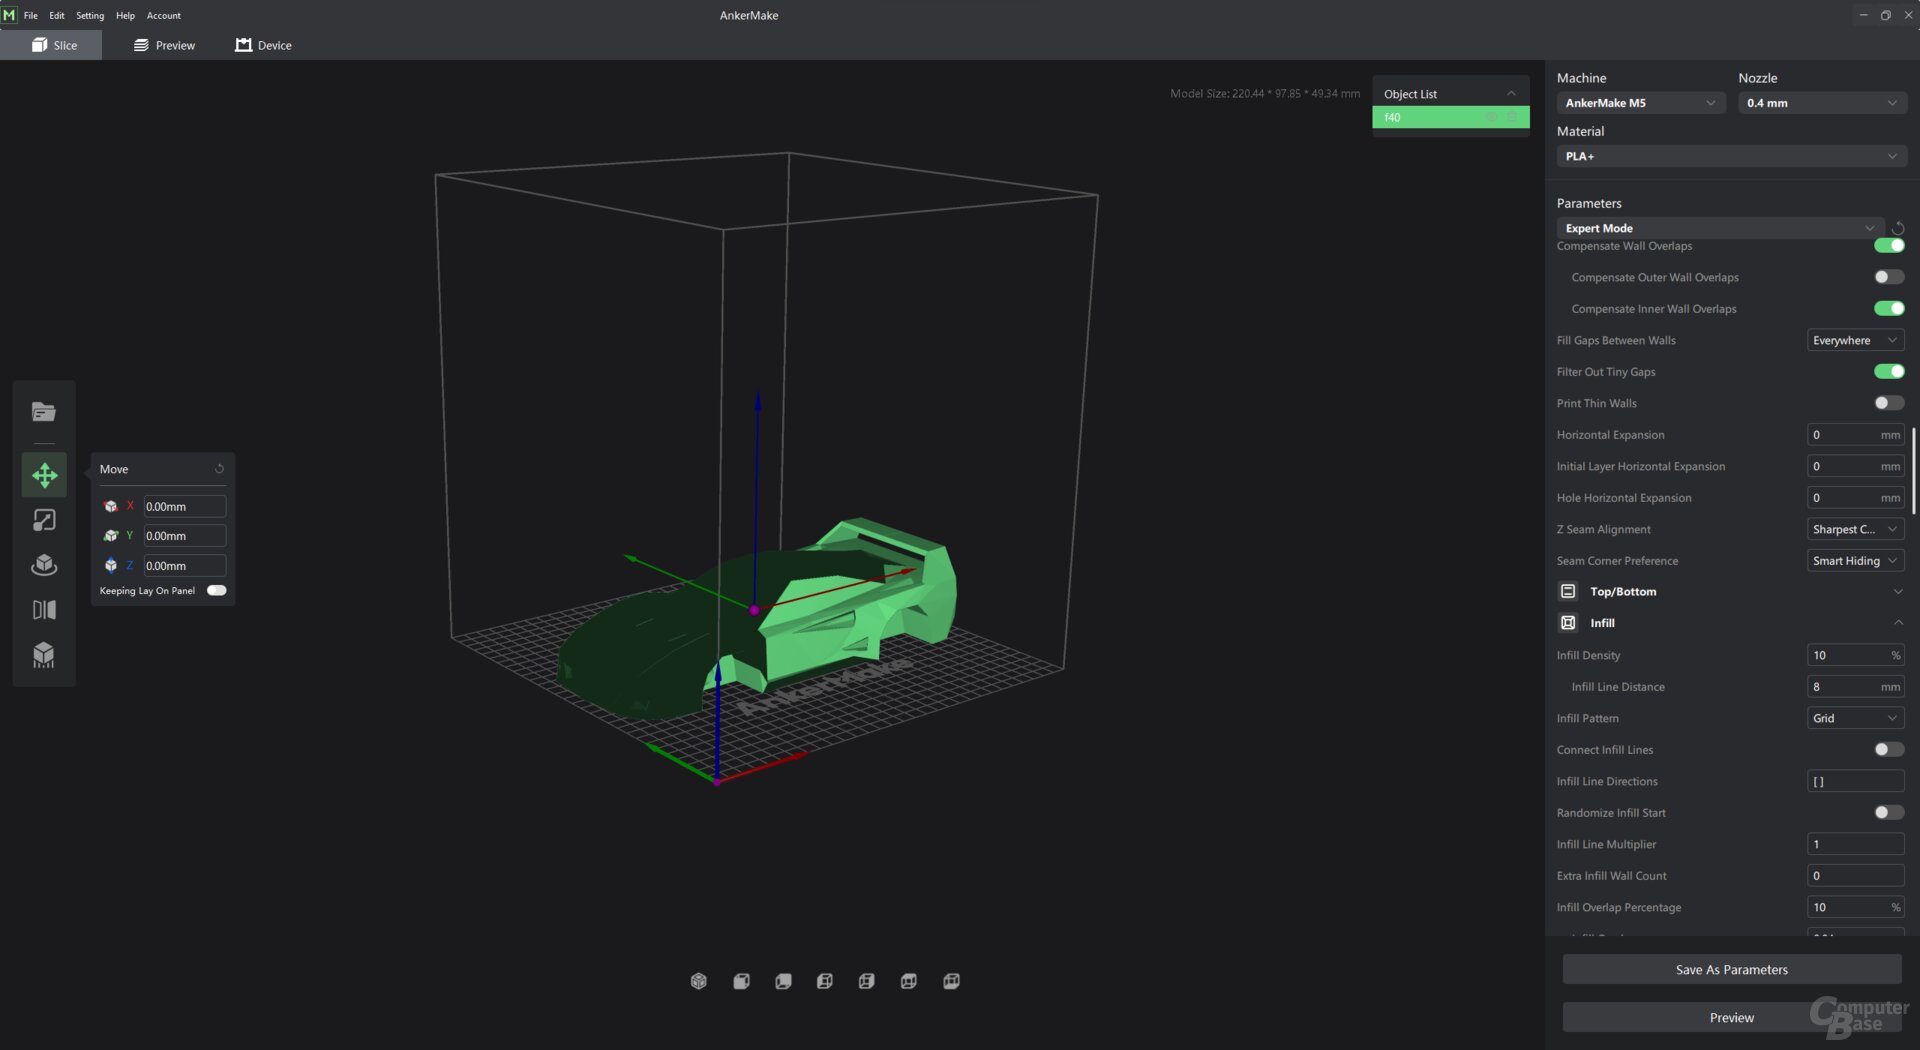
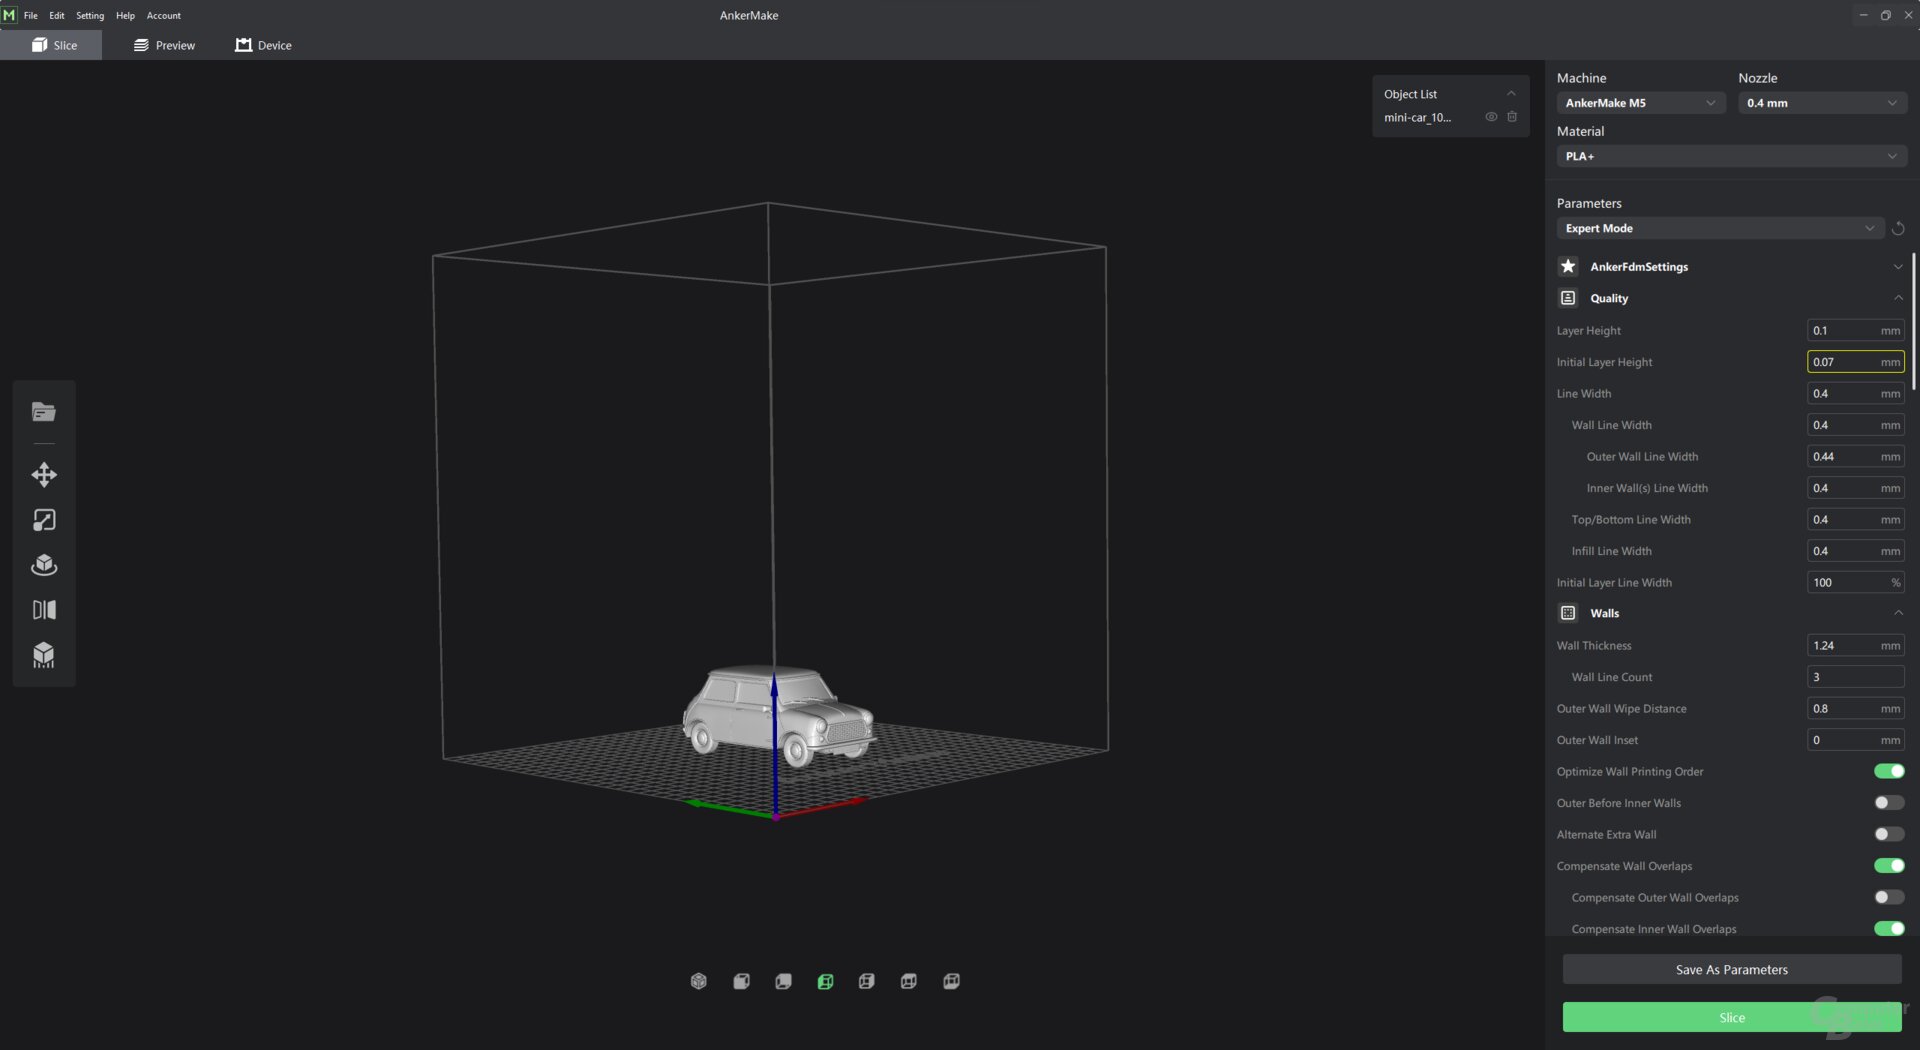
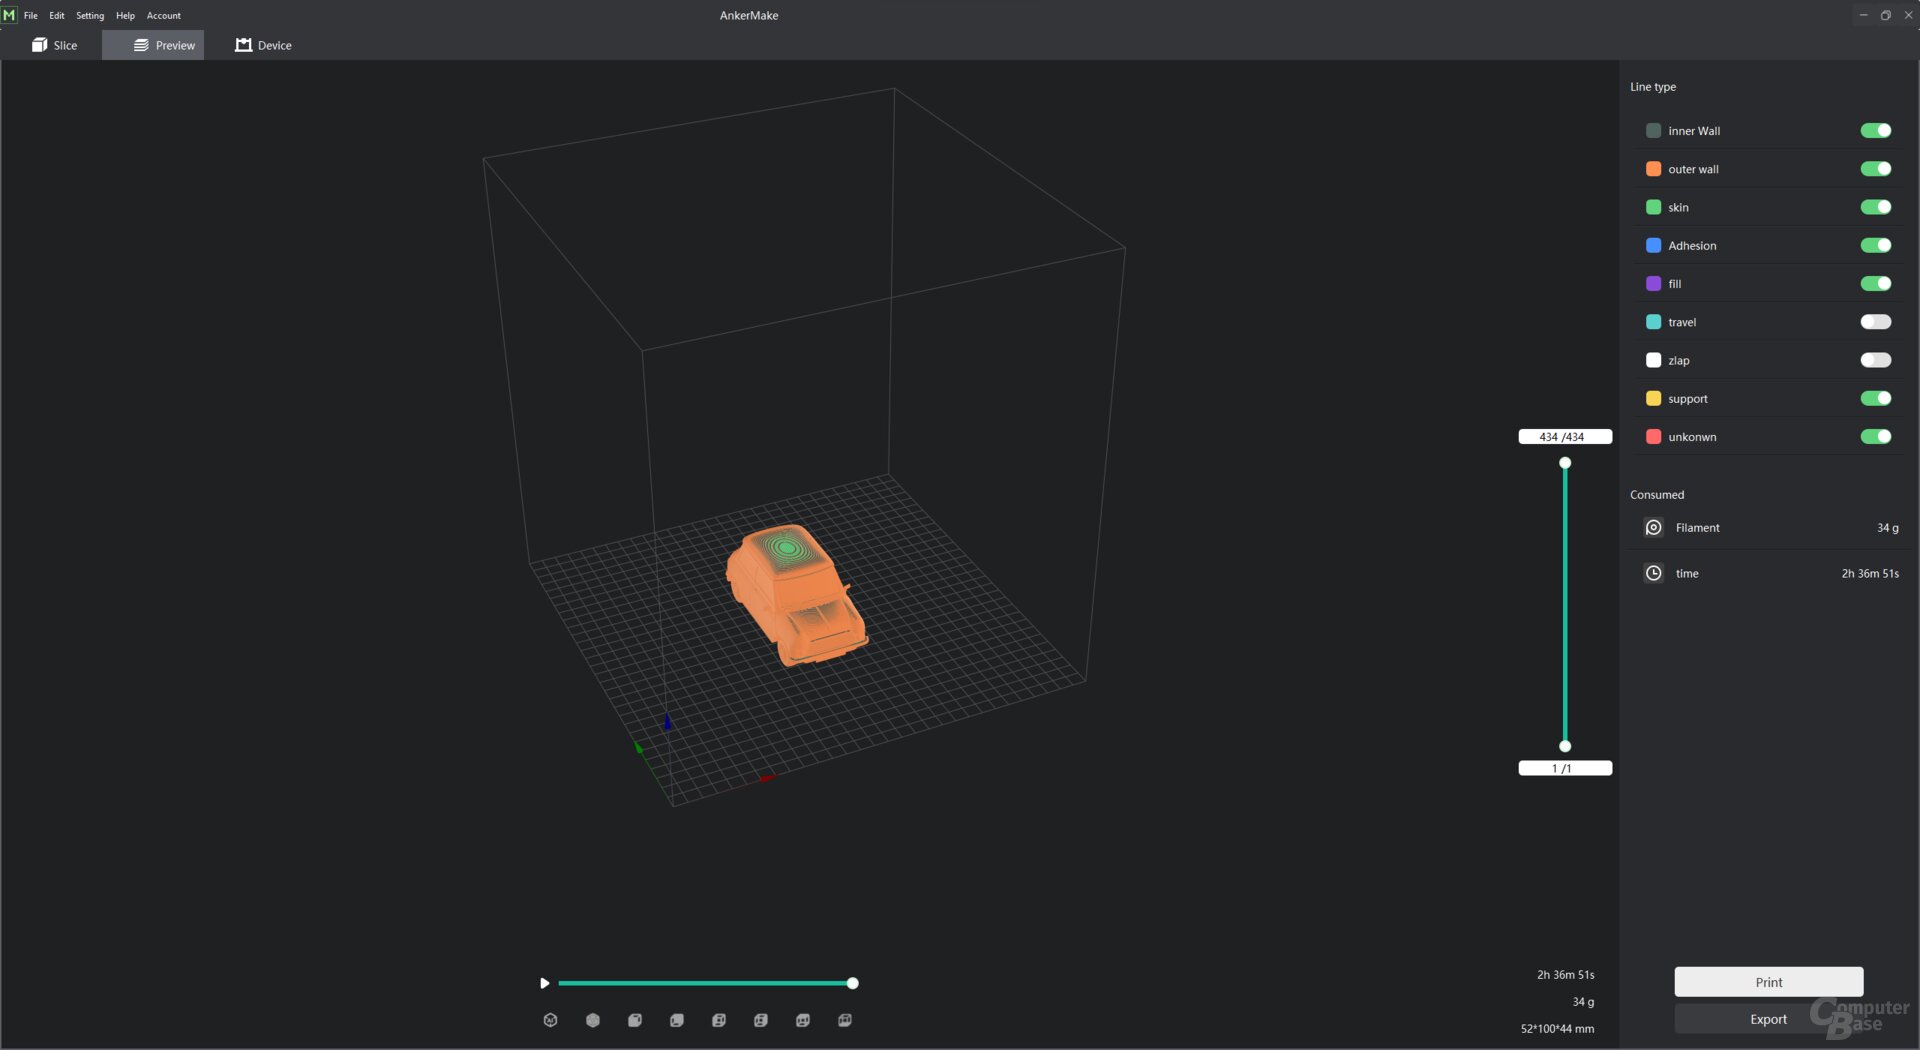
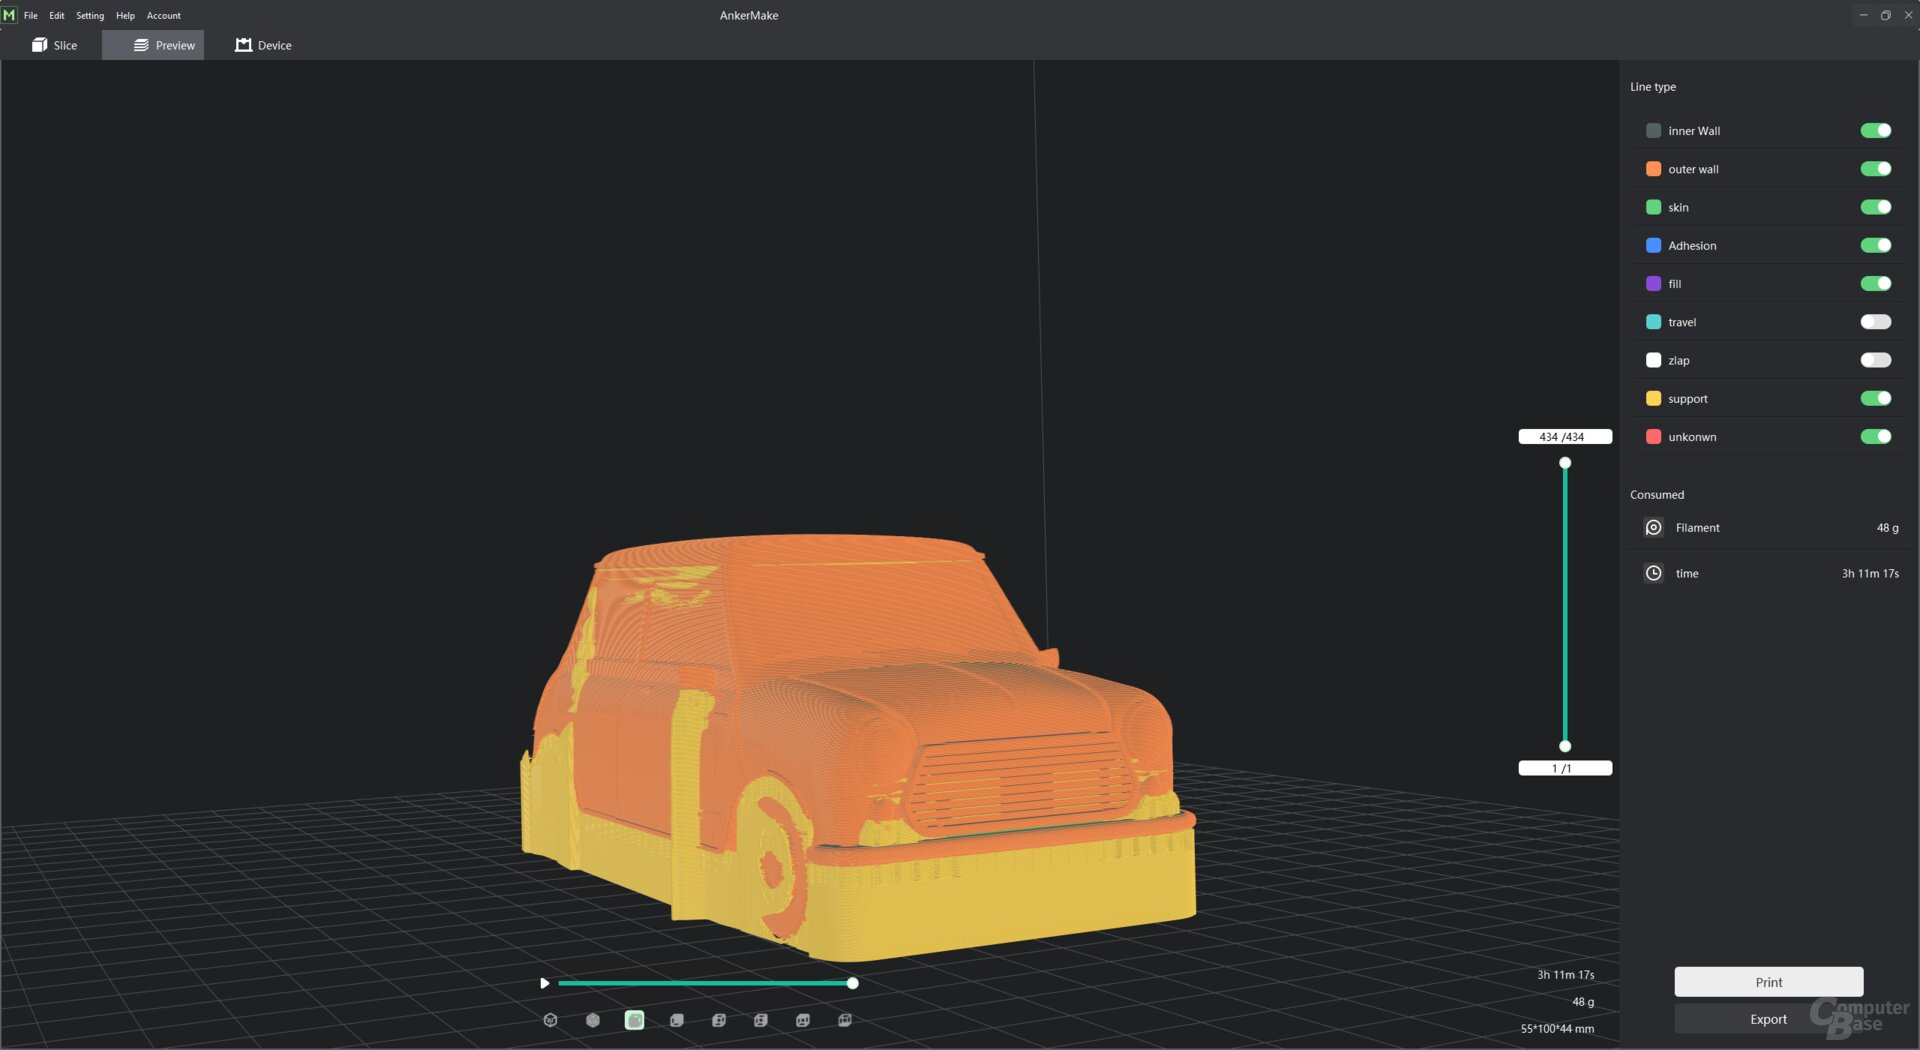
AnkerMake slicer: Cura with extras
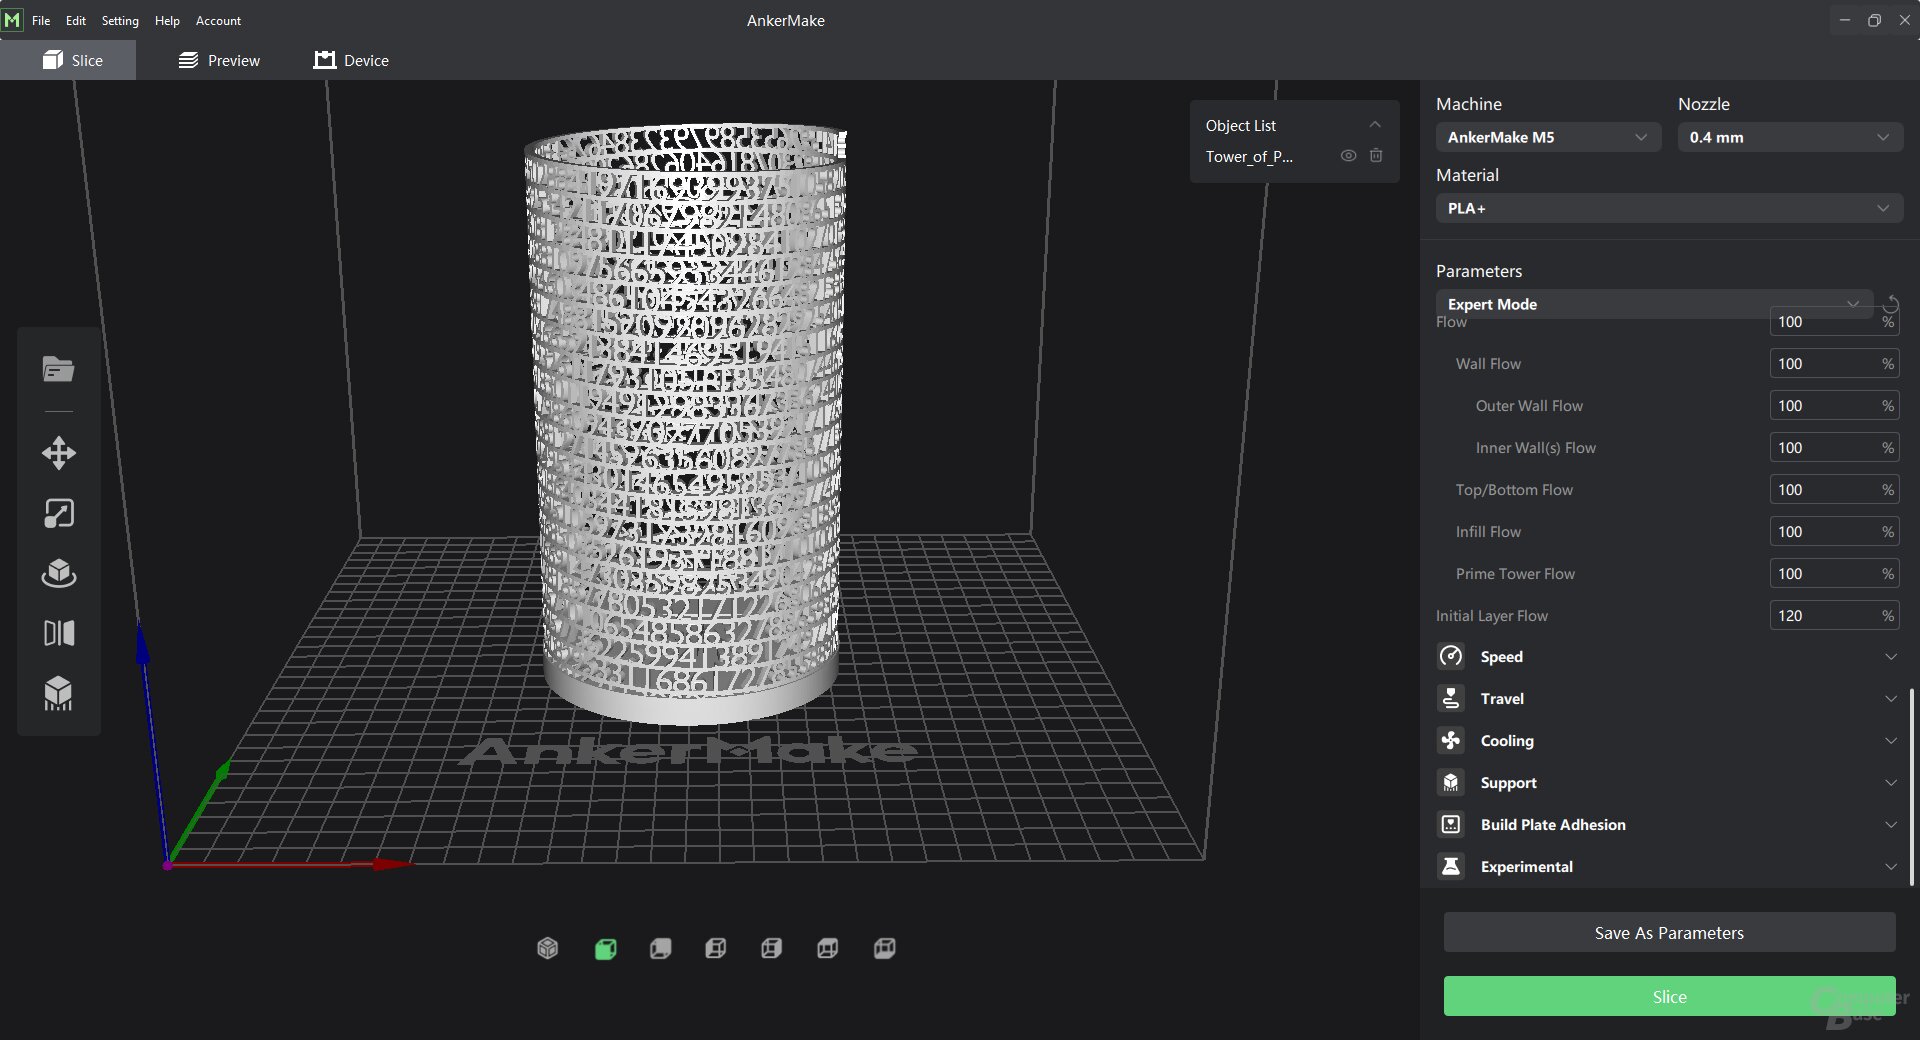
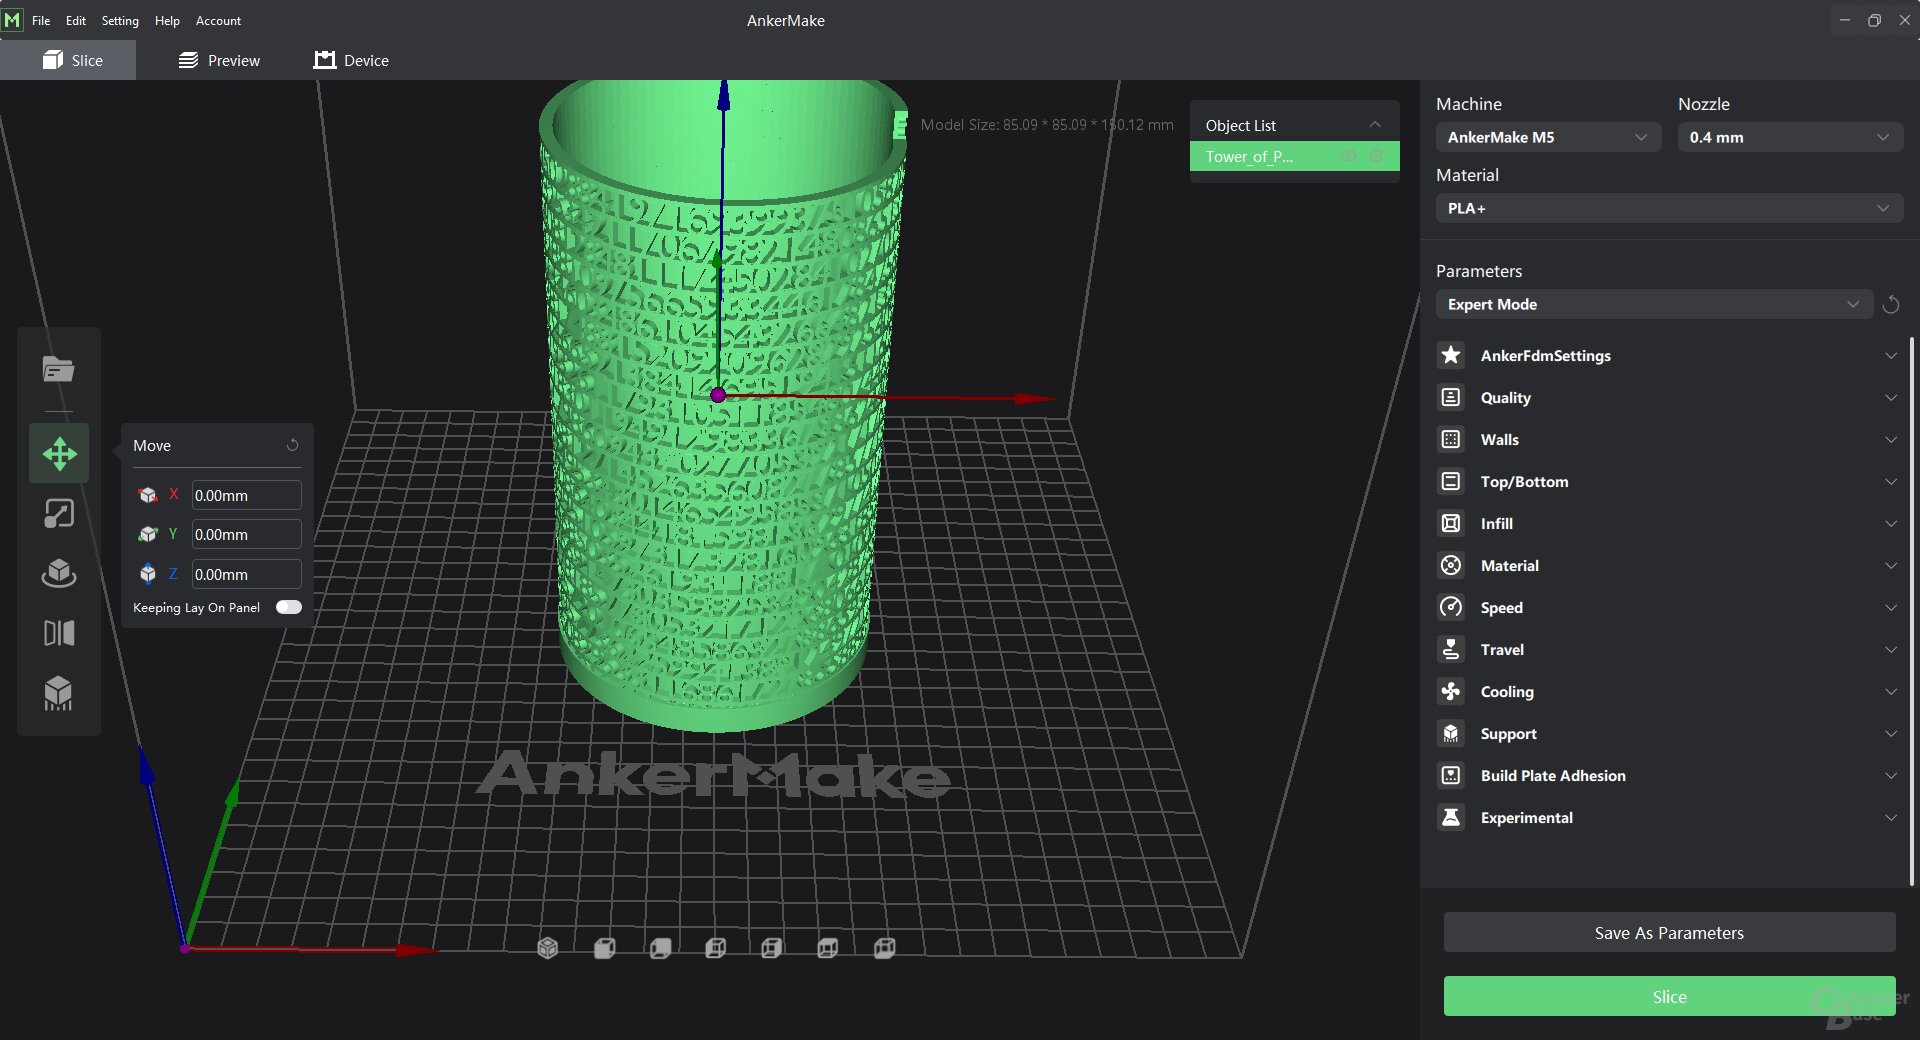
In order to be able to print at all, you need a suitable one 3D printing plan of a 3D model. This is created with a slicer, which breaks down the model into individual layers, which are then processed by the printer – as optimally as possible.
The AnkerMake slicer is based on the well-known Cura slicer software, but uses a specially developed interface and comes with the right printer profile for the AnkerMake M5 directly – without one with defined printer parameters, the software and printer are useless. The AnkerMake slicer was available in the test for Windows, but should also appear for macOS.
-
 AnkerMake Slicer for the M5
Image 1 of 9
AnkerMake slicer for the M5
Since it is based on Cura, it offers all the functions known from the established slicer and gives the user the choice of how deep they want to delve into the matter of the print settings. You can be content with choosing a predefined profile as the quality level or delve into the depths of the material and pressure settings to adjust the speeds, wall thicknesses, the infill including the pattern, the support structure in detail and numerous other optimizations yourself. If you want to optimally adjust your printer to the material used, you will find it here. So Anker's choice of Cura is a good choice.
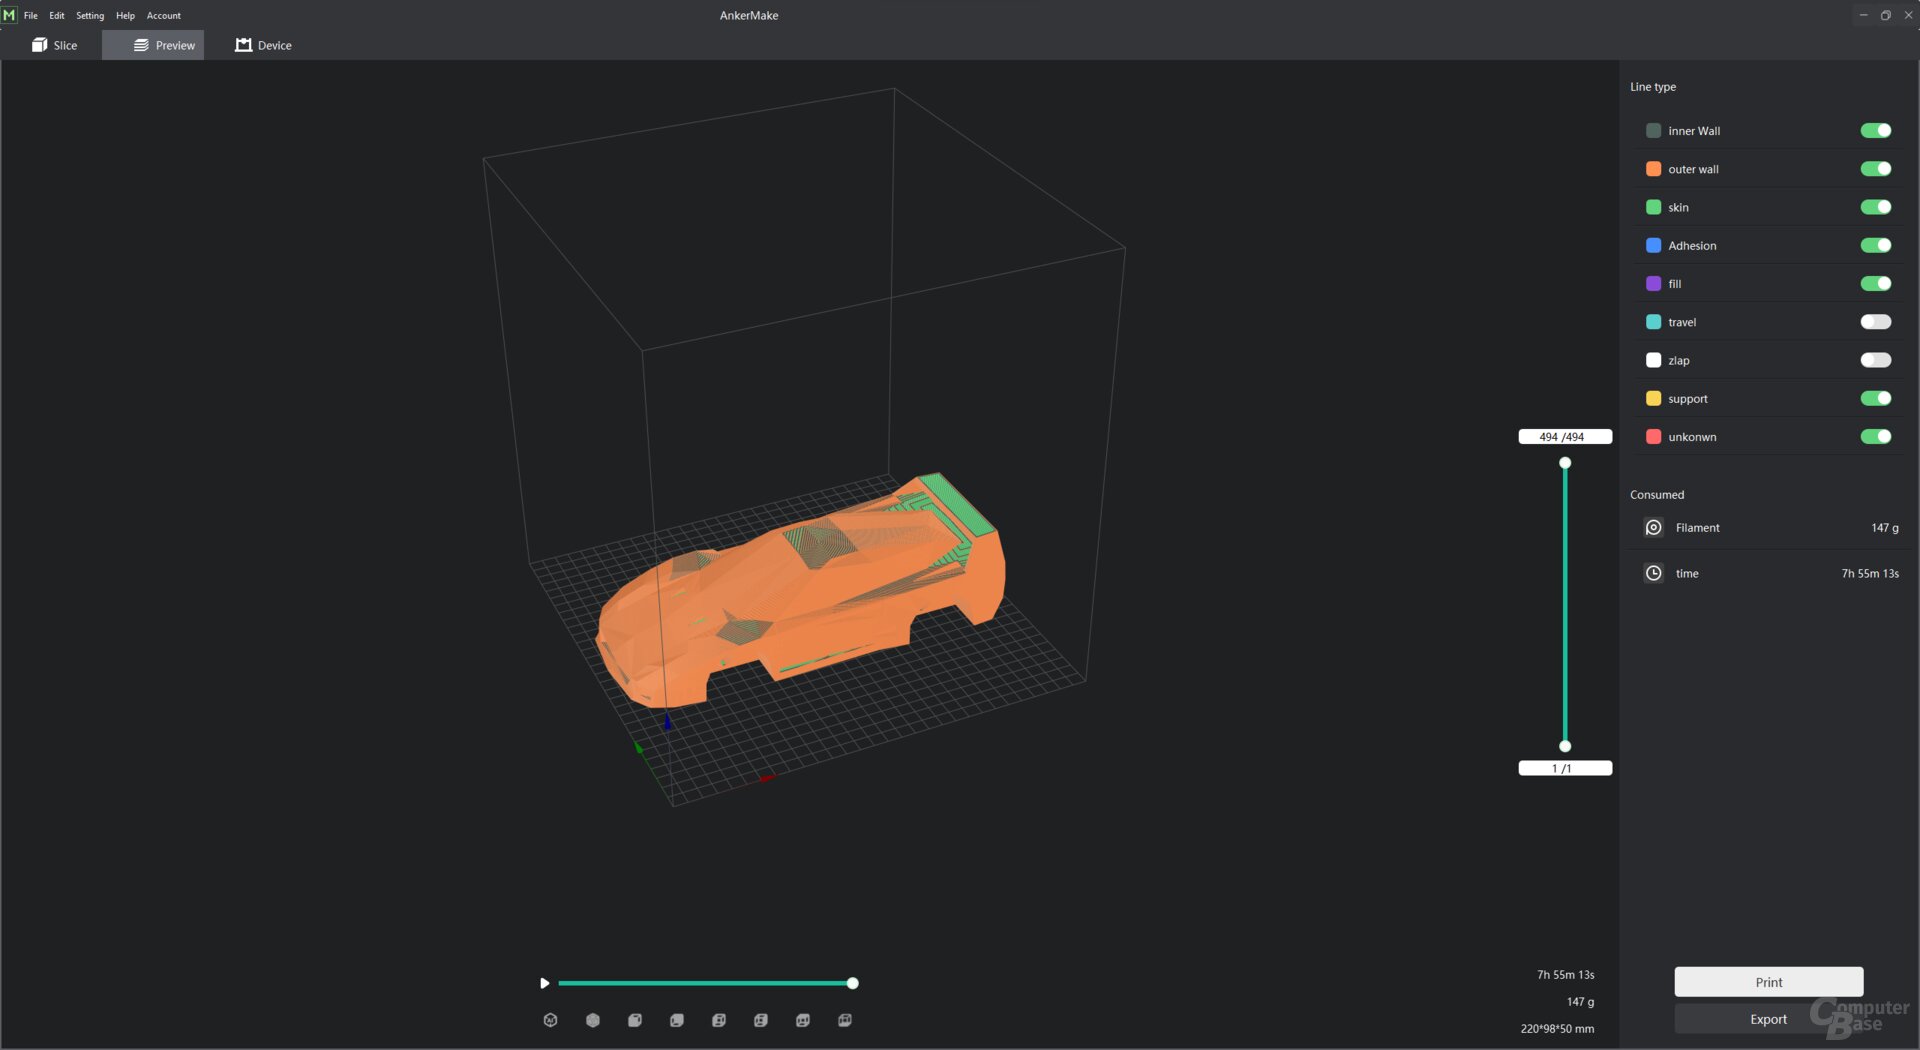
After the profile has been selected and, if necessary, the settings and alignment of the model have been adjusted, the slicing process can be carried out and the print plan can be checked. Any areas that still require support can, at best, be found before the print fails.
If you log into the software with your AnkerMake account, access the If the printer is also registered, it is displayed in an additional tab. At the time of the test, this only worked if the USA was selected as the region in the smartphone app, otherwise the printer was not found by the slicer.
- < figure class="gallery__figure">
 AnkerMake Slicer for the M5
Figure 1 of 5
 < /figure>
AnkerMake slicer for the M5
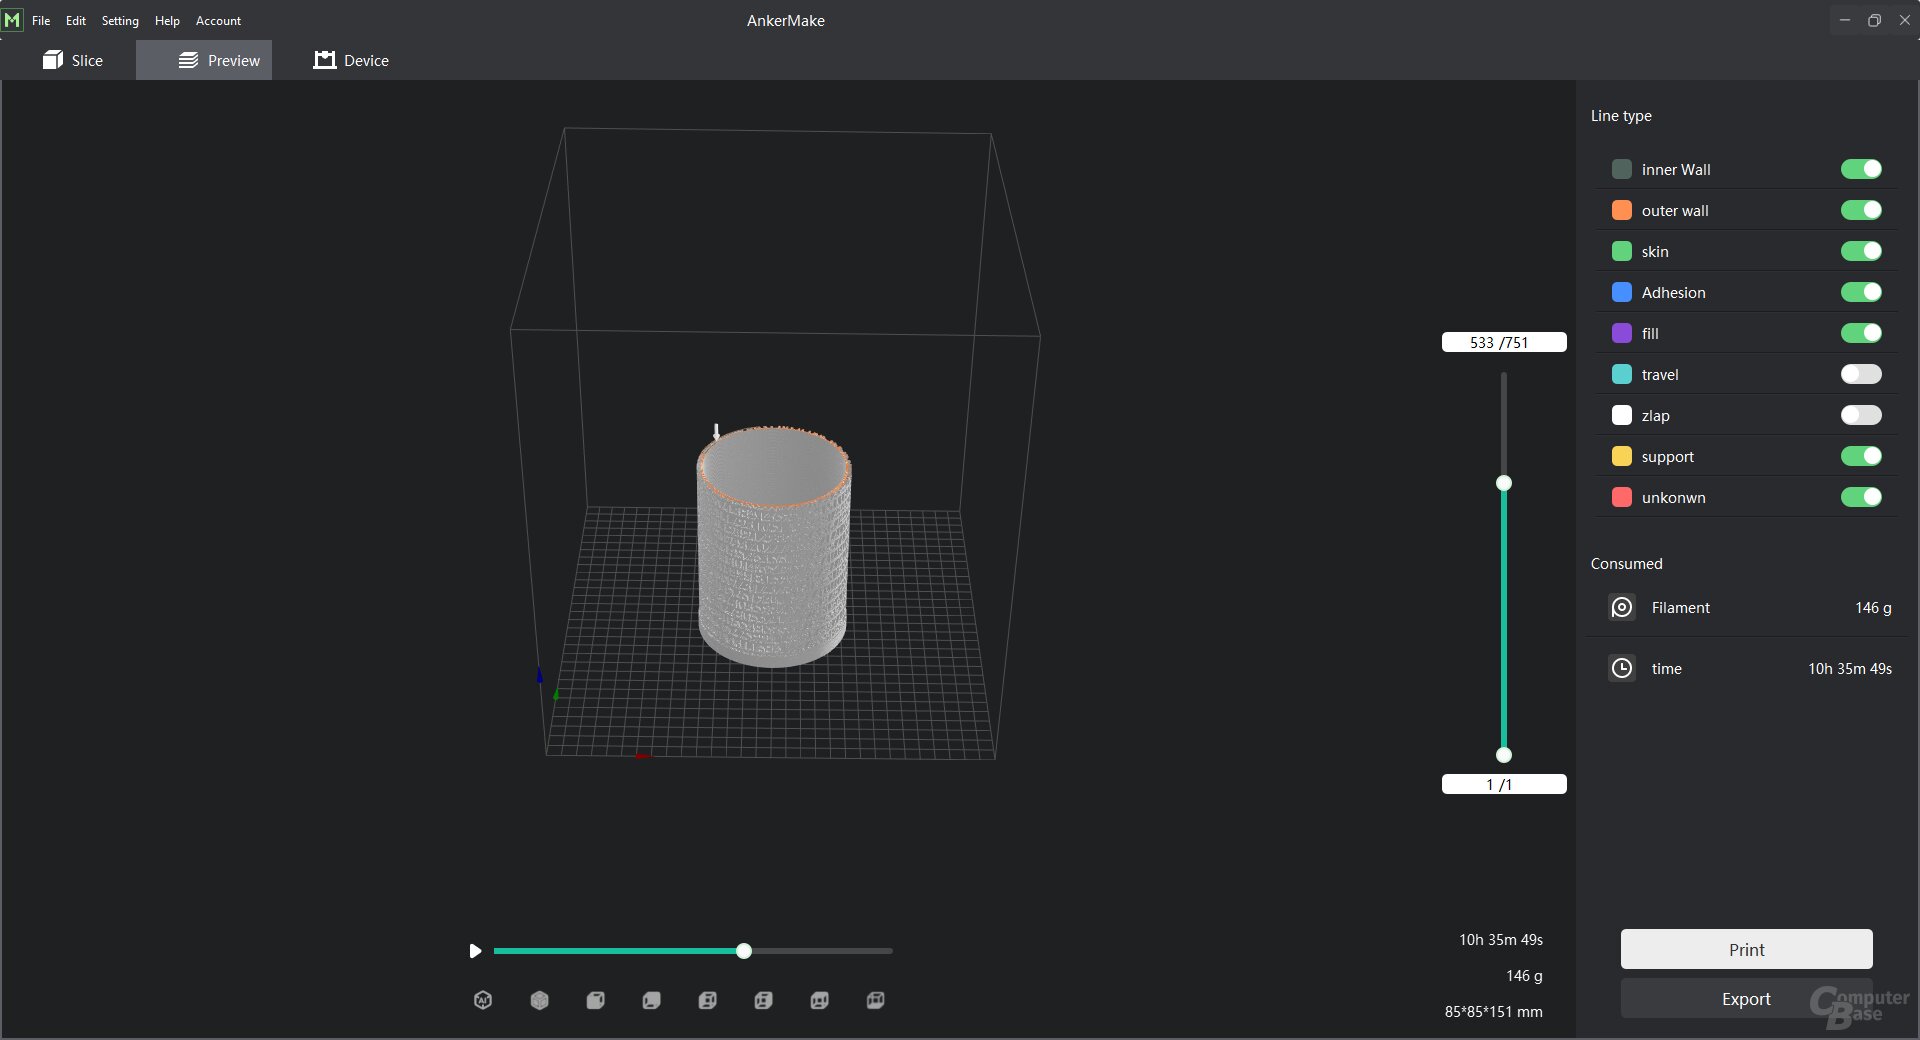
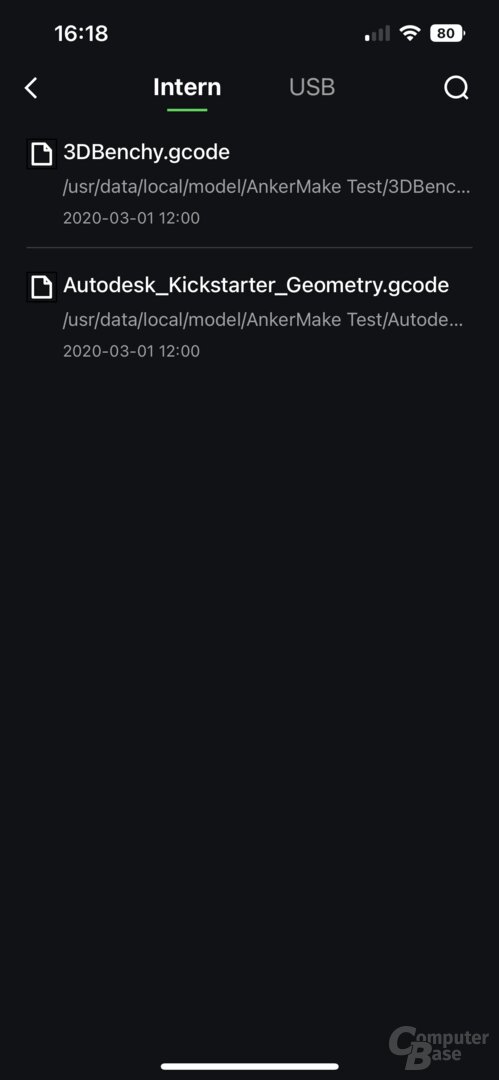
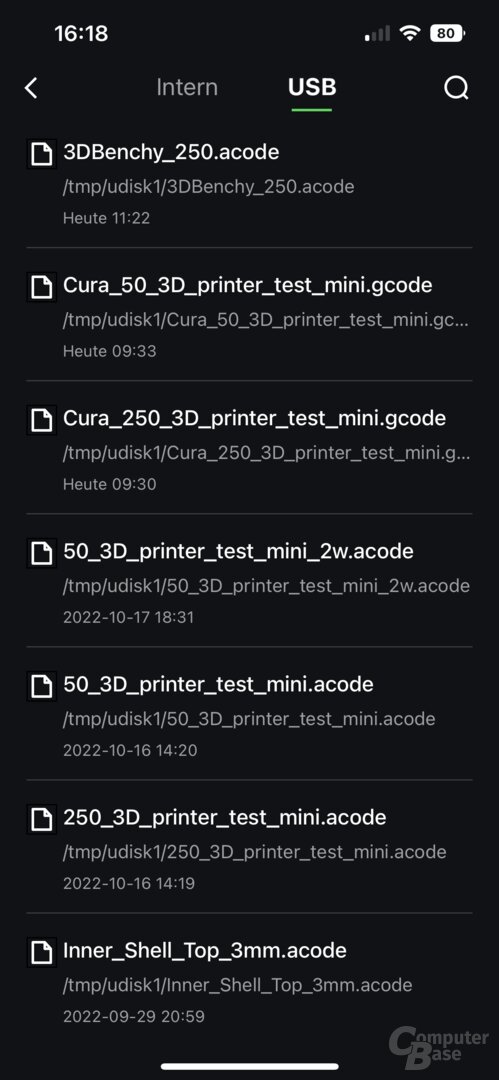
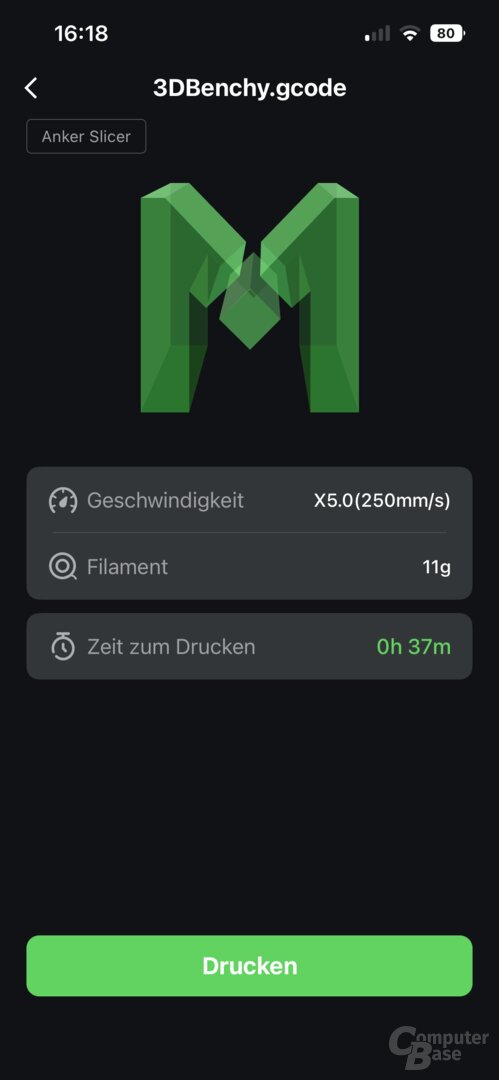
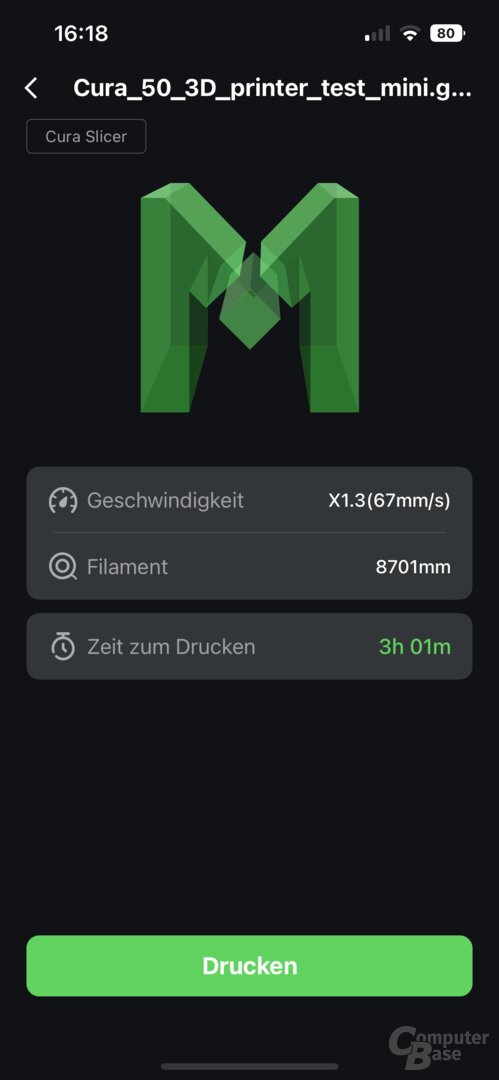
< p class="p text-width">After slicing, print models can be sent directly from the software to the M5 to start printing. Alternatively, the file (*.acode) can also be saved locally or on a storage medium in order to then print it via the USB-C port of the M5.
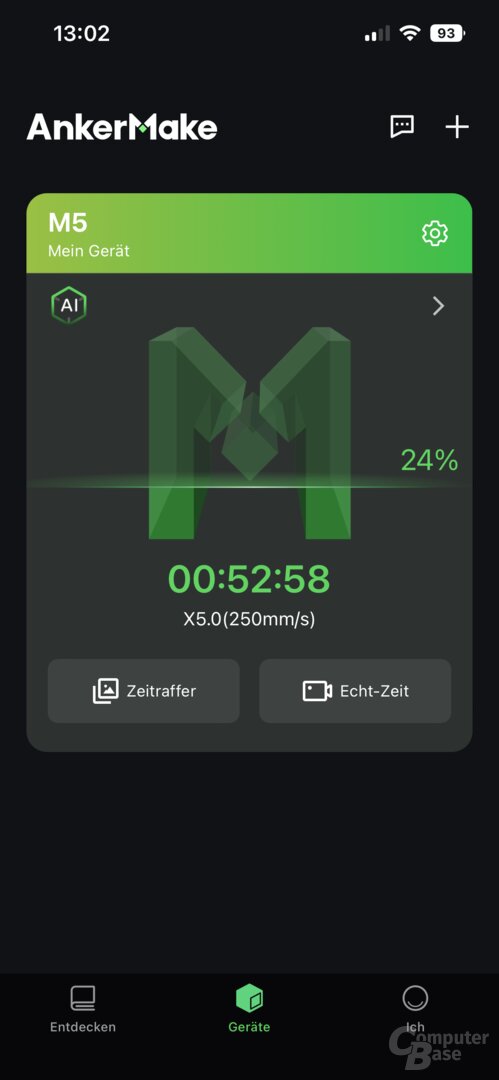
During the printing process, not only can the progress of the print be tracked using percentage values, but the print can also be paused or stopped at any time from the slicer software. If the temperatures are to be adjusted during printing, this is also possible. For example, if a model is to be printed in different materials, this can be done quickly without having to send the model through the slicer again. The connection between the slicer and the printer will be restored and the progress updated even if the slicer is exited or the PC is restarted.
However, the time-lapse videos cannot be called up in the AnkerMake slicer and there is only a live view in the smartphone app. So there is still potential here to expand and adjust the range of functions.
Cura can also be used
With the right profile, Cura can also be used with the AnkerMake M5 without any problems, as the AnkerMake slicer is based on it. ComputerBase tried this out in the test with a provided profile, the results are unsurprisingly identical. However, it must be noted that with Cura neither error detection can be used, nor can the print model be wirelessly transferred to the M5 or the print can be started. Also pausing, stopping and adjusting the temperature via the slicer is not possible when using Cura instead of the AnkerMake slicer.
The slicers Simplify 3D and PrusaSlicer can be used with provided Profiles can also be used with the same restrictions.
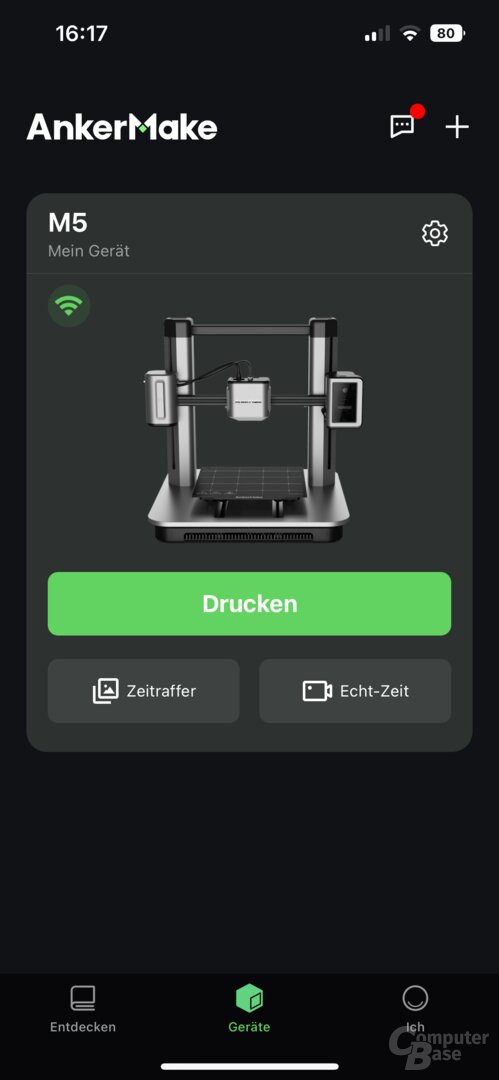
The AnkerMake smartphone app
With the AnkerMake app for Android and iOS, not only can a live image from the camera be displayed and the time-lapse video displayed and downloaded, but the print itself can also be started, provided the appropriate 3D model is on a connected USB storage device and the correct filament is already inserted. The expected printing time is also displayed in the app. However, the app does not show a preview of the model that will be printed.
During printing, the app shows the progress as a percentage and the remaining printing time. A very useful feature for larger or slower prints. In the future, Anker could add a still image from the camera in the background that is updated every minute, for example, instead of the AnkerMake logo, so that you can see at a glance how far the print is complete and whether there are any obvious problems such as spaghetti formation.< /p>
-
 AnchorMake app for M5 3D printer
Image 1 of 24
 < /figure>


AnkerMake app for M5 3D printer
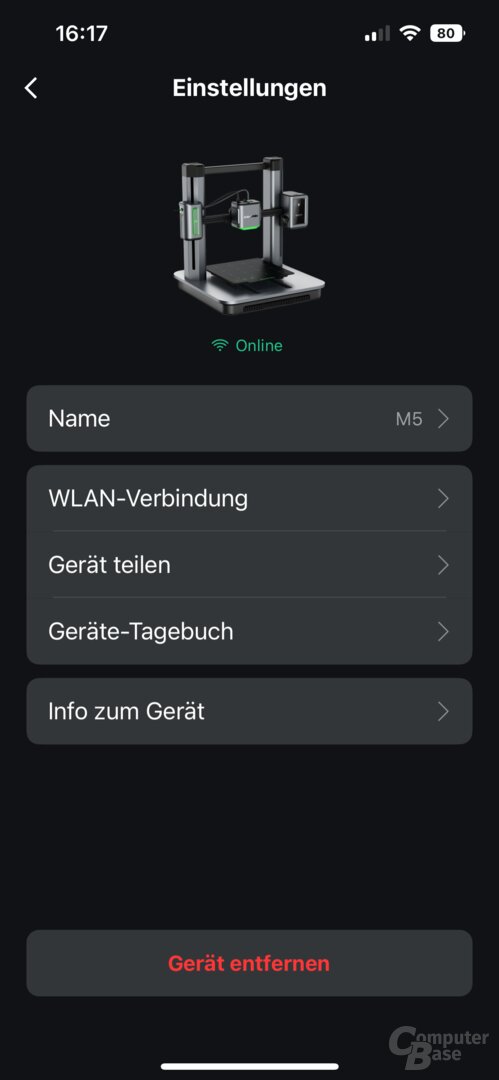
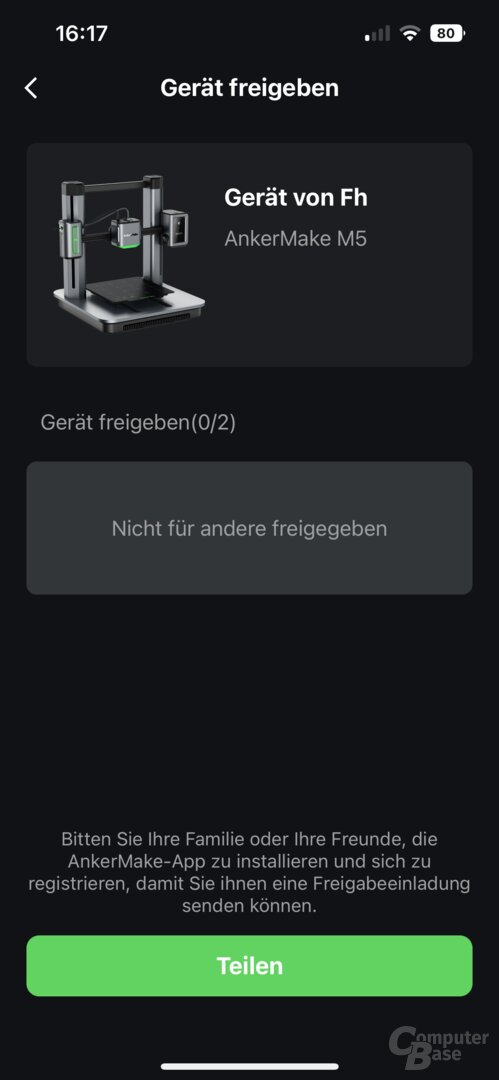
The app can also be used to configure a new WLAN at any time and share access to the printer with others. A device diary shows which model was printed and when, and the message center can be used to see when a print was finished and any anomalies found during the print.
Moving the 3D models from the internal memory to the USB memory or vice versa is currently not possible via the app or the M5's display. Videos can also only be downloaded via the app and cannot be saved or copied directly to a USB stick.
As mentioned, when the print is complete, the user is informed of this by notification on their smartphone. However, what the app lacks is an option to turn off the printer remotely. In this way, the approximately 10 watts of basic consumption of the activated AnkerMake M5 can be saved when the print is finished but you are not nearby to switch off the printer.
However, the app is not a mobile slicer. It is unlikely that such a function will come in the near future, because Cura would first have to be available on mobile devices. Such efforts already exist, but have not yet been completed.
Printing experiences with the M5 in practice
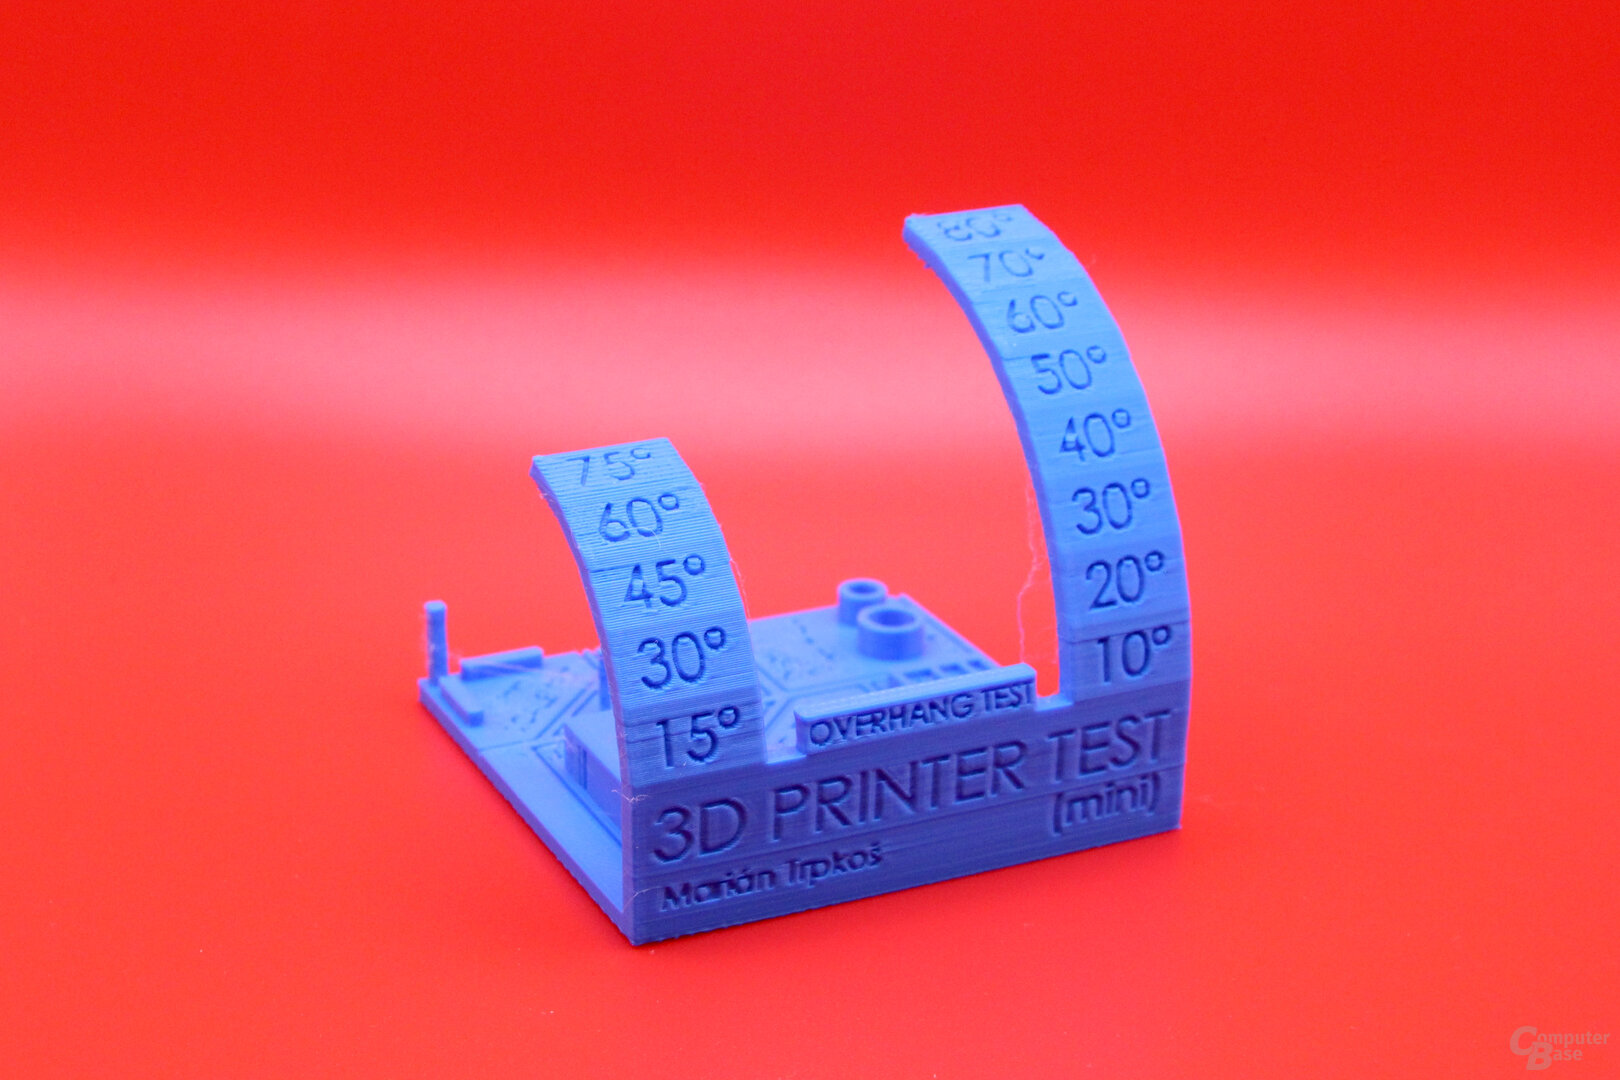
The M5 slows down with critical overhangs
During the test and the comparison with the Creality Ender 3 S1 Pro, an interesting behavior of the AnkerMake M5 became apparent: With critical overhangs of more than 50 degrees, which usually require a support structure, the printing speed is significantly reduced in order to achieve a clean result, where the overhang does not collapse. The appropriate setting can be found in the AnkerMake Slicer and in Cura in the experimental settings. However, it makes an enormous difference with overhangs, which otherwise cannot always be printed so cleanly.
This option is also available for other printers in Cura, it is actively used by default, for example, with the Ender 3 S1 Pro, but not even at the highest speed.
In addition, as always, the advertised 250 mm/s are not implemented in all printing steps, but are adjusted according to the selected maximum speed in the slicer app, as is the case with other 3D printers, just at a lower one Level. For example, outer walls are printed at 150 mm/s, the first layer at 125 mm/s, but infill and inner walls at 250 mm/s.
The following time-lapse recording shows the AnkerMake M5 and the Creality Ender 3 S1 Pro, both of which work with a preset print speed of 50 mm/s. The AnkerMake M5 finishes faster and prints cleaner due to higher acceleration values.
Filament detection reveals design weakness
The filament detection provided reliable information in the test when the filament was empty – this should rarely occur in everyday life, in the test it was deliberately provoked with a cut filament. The print then pauses automatically and the user can hang in new filament. In this point, however, the design reveals a disadvantage. The detection triggers reliably and you can cancel or continue the print, but the remaining filament cannot be easily retrieved from the M5. Retracting doesn't work to get the missing end out far enough to grab and pull back. A new filament can be added, but it must then be pushed seamlessly until it reaches the extruder, i.e. through the entire hose – before that it is not automatically fed, since it is a direct extruder at the hot end sits. Alternatively, you can grab the tool and loosen the hose on the print head to pull out the old filament.
 AnkerMake M5: Filament detection and print head are connected with a tube
ABS without an enclosure is a challenge
The AnkerMake M5 can print ABS if you choose a suitable material that can be printed without problems at less than 260 °C. However, it cannot print all types of ABS, the hotend does not get hot enough for that.
In addition, like most models, the 3D printer is delivered without a housing and Anker does not offer a suitable one either. Here the buyer must either choose a suitable model from other manufacturers or build something himself. The lack of an enclosure makes printing with ABS even more difficult, as without a heat-trapping enclosure, depending on the model, preventing the material from shrinking at different rates can be an almost impossible challenge. An ambient temperature of 45 to 50 °C is very helpful when printing with ABS, but is never reached in an open structure.
Even with an enclosure, it's not easy to prevent warping with the Creality Ender 3 S1 Pro on larger models. Depending on the model, this requires numerous adjustments before it succeeds. For smaller ABS prints, a brim, i.e. a wider base layer, is mandatory on the M5 to keep the edges on the print bed. A thicker raft can also help with larger models. Pressure-sensitive adhesives on the print bed are also a welcome aid. In addition, the printing speed should be reduced if there are problems. Another major influencing factor is the proportion of infill, because the more material there is in the model, the greater the stresses that form as a result of different cooling. The pattern of the infill also plays a role, because long straight lines create more tension than a zigzag pattern or a honeycomb structure of the infill. However, these issues are not unique to the M5. The correct printing with ABS is one of the areas where the learning curve in terms of 3D printing is still extremely steep and you use a lot of material initially.
Noisy fans are always running
If you print PLA with the M5, for example, with the cooling running at 100 percent, the printer fans get loud – and also significantly louder than with the Creality Ender 3 S1 Pro. The AnkerMake M5 is therefore not suitable for the living room and – like other 3D printers – must be operated in an otherwise unused place. In the test, around 65 dB are measured from a distance of 30 cm.
The fans also rotate before and after printing is complete, albeit at a reduced speed. However, when the components have cooled down, they could switch off in these cases.
Camera angle not always optimal
The set camera angle on the right arm of the M5 proves to be less than optimal on smaller, flatter models, as more than half of the image is occupied by the base and the print bed. With taller models, however, as the Z-axis moves up, the model then takes up most of the space in the image. It is therefore difficult to make a general statement as to whether this is to be criticized, since it depends on the printed model. An angle-adjusting camera would be an option, but unnecessarily expensive in everyday life.
- < figure class="gallery__figure">
 AnchorMake app for the M5 3D printer
Image 1 of 2
 AnkerMake app for the M5 3D printer
The print quality of the AnkerMake M5
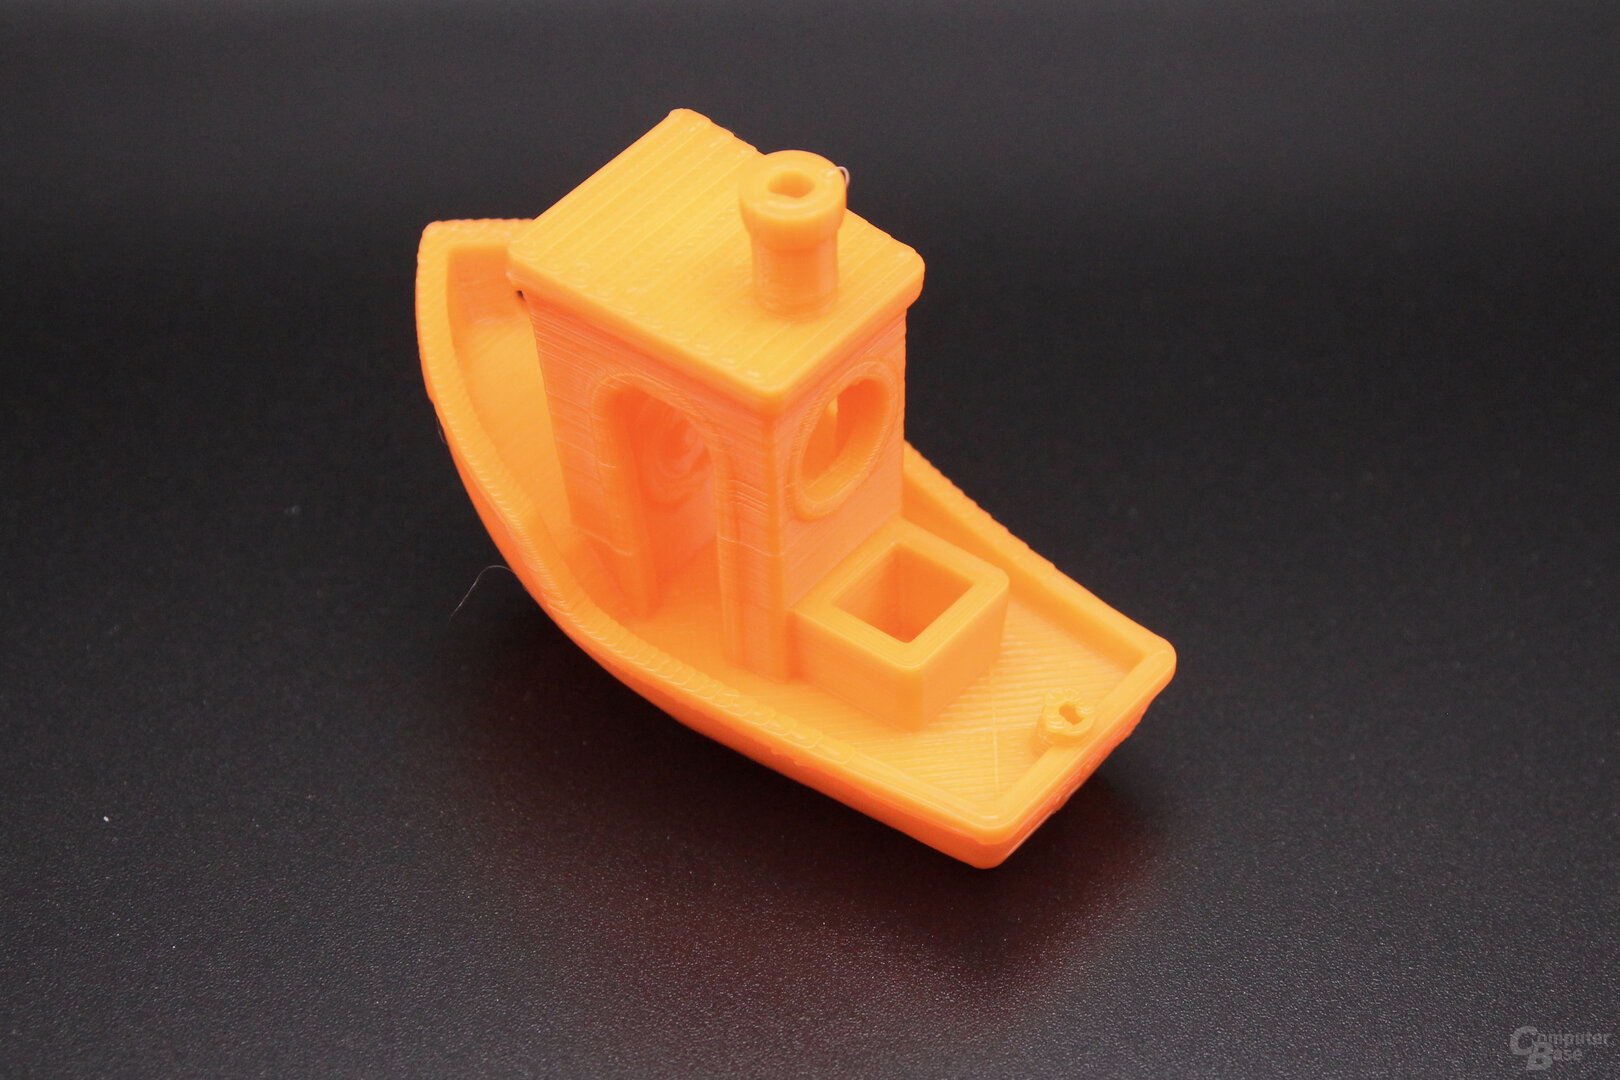
3DBenchy and Autodesk x Kickstarter Geometry
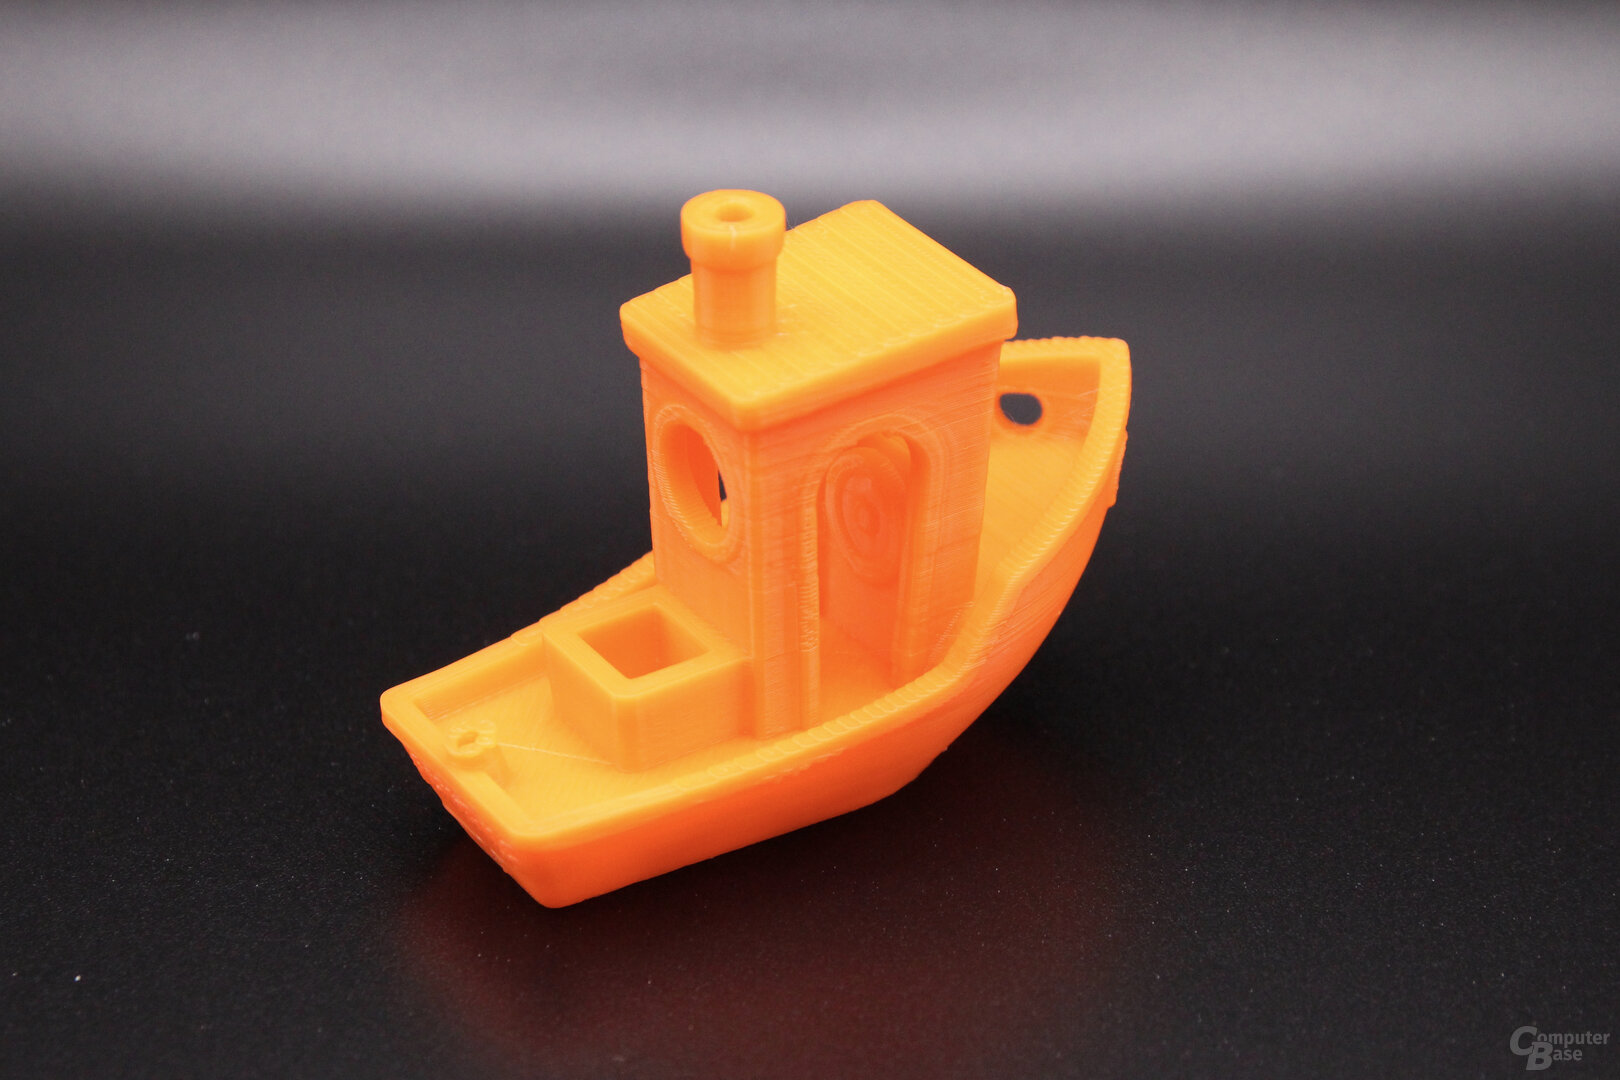
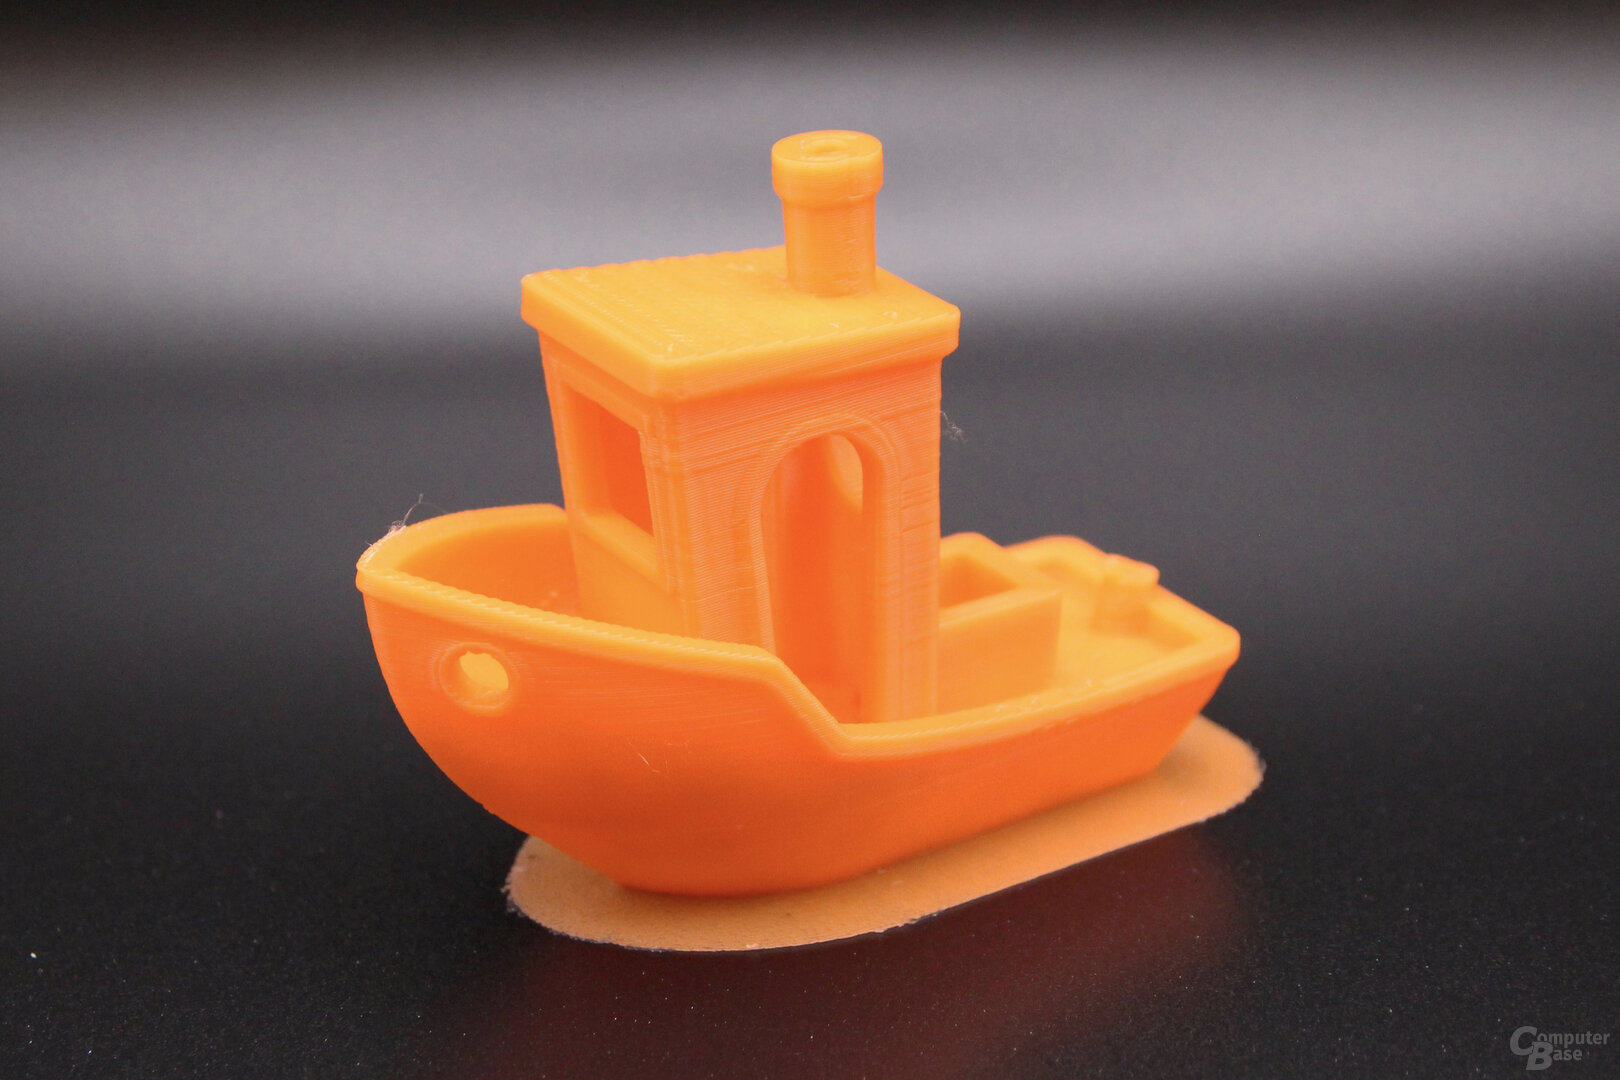
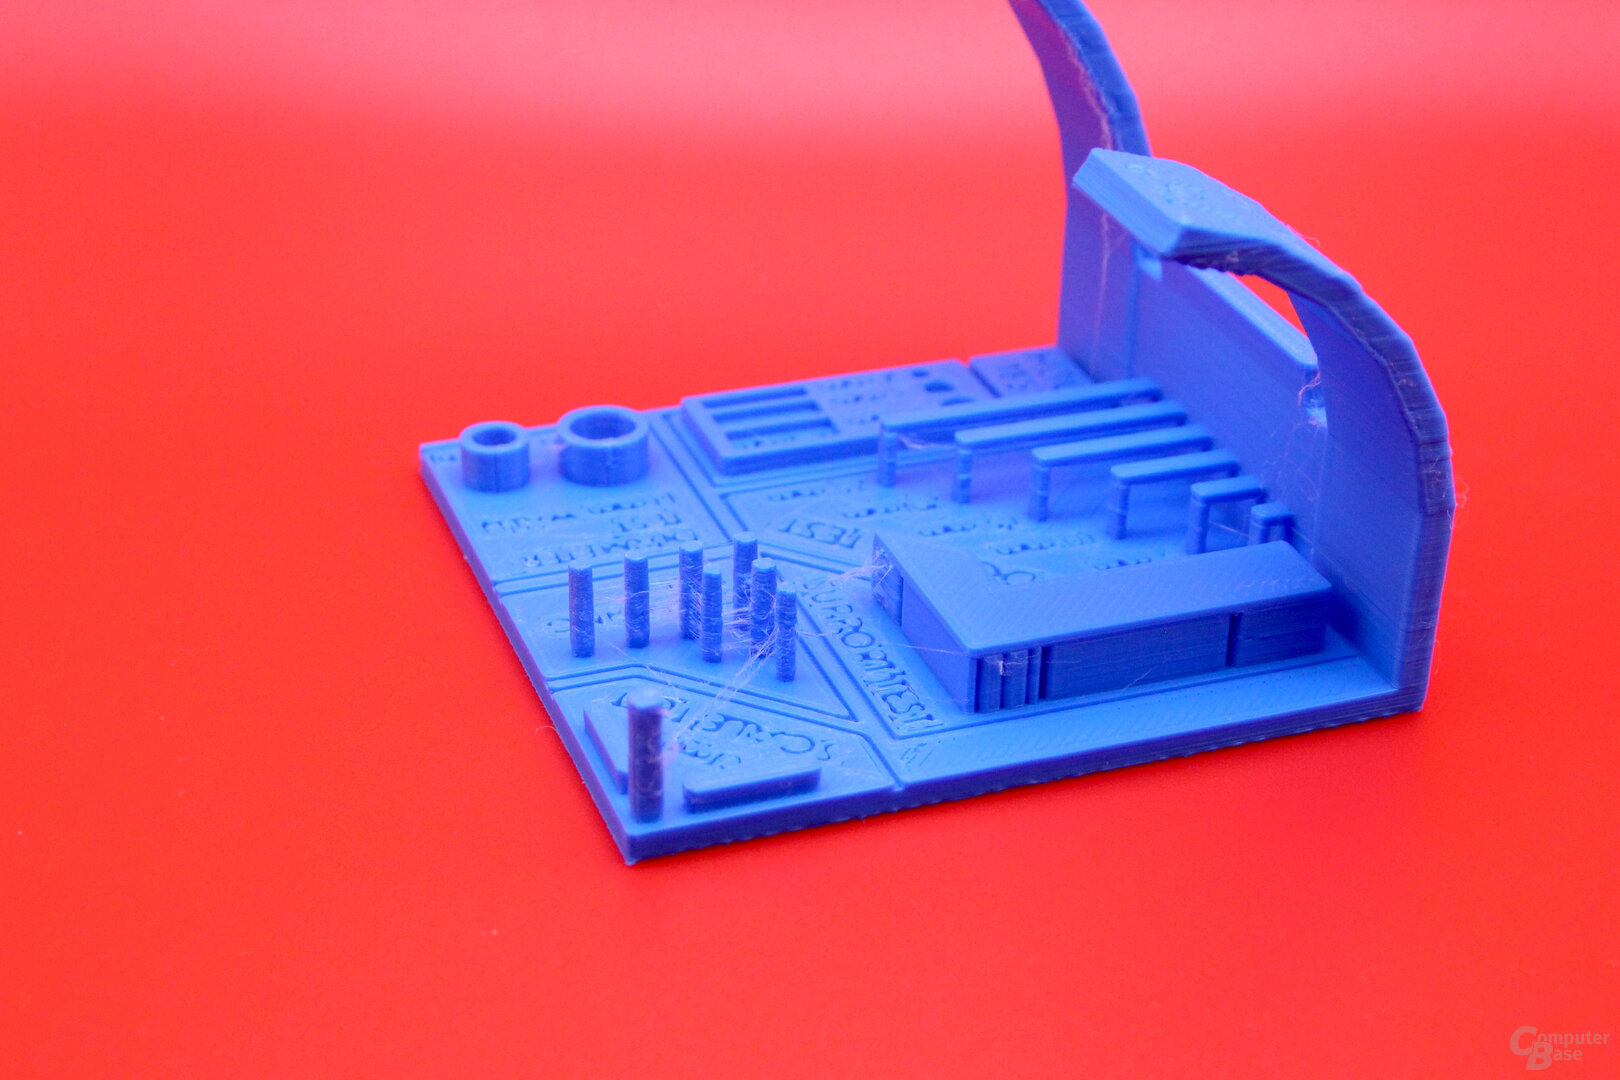
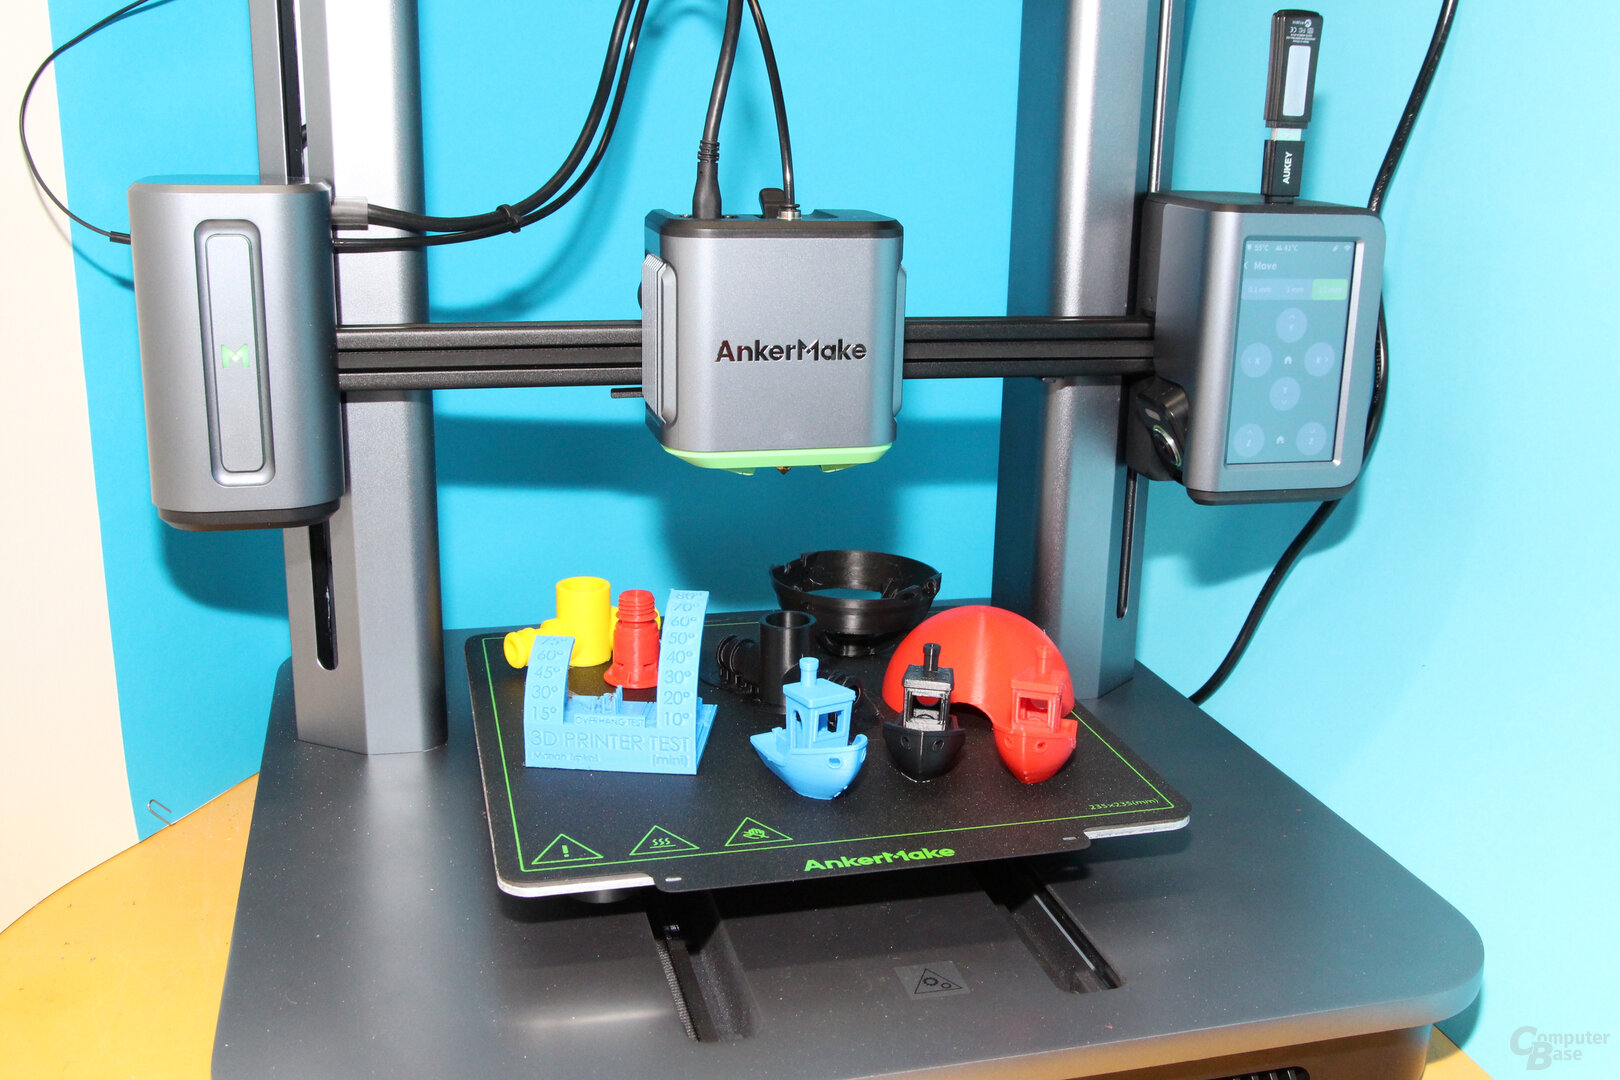
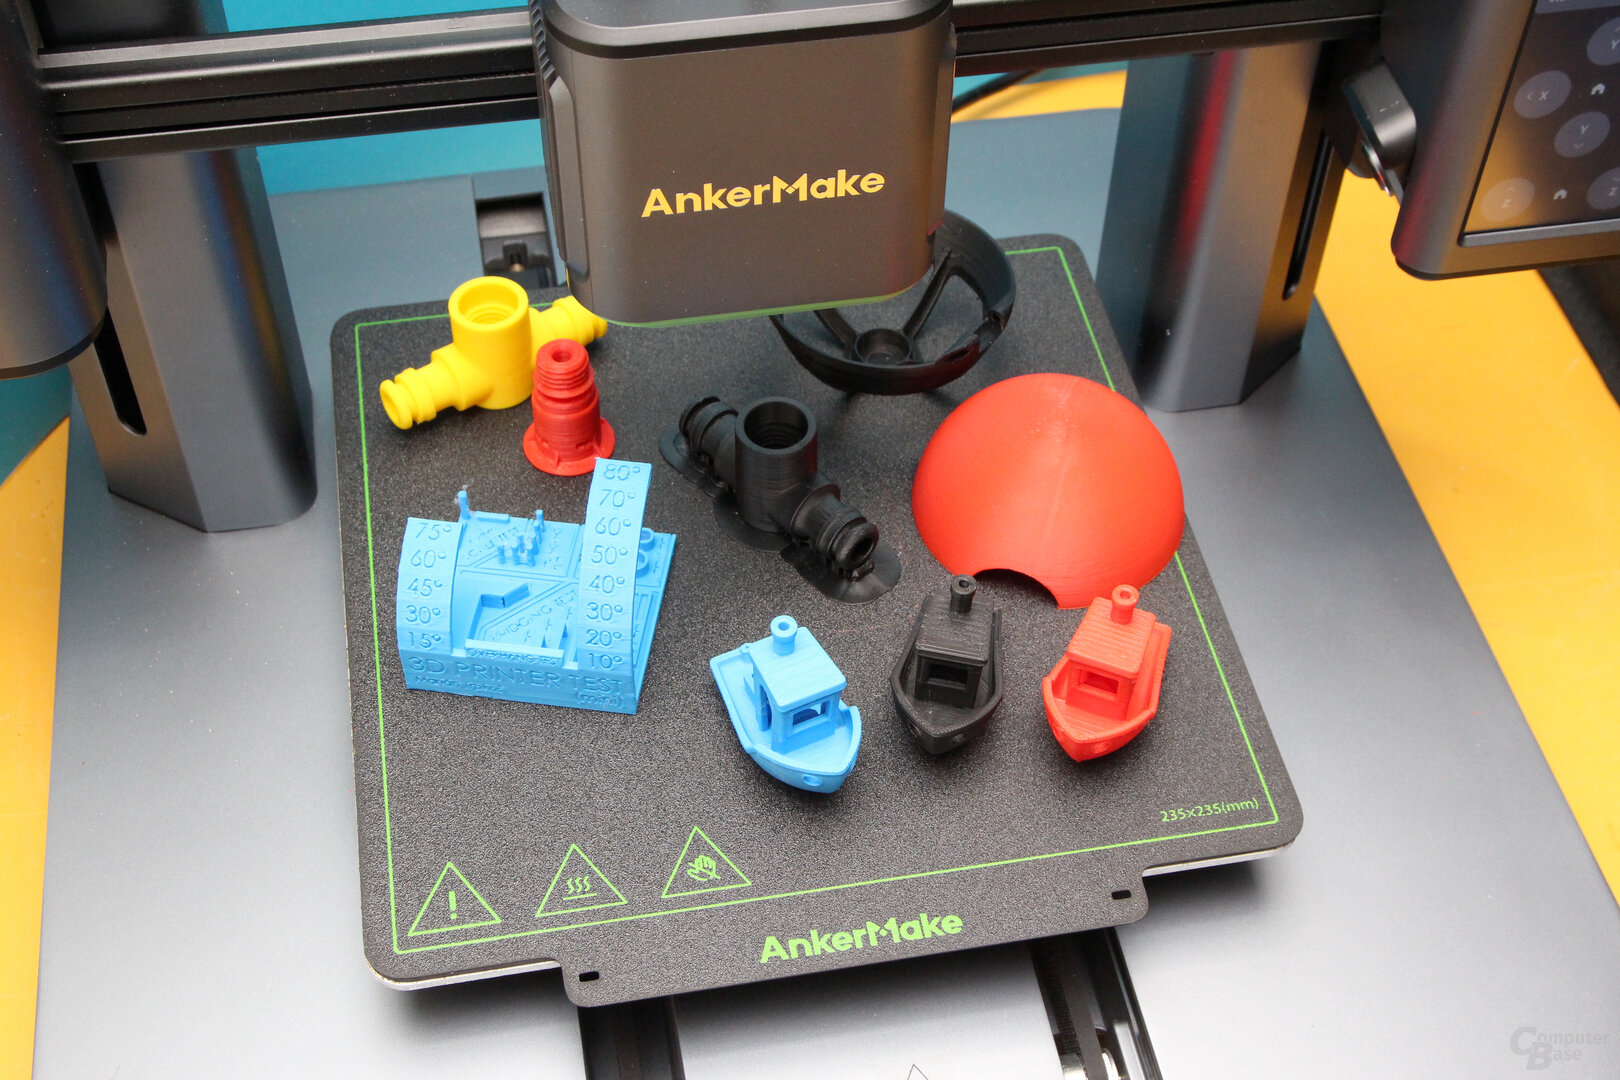
To assess the print quality, the well-known 3DBenchy was used, among other things, which was printed on the AnkerMake M5 and the Creality Ender 3 S1 Pro with identical filament and their respective preset standard values for the profiles – i.e. with 0.2 mm accuracy and with the M5 with 250 mm/s or with the Ender 3 S1 Pro with 50 mm/s. The Ender 3 S1 Pro was also allowed to try its maximum speed of 150 mm/s. In addition, the Autodesk x Kickstarter FDM 3D Printer Geometry Assessment was used, which is intended to enable a standardized quality assessment for 3D printers.
- < figure class="gallery__figure">
 3DBenchy: Printed with AnkerMake M5 (250mm/s)
image 1 of 8
3DBenchy: Printed with AnkerMake M5 (250mm/s)
So it's primarily a question of assessing the print quality that buyers will get without spending hours tweaking, because many users of the M5 would certainly like to avoid such escapades.
Better prints even at full speed
The result: In terms of print quality, the AnkerMake M5 can not only easily compete with slower 3D printers such as the Creality Ender 3 S1 Pro, but even easily surpasses them in many respects. An excellent result is achieved not only for a “bed pusher”, as printers with a moving bed are often called pejoratively, which in the case of the 3DBenchy is even achieved in a printing time of only around 40 minutes.
 Test model: Printed with AnkerMake M5 (250 mm/s)
 Test model: Printed with Creality Ender 3 S1 Pro (150 mm/s)
-
 Test model: Printed with AnkerMake M5 (250 mm/s)
Image 1 of 9
 Test model: Printed with AnkerMake M5 (250 mm/s)
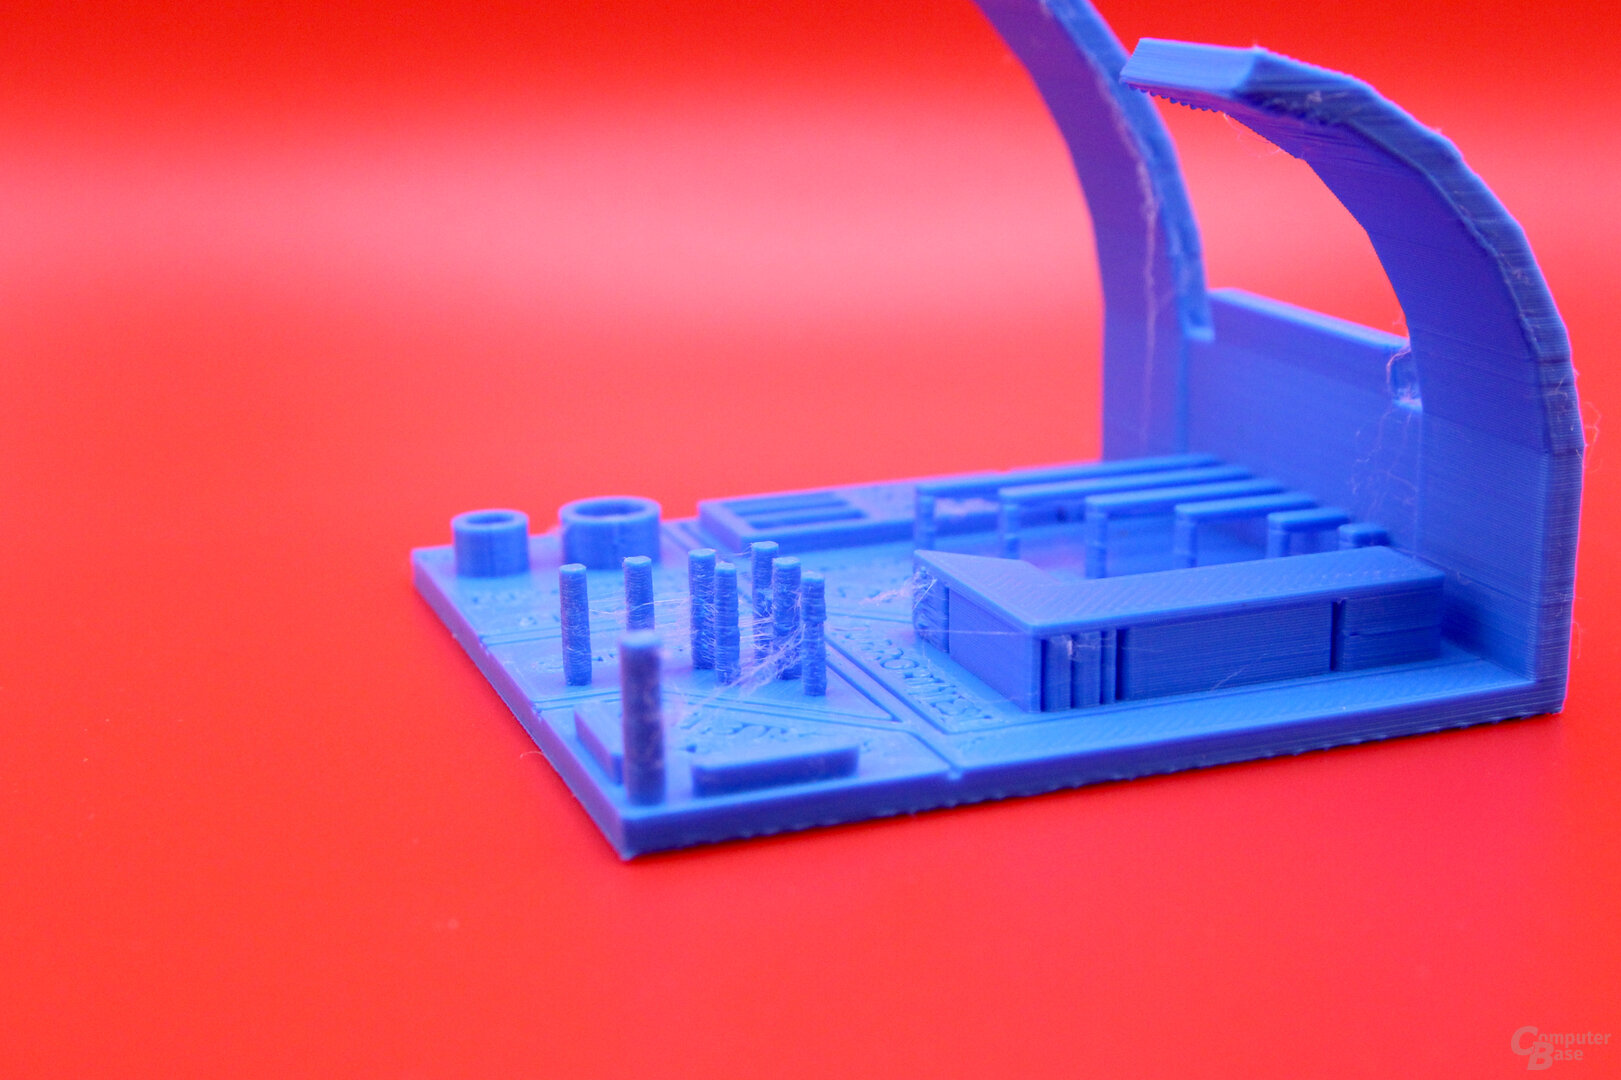 Test model: Printed with AnkerMake M5 (250mm/s)
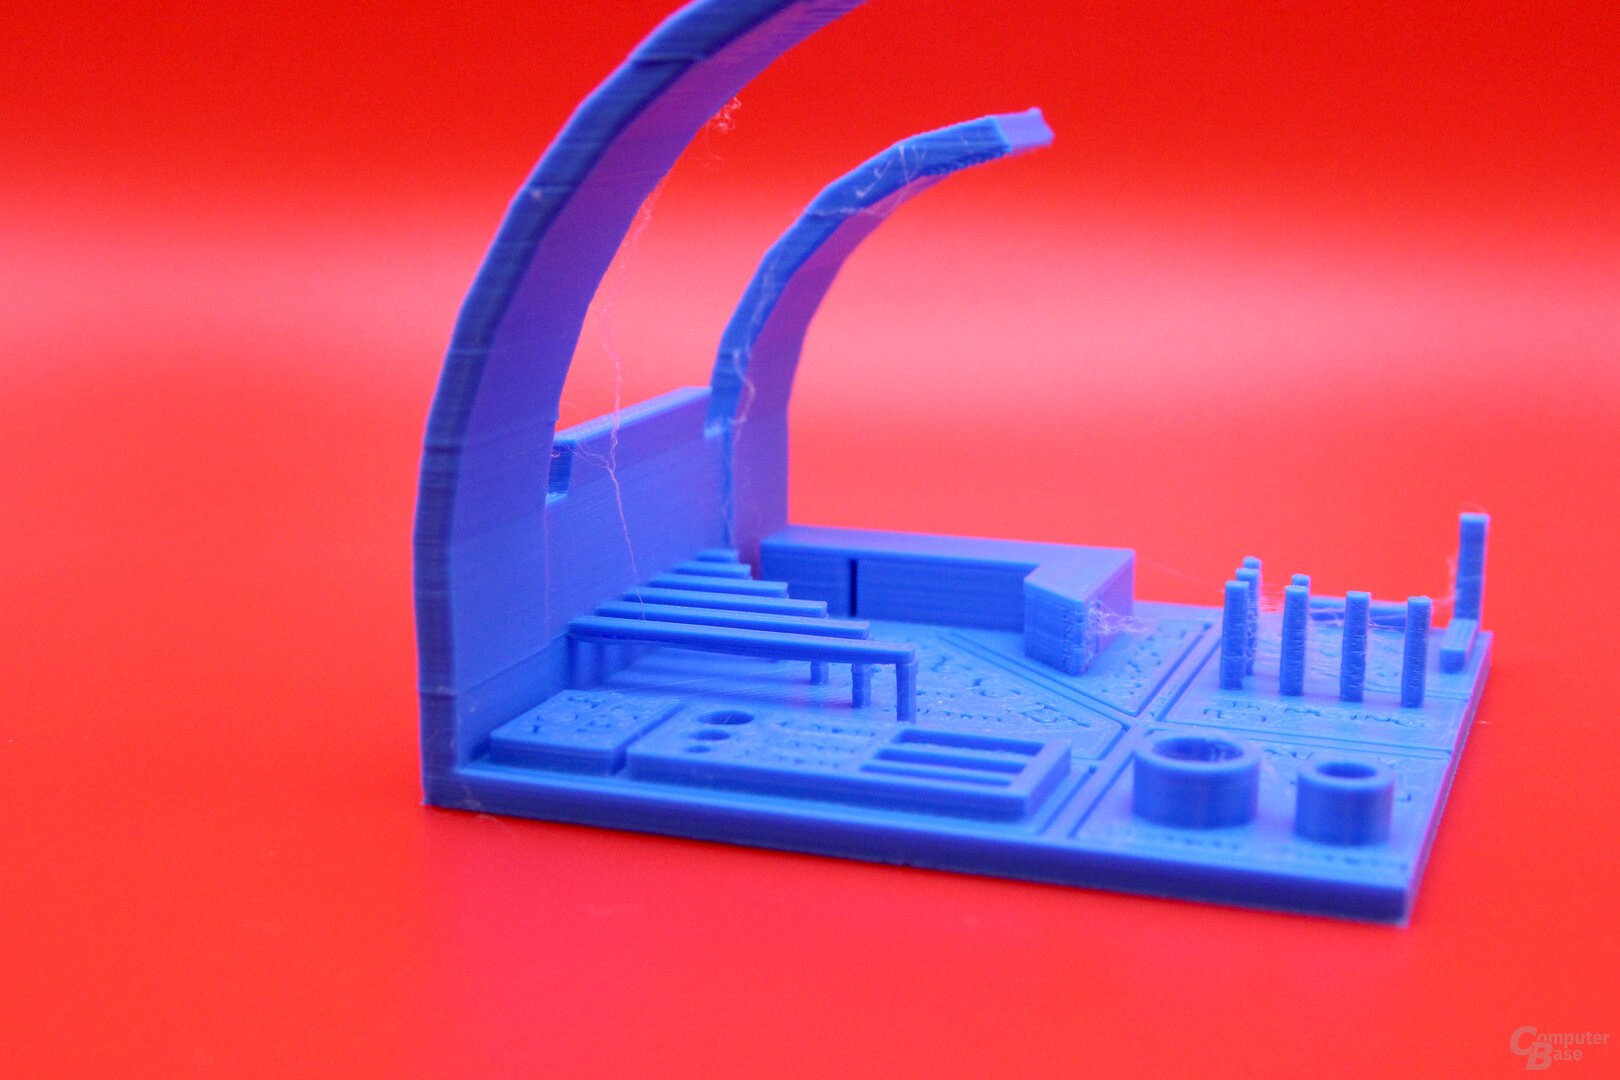 Test model: Printed with AnkerMake M5 (250 mm/s)
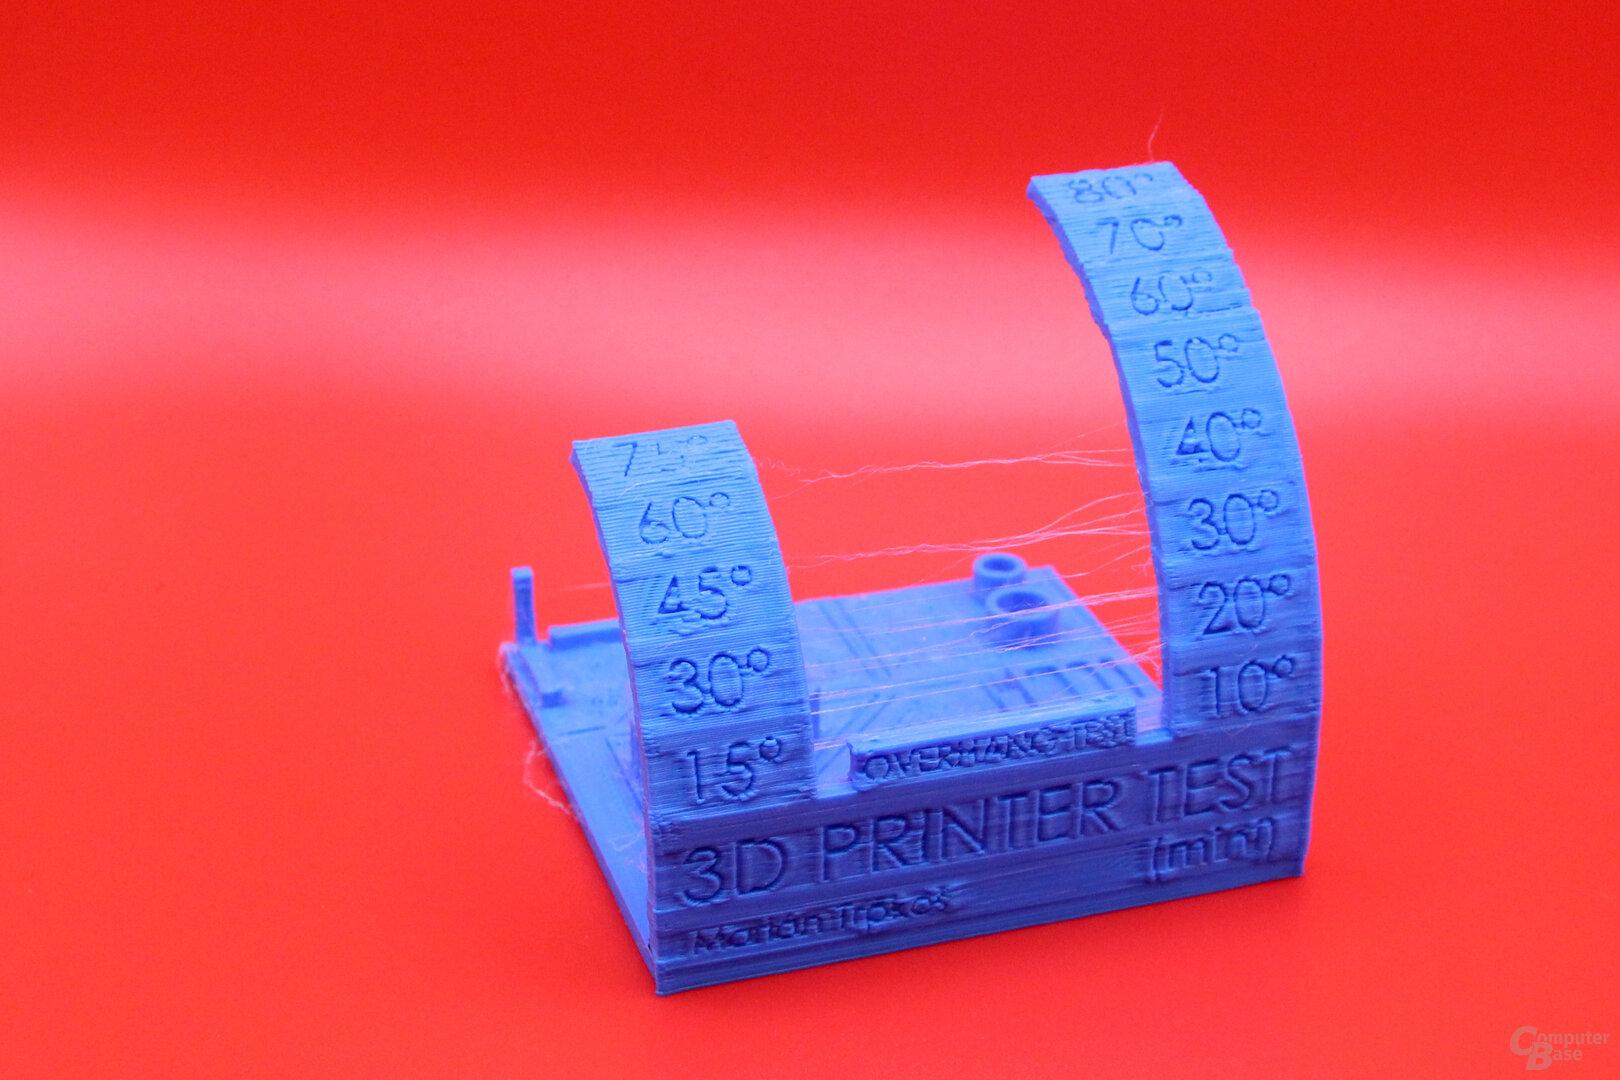 Test model: Printed with Creality Ender 3 S1 Pro (150 mm/s)
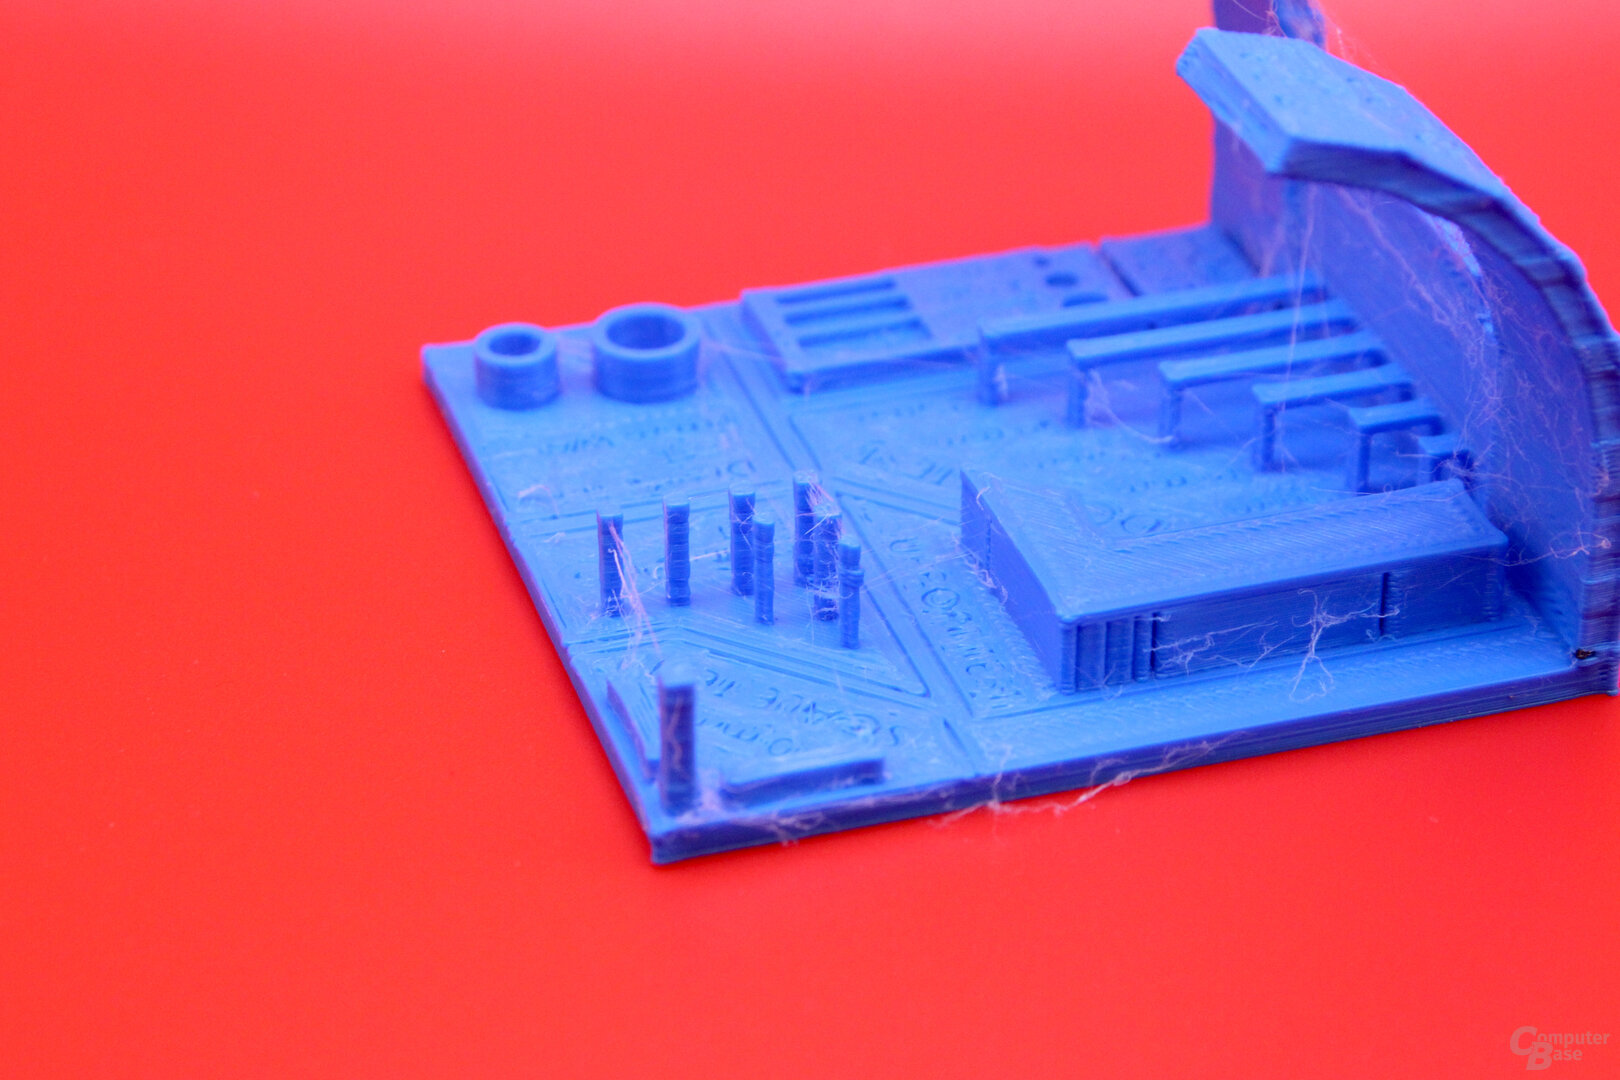 Test model : Printed with Creality Ender 3 S1 Pro (150mm/s)
 Test model: Printed with Creality Ender 3 S1 Pro (150 mm/s)
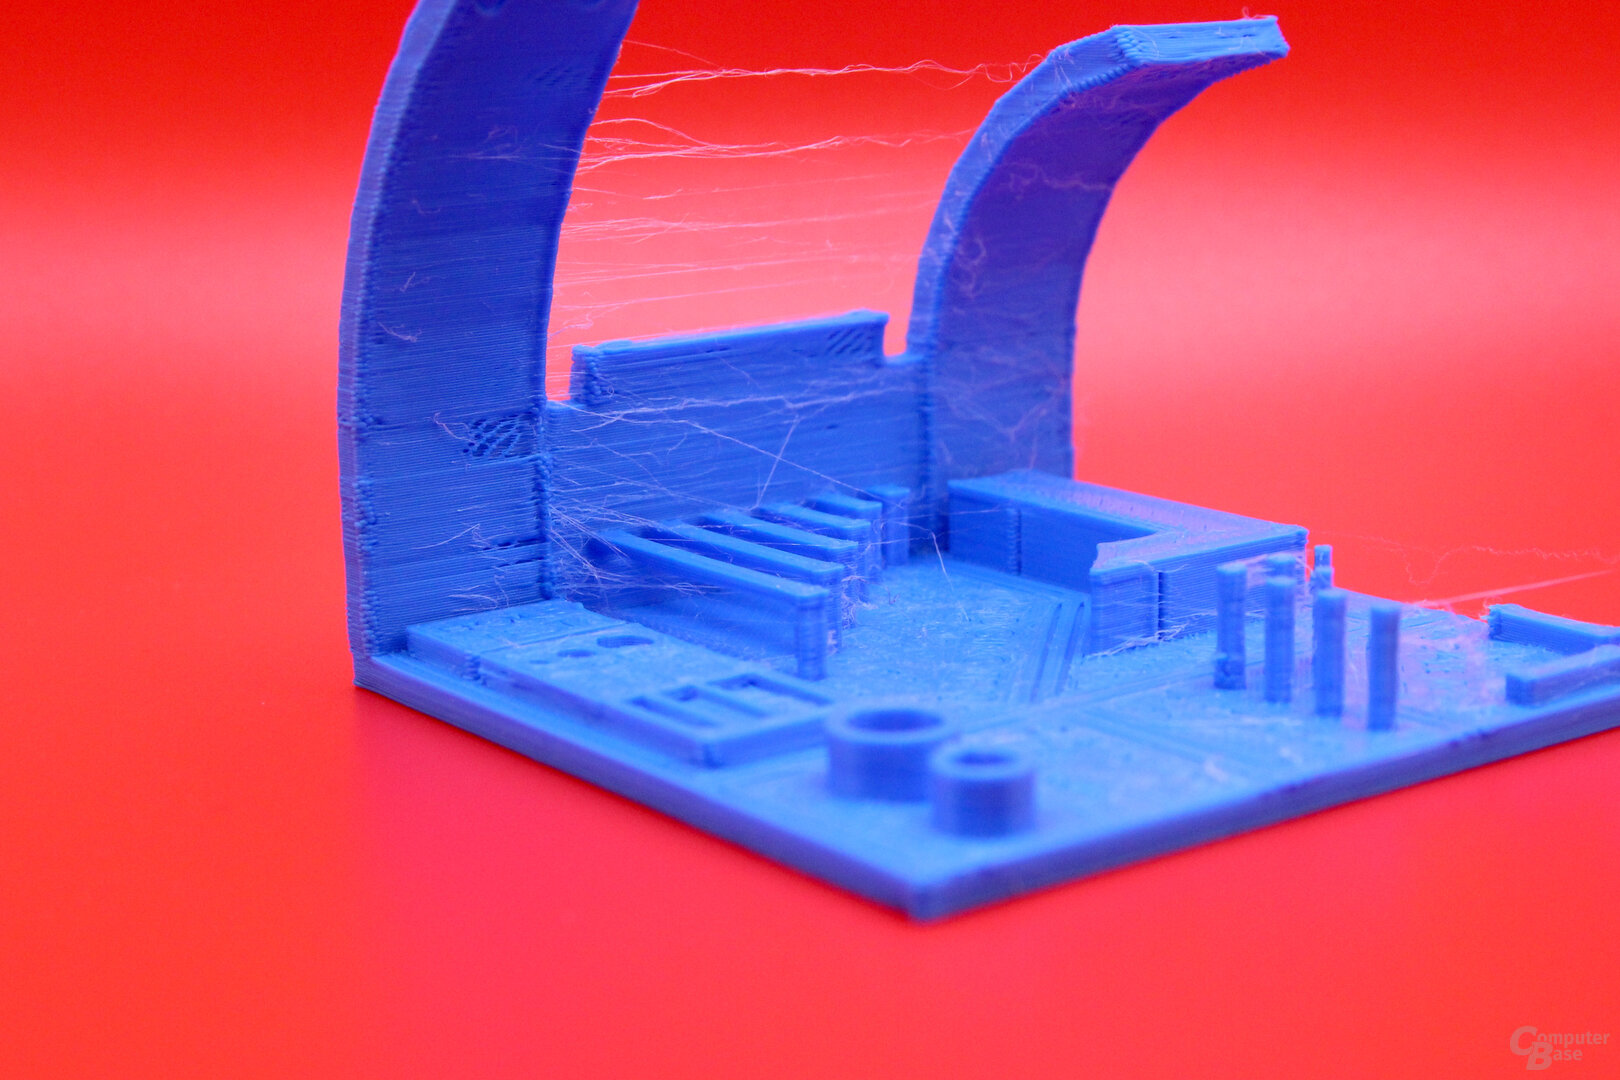 Test model: Printed with Creality Ender 3 S1 Pro (150mm/s)
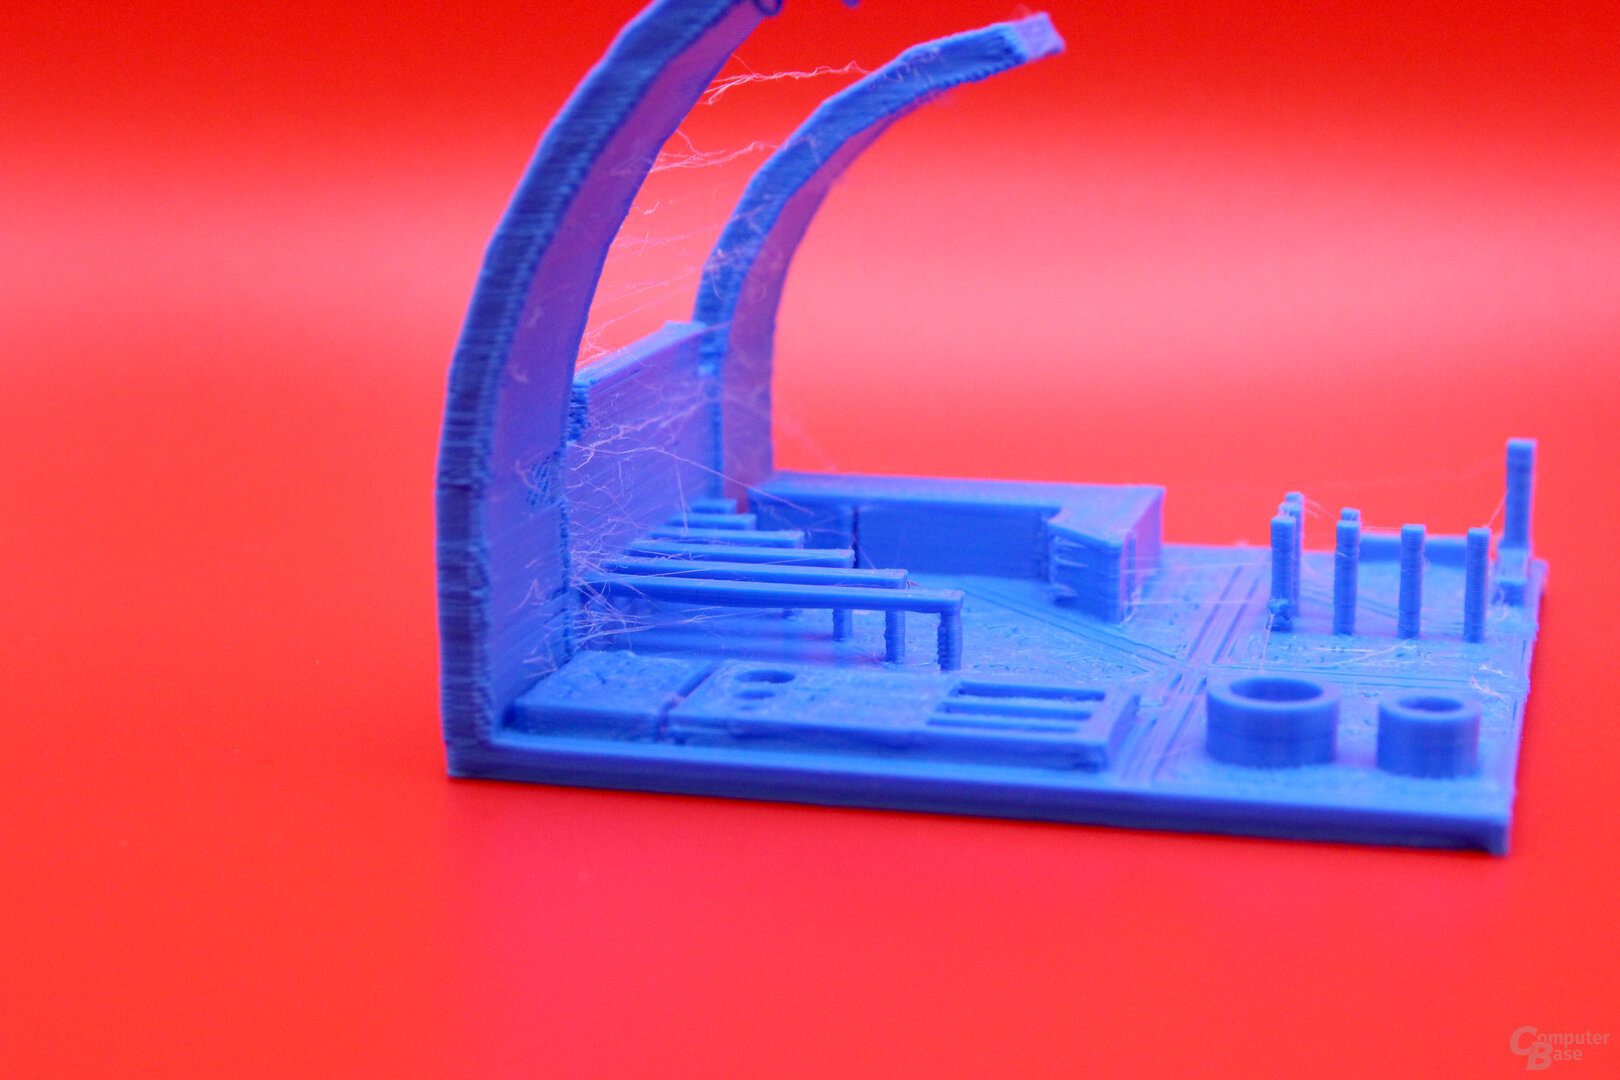 Test model: Printed with Creality Ender 3 S1 Pro (150 mm/s)
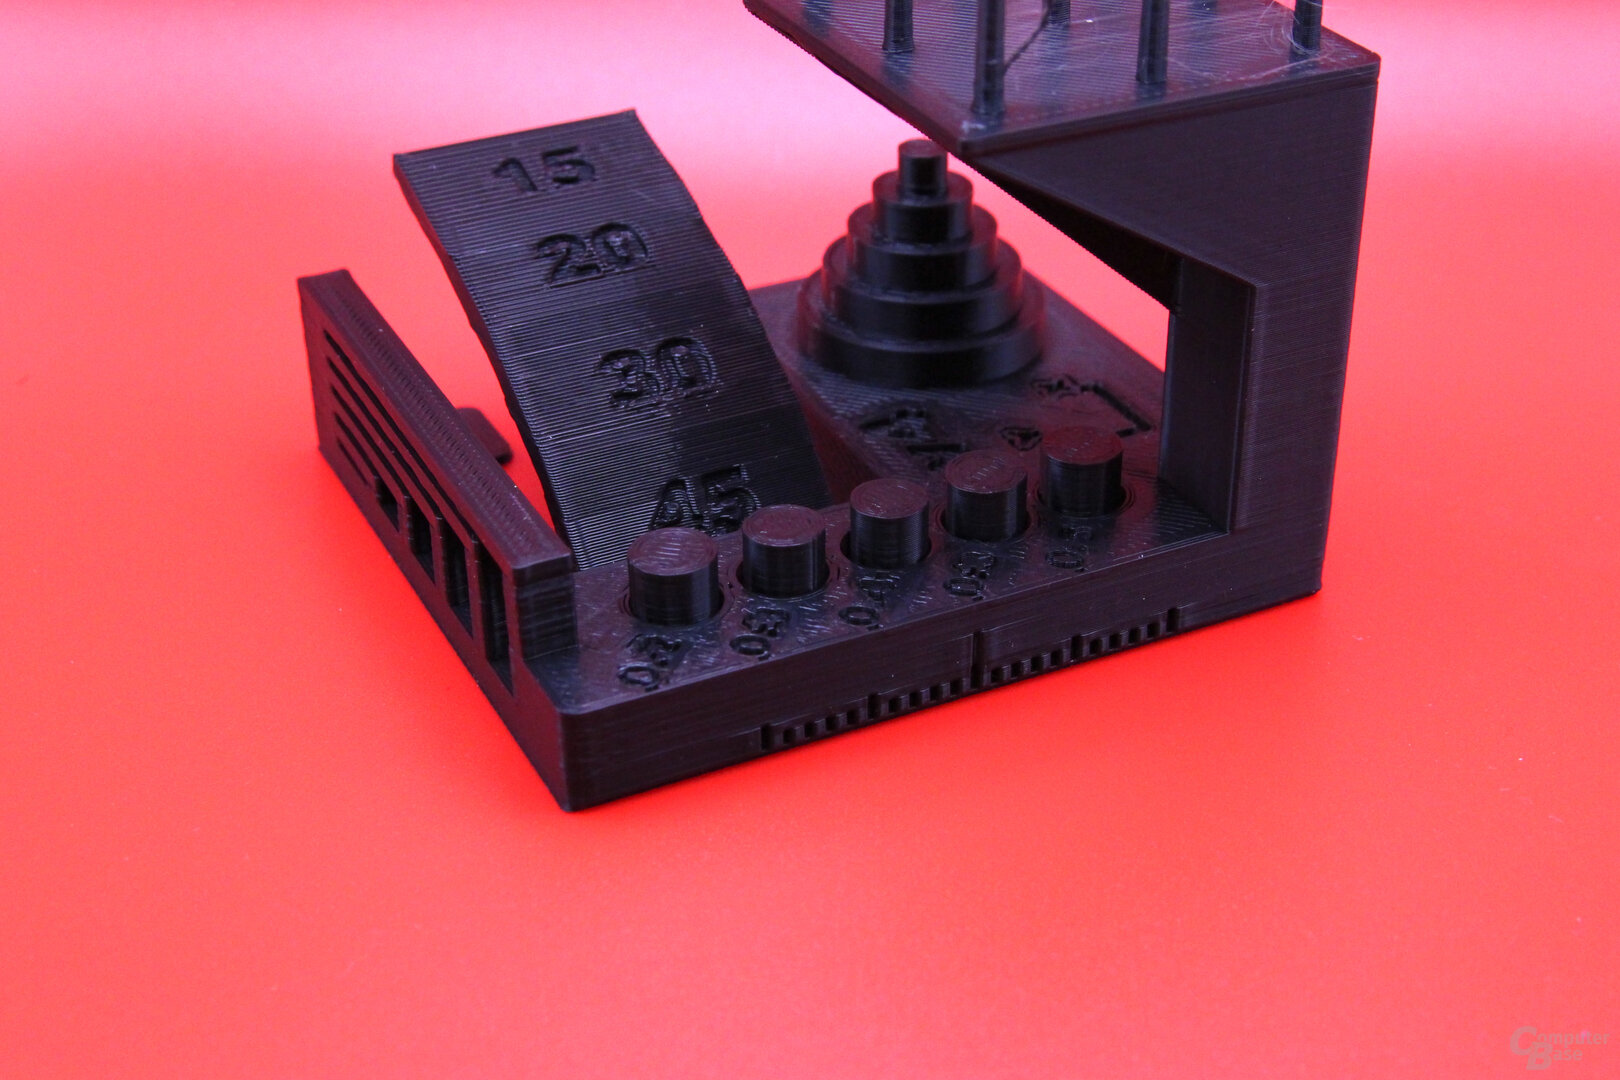
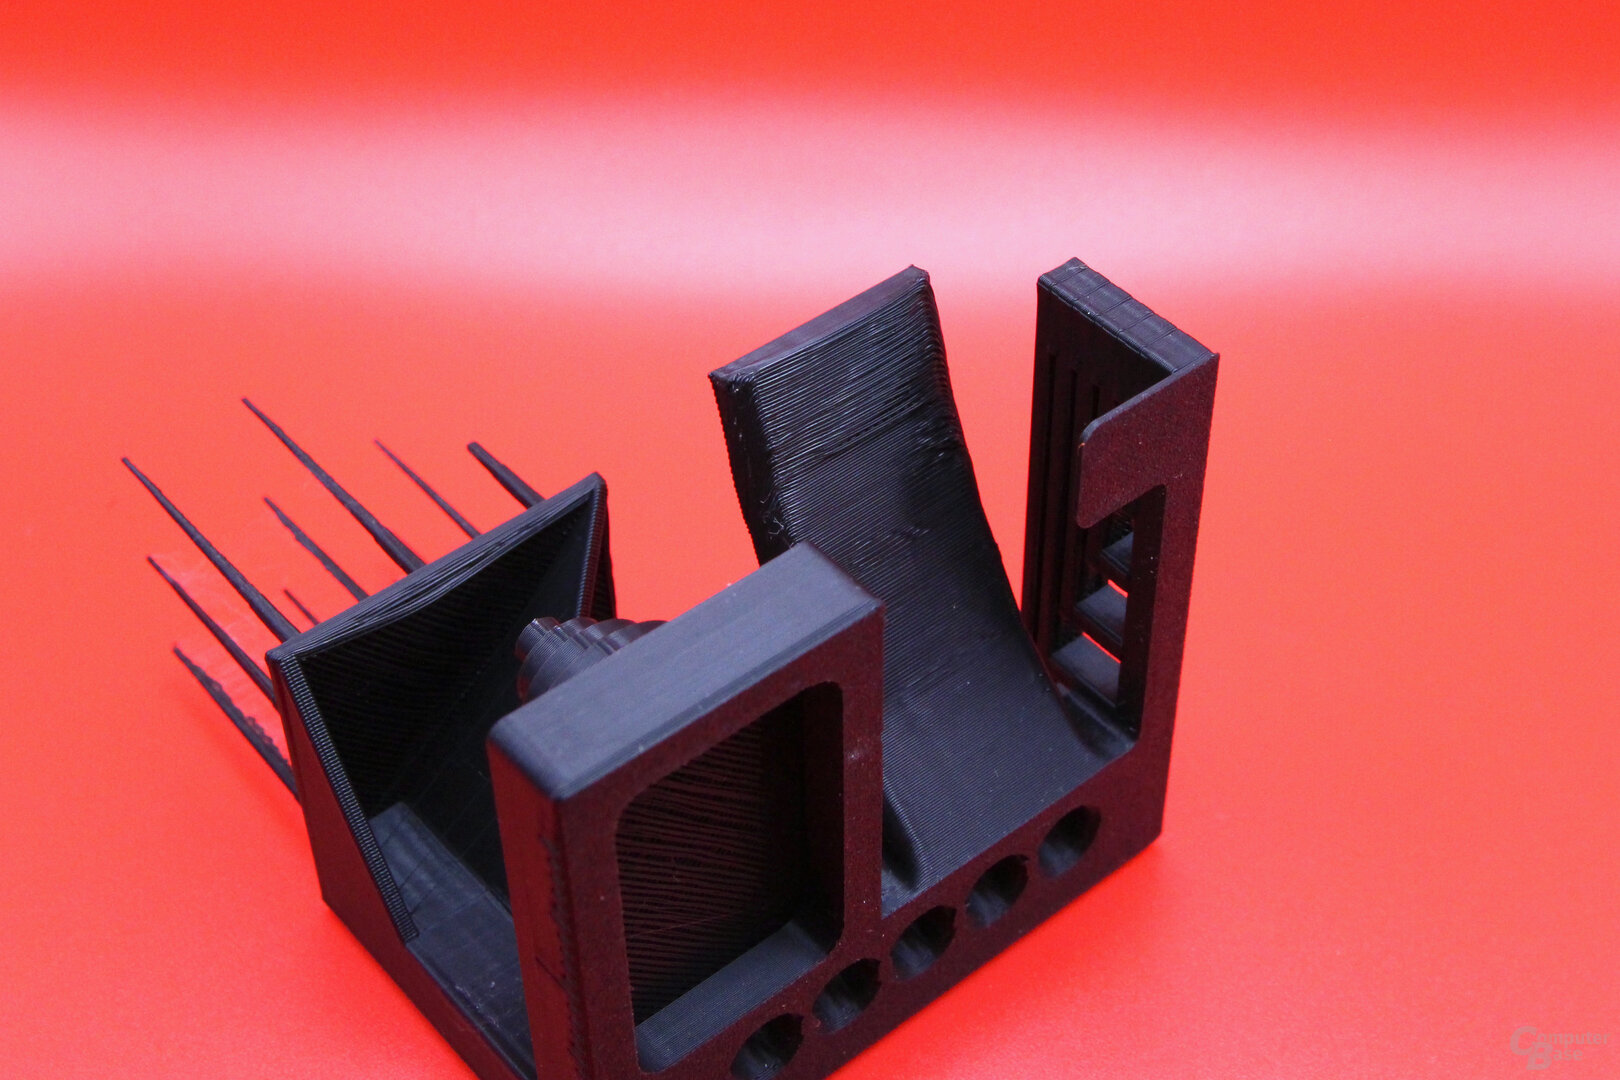
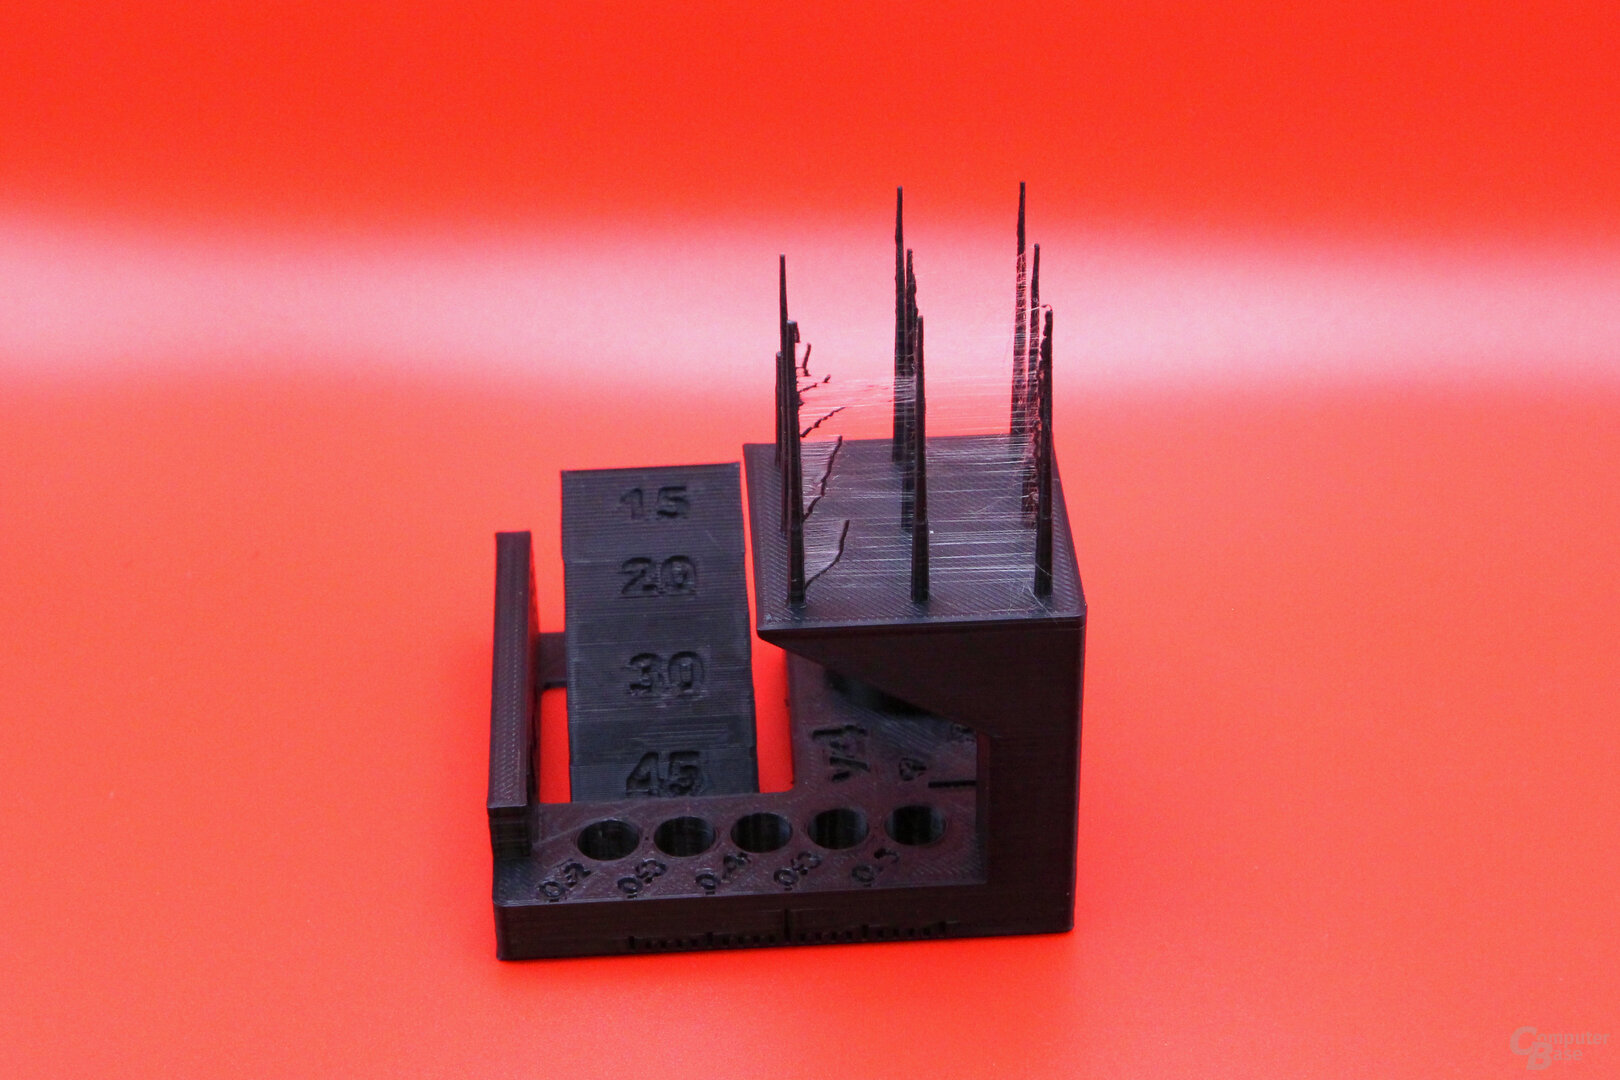
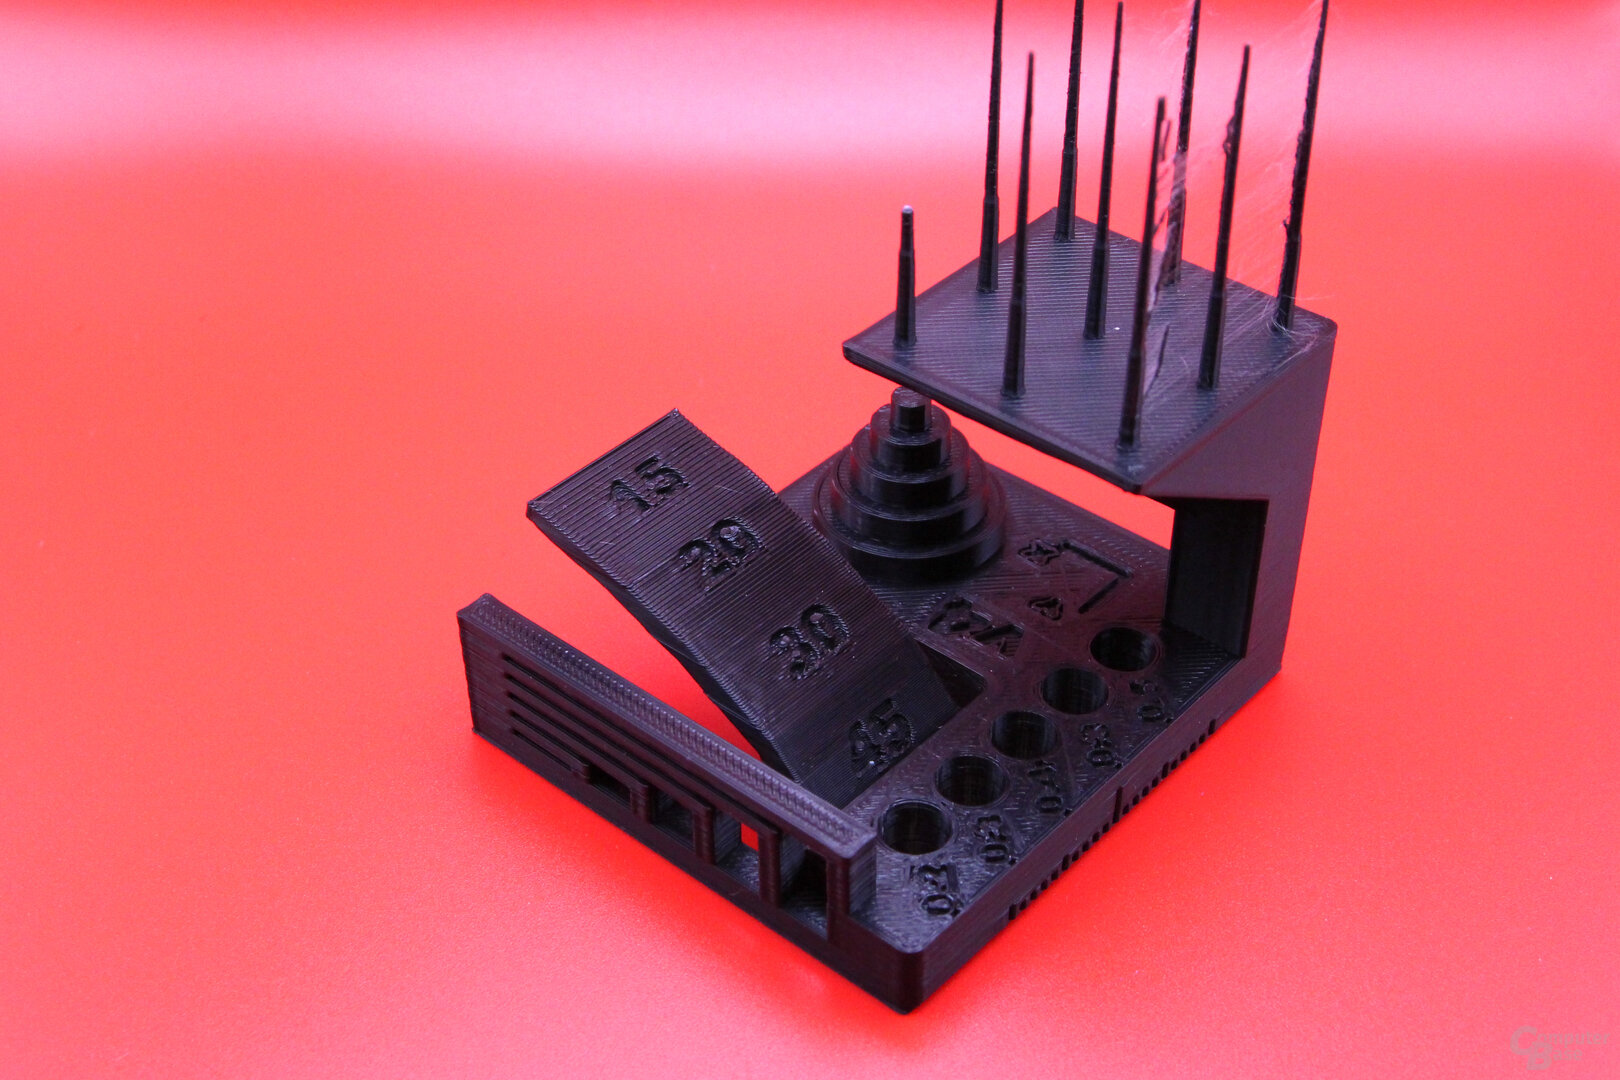
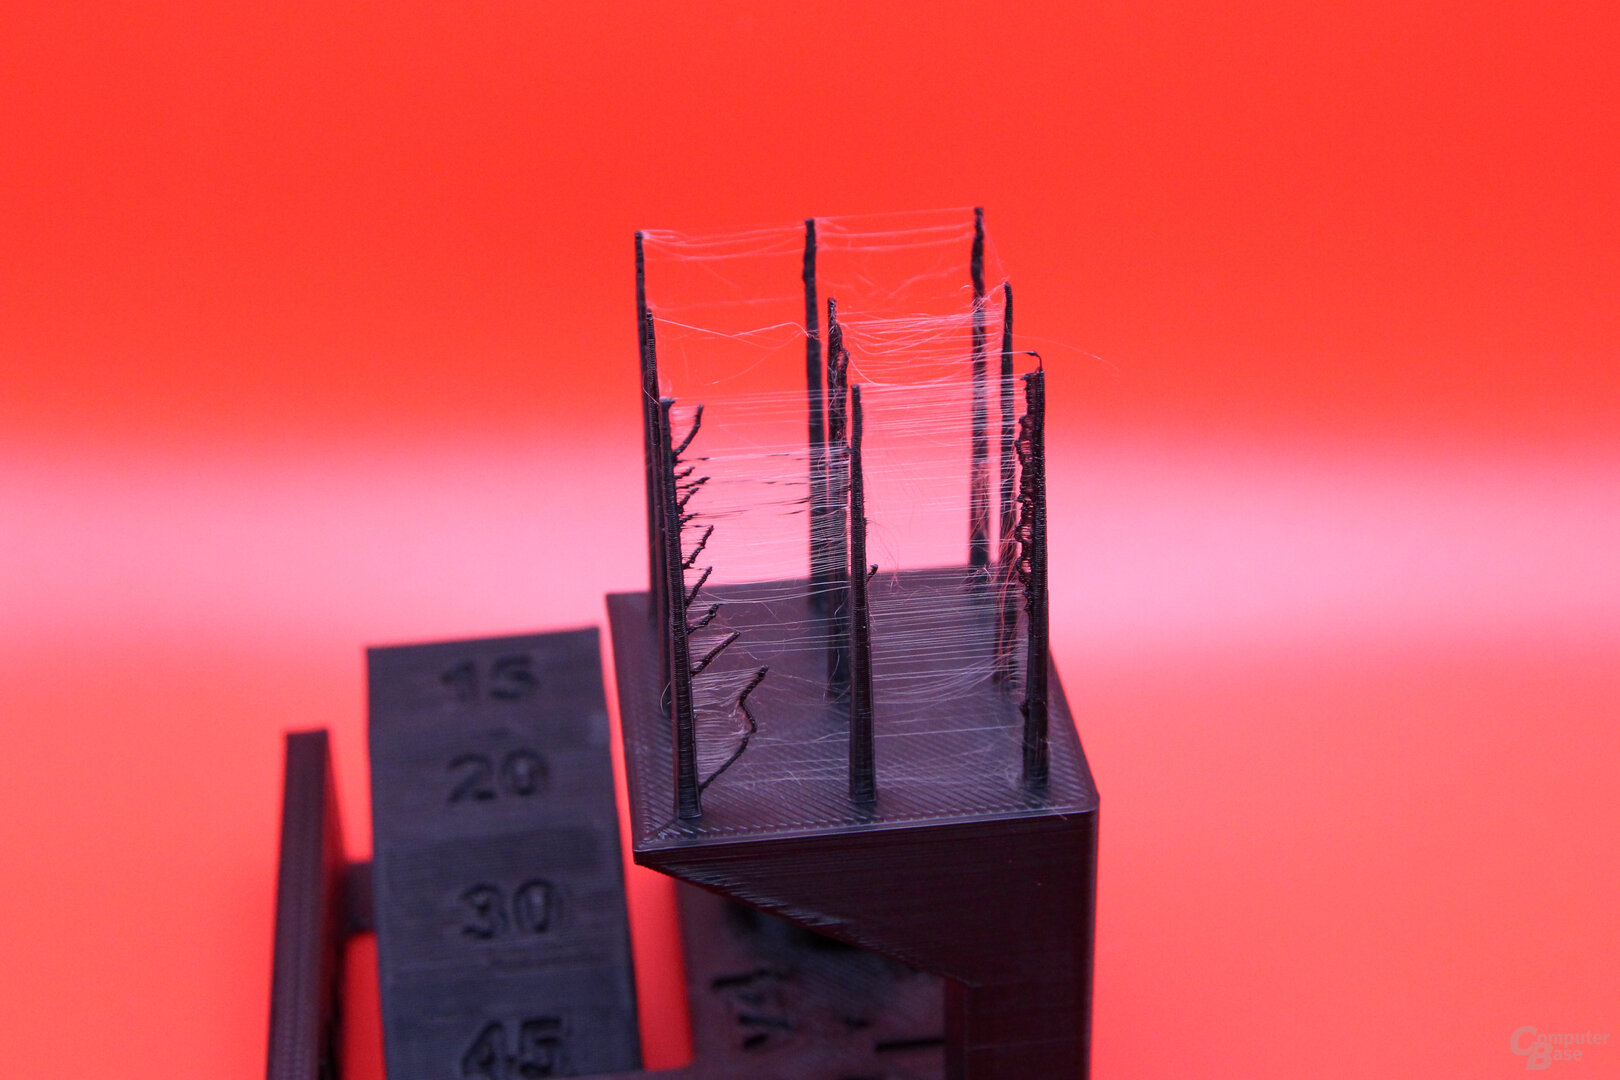
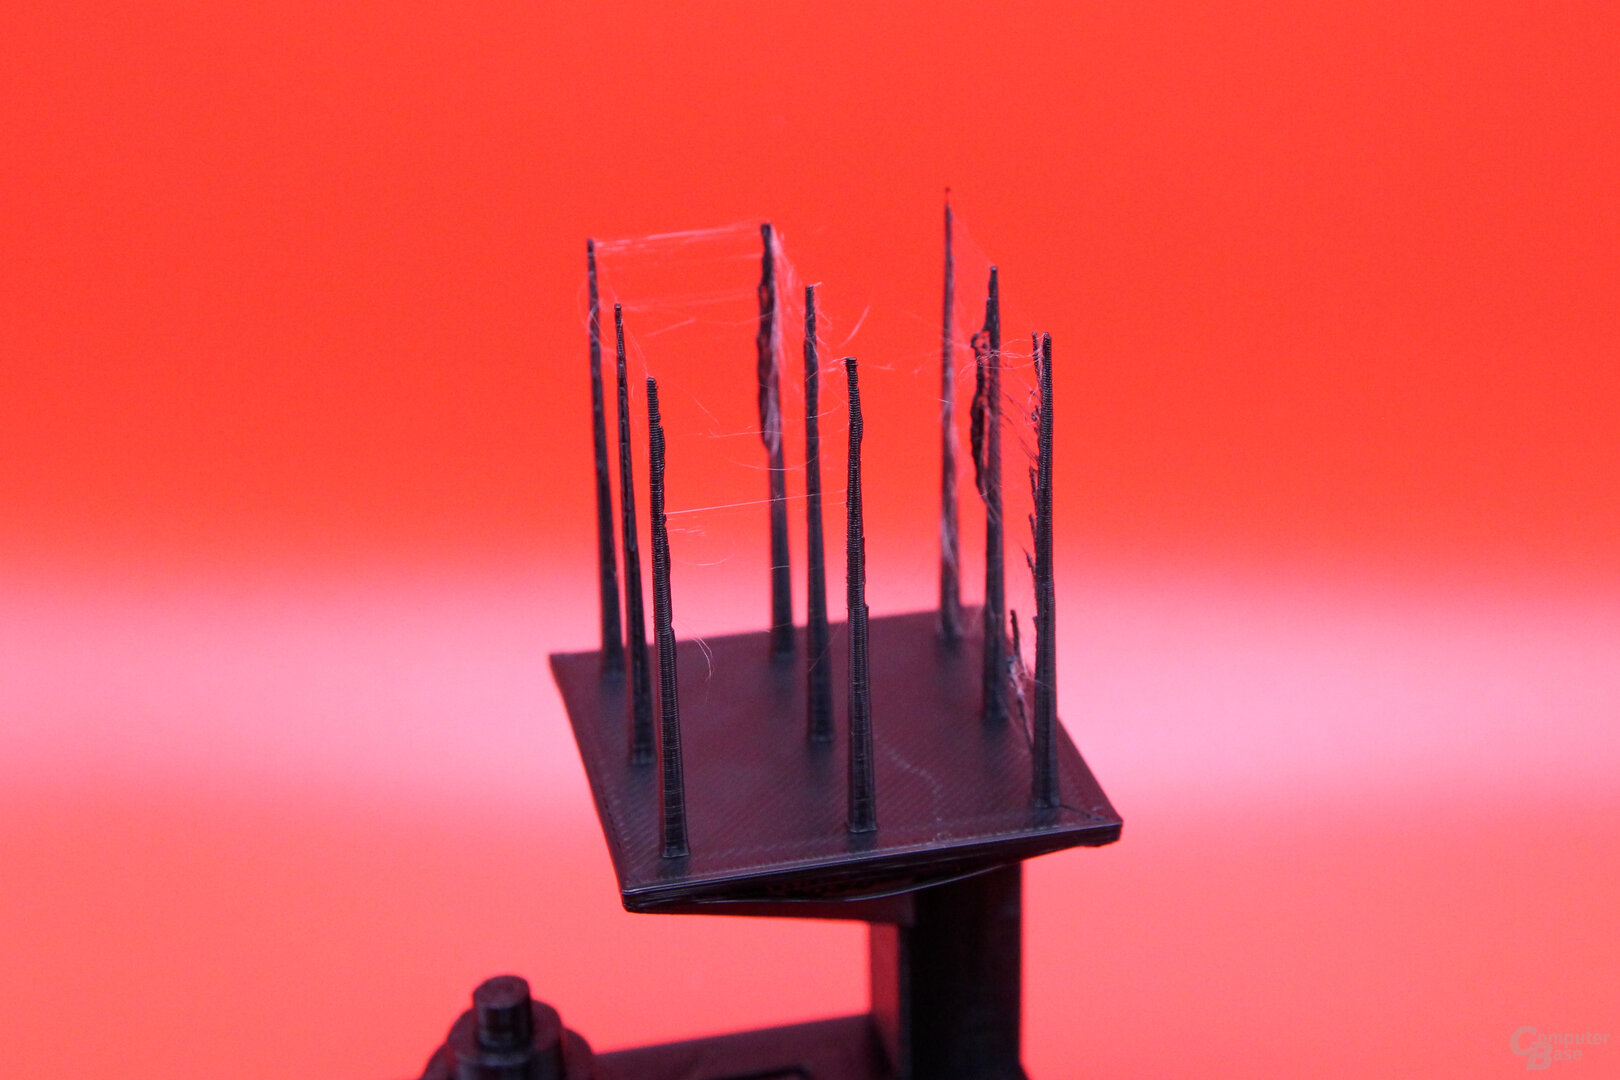
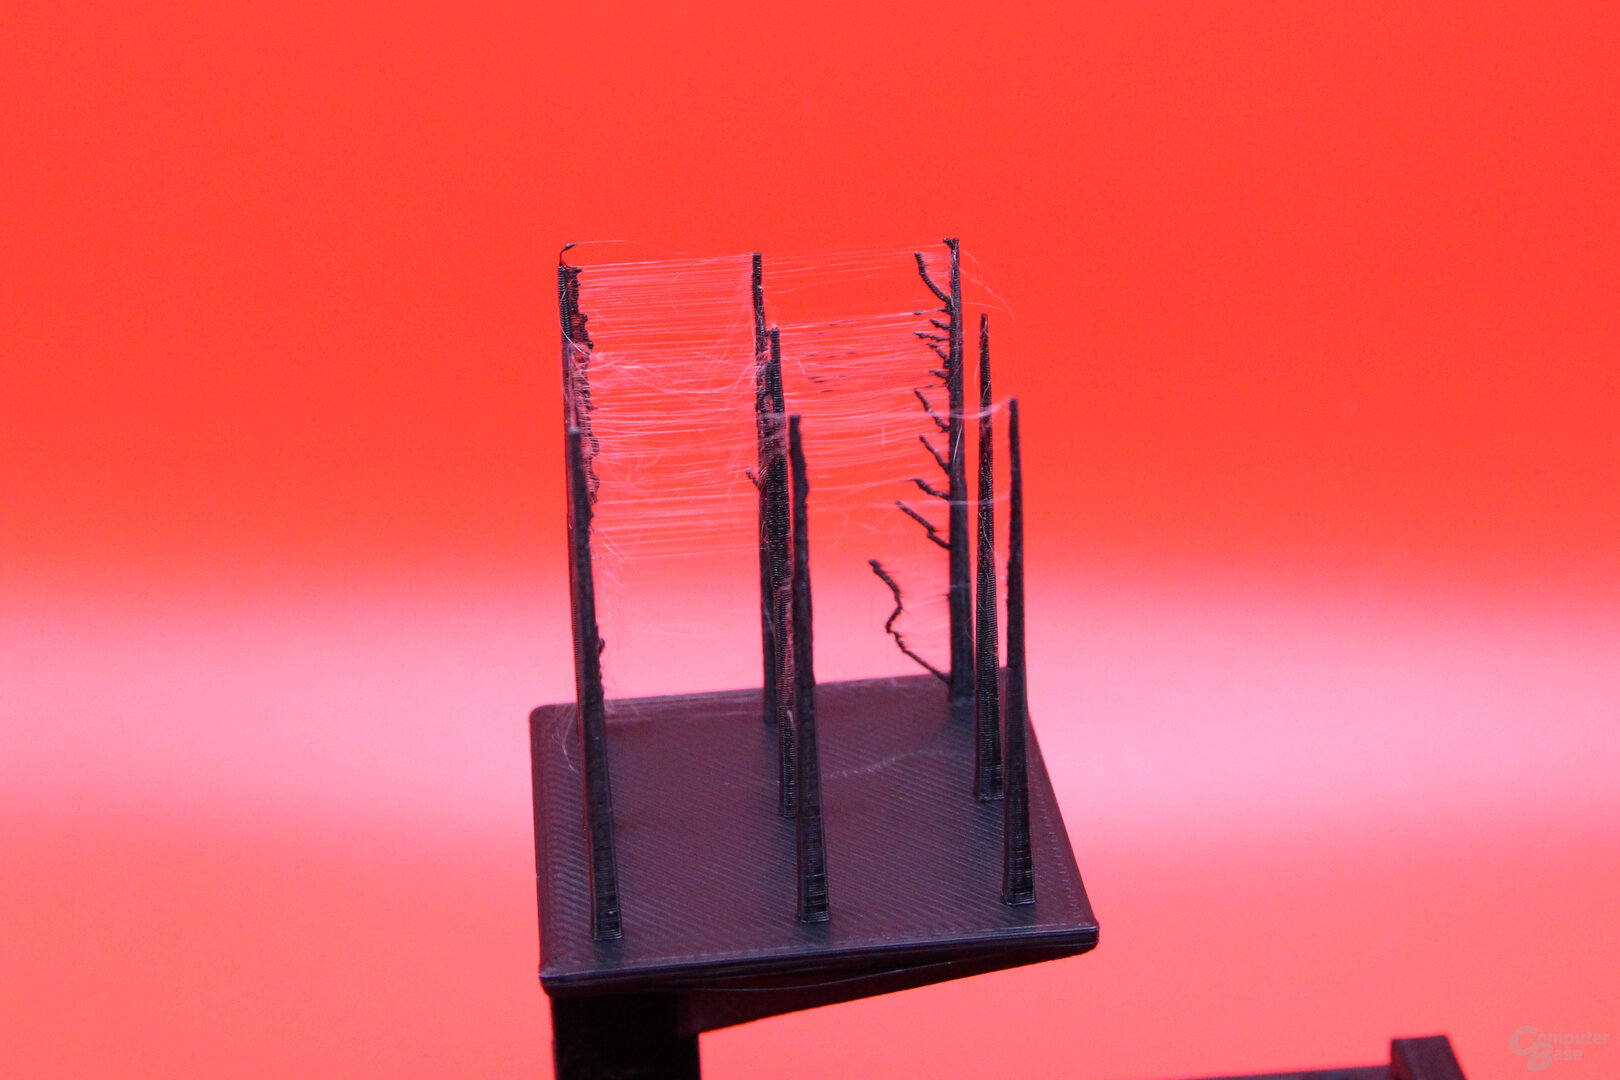
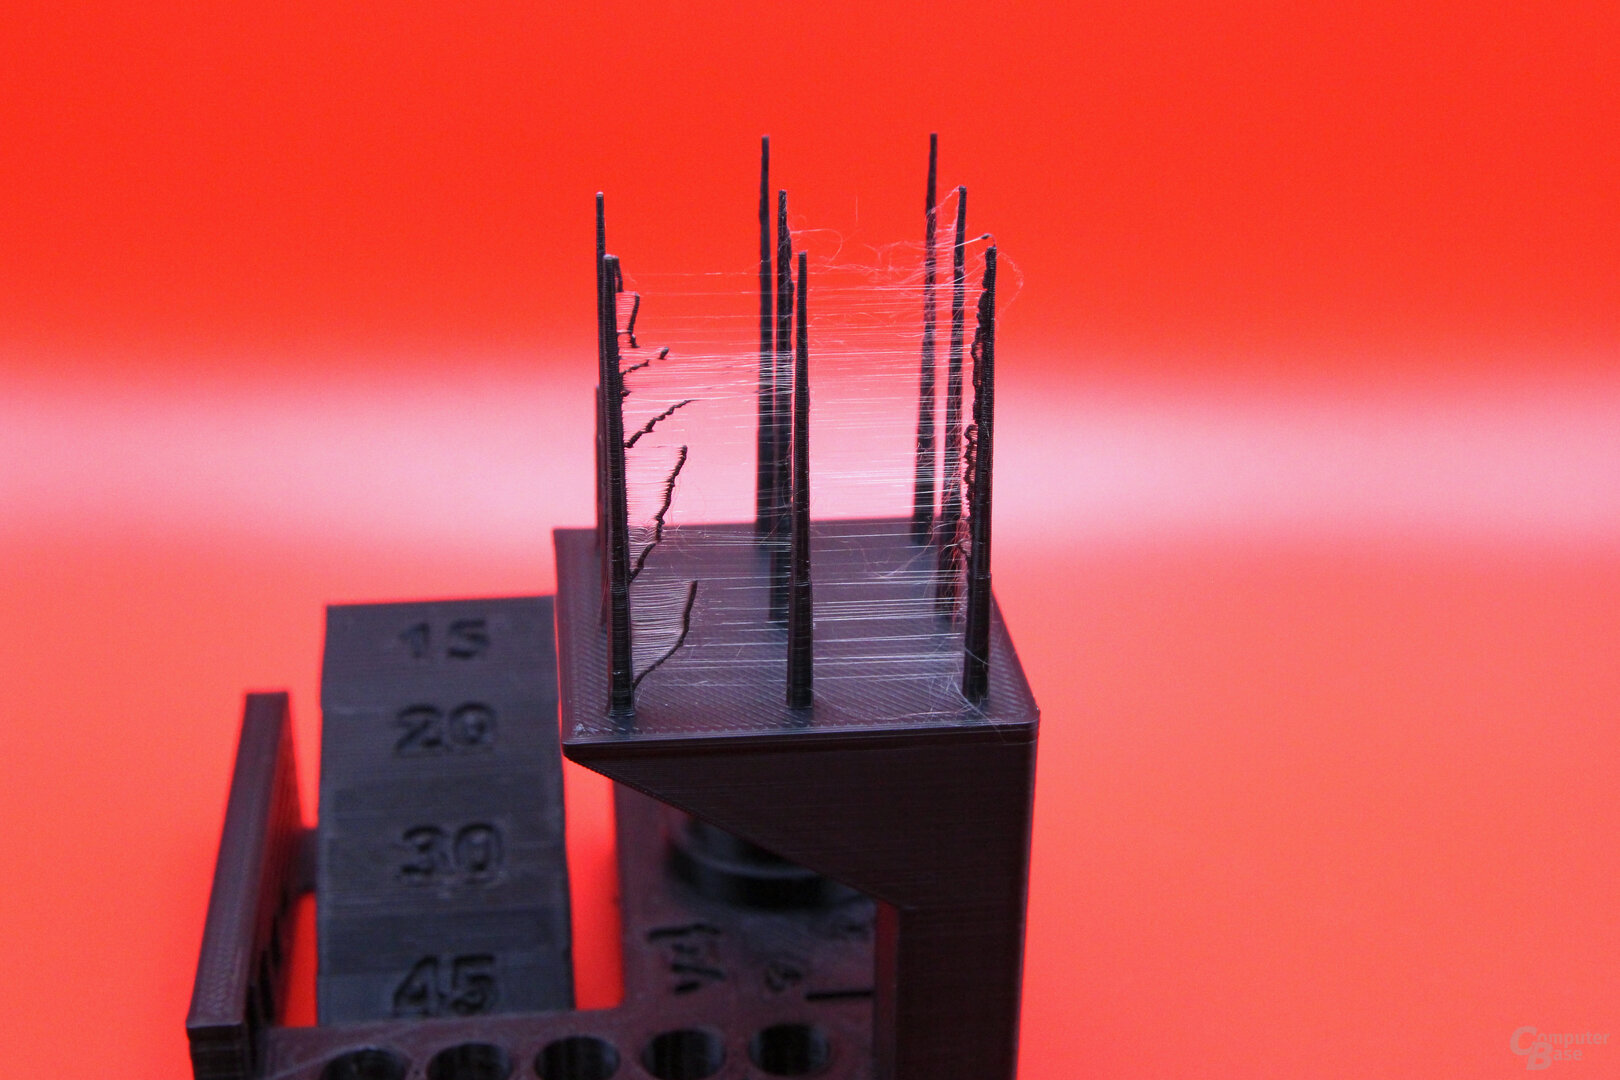
With the “Autodesk x Kickstarter FDM 3D Printer Assessment” with a printing speed of 250 mm/s, all 5 pins can even be removed from the holes by hand and without force. The overhang shows slight imperfections at 15 and 20 degrees. In the bridging test, no sheet rests on the one below. The spikes print to full height but show some stringing between a few elements. For the dimensional accuracy test, each circle is measured in its X and Y dimensions and compared to the target value. The average deviation of the AnkerMake M5 is 0.048 mm, which is an excellent result.
-
 Autodesk x Kickstarter FDM 3D Printer Geometry Assessment: Printed with AnkerMake M5 (250mm/s)
Image 1 of 5
Almost no stringing
The well-known stringing, in which hairs or threads on the 3D model show up due to a damp filament, an incorrect printing temperature or too short a retraction of the filament when changing position, hardly ever occurs in everyday life with the M5, even with standard values. Depending on the model, they can be seen in the infill – i.e. the support structure inside the model – during the printing process, but the result is convincing on the outside, and not just in relation to the printing speed.
In the case of special test prints, which aim precisely at this problem and which can be used to optimize the settings and temperatures, they occur more often with standard settings, especially on the x-axis.
-
 Autodesk x Kickstarter FDM 3D Printer Geometry Assessment: Printed with AnkerMake M5 (250mm/s)
Image 1 of 5
 < /figure>

Autodesk x Kickstarter FDM 3D Printer Geometry Assessment: Printed with AnkerMake M5 (250mm/s)
If you want, you can further optimize
Even with the M5, however, it can be worth investing time in calibrating the settings more precisely. Depending on the material, it is also worth reading how to print a temperature calibration tower, for example, to check at which temperature the filament produces the best results. The stringing is also mainly a matter of setting that can be managed. If there are only a few fine hairs, they can also be removed without leaving any residue after printing.
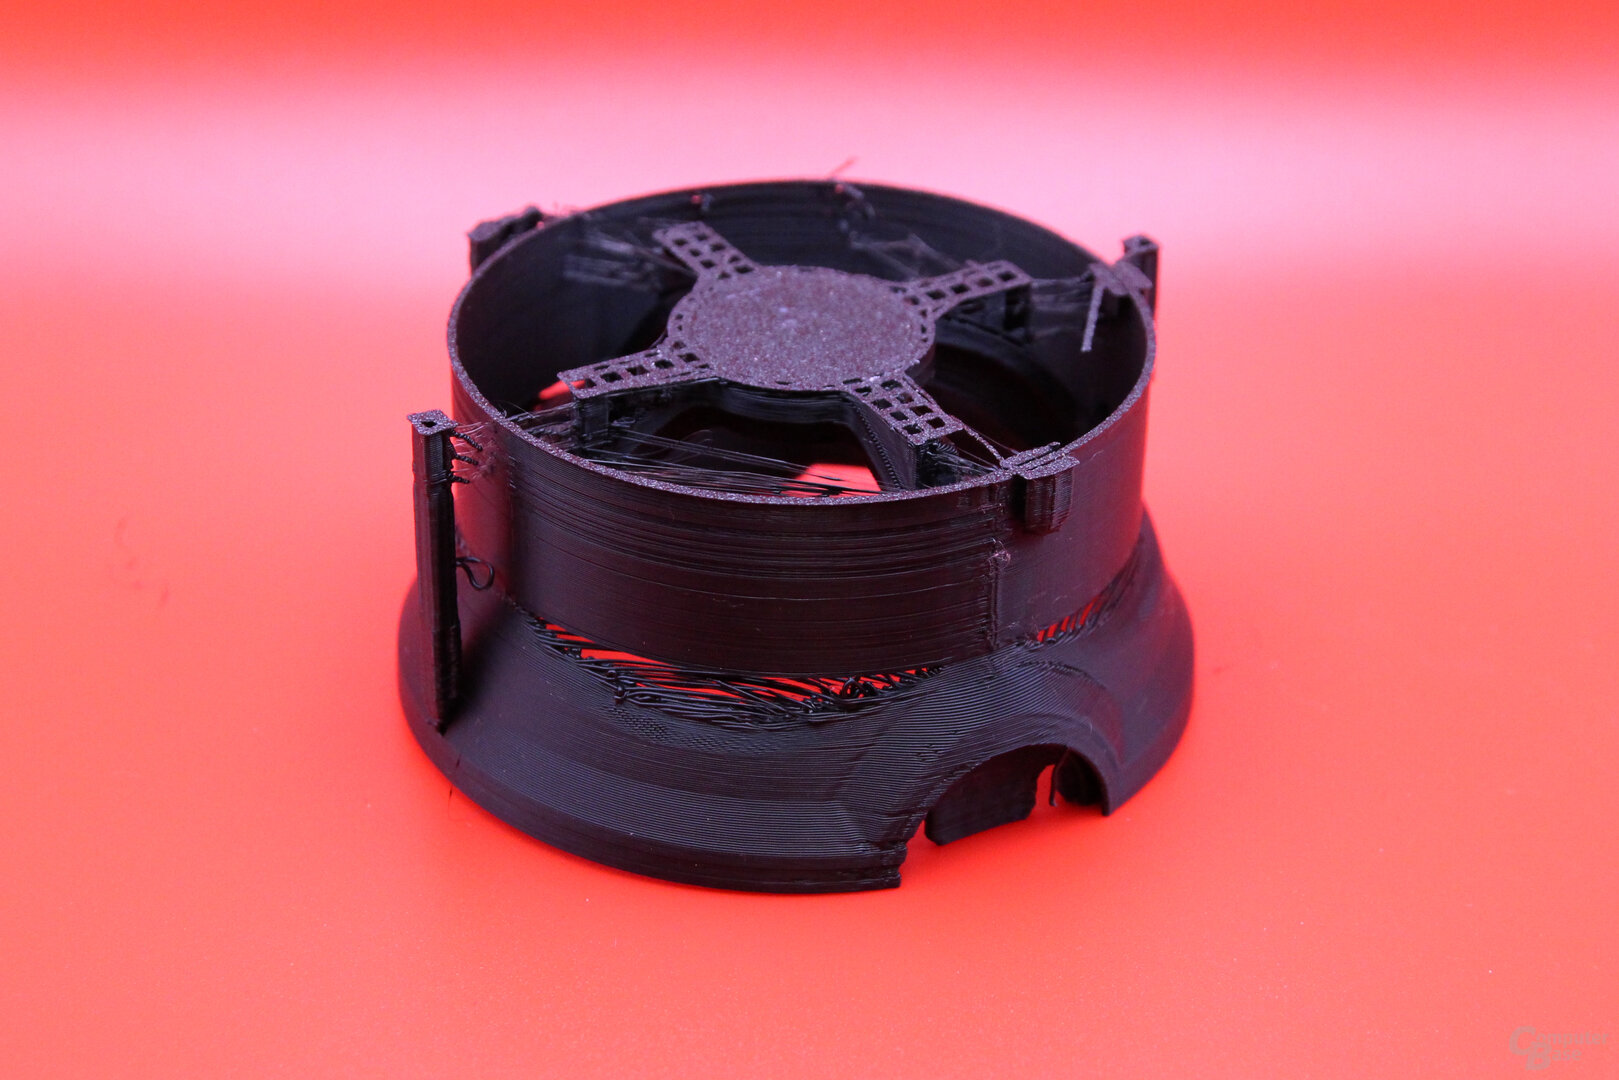
But there are also problematic models
But there are also more filigree models with a support structure, where the AnkerMake M5 has a hard time printing at high speeds. Then there is sometimes a lack of adhesion between the layers with otherwise unproblematic settings and strong stringing occurs with large, round shapes. With the AnkerMake M5, you can’t do without any failed attempts and you have to approach the optimal print properties and settings depending on the model and filament.
 < /figure>
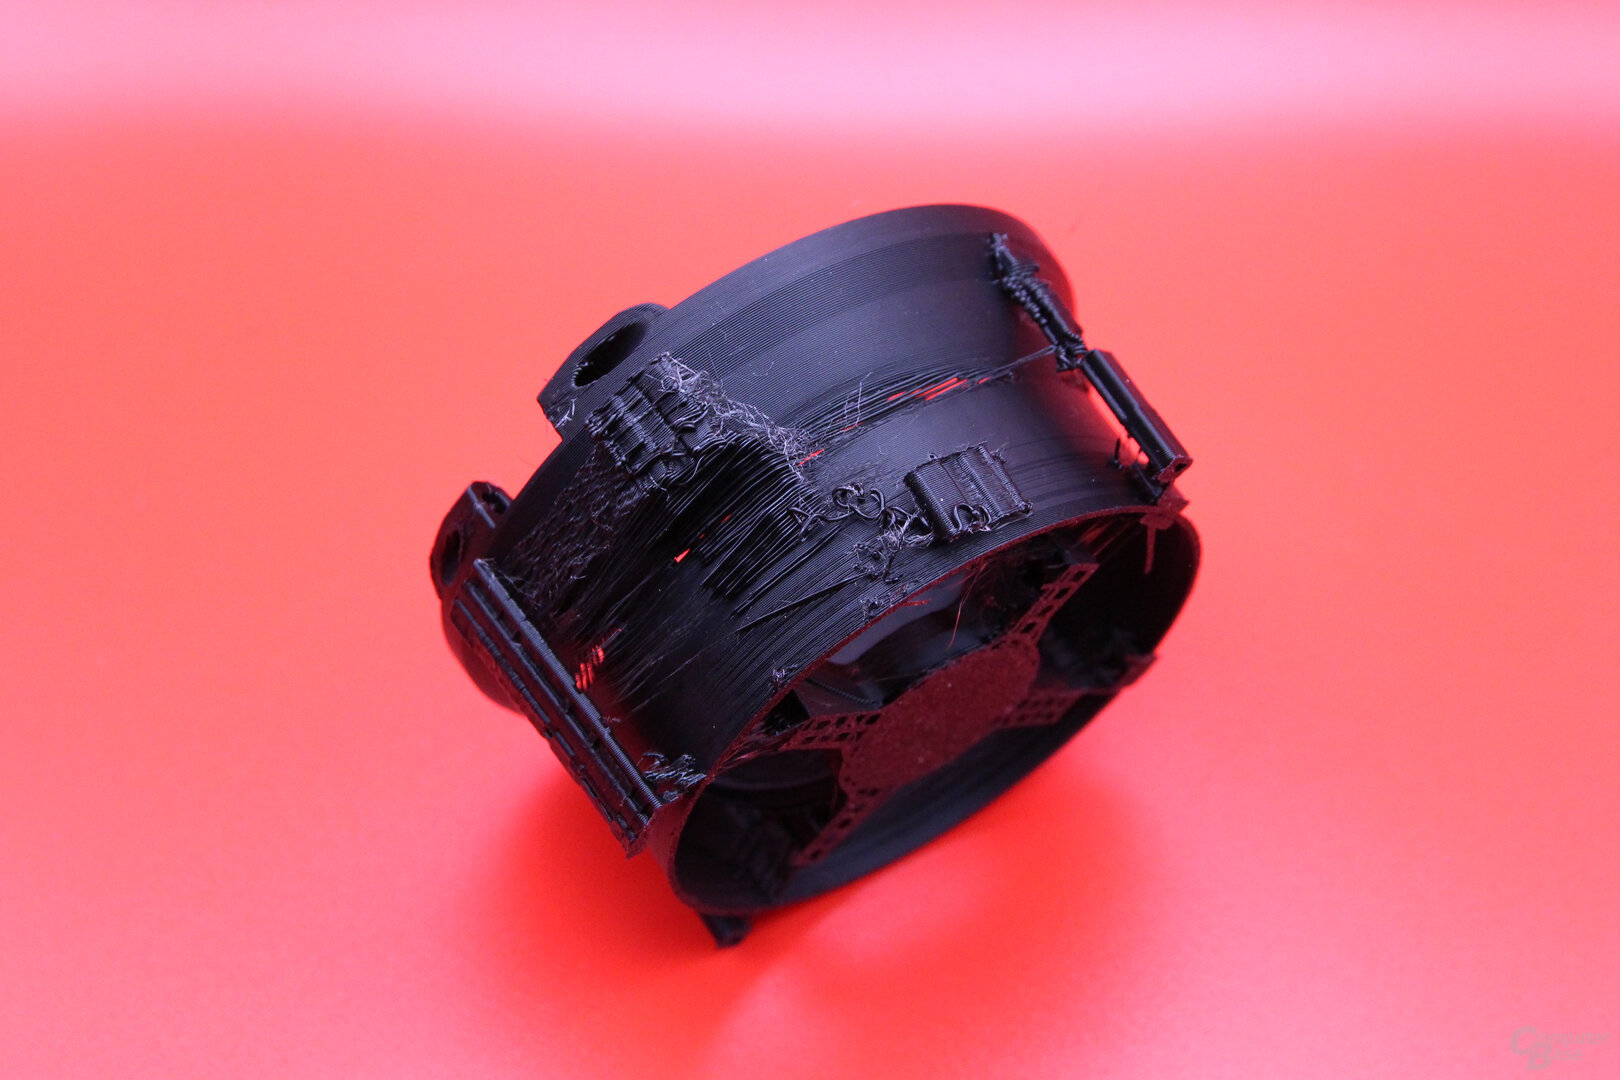

Prints also go wrong with the AnkerMake M5
Speed and quality are excellent
All in all, however, it can be stated that the higher speed of the AnkerMake M5 is not bought with a lower quality, in fact the opposite is the case: speed and quality are excellent.
Conclusion
With the AnkerMake M5, Anker has made an excellent entry into the 3D printer market. The model not only prints reliably and in a very good quality, but can actually be operated at its high speed without having to sacrifice quality and reliability. For newcomers to the field of 3D printing, the AnkerMake M5 is therefore not a cheap entry at 800 euros, but one that saves a lot of frustration, which you can experience with cheaper 3D printers at first, until you get into the subject read it and incorporated it through numerous self-experiments. The AnkerMake M5 significantly lowers the barrier to entry for less experienced users.
-
 AnkerMake M5 3D printer
Image 1 of 5

AnkerMake M5 3D Printer
The comparison to the desktop PC is not entirely wrong, because those who used to put together a PC themselves at great expense and tweaked it again and again usually end up with a PC that they may have put together themselves, but are no longer constantly reassembled. It's similar with 3D printing and the M5. If you don't want to invest your time in the 3D printer but in 3D printing, you can buy the AnkerMake M5 without hesitation.
The AnkerMake M5 does not reinvent 3D printers and what he has mastered can also be achieved with other manufacturers, but often only through upgrades, conversions and the replacement of the extruder. The AnkerMake M5 already comes with all this, which also justifies its surcharge compared to the Creality Ender 3 S1 Pro, which is more frequently mentioned in the test and is available for around 500 euros.
Nevertheless, you should also take the time with the AnkerMake M5 to get to know the printer and the material used. Because the optimal settings for each model and the best temperatures for the filament still have to be found by the user himself, and the M5 doesn’t change that either. And if you think you can buy the M5 and print any spare parts for your devices yourself, you are wrong – completely independent of the specific 3D printer. Sending a file to the printer, as is done with a PDF with a laser printer, is usually not enough. If you want to create models or spare parts yourself, you must also have good CAD knowledge.
 AnkerMake M5: Automatically detects printing problems
The pros and cons
After this general summary, the conclusion should go into more detail about the advantages and disadvantages of the AnkerMake M5.
The AnkerMale M5 delivers very good, very reliable and very fast 3D prints without having to modify or replace anything on it. In any case, it offers fewer points of attack for hobbyists, because its design with no exposed cables and no visible rods hides as much of the inner workings as possible behind covers. The aluminum housing is excellently processed and even the filament holder is made entirely of aluminum and the base, with the exception of the cover on the underside, is made of cast aluminium. It may look good in the living room, but it's just too loud for that.
 AnkerMake M5
The speed of the AnkerMake M5 also makes it great for prototyping, where waiting a long time for a first print is always a nuisance.
The touchscreen is well implemented with large symbols and a well thought-out menu and reacts quickly to inputs. With USB-C for the USB stick, the M5 should be ahead of some users who only have memory sticks for USB-A. Thanks to WLAN and wireless printing via the AnkerMake slicer, the USB port is not absolutely necessary. A very good comfort function in everyday life.
The printing plate is coated on both sides and can be used on both sides, but does not offer a smooth surface, so that all 3D prints have a slight pattern on the underside . If you want smooth prints, you have to buy a different plate, in which case you have to pay attention to sufficient adhesion.
Above all, the automatic time-lapse function is a nice gimmick. Later you will hardly look at the recordings, especially since you cannot influence the length of the time lapse. More options for the user would be desirable here, but ultimately just a bonus that is not absolutely necessary.
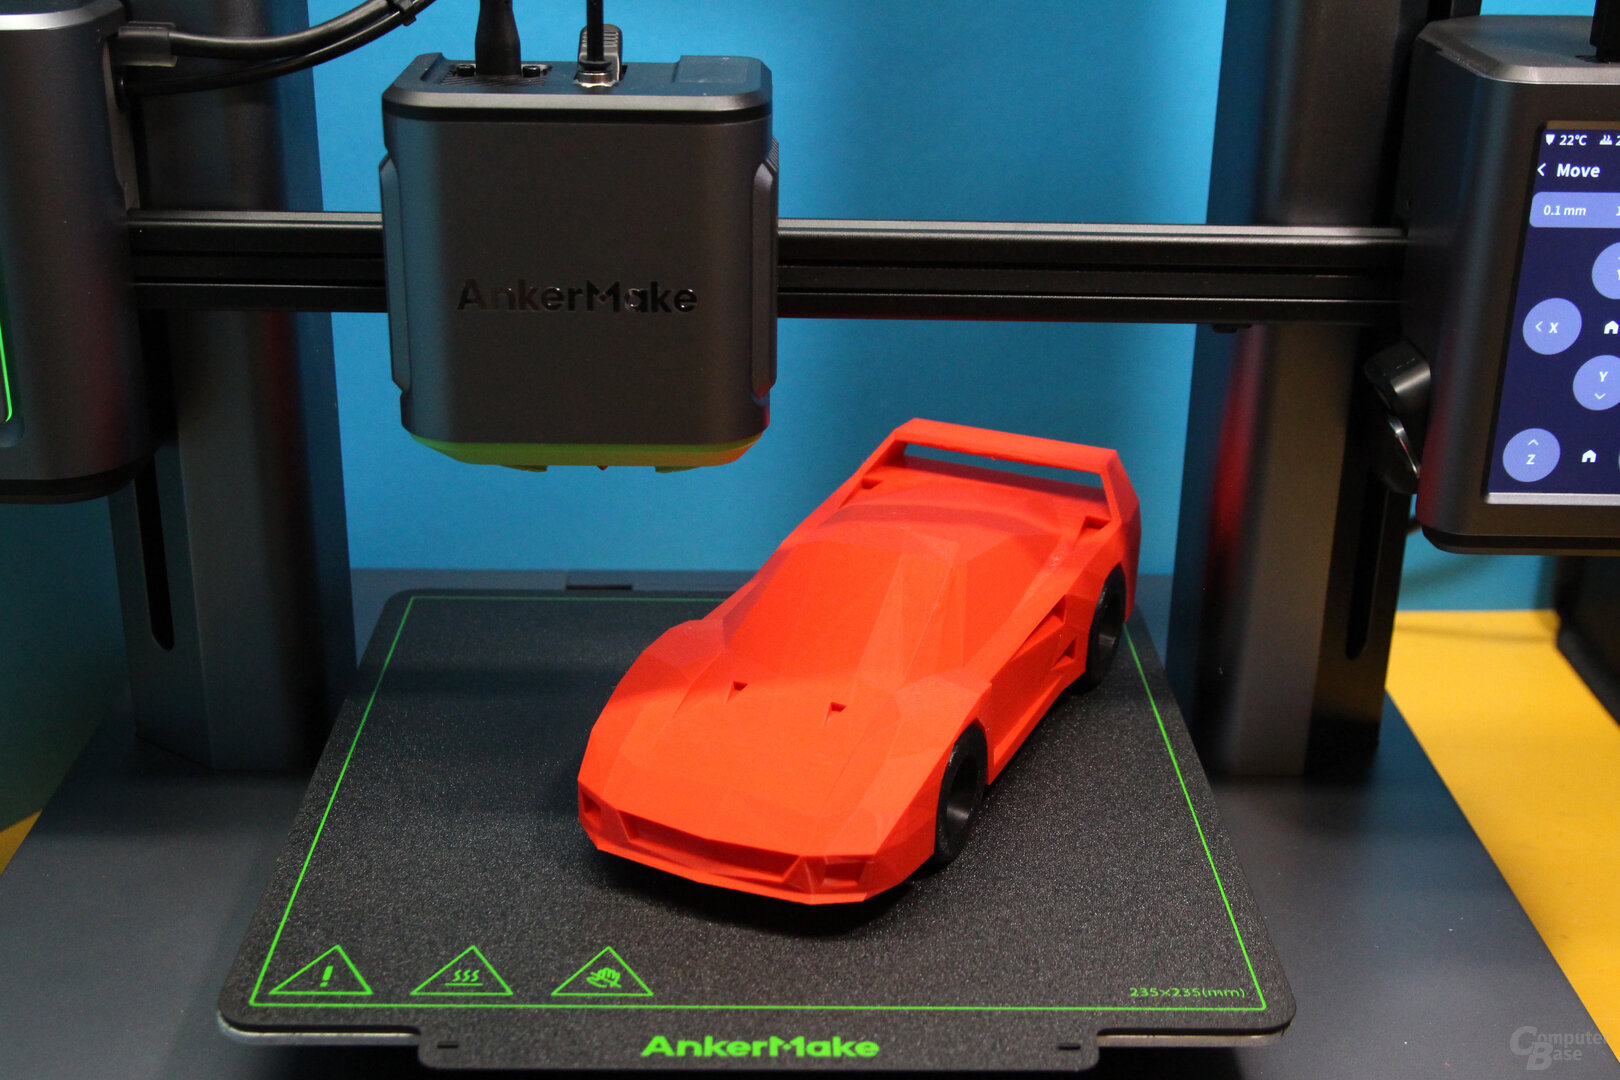 F40 Low Poly: Printed with AnkerMake M5 (250mm/s)
 Image 1 of 3
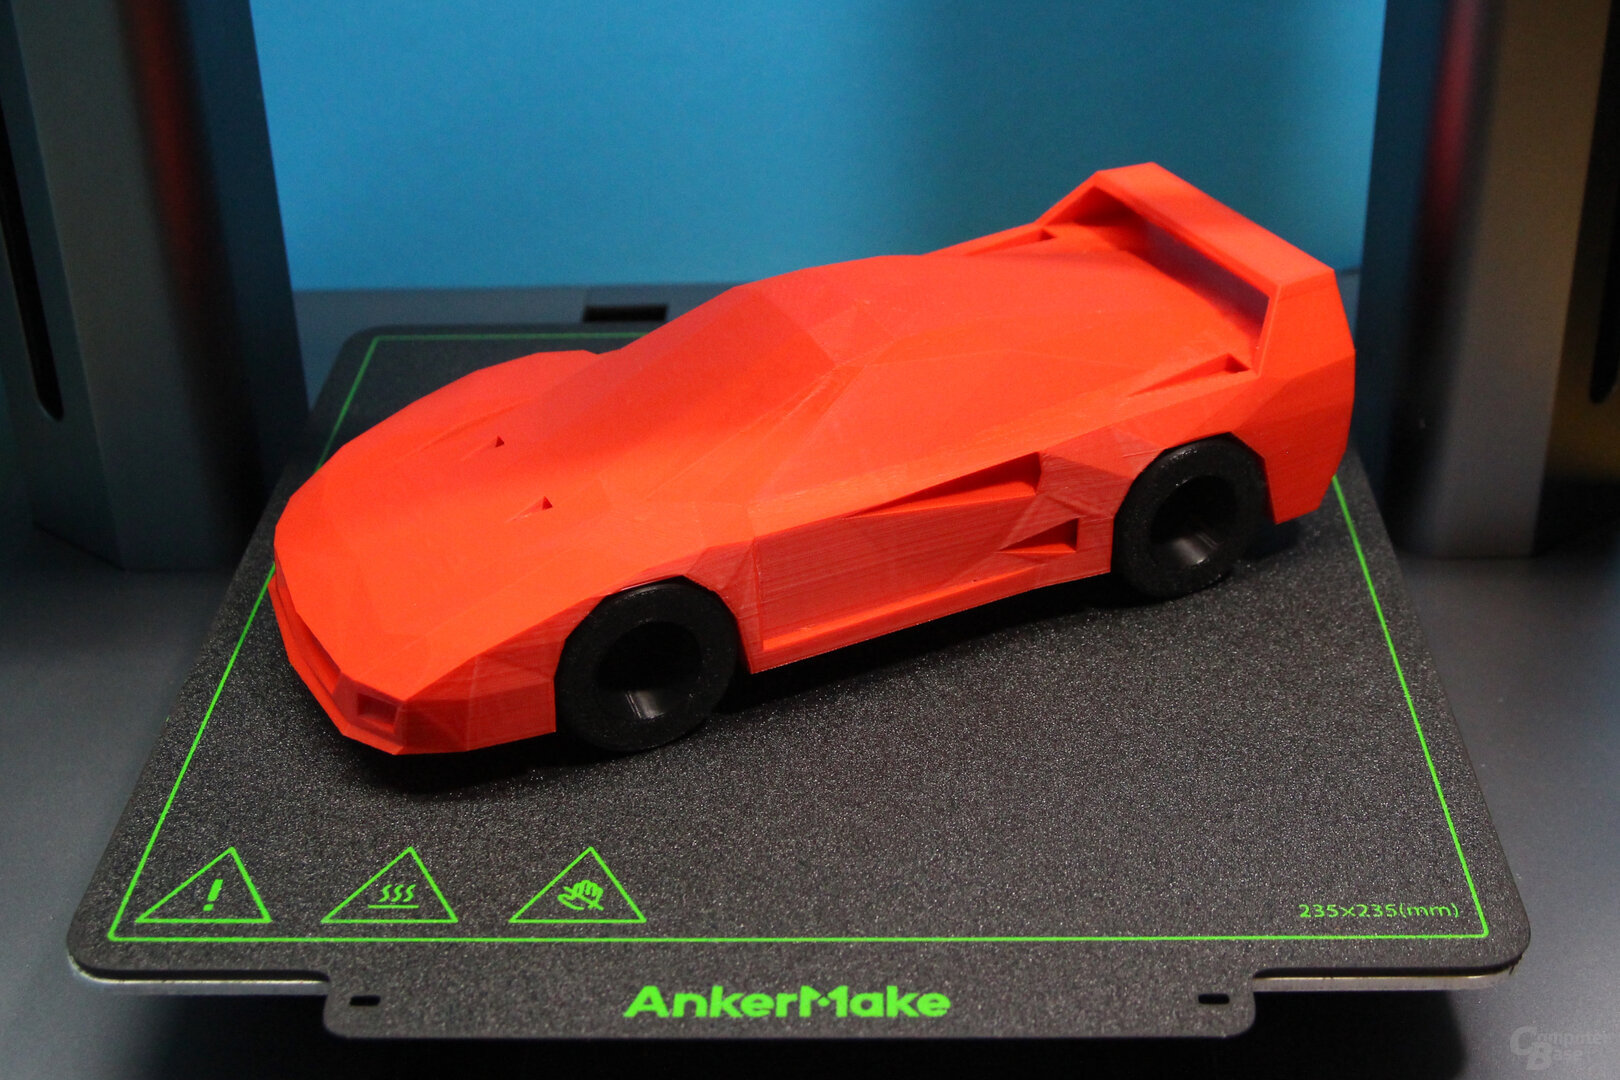
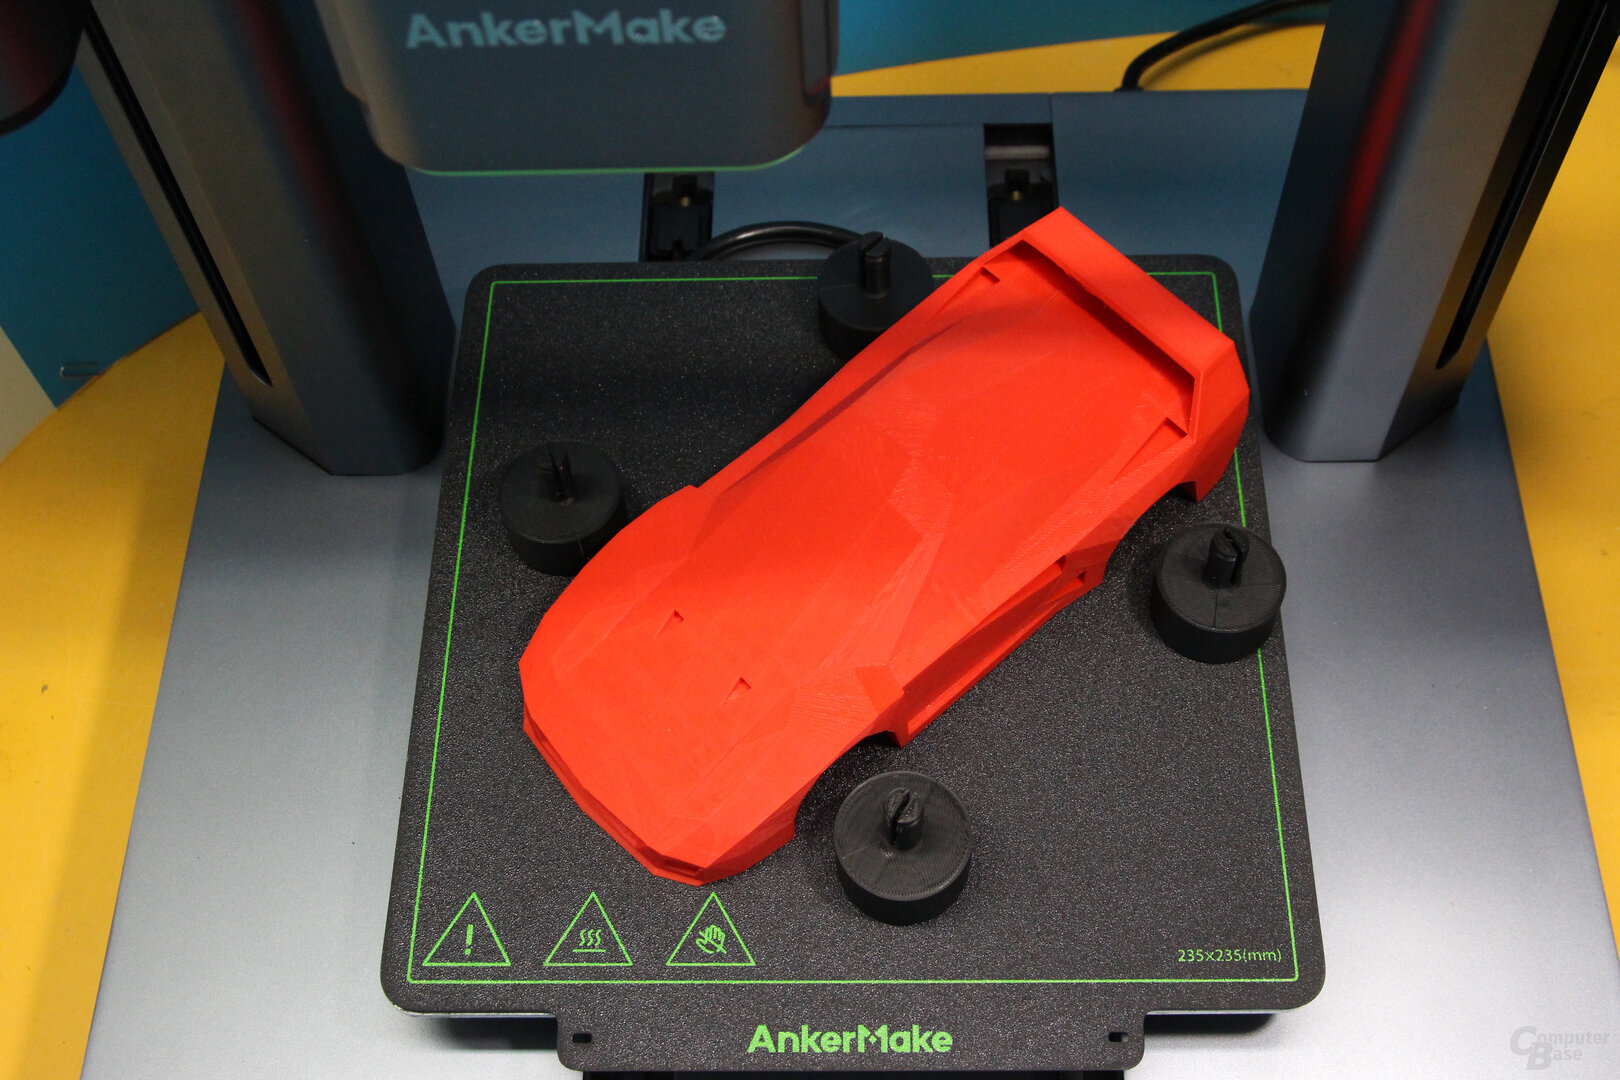
F40 Low Poly: Printed with AnkerMake M5 (250mm/s)< /figure>
It must also be mentioned that not every material can be printed with the M5 and that the maximum hotend temperature also limits the supported ABS. Conventional ABS can be printed at 260 °C, which is required if you want to print models for outdoor use. However, some demanding filaments that only start at 280 °C are excluded.
In addition, a few improvements could be implemented with software updates. On the one hand that the fans switch off when the printer is idle, on the other hand that it can be switched off remotely via the app. A still image of the current pressure right on the app's home screen would also be a nice touch, for which the M5 could create a new image every minute via the camera in the background. It would also be desirable to have access to the camera and time-lapse videos in the AnkerMake slicer, where the time, percentage of completion and temperatures can be viewed and adjusted during printing. A slicer app for the smartphone would also have its appeal, in order to completely avoid the detour via desktop or notebook.
 AnchorMake M5
 Image 1 of 2
 AnkerMake M5: The print head with direct extruder, hotend and nozzle
The ability to control the print at any time via the app and the camera is a function that you learn to appreciate in everyday life – but can also be achieved with upgrades with other printers or via WLAN cameras. The error detection is a good addition to be able to interrupt the print promptly in the event of spaghetti formation or a clogged nozzle – which incidentally did not occur in the test – before time, energy and filament were wasted. In the test, however, it often struck with minor inaccuracies where you didn't want to interrupt the print.
In the event of printing errors, however, printing with the M5 may have been completely in vain, because there is no option to automatically pause printing if an error is detected. Unfortunately, manual intervention cannot always save the print if structures have collapsed or layers are already missing. However, the option to pause the print and continue seamlessly is part of the features in this price range.
 AnkerMake M5
Depending on the model, the support structure or the printing speed must also be adjusted, since the M5, with its enormous acceleration, can collapse fine support towers (which usually hold up easily on other 3D printers) when they reach a certain height. More support or a support surface on the print bed can be a way to solve this problem.
It is to be commended that Anker has already taken criticism from the beta phase of the M5 from many accepted jobs and implemented improvements. Initially there was no manual preheating, for example to change the filament, but this is now integrated. Also the labels on the touchscreen to load and unload filament via the display have been adjusted to be more understandable.
AnkerMake M5 product group 3D printers, 10/24/2022 
Multicolor prints with AnkerMake V6 Color Engine
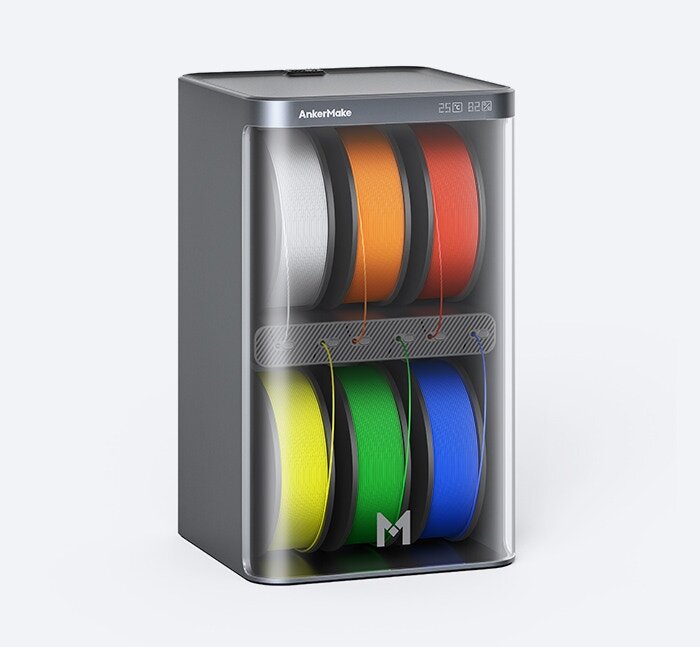
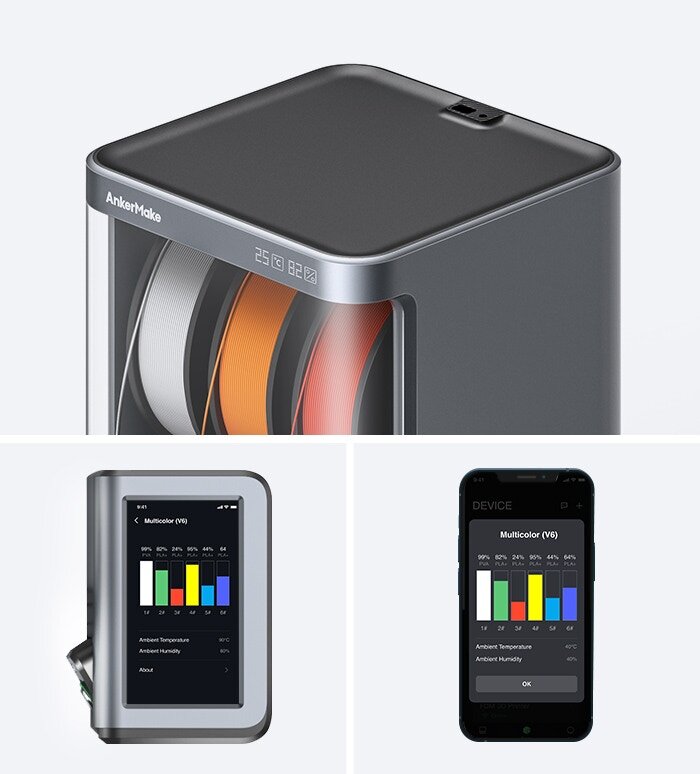
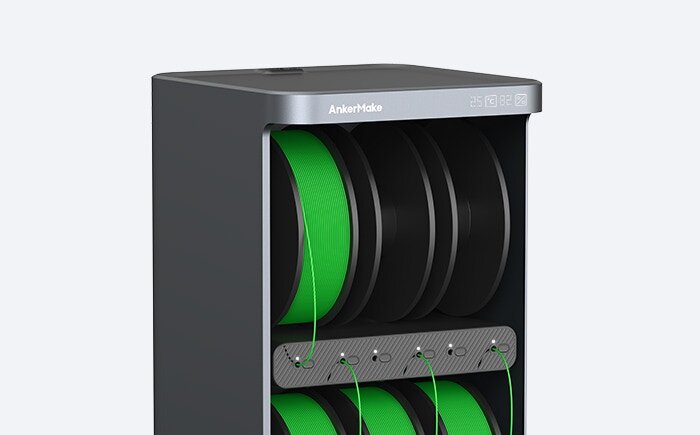
For next year, Anker has announced an interesting extra for the M5 with the AnkerMake V6 Color Engine. The Color Engine can hold up to six spools of filament and automatically switch between them during printing to print multicolored models. If a filament is empty, it will also automatically switch to the next roll without interrupting the print. The display of the M5 and the app should also show how much filament is left per roll. At the same time, the housing can serve as a storage place for the filament and displays the temperature and humidity inside. According to the current state of knowledge, the V6 Color Engine requires the replacement of the M5 extruder, since all six colors have to be fed to the extruder in hoses at the same time, otherwise it would not be possible to change colors quickly. For the US, the Kickstarter campaign has a suggested retail price of $499 for the V6 Color Engine.
-
 AnkerMake V6 Color Engine (Image: Anchor)
Image 1 of 5

AnkerMake V6 Color Engine (Image: Anchor)
Alternatives to the AnkerMake M5 are not only available in the form of the popular Ender or Prusa printers, because with the Bambu Lab X1, which was developed by former DJI engineers, an even faster 3D printer (500 mm/s) is available , which takes a similar all-encompassing approach as the M5, bringing the option to change colors and an enclosure right out of the box. With an end customer price of 1,630 euros, the Bambu Lab X1-Carbon, which can only be pre-ordered in Germany after the successful Kickstarter campaign, is twice as expensive and, according to initial reports, has even more problems with printing.< /p>
ComputerBase was loaned to the AnkerMake M5 by Anker under NDA for testing. The only requirement was the earliest possible publication date. The manufacturer did not influence the test report, there was no obligation to publish it.
This article was interesting, helpful or both? The Editors are happy about any support from ComputerBase Pro and disabled ad blockers. More about ads on ComputerBase.