
Now that you can buy a 10 MP digital camera off eBay for cheap, it has become a lot more common to see your digital pictures grow in size from anywhere between 1 MB and 7 MB! If you take pictures in RAW format, they can be 15 MB+ in size! Obviously, it becomes a lot harder to try to email these photos or upload them due to the limitations on the size of attachments or simply because it takes a long time to upload 10 pictures that are 5 MB a piece! So I’m going to talk about two methods to send your large digital pictures in a speedy and easy way!
Windows XP, Windows 7 and Windows 8 have a built-in feature that will take your photos and automatically re-size them to a manageable size and then attach them to an email in your default email program. Using this method you need to have Microsoft Outlook, Outlook Express or Windows Live Mail as your email program because Windows is really annoying about default programs. If you don’t use any of those for your email, there is a bit of a trick you can use to get the re-sized file without using the default email program, but otherwise you’ll need to download and install a free application.
The first step is to go to the folder that your pictures and select the photos that you would like to re-size. Once selected, you will see an option on the left side or at the top depending on which version of Windows you are using called “E-mail“, “Email this file or “Email the selected files“.


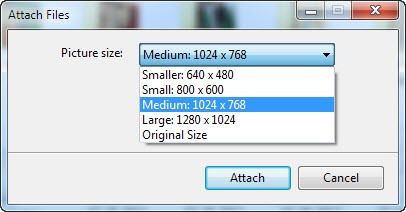
Once you click this, you will be prompted with another dialog box that asks you whether you want to make the images smaller or if you want to keep them the same size. Go ahead and choose “Make all my pictures smaller“. In Windows 7 and above, you’ll get a different dialog box asking you to choose a picture size from Smaller to Large. Once you select the option, you’ll also see the estimated size of the re-sized pictures, which is a really handy feature they added.

Click OK and Windows will re-size all the images and open a new email with your default email program with the pictures attached!


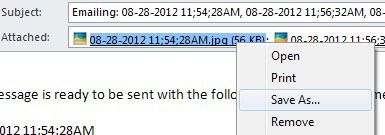
Now if you’re one of the people who does not use any of the above three listed programs for your email, this will not work! There are two workarounds. The first one is to simply download the re-sized images and then attach them yourself wherever you like. To do this, just right-click on the name of the image in the Attached section of the email and choose Save as.

You can simply save the smaller image to your computer and then you’re good to go. The other option and probably easier one is to download a program called Image Resizer for Windows that adds an option for resizing to the right-click context menu.
Once you have it installed, go to the folder with your files, select them, right click on one of the selected images and you’ll see a new menu option called “Resize pictures“.


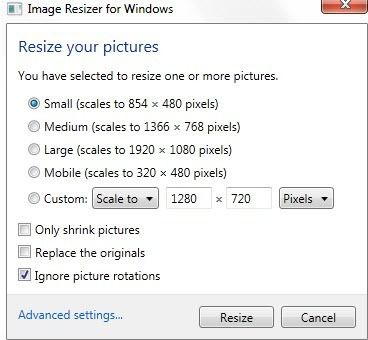
When you click on this, you will get a similar screen to the previous one where you can select the size from small to large. You also have a couple of more options with this program like choosing a custom size and replacing the originals if you want. The Only shrink pictures will not resize any pictures smaller than the size you specify.

Click Resize and your file is created in the same directory as your original file, but with a different name. Now all you have to do is go to your email program and attach the smaller files to your email!