


A spacious case with lots of installation options for drives. Well-prepared for water cooling and easy to open by means of the doors. The closet has a price tag, but it is in my eyes worth it.
Pros
- Large
- Many installation options
- Prepared for water cooling
- Dust filters easy to remove
- Enough space for cable management
- Lots of space for drives
Cons
- No rubber seals for water cooling
- No dust filter on the top
- Dismantling the drive cage difficult
Final conclusion
Score: 5Per criterion
Modbaarheid
Score: 5


- Introduction
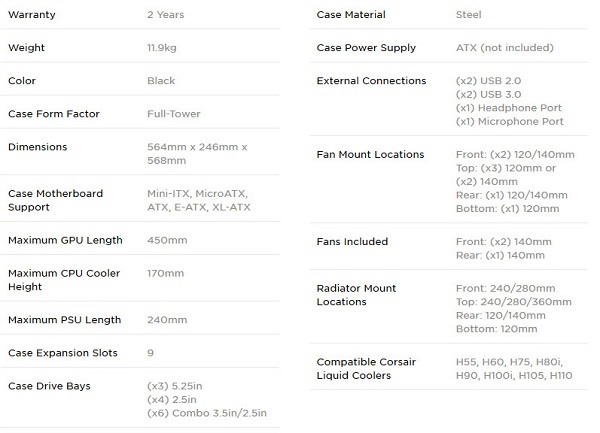
- Specifications
- Unboxing
- Outside
- Inside
- Installation
- Conclusion


By chance I came across this case at the outlet section of a computer store here in the neighborhood. This cabinet had a nice review had (thumbs up for stin00), but this variant was fitted with a window which is normally on the 760T is delivered (the big brother of this case). The closet had 2 small scratches on the top and went for a much lower price way. Thanks to this very low price I didn’t have to think long to bring the cabinet to purchase.
And of course, a review of the cabinet not to be missed. 

The price of the cabinet at this time (the closed version) is currently around the lwa 149,-

First, the specifications of the case.


If you have the box for the first time, he is impressive in its size. The box is 65 inches wide, 34 inches deep and 67 inches high. The box is a further standard brown with prints on it. No exciting colours on the box, just nice and basic.
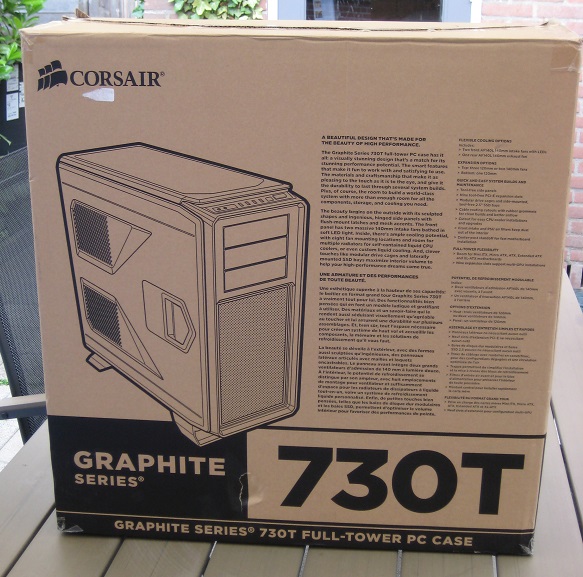

On the front of the box can you see on the left a drawing of the case. To the right there is a lot of text, which probably not many people at all will read. At the bottom is the name of the case: Corsair Graphite 730T.
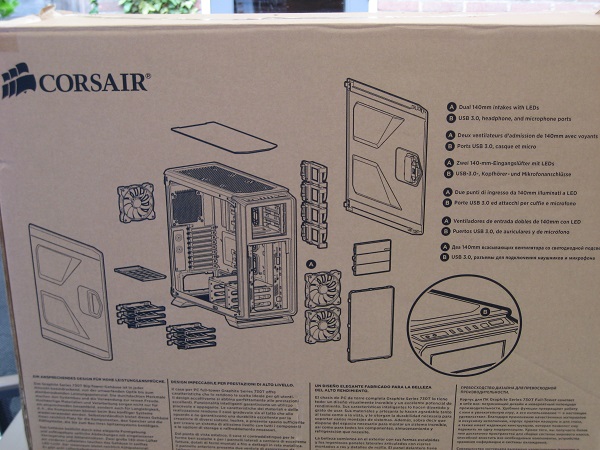

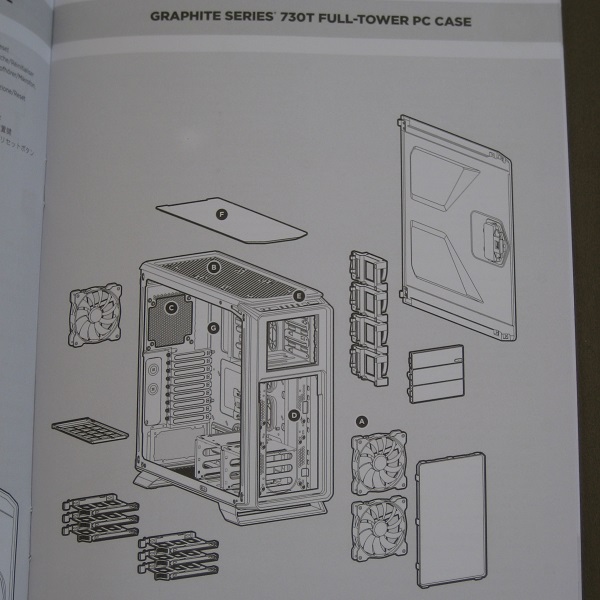
On the back we see again the case of the computer, but now totally disassembled. This is what the cabinet looks like all the parts of the cabinet are removed. To the right of it is a explanation to see 2 things in the cupboard.
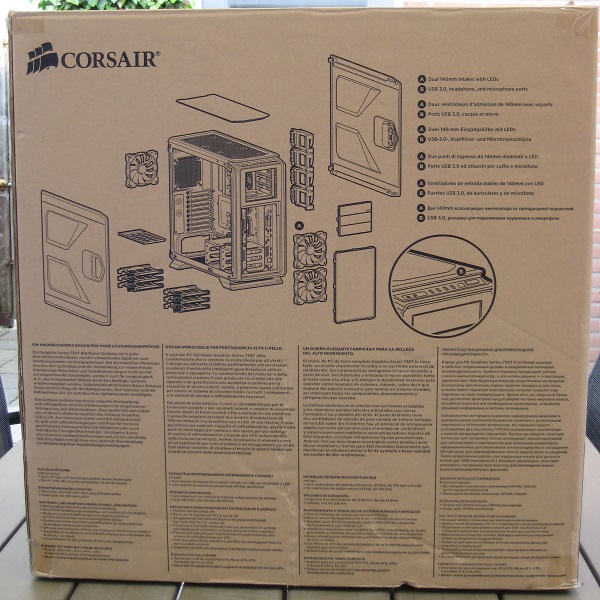

Under the image there is some text about the case. So there is the koelmogelijkheden to read, what motherboards you can build and what more features are present in the base assembly. These features will be in the review all come along.
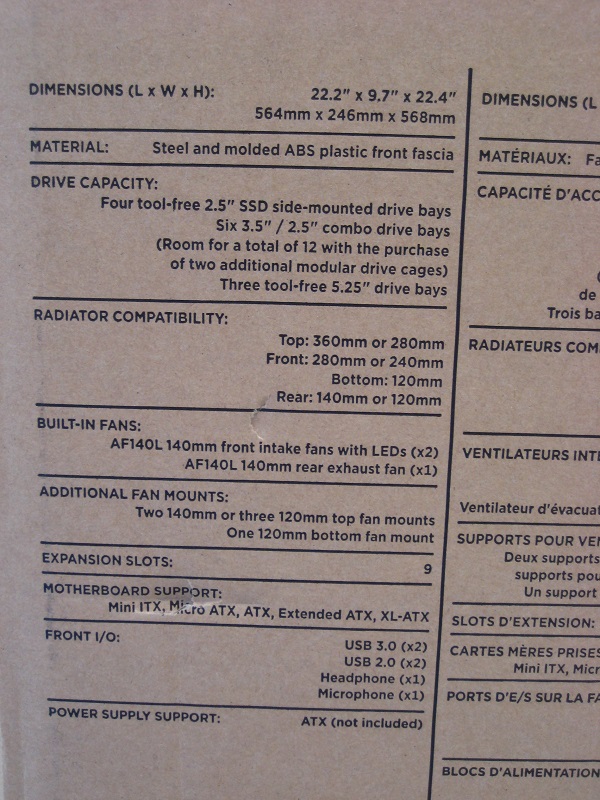

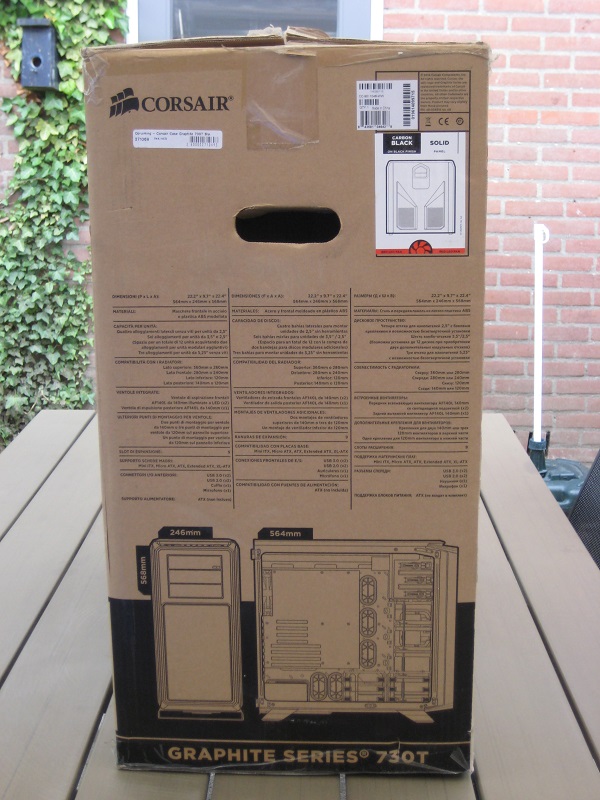
The side of the box shows the specifications of the computer chassis. There is also at the bottom a drawing of the chassis with the front view and the side view when the cover of the cabinet has been removed. And even if the white sticker on the box to see that this is a closed model: this was really a version with window.
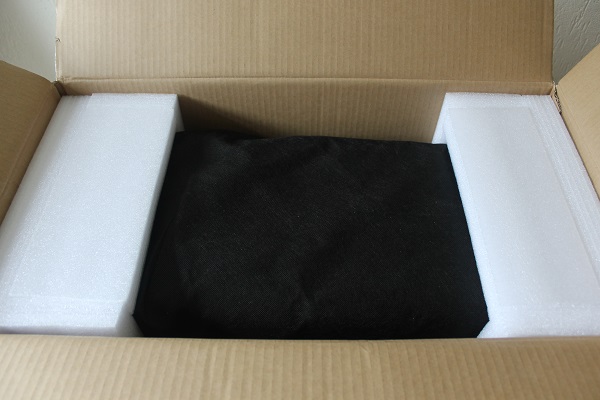
If we get the box open, then we see 2 pieces of foam and a black cloth.
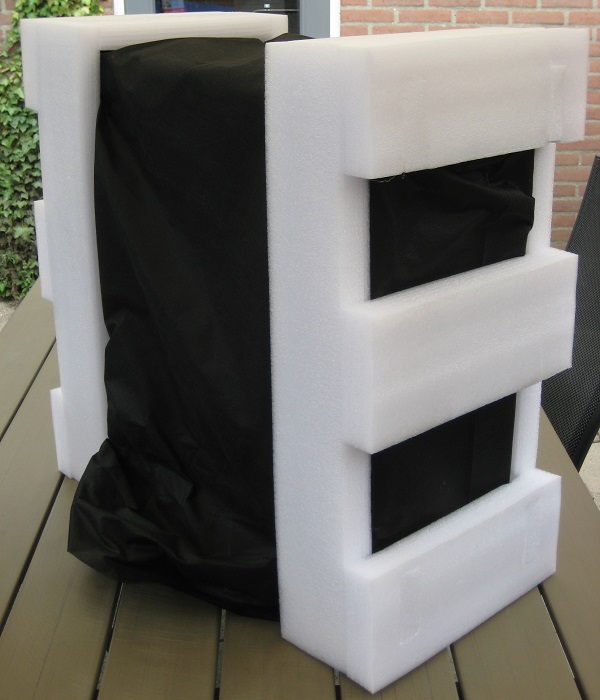

If we pull out, we see 2 large blocks of foam to avoid the case was damaged. Also, the black bag must make sure that the cabinet remains intact.
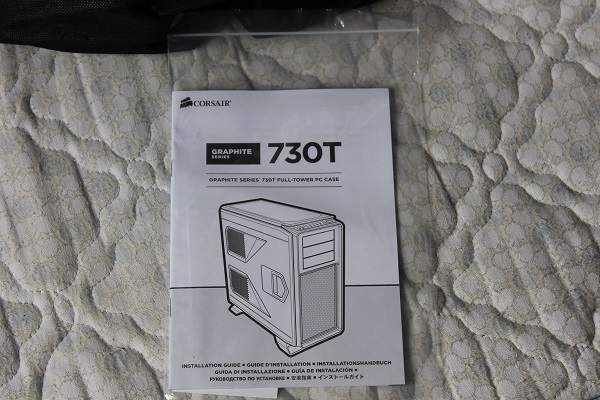
In the box we also find an instruction manual packed in a plastic bag.
Instead of a simple piece of paper which you should open fold, there’s a nice booklet included, with clear text. Definitely a plus in a time where more and more is digitally available or only a quick start guide is included.
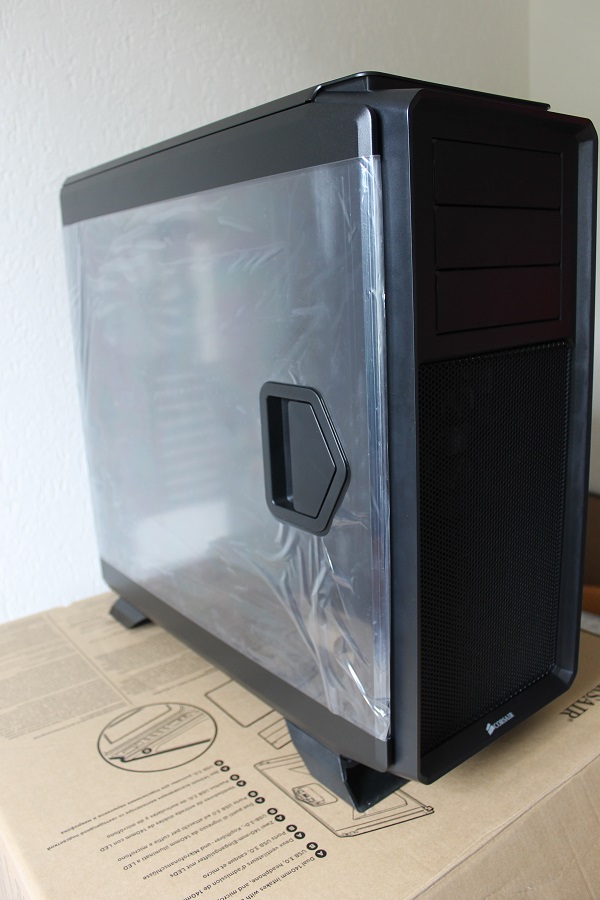

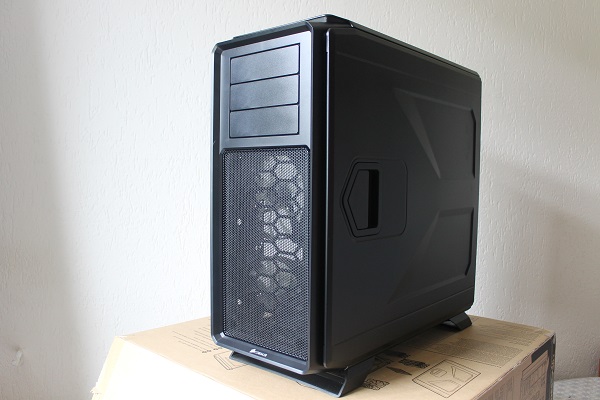
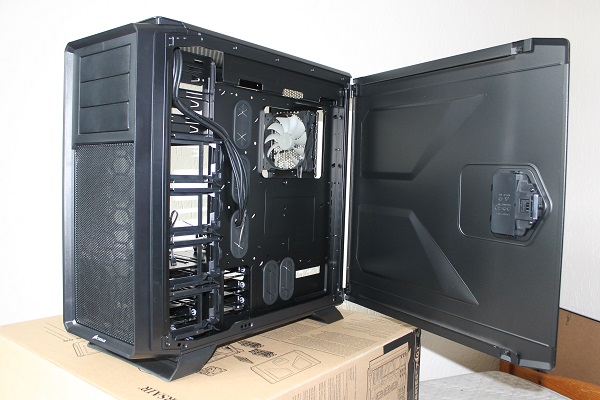
We pick the foam away and remove the black bag, the closet was revealed. What if the first falls on it, is that the window is fitted with a foil. This is to prevent the plexiglass and cause damage. This film is both on the outside as the inside. I also think that the cabinet is already a firm impression.

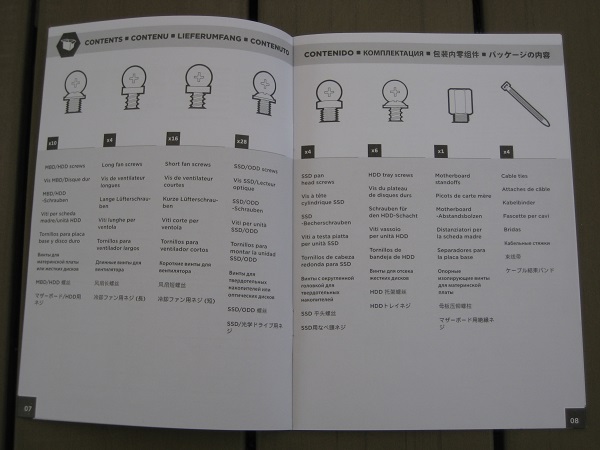
If you’re by the window watching, see you in 1 of the drive bays in a box. Herein are the various accessories that you may need when building your system.
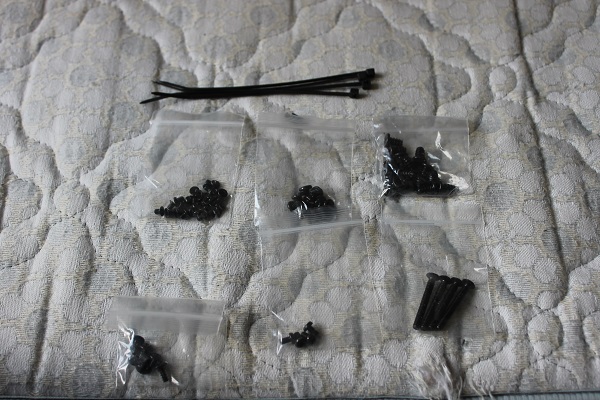
There are tie wraps supplied to hold the wires away behind the motherboard tray. Also, there are the screws to secure the hard drives to screw it in (even though it is not always necessary), and to possibly multiple fans to be installed.

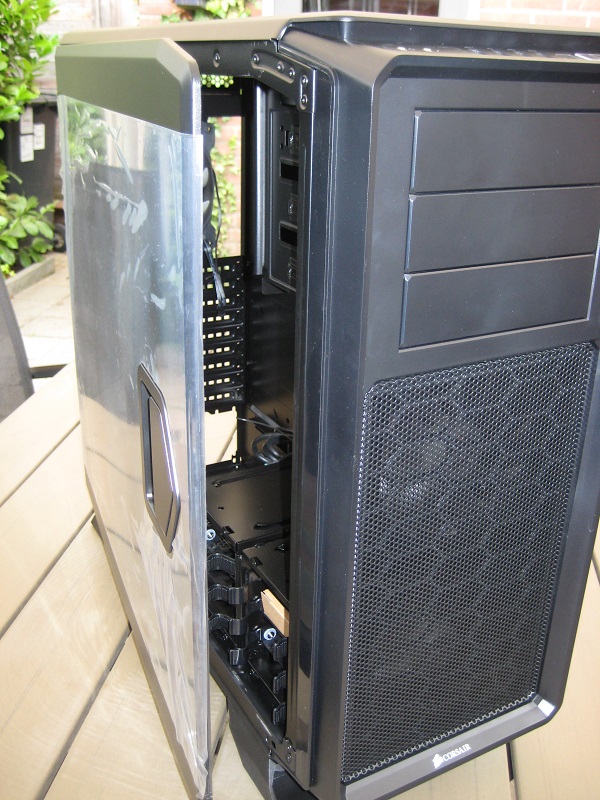
Time to cabinet once the outside.
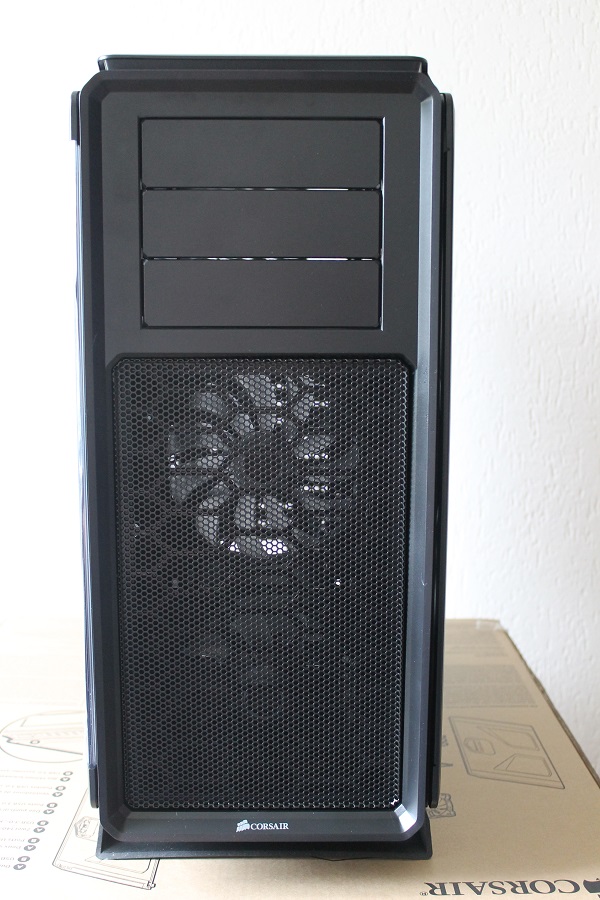
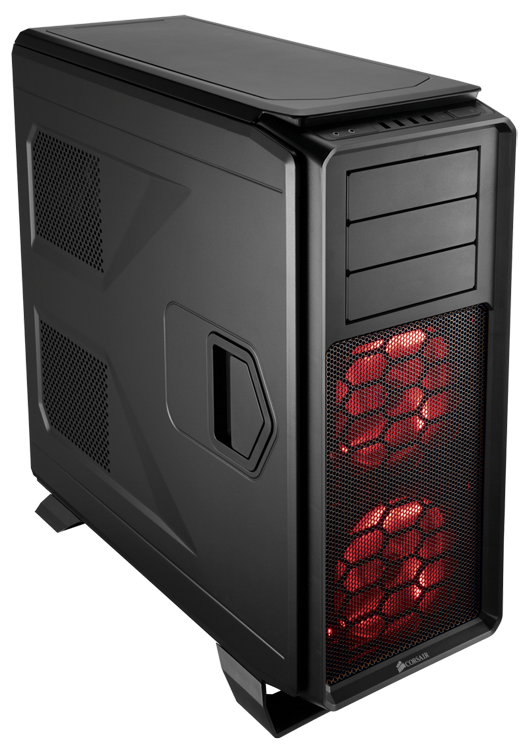
If we front, than it is to see that there is room for 3 5.25 inch drives. Something not used as much anymore, but it is possible to see here a fan controller in the build.
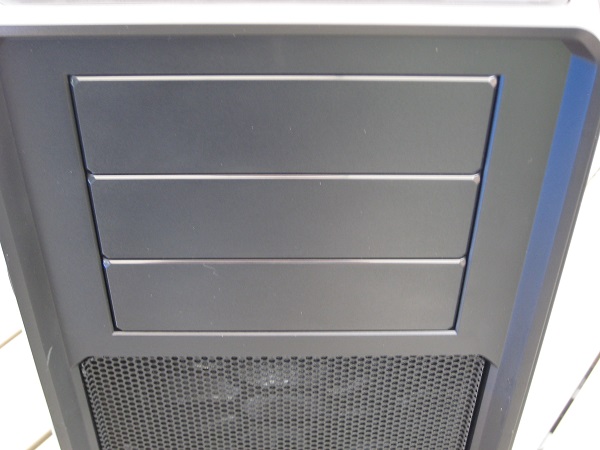
What a pity is, is that there’s no place for a 3.5 inch card reader. With my previous cabinet, it was possible to be on the spot of a 5.25-inch bay one 3.5-inch device in build. Of course, it is, however, possible to itself for a solution, but it might have been better if this standard was present.
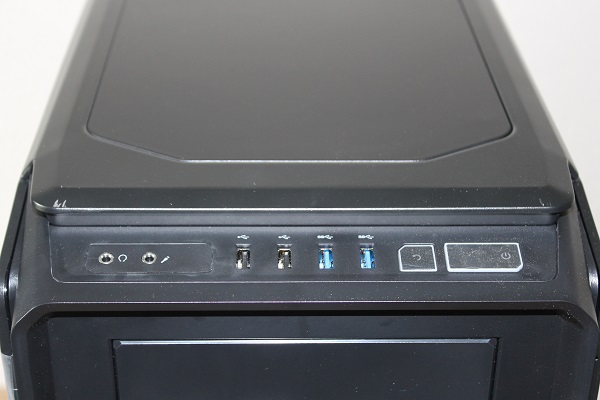
At the front there are also various connections. So, we see connections for headphones, microphone, 2 USB 2.0 and 2 times USB 3.0. To the right are the reset button and the on/off button. The 2 buttons to give light: the reset button indicates the hard drive activity, while the on/off button light indicates when the machine is on.
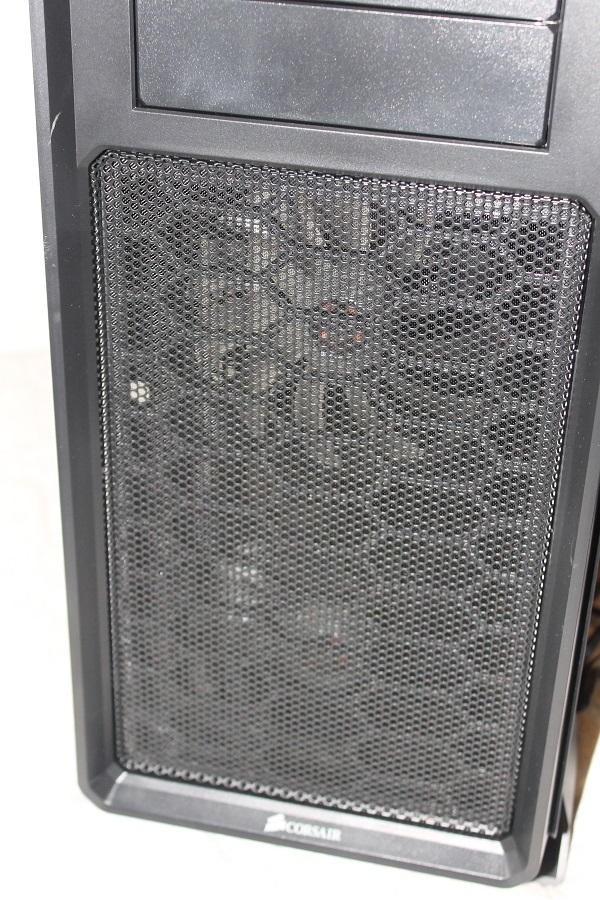
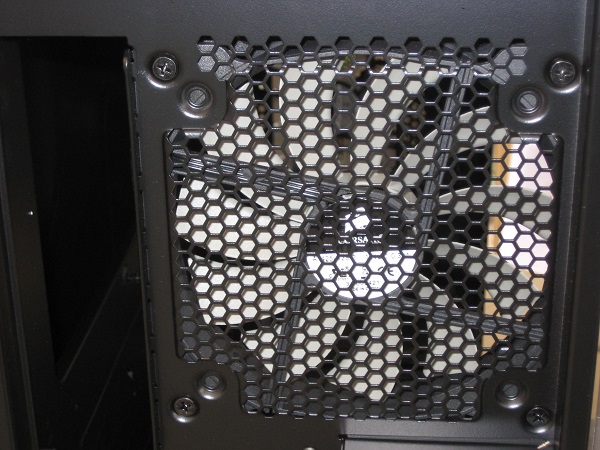
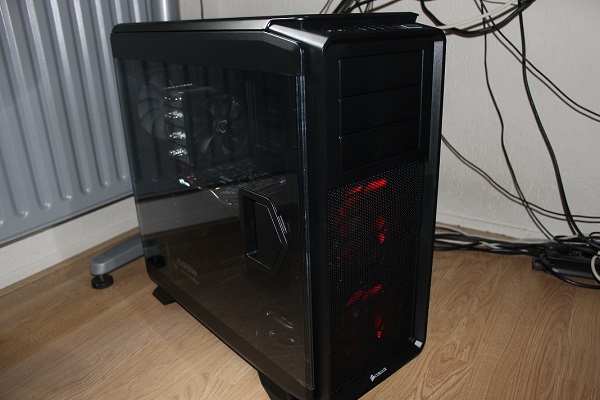
We also see at the front and a lattice with behind 2 fans. The grid should serve as a filter for all the unwanted dust out. Of course the grill easy to remove to clean.

Fortunately, this is possible. By upper left and upper right of the grid button, it comes loose of the case. That way, you can well as blowing with a compressor or using a can of compressed air.
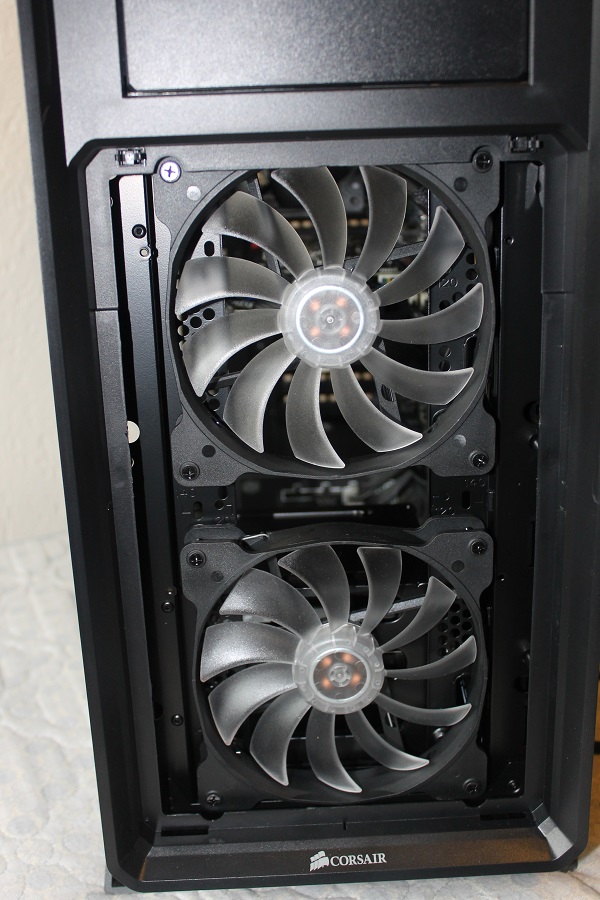
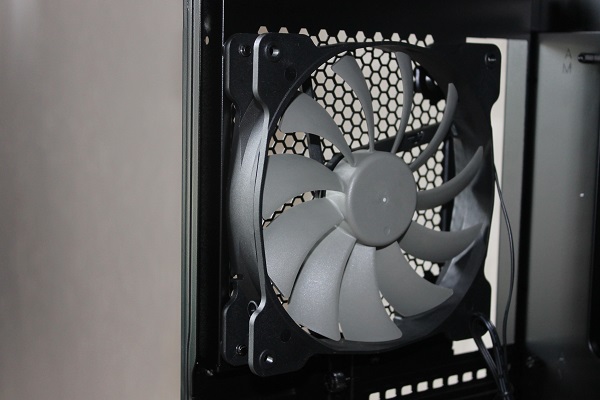
Behind the lattice, as previously mentioned, 2 fans attached. These are Corsair Air Series AF140L fans. This run by default at 1000 rpm, but are silent to call. This you can hear the computer.
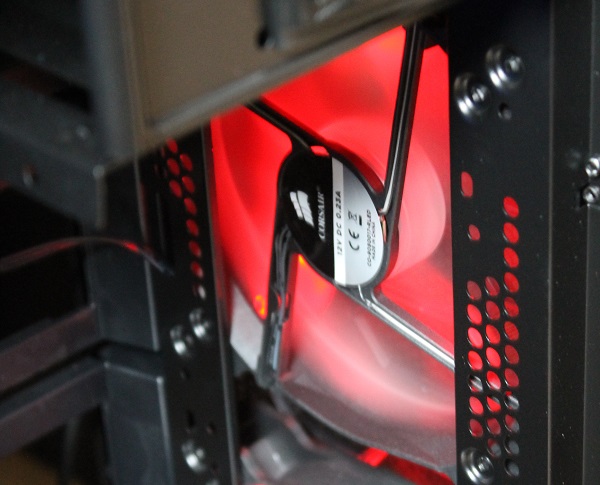

These fans light up in red when the computer is turned on. Something a nice effect, but you need to make sure that your grill is clean.
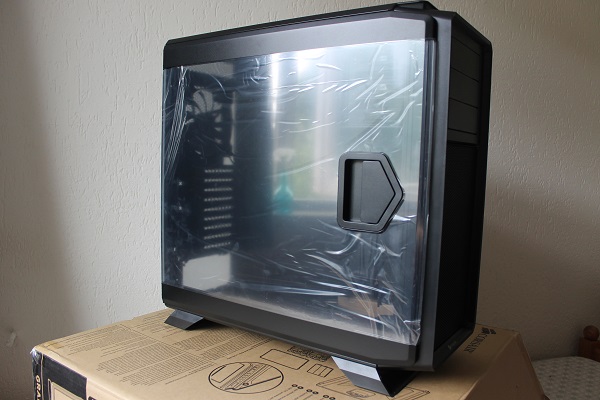
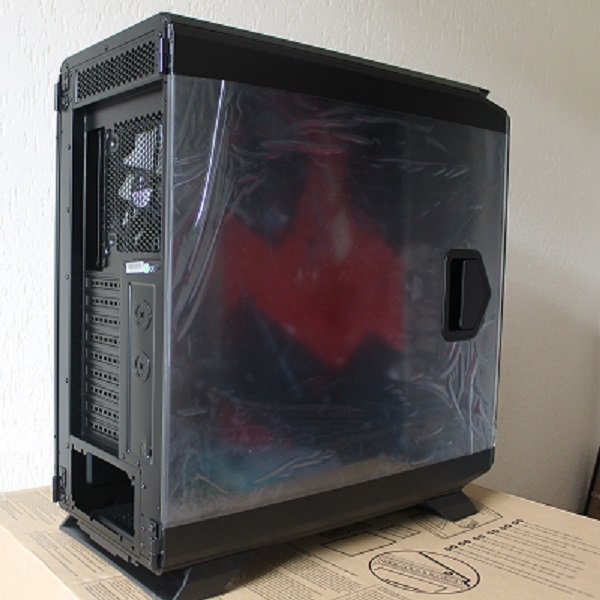
On the side of the cabinet we see the window to sit. The nice thing is, that the sidebar, complete of plexiglas. There are no edges to those in the cabinet must hooks.
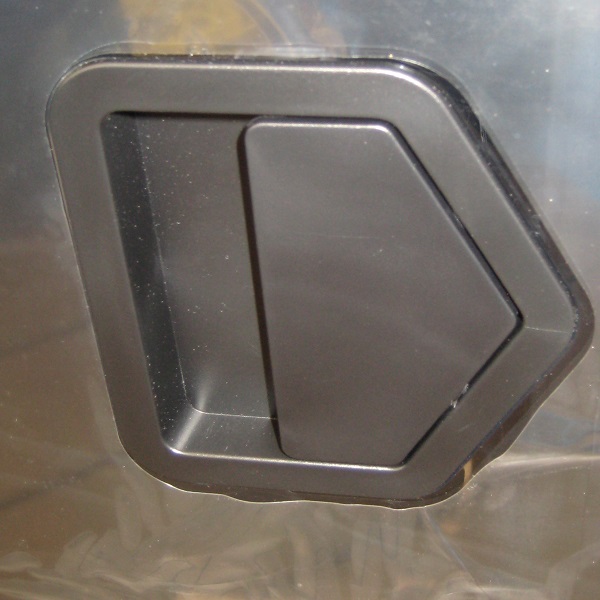
The latch is on the center of the cap. As lan, you are very easy the side open and also close again.

The side hangs on 2 hinges: 1 above and 1 below. So you open the cabinet as you open the door.
You can very easily the closet open, something build or expand and the cabinet close again. To do this, so you have no need for tools. Very useful.
A small disadvantage is, that the closet a little bit can deviate, since the edges do not fit tight. But I personally don’t find such a disaster, since you don’t every day to the doors. .
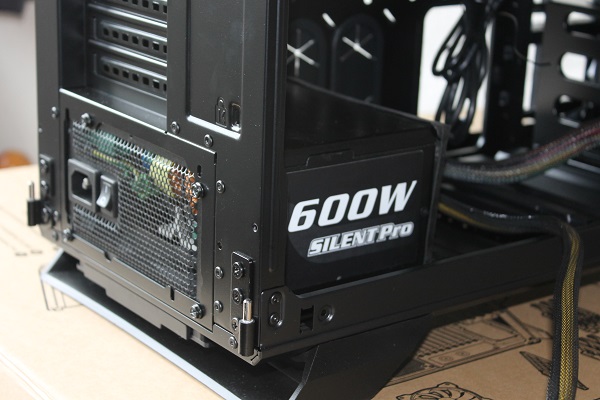
When we go to the back to look, then we see at the bottom of the space for the power supply to sit. This is just a standard power supply.
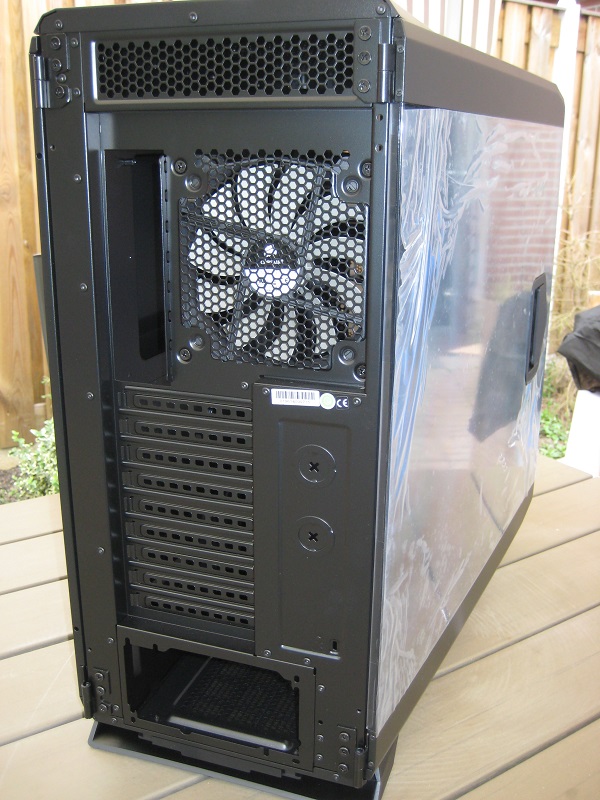
Above are 9 locks are present for various cards to assemble, such as a SLI setups of video cards. To the right of it, there are 2 “holes” made for external water cooling. It is nice that this on the cabinet made. Unfortunately, you can it after 1 time use no more sealing. It would have been nice if these inputs with rubber sealed would be instead of metal.
On top of this we find once again a fan. This is also a Corsair Air Series AF140L, which is not equipped with lighting. No problem, since these on the back. To the left of the fan is the space for the I/O shield. At the top are ventilation holes made for any additional cooling.
On the other side we see a black cap. The principle is the same as in the plexiglass door, only this is a door of metal. That way, you can easily get a SSD to make (as later seen) and you can easily with the cables.
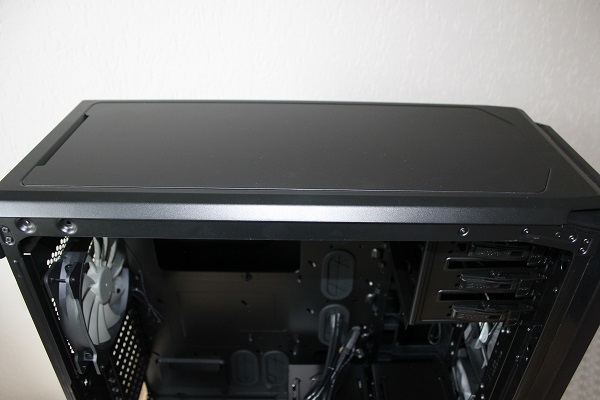
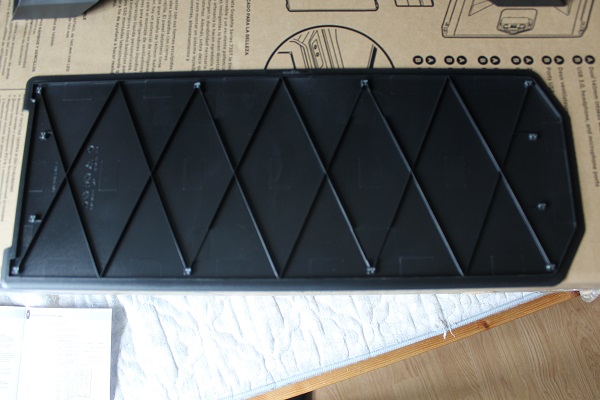
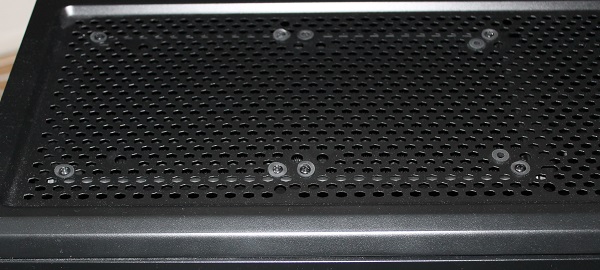
The top has a “loose” plate. This plate is held in place with magnets. This plate you can easily remove them.
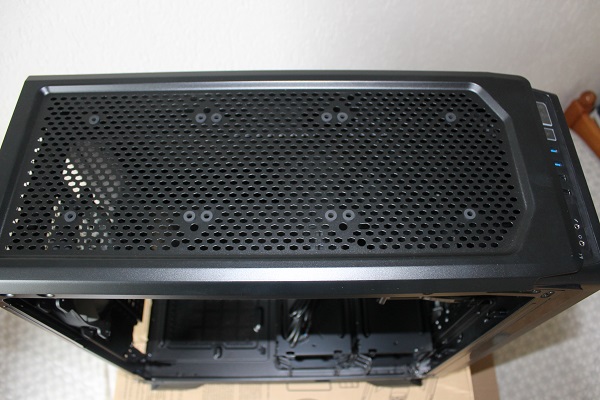
If you do that, then there are different rubbers out. Here you can add additional fans to be mounted as you want. Also is it possible to be here for a 240mm or even a 280mm radiator mounted on the inside. Depending on the size, you need to have some rubbers to move. It is a pity, that there is no dust filter is present on the top. That would be just slightly more for if you are water-cooling mounts. Now can all the dust through the top to the inside, or you have the top cover on the moment you turn the computer off.

We look finally to the bottom of the cabinet, then we see another 2 feet where the cabinet itself. These are solid brackets which are equipped with 4 rubbers. This will ensure nicely that the cabinet is not as fast shifting. Going to the cabinet, yet slide, scratch, in any case, not on your floor or your desk.
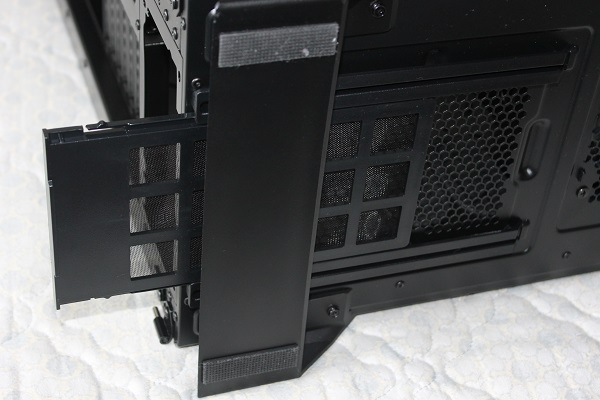
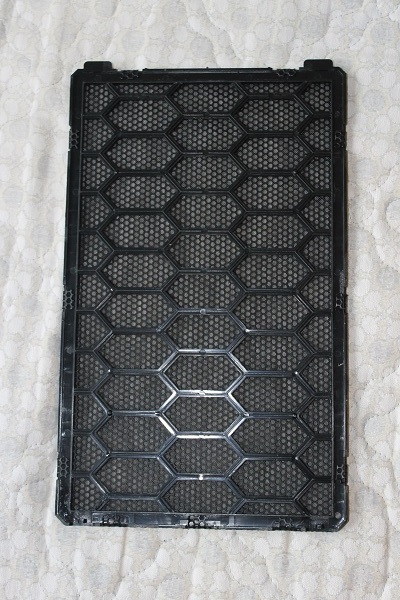
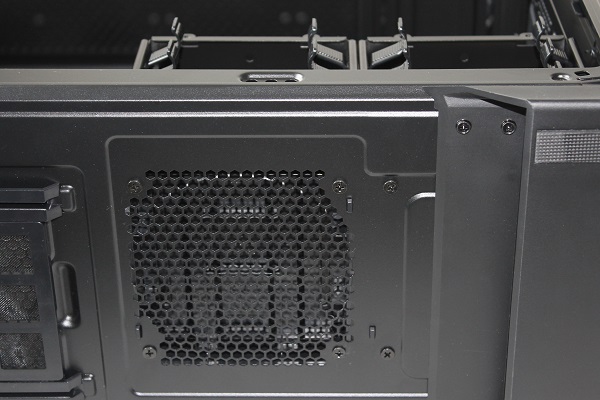
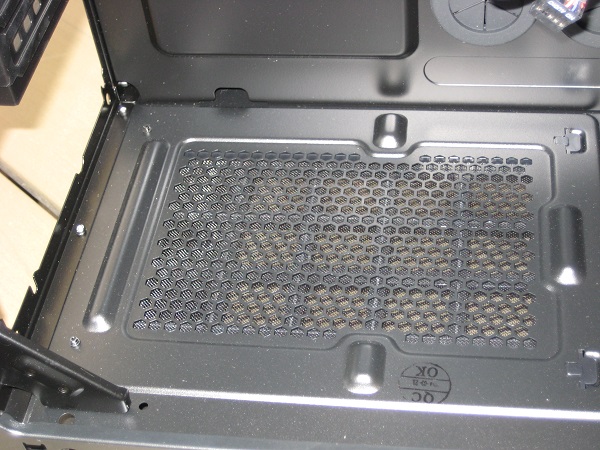
Also, we find a dust filter that is easy way to slide. This to dust from the power supply and the rest of your computer.
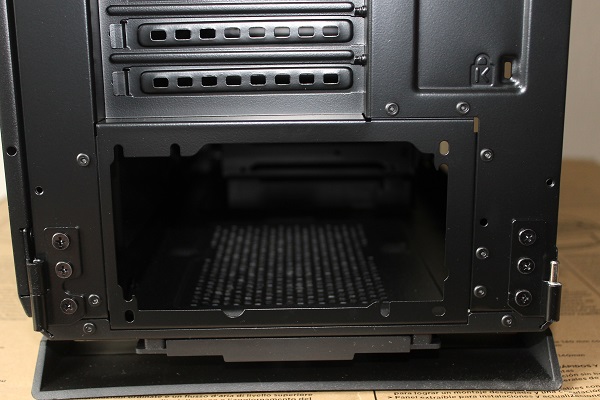
Finally there is a place where you can still have a 120mm fan can be fitted. This is not a standard accessory. You will want to get 1 mount, then you will have the drive cage to remove, giving you 3 disks less to build. However, with the capacities of today, the question is whether that is still a lack. Also here, there is no dust filter present, so if you are a fan, go to mount, then you will regularly need to clean.

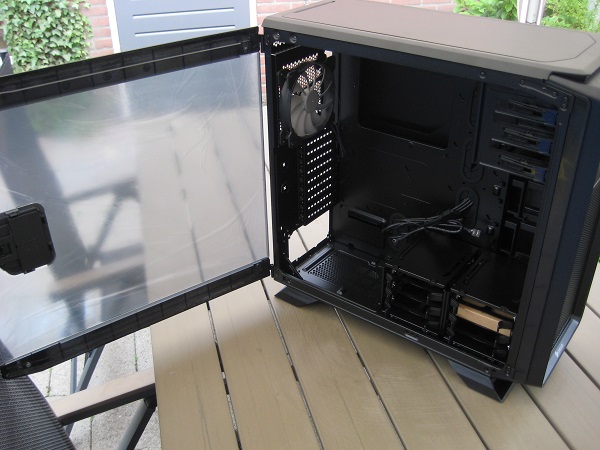
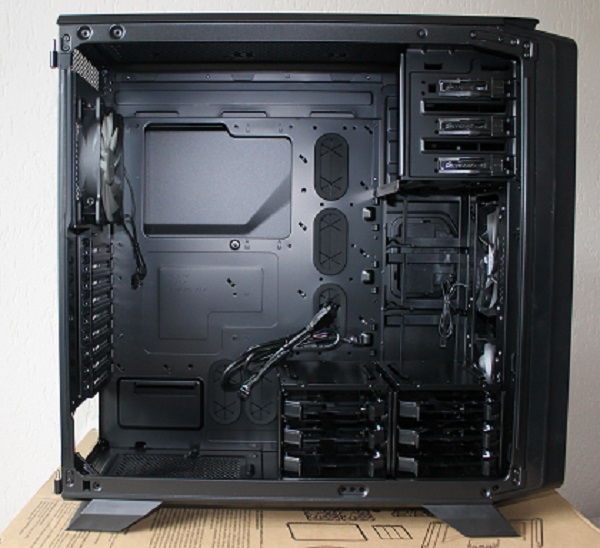
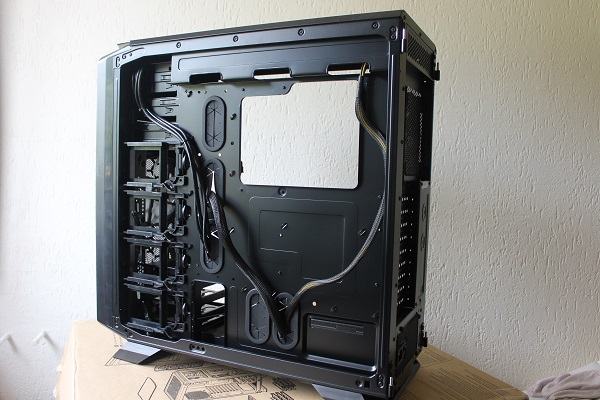
Time to get the door open and inside to explore. The interior is completely painted black, something which is almost standard in housing today. Nice in a closet with a window. 
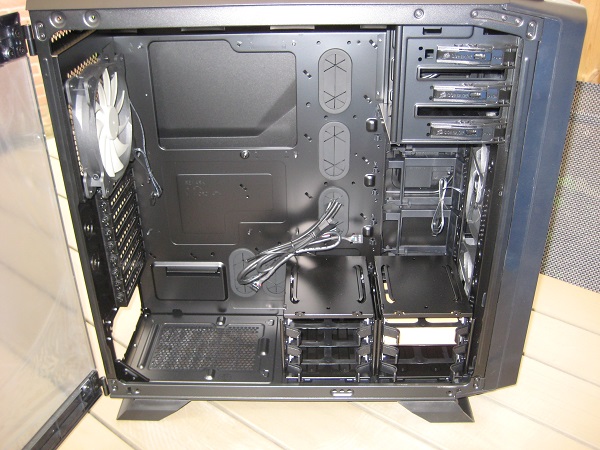
The cabinet has a bit of a standard format. However, there are also some new things added.
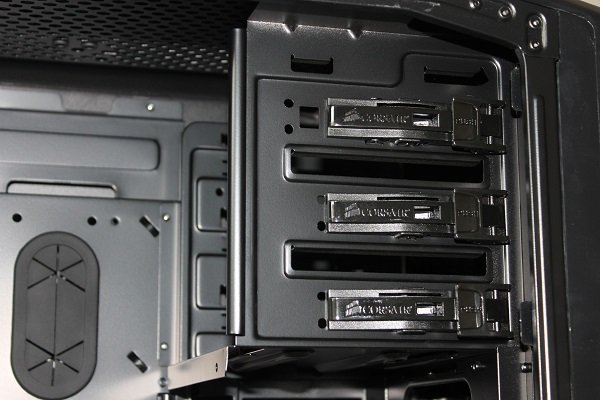
First, we see that the 5.25-inch devices can be attached without screws. The only thing you need to do, is the device in the cradle to slide and be fixed by a slider to move to pick it up. If desired, you can always have the device fixed.
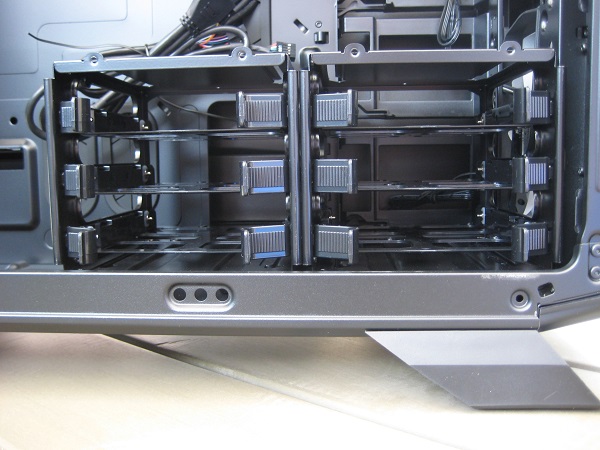
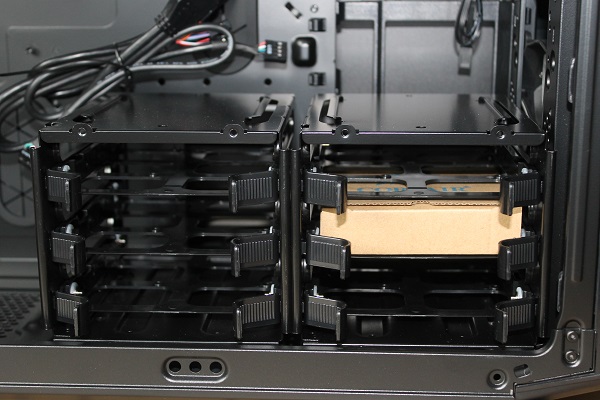
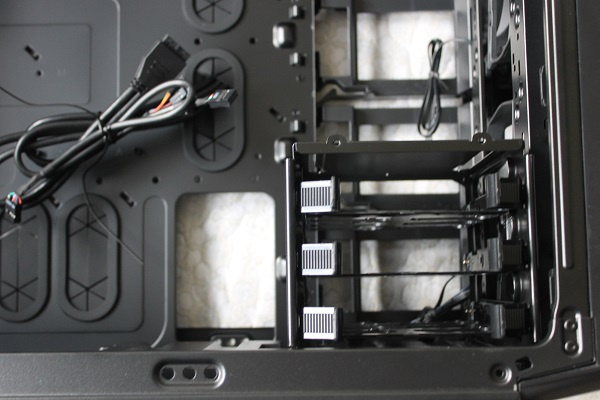
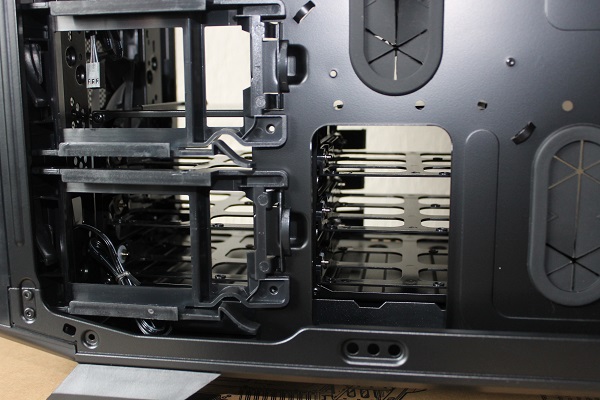
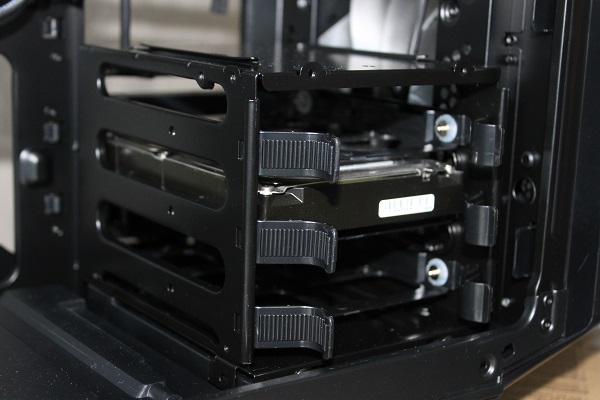
At the bottom of the cabinet we see 2 drive bays, where you have a total of 6 hard drives in. You get a cradle from the ends toward each other to push.
A little caution is advised. If you push the tips too hard at each other, then it can happen that 1 side can break down. Unfortunately, this was happened to me when I the system to the installation. Fortunately I did not get all of the trays are needed, so this tray from the cabinet could be.

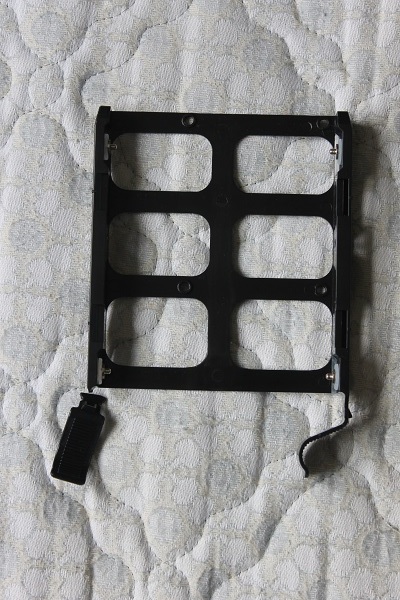
You have no need to use a tool a hard drive to mount. You can use the ends to get the districts so that the pins in the screw holes of the hard drive to fall. You can then use the cradle just push back in the drivecage.
As indicated earlier, it is possible to, when you only have 1 or 2 drives, a drive cage to remove it. That way you have more room in your closet. However, if you want the right cage to remove, you need the base of the cabinet. This had what I would what have been better.
On the other side of the cabinet we find the place where the power supply must be placed. At that place are feet placed, so that the power supply is not fully on the bottom of the enclosure rests.
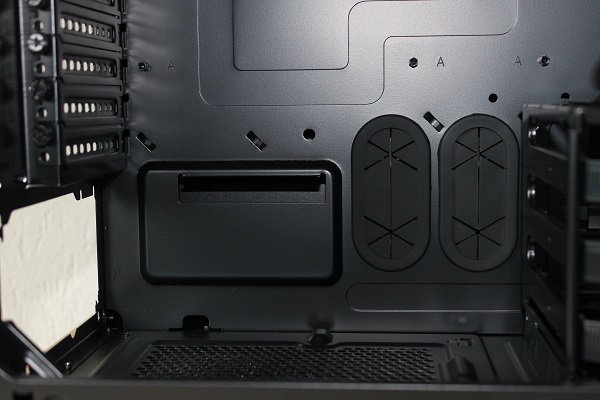
When the power supply has 2 holes to route the cables through. So you could have the cables behind the moederbordtray rid. For example, the cables are not in view, and the airflow not obstructed.


Above the power supply we find the locks for the expansion cards. The cover plates are easy to remove by means of thumbscrews. You have also here so no tools are needed. (unless the screws are completely stuck down)
At the top we find than the previously mentioned fan.
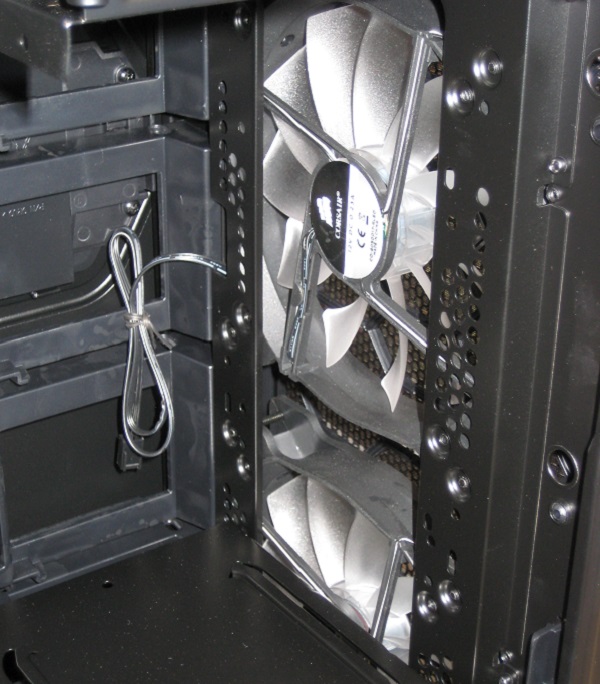

On the front we see the 2 other fans that stuck by means of 4 leds in a red colour if the pc is on.
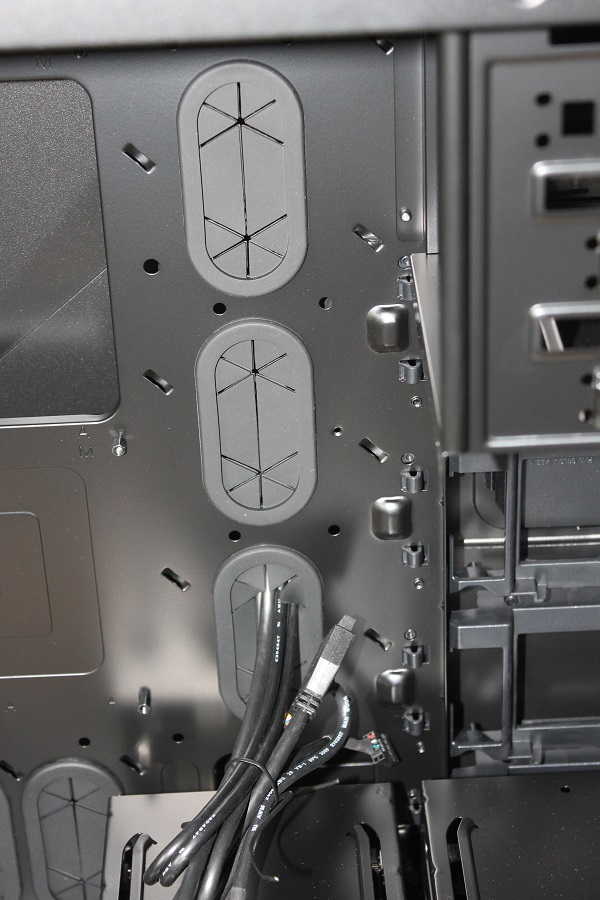
In the middle of the cabinet we see, as with the power supply, 3 openings where cables can pass through. These are also finished with rubber inserts where you can easily cables through which you can attract.
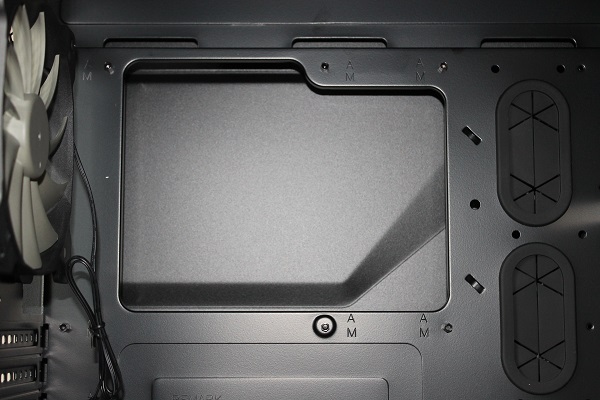
As the last on this side, we see the opening to a cooler is easy to build. I think the personal is always nice to pre-cooler to build, but if you have the cooler in want to build if your motherboard is already installed, is a lot of room certainly comfortable. And there is enough space available. 
At the top, finally, are rubbers present, that vibration should go. If you decide you extra fans to mount or a radiator, the vibration is absorbed.

We make the other door open, then see the space where the cables along. In this way cables are not visible anymore and the airflow not obstructed.
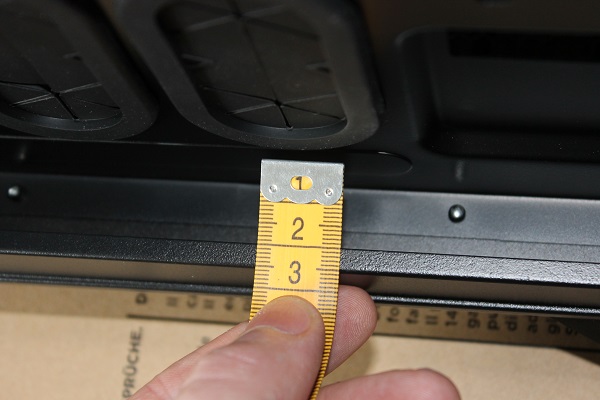
There is 2 inches of space between the motherboard tray and the door. Plenty of space for all your cables are good. So you don’t force it.
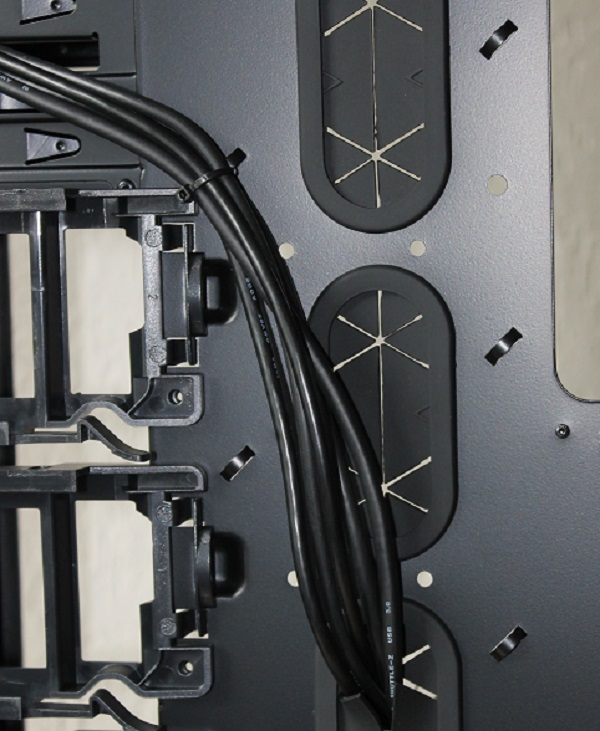

There are, on the back enough eyes to cables to be fixed by means of tie wraps. This keeps it neatly in place.
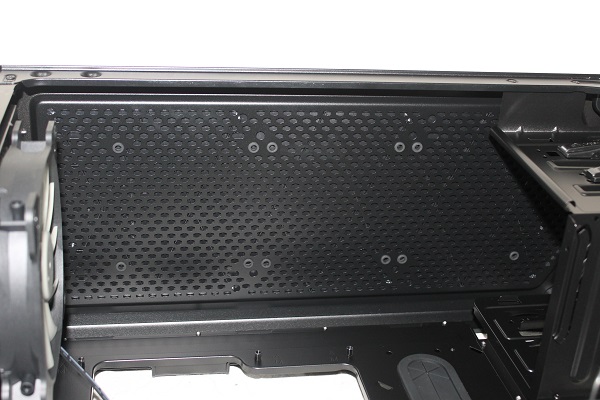
Finally, we are seeing one of the most beautiful tricks in this cabinet. There are 4 trays built in, where your 2.5-inch ssds can mount. That saves the use of a reducer or a place in your hdd cage. Furthermore, you drive out of sight.
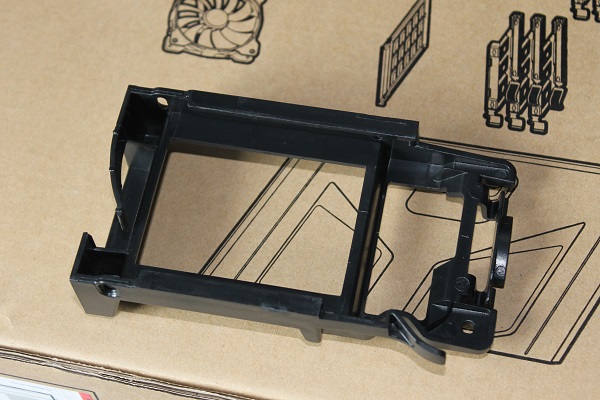
Here you have no need for tools, because you can make the ssd neatly fixed terminals, something which later will be shown. If desired, you can always the ssd is even fixed with 2 screws.

Enough of the talk. Time to a computer in this cabinet to build!

We have, of course, an empty wardrobe necessary, together with the parts. 1 thing what I not built have in this build is a DVD burner. I have consciously made the choice not to build, since most of what’s normally on cd/dvd media to download is. If I had a DVD burner is required, then I have a remote copy in the closet.
First I place the power supply at the bottom of the base assembly. Due to the large amount of space in the cabinet, placing it so happened.
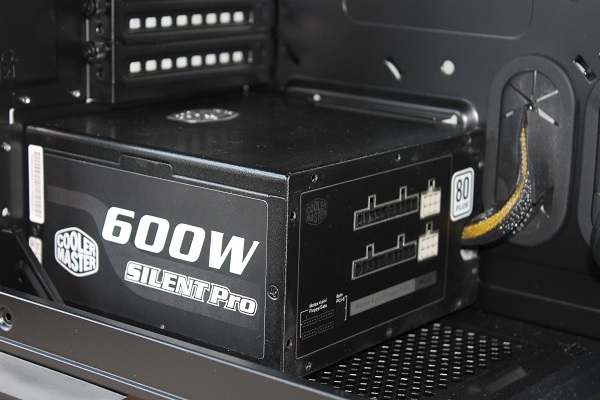
You can then select the power cables through the holes to the back post. So block the cables with the air flow through the cabinet.
The 24-pin cable and the 8-pin CPU cable can you already make to the places where the connectors back in. Any place to get the cables to the eyelets on the back of the motherboard tray sit.
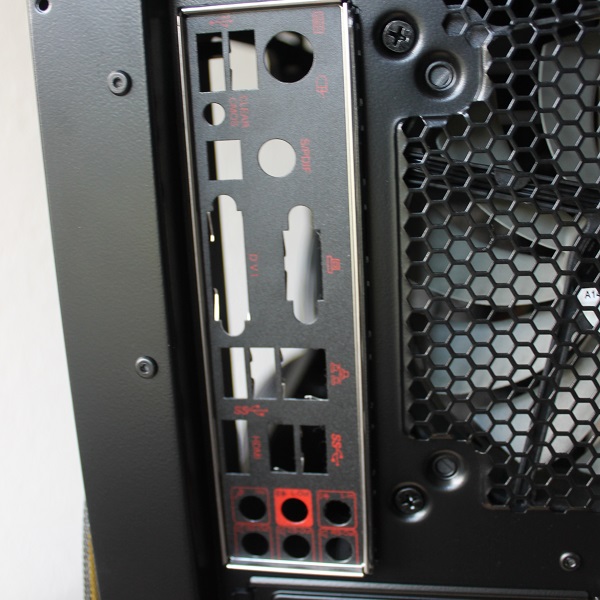
Then I place the I/O shield of the motherboard. Nice to see what connection, what function does. It keeps the dust out of the cabinet.
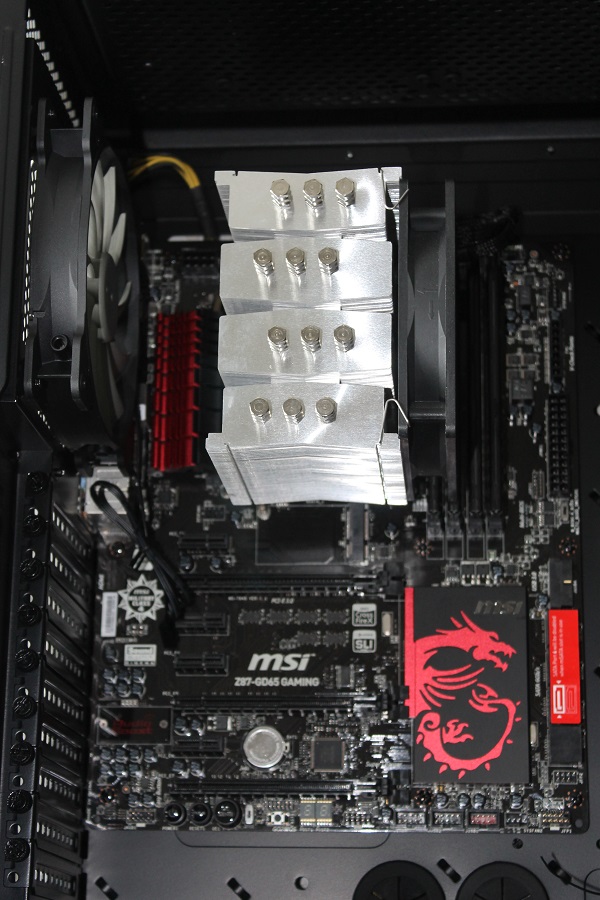
Time to put the motherboard in the cabinet. There is plenty of space to the motherboard will easily spot to lay and then to screw it in.
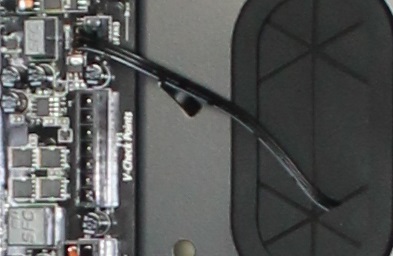
I connect immediately, the fan on the back of the motherboard. In this case, is the connection near the fan itself.
The fans on the front, need to still be connected.
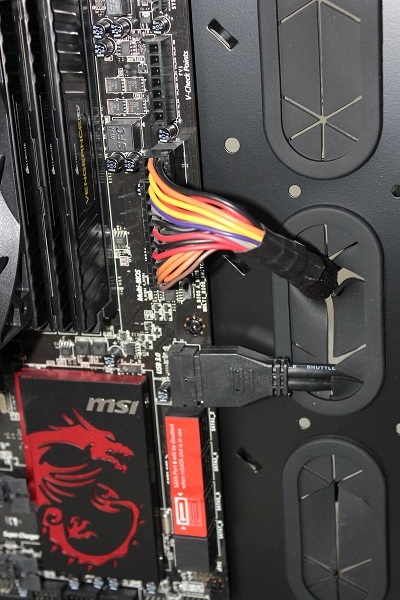
On the right side of the motherboard we have the 24-pin connector from the power supply and the connector of the USB 3.0 ports on the front connect. Both cables are at the back concealed.
What also not to forget is the 4 + 4-pin connector for the processor. Also this cable can, provided it is long enough, behind it are placed. At the top is space for the connector and connect it to the motherboard.
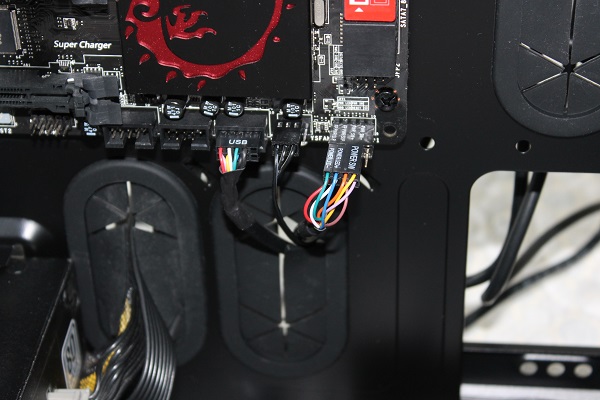
At the bottom of the motherboard and can the connectors for the front USB and the Front Panel can be connected. Also can you here a fan connector, making for one of the fans at the front. The cables are nicely hidden.

The last fan at the top, with the cable, again neatly hidden behind the tray.
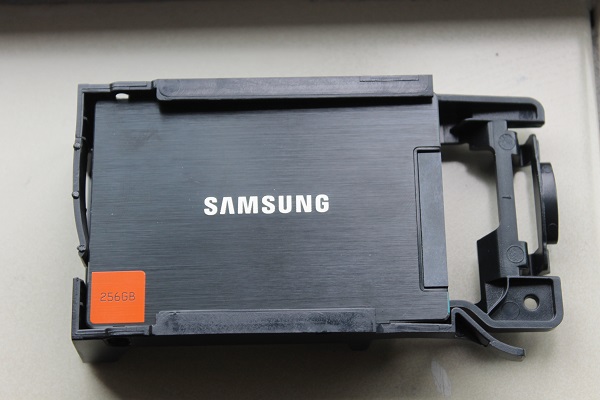
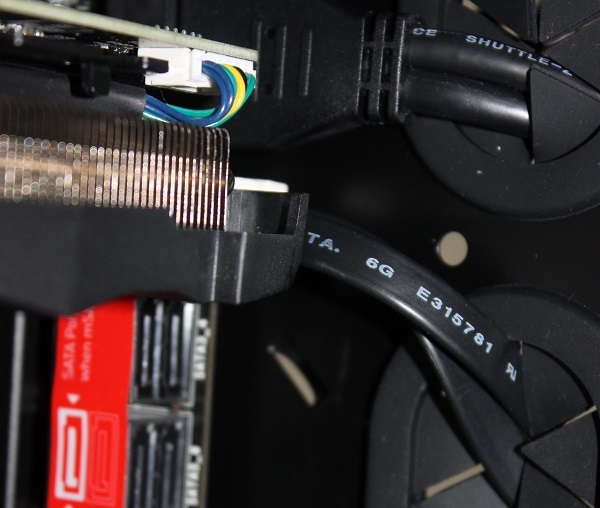
Time to add some storage in the cabinet. First, I am going the SSD mount behind the moederbordtray. As previously written, you have actually no screwdriver needed. It is a matter of the SSD in the bracket, slide, and ready.
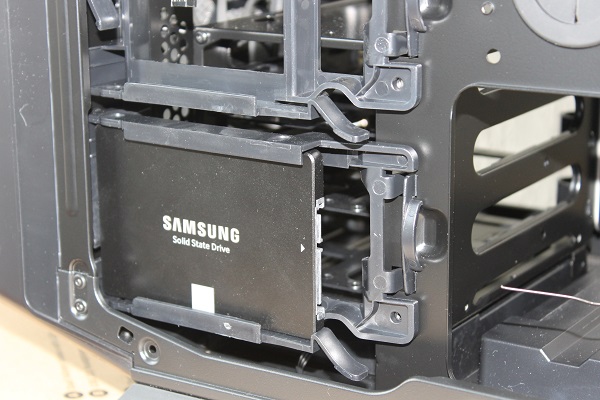
Then you can make the bracket snap into place in the base.
Where you do have to look out for, is the use of a right-angled Sata connector. If you want to use on the SSD side, look carefully at what you are doing and do not just snap into place. If you use excessive force, it may happen that your SSD unusable because the connector breaks off.
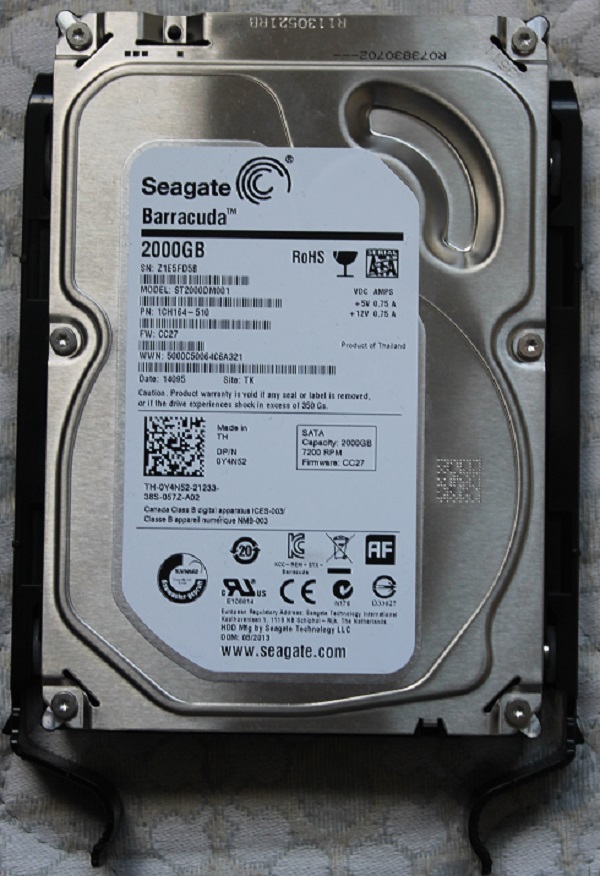

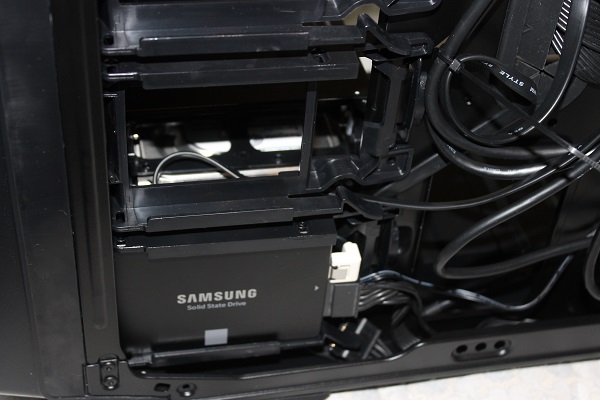
In addition to the SSD, we also have a regular hard drive that has to be placed. This can get you in the bracket lay ale the sides and a bit of other draws. The pins fall exactly into the screw holes of the hard disk.
You can then select the bracket in the hard drive cage slide, after which he with a click stuck. The connectors on the rear and connecting the cables neatly away.

You can then use the Sata cables are neatly connected to your motherboard. In my case, I had to do this before the video card was placed, because otherwise I will no longer be with the connections.
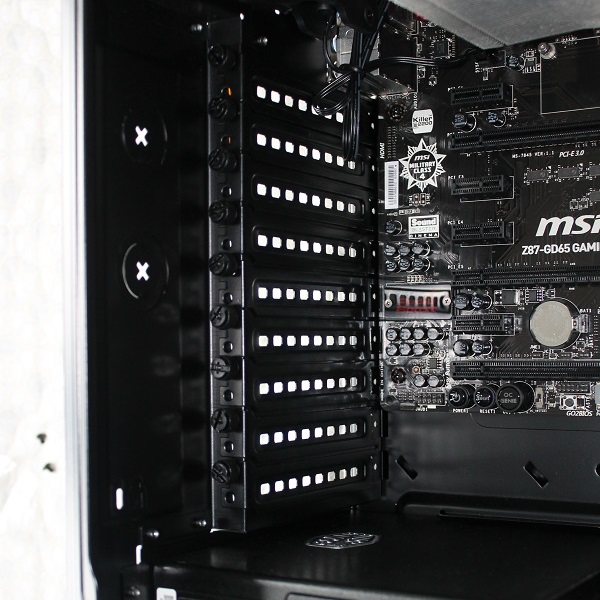
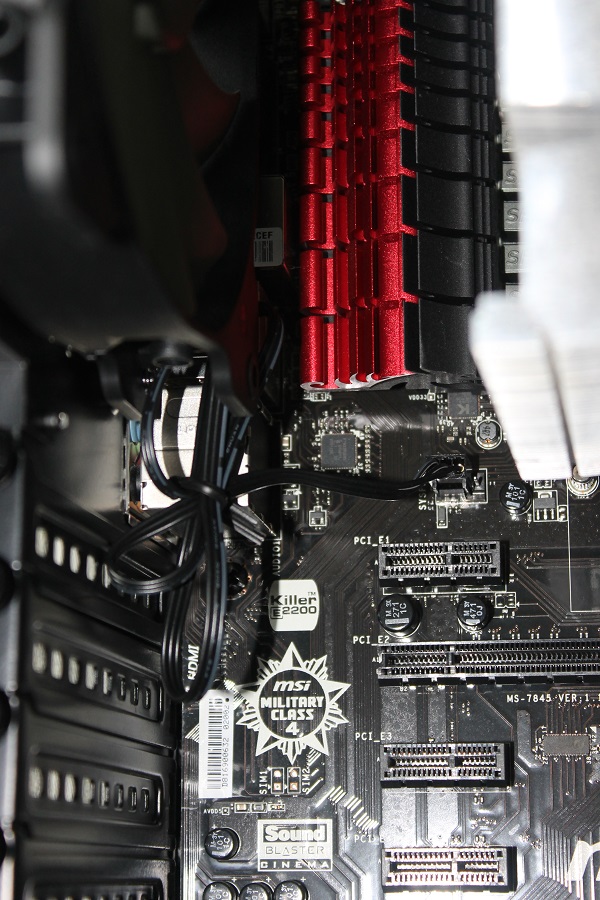
Last come the expansion cards. In this case, do I connect a video card and a separate sound card. To start, you can remove the thumbscrews from the locks that you must make. You can do this normally without the use of tools. If they are well stuck, you can always use a screwdriver.
Then plug the video card into the designated connector on the system board. Then put the card back in place with the thumbscrews.
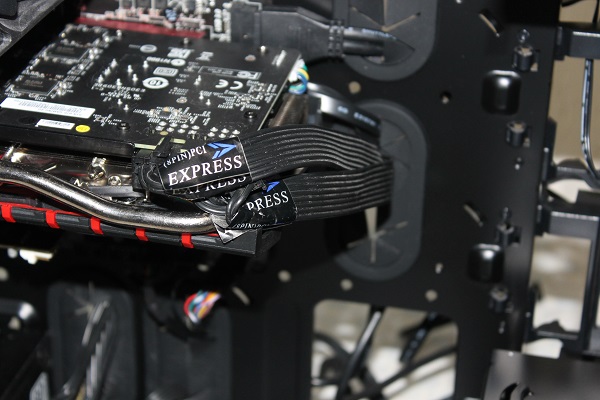
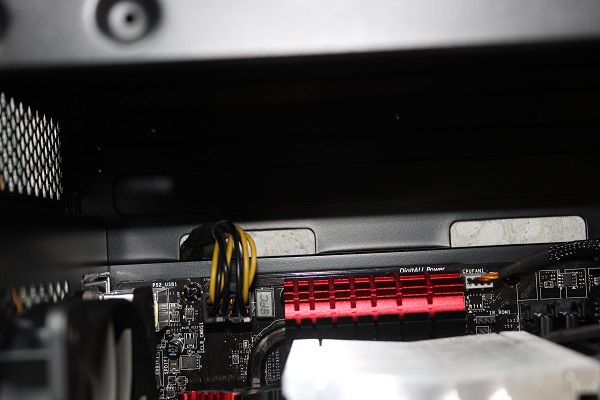
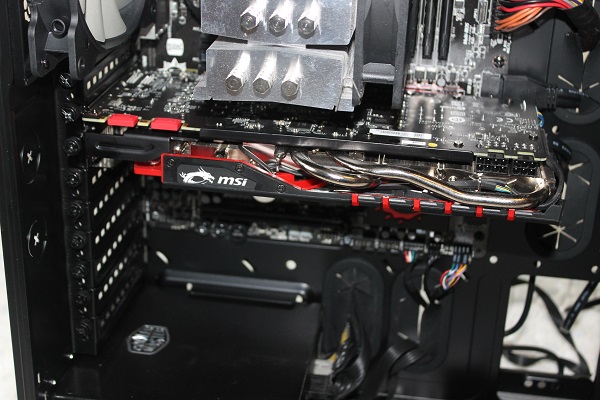
Make sure then, that any power cables for the video card are plugged in. Depending on the length of your cables, you can have this beautiful sight. However, they were mine a little shorter, so I use the lowest hole and had to use the cables to carry through. This is the finish less.
Last, we put the sound card in the computer. This one does have an extra power cord needed, but also that we work away again. Also the card is secured with the thumbscrew.
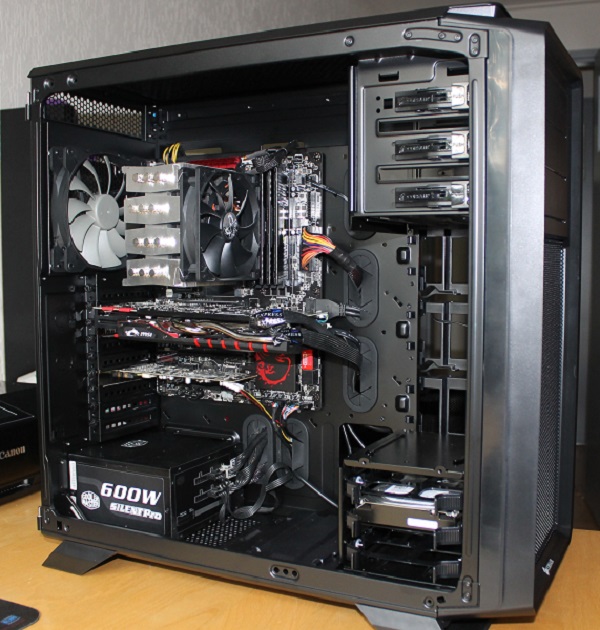

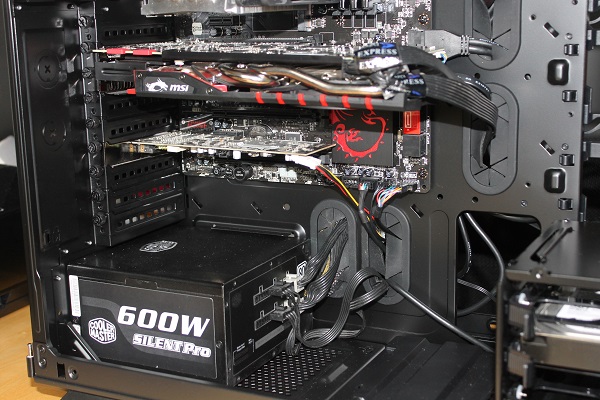
The end result in the case shown on the picture here above. A case that is quite cleared, and where not a lot of cables run through it. Therefore, there is a good airflow as possible.


On the back of the motherboard tray, all cables. These are not visible when the caps are closed when. The cables together neatly bound and secured to the eyelets that are present. Do this with tie wraps.
The end result: a computer with you all the way to within can look. By the cable management you see from cables almost nothing in return.
Also, on the front the fans to see. These lights are pretty red. If desired, you can, of course, there are always other fans in turn.
Last update:
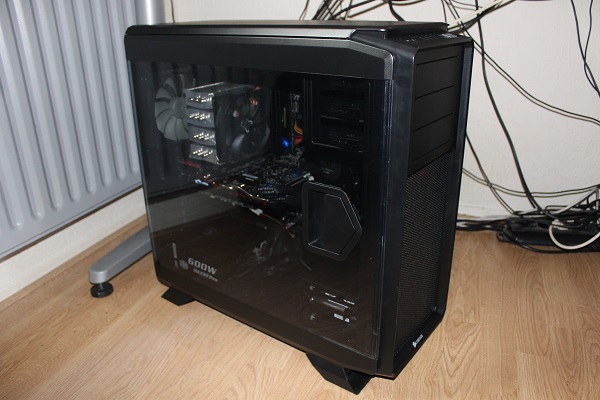
Meanwhile, the intercooler (and the motherboard) replaced. There is now a NZXT Kraken X61 in mounted. From the outside it looks like this:

You go inside the cabinet to look, then you will see the following:
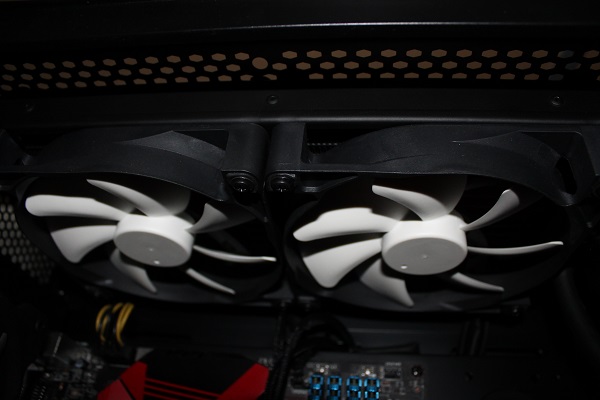
There was enough space for the radiator in its place to assemble. After the move of the rubbers could the radiator be mounted with the supplied screws. Please note: you can, depending on your set-up, the top cover on the cabinet. But if you have your processor quite are going to charge, then you hear geklapper of the hood.

The purchase of this case has me certainly not disappointed. In comparison with my previous case (Nexus Prominent R), I now have a lot more installation options, and there is also a window available where the computer can see.
The 730T is a large and sturdy cabinet that is also well finished. You can just about all motherboards have lost that sale. Even the XL-ATX format should fit. Nowhere are sharp edges to be found. The doors are a good solution to access your case. So, you have your case open, if you want something to connect, replace, or remove.
In space there is no lack. You can have up to 6 hard drives in the hard drive cages. In addition, you can also have 4 2.5 ” disks lost to the back of the case, neatly out of sight. You can also 3 5.25 ” devices installation. Think of a DVD burner and a fan controller. What a pity is, is that it is difficult to get a drive cage to remove it. Do you want a cage off the walls, you will first of the closet on his side and lay still with a screwdriver to get started. There is enough space for a large processor cooler. In my example, is a Scythe Mugen 3b placed and yet there is a few inches over to the window.
There are plenty of koelmogelijkheden present in this cabinet. There are 3 fans included and there is the possibility to have another 4 fans to place (3 120mm fans at the top and 1 at the bottom after the removal of the drive cage).
Dust filters may of course not be missing in a cabinet with this price. There are on this cabinet 2 places to find where the filters are being used. 1 filter is at the front of the cabinet to find, the other filter is located under the power supply. These are also very easy to remove to clean them. Unfortunately, there is no dust filter at the top to find. Use no fans, then you can have the cover on the cabinet. You go closed water cooling use or loose fan mount, it is a disappointment.
Also, there are no rubbers used on the back, if your external water cooling.
Also cable management is thought of. There are plenty of doorvoerplekken available to various cables along. With 2 inches, there is also enough space behind the motherboard tray to route the cables all the way to work. Also the fact that SSD’s out of sight is well fabricated. This makes for a tidy case.
Despite the few drawbacks, this is still a top cabinet. Lwa 145 is a pretty high price for a cabinet, but you get a lot for it back! Anyway, I’m very pleased with this cabinet and hope there is still a lot of fun to have!
If you and/or suggestions you have or to ask for something, then I hear the obviously happy. If you do a nice review find, then I hear the this, of course, also like. 
![]()


