All in all, great product. for the normal user with a budget. Kabelmanagemnt is good to do. psu and front air filter material.
Pros
- Lightweight
- firmly
- retractable hdd bracket
- a lot of cabinet for little money
- would any wc in may
Cons
- tight
- cd rom cross something out/falling to the inside
- does not apply a 160mm cpu cooler.
- pci slot holders are difficult to remove not terugplaatsbaar
Final conclusion
Score: 3Per criterion
Modbaarheid
Score: 3
Ease of installation
Score: 3
Design
Score: 4
Koelingsmogelijkheden
Score: 3
Click
Score: 3
Build quality
Score: 4
Price
Score: 5
Intro
Bitfenix we all know, of course, the fans, and the cabinets. As they have recently in the NEOS series released in various colour combinations and with and without window. This time, I have a Black/blue NEOS without window.
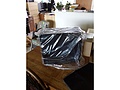
Packaging
On the packaging, neatly outlined what you get.,how it’s packaged, and what the specifications are. The box is made of thick cardboard and let’s see what the closet has to offer and whether there is a window, then. Inside we find blocks with beep foam, not the plasticschuim, but sturdy styrofoam, which I think is better to have something to transport than the more expensive plasticschuim, the only downside is that the you with styrofoam much chance have on electrostatic charge. Both the cabinet sits tightly in the styrofoam as the styrofoam in the box made from thick cardboard.
Content and appearance
In the box we find the following, the case with an instruction manual, This is a clear short instruction manual with clear pictures and English description. I miss only the interpretation where the afhouders for an ATX, Matx and mini-ATX board.
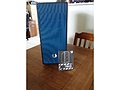
Of course, we also find the slot in the box, and after unpacking, we see that everything is complete, neat finish of the cabinet. The blue jumps are beautiful, unfortunately the color of the 5.25 drive bays have a slightly different tint of blue. For the rest a very neat cabinet that is finished with top of the power button , reset, frontaudio and 1x USB 2.0 and 1x USB 3.0. Disadvantage with the latter is that the 5.25 bays this lower on the cabinet to start, and as disturbing can be.
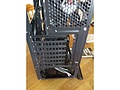
The appearance is sleek and simple,so is the front panel easy to remove with noise/filter material . we also see a filter/mounting panel for 2x 120mm fans.Only downside is the cleaning of this panel, or the connectors need disconnecting, or the fans off screws.
At the bottom we find a PSU filter which is easy to remove and easy to clean. 4 by default, neat round feet so that the cabinet as a 2cm free.
In short, a nice tight cabinet with a striking front color!.
Installation
installation after the correct points are found to have relatively easy. You have a nice tight workspace, but it is good to build in all.. Everything is also clearly described about how you can build. Please note that you have the PSU as the last places otherwise you moetlijk with the other screw posts in the cabinet at the bottom.
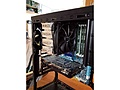
On the back we find a 120mm cooler, of course, Bitfenix itself,It had been better if the front there is also 2 were was the picture immediately complete.
The installation of the power supply, I would last doing so that you do the cable management can best determine the installation goes fine. But it had been easier if we have a little more space had .By the removable panels can jewel make your cables behind it to work.. It might be preferred to have a modular power supply because there is not too much space is behind the moederboardtray .
After placing the food place I then the SSD /HDD,this go easy in the extendable brackets for the HDD that came with the cabinet. This would not even the confirmation schoeven necessary. This money for the SSD. Up to you 3 HDD’s and 3 SSD drives.
After all this, to have placed you can the cables neatly go rid and the connecting components. There are enough points and you can easily hold in place by zip ties.
Unfortunately, I find also a downside t.o.v. what the manufacturer indicates. According to the manufacturer fits a cooler height of 160 mm ( 155mm window version ). After the specifications of my Mugen 3B looked up too.. fits the 160 mm is actually not.
The cooler is 160 mm high.. the cabinet says to be able to 160 mm. But if I make the cabinet, then close the net or the panel, something ball state and feel the cooler as I have on the plate?
Which gives you a resonance gets I’m afraid.
So also the dvd-rom/fan controller If you have it set you have to settle for a something to within cases or just excellent dvd/fan drive.
Cooling
Kwa refrigeration may present you have there is not a lot. 2 fans in the front 1 in the back. You can use a 120mm waterkoelingsetje in the back of the closet lost and there you have it, as a non-mud be had. If you are handy in the modden then there is a possibility to get the 3.5 and 2.5 drive bays to move and a slimrad 240mm lost to just behind the front panel. But for the normal gamer/user should have the 3x 120 mm fan space more than adequate.
Specs
Product Name NEOS
Dimension (L) 470x (H) 429x (W) 185mm
Drive Bay 3.5” x 3 , 2.5” x 3, 5.25”x 2
Expansion Slot 2 slots
Motherboard Support Mini-ITX, mATX, ATX
Power Supply PS2 ATX (bottom, Multi direction)
Cooling System Rearfan 1x120mm included. 2x 120mm fan front optional
I/O Panel USB 3.0 x 1, USB 2.0 x 1 and HD Audio in/out jacks
Max Graphic card Length: 300mm
Max CPU Cooler Height 160mm ( windowed 155mm )
Conclusion
A nice tight finished cabinet that is not too large and a beautiful appearance. Which you with patience everything can build. Unfortunately, not the 160 mm space for the cooler and the drivebay falls slightly to the inside / outside
Links
Website http://www.bitfenix.com/g…cts/chassis/neos#overview
Pricewatch pricewatch: BitFenix Neos White/blue
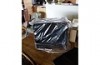
Here under, a number of photos. You can see that space is limited,But with patience you can all the cables neatly concealing where needed. As indicated previously, a modular power supply would be nice.
Used in combination with:
- Scythe Mugen 3 Rev. B
View all images: