
If you’ve recently bought a Windows 10 machine or upgraded your PC to Windows 10, you might be wondering how secure the operating system is. Luckily, by default, Windows 10 is more secure than Windows 7 and Windows 8.1. It has a lot of new security features that help block viruses and malware infections. This is especially true if you are using newer hardware.
Even though Windows 10 is more secure, there is still more room for additional security. In this post, I’m only going to talk about various settings in Windows that you can configure to make Windows more secure. I won’t be mentioning any third-party programs like anti-virus, anti-spyware, etc. For additional security tips, you should check out my post on how to protect yourself from hackers and spyware.

Windows 10 Privacy Settings
The first thing I do whenever I setup a new Windows 10 machine is to turn off all the tracking features that Microsoft included with Windows 10. Unfortunately, this is one area that is not better than older versions of Windows.
Windows 10 has several features that connect back to Microsoft and, even though they are not going to cause you to be hacked or get a virus, they are still a little unsettling. Do I really want Microsoft knowing what I’m typing on my computer all the time or listening to everything in the room all the time because of Cortana? Not really.
This is much easier to do when you first install Windows because you can click Customize and disable everything all at once. Obviously, if you can’t reset or reinstall Windows, you can manually change the settings.

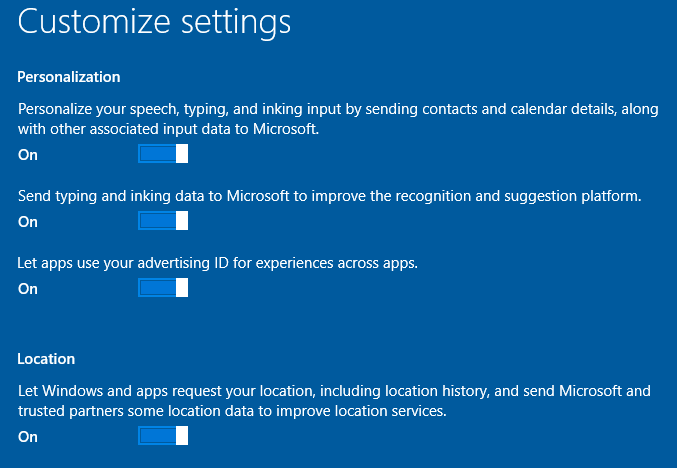
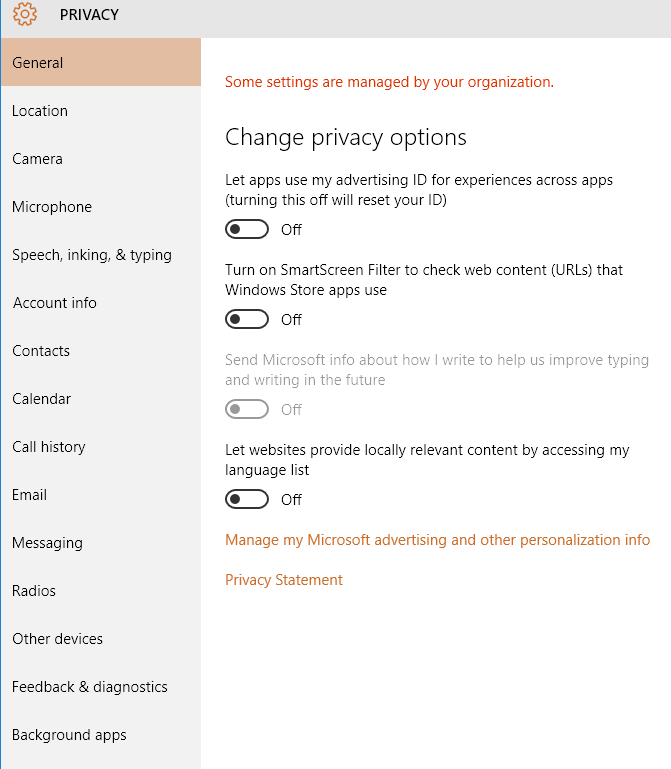
To do this, go to Settings and then click on Privacy. You’ll find a whole slew of items on the left side along with their On/Off options to the right. I literally have everything to Off and only turn something on if I run into an app that requires a certain permission.

Enable Automatic Updates
If you’re running Windows 10, you should definitely enable automatic updates. It should be enabled by default, but it’s a good idea to check anyway. Click on Start, type in Windows Update and then click on Windows Update settings.
This will bring you to the Settings dialog on Windows Update. Click on Advanced Options and make sure the drop-down box says Automatic (recommended).

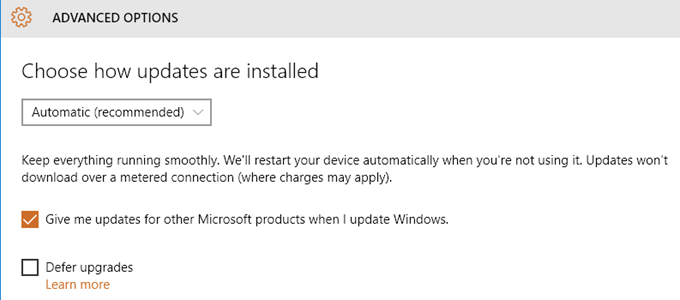
Also, make sure to check the Give me updates for other Microsoft products when I update Windows. This is especially important if you have Office installed as it will install all Office-related security and feature updates too.
Enable Windows Defender
Again, this should be enabled, but to check, click on Start, then Settings and Update & Security. Click on Windows Defender and make sure the following three settings are enabled: Real-time protection, Cloud-based protection, and Automatic sample submission.

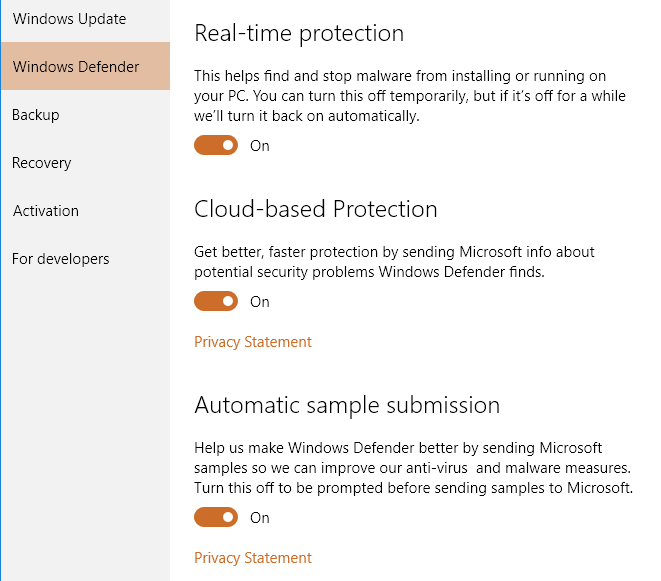
I’ve been using only Windows Defender on my Windows 10 machine for many months and haven’t had to install any third-party anti-virus or anti-malware software. Windows Defender does a great job of protecting your computer and it’s built right into Windows, which is great.
Enable Windows Firewall
The built-in Windows firewall is a very powerful feature, if you really want to control how your computer communicates with other device on the network. However, the default settings will work fine for most people. By default, all outbound communication is allowed to pass through the firewall.
Inbound connections are controlled by a list where you can check or uncheck which programs are allowed through the firewall. First, click on Start, type in firewall and then click on Windows Firewall.

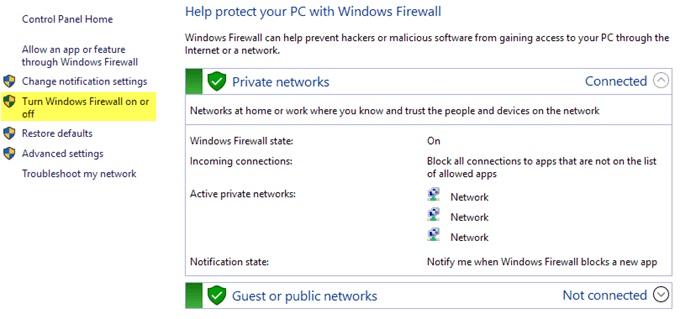
If your screen shows green shields with check marks, that means the firewall is On. If not, click on Turn Windows Firewall on or off to enable it. Next, you should click on Allow an app or feature through Windows Firewall to pick the programs that should have free access through the firewall.

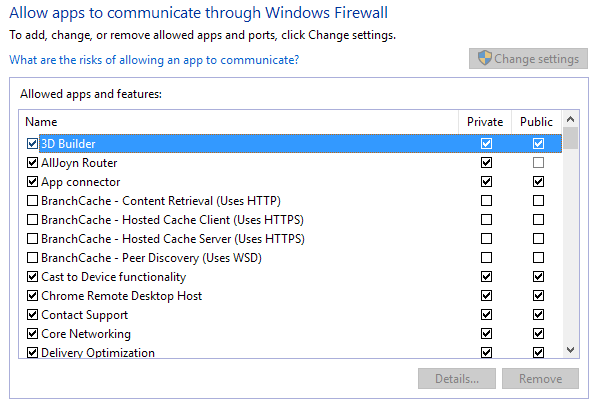
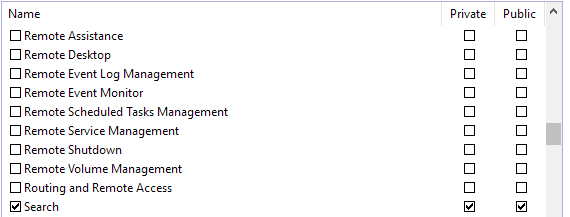
You’ll notice there are two columns with check marks: Private and Public. Check out my post on the Network and Sharing Center in Windows 10 to learn the difference between public and private networks. The more items you can uncheck from the Public column, the better your security. Items like File and Printer Sharing or Netlogon Service should never have a check in the Public column. You’ll have to Google to figure out which items you can uncheck.
It’s also a good idea to uncheck anything that has “Remote” in the name like Remote Assistance, Remote Desktop, etc. Unless you connect to your computer remotely, you can uncheck both the Private and Public columns for all of these programs/services.

Advanced Sharing Settings
While you are in the Network and Sharing Center, you should also configure the Advanced Sharing Settings. Scroll down to the Advanced Sharing Settings section of the article. For a quick review, here is what you should choose for the settings for maximum security. Adjust them accordingly if you need to.

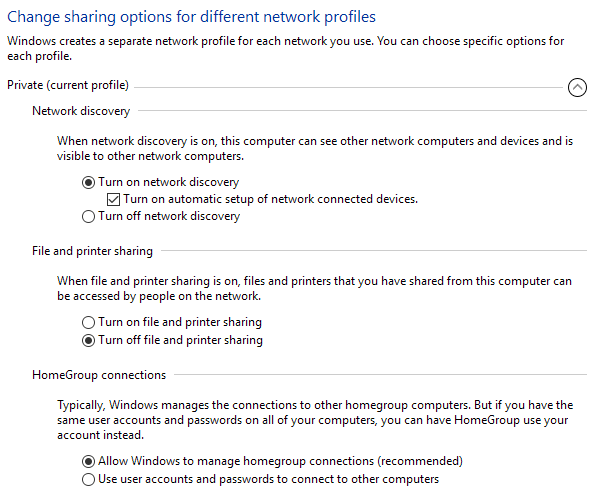
Private
- Turn off network discovery (Only if you never access other devices on your network using this PC)
- Turn off file and printer sharing
- Allow Windows to manage HomeGroup connections
Guest or Public
- Turn off network discovery
- Turn off file and printer sharing
All Networks
- Turn off public folder sharing
- Turn off media streaming (enable only when you need to stream content from the PC to a device)
- Use 128-bit encryption for file sharing connections
- Turn on password protected sharing
User Account Control (UAC)
UAC has been around in Windows for a long time now. You’ll always read articles on the Internet explaining how you can disable UAC if you don’t like those pesky prompts all the time. In my opinion, I don’t get them that often and it’s not worth making your computer less secure just for a minor convenience.
Click on Start, type in UAC and then click on Change User Account Control Settings. By default, the slider should be at Notify me only when apps try to make changes to my computer, but you should try Always notify if you can bear it.

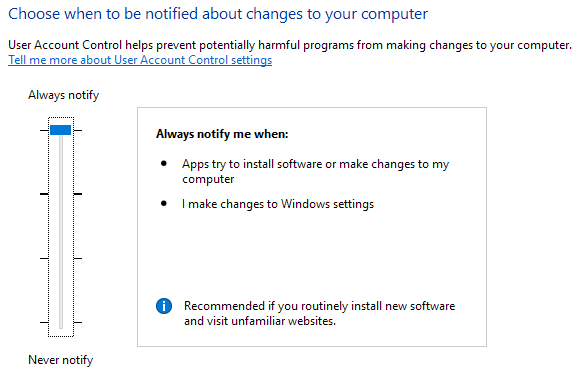
This is definitely a good option if you visit websites that are sketchy in nature. Keeping UAC to the highest setting will prevent certain changes from being made on your computer without your consent.
Use a Local Account
Since Windows 8, Microsoft has been pushing users to login using their Microsoft account. This has some benefits like two-factor and being able to sync your desktop to any computer, but it also has downsides. Firstly, again, I don’t want Microsoft knowing when I’m logging into my computer or anything else about my computer.
Secondly, what if my Microsoft account gets hacked or something else? Do I have to worry about someone being able to remotely log into my computer, etc.? Instead of worrying about all of that, just use a local account like you were with Windows 7 and earlier. To do that, click on Start, type account and then click on Manage your account.

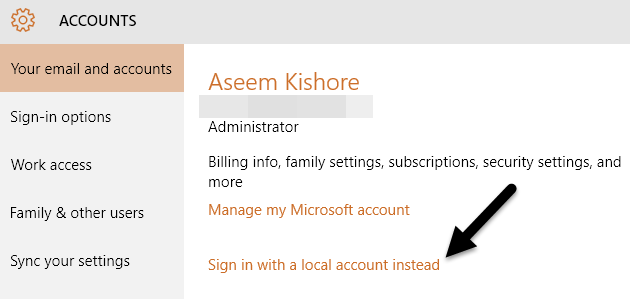
Click on the Sign in with a local account instead link and follow the steps. You’ll get some warnings from Microsoft as to why you shouldn’t do this, but just ignore them. Nothing bad will happen to your computer.
Use a Lock Screen
If you want to keep your computer secure, you should make sure the screen is locked automatically when you’re not around. To do this, click on Start, type lock screen and select Lock screen settings.

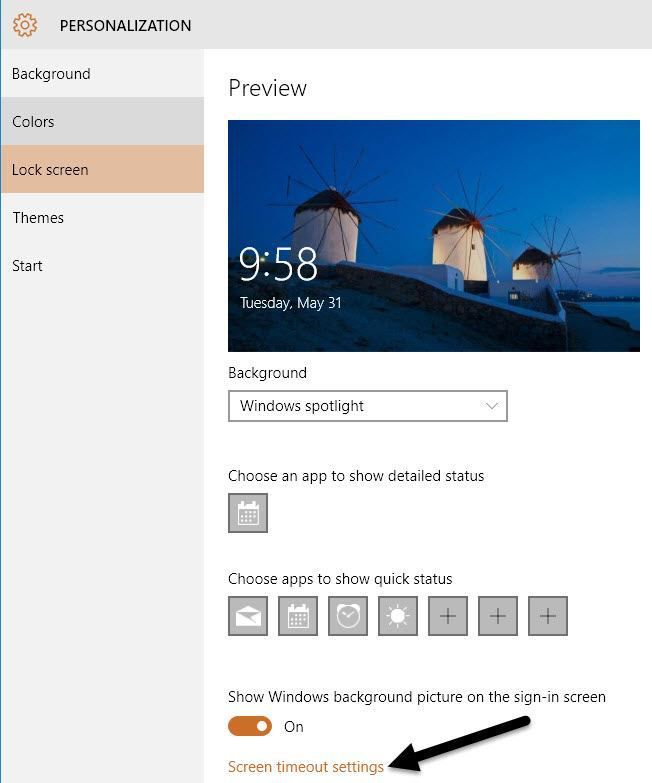
Click on Screen timeout settings and select an appropriate value that works for you. Also, be careful which apps you allow on the lock screen as others will be able to access that information without entering a password.
Secure Boot & UEFI
If you have a newer computer, you should make sure that you enable secure boot and UEFI instead of legacy BIOS. These options are changed in the BIOS, so you’ll have to Google around to get into the BIOS first and then enable these settings.

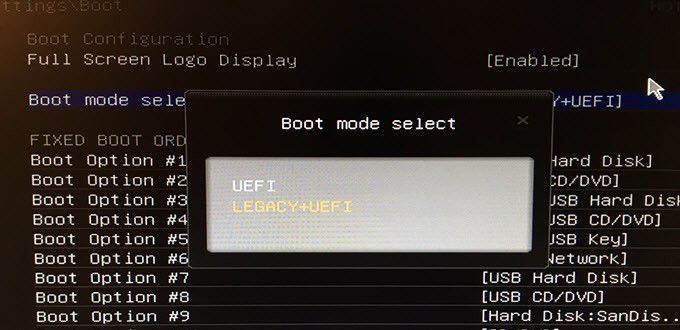
It’s worth noting that you may or may not have the option for secure boot on your computer. Also, if you switch from LEGACY+UEFI to just UEFI and your computer doesn’t boot, just go back into the BIOS and change it back.
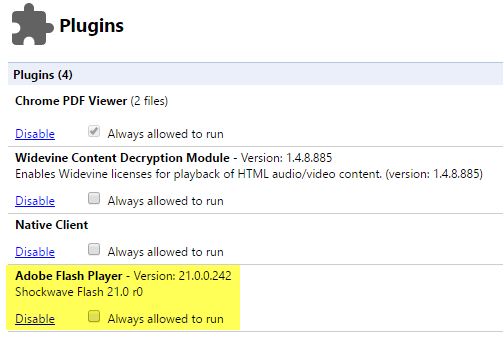
Disable Flash and Java
Two of the biggest threats to all computers are Flash and Java. Literally, every week there is a new security vulnerability found in one of these platforms. Most websites have moved beyond Flash because HTML 5 is now supported in all major browsers.
My suggestion would be to disable Flash and Java and just use your computer normally. Like me, you might find that you never really needed either installed in the first place.

Check out my previous post on how to disable Flash in Microsoft Edge. If you’re using Internet Explorer still, just click on the gear icon, then Internet Options, then Programs, then Manage Add-ons.


Under Show, select All add-ons and then right-click on Shockwave Flash Object and select Disable. If you are using Google Chrome, type in chrome://plugins in the address bar and then click on Disable under Adobe Flash Player.

For Java, just go to Control Panel, Programs and Features and uninstall any Java version currently installed on your computer. You can also read my post on how to uninstall or disable Java in Windows and Mac.
Encrypt Hard Drive
Finally, you should encrypt your entire hard drive if you want the maximum security for your PC. Encryption is more protection against someone stealing your computer or gaining access to your machine physically rather than online threats, but it’s still important.
I’ve written a detailed article on how to encrypt a hard drive using BitLocker in Windows. If you have a computer with a fast CPU, the encryption will not make a noticeable difference in speed. If you have an older computer, I would probably avoid using encryption unless you upgrade the hardware.
Overall, you should be in pretty good shape if you follow all the steps above. Remember, though, visiting the wrong websites will harm you no matter what security you have on your computer. A good option is to use Chrome since it tries to warn you before you visit a malicious website or download something harmful. Enjoy!