

How did an instant messaging and VoIP service primarily used by gamers become a communications tool of choice for education and businesses? The answer is pretty simple.
Discord created a fun product for a group of people that are early adopters of technology and it seeped into their everyday lives. Because Discord is now a preferred way of socializing, learning, and doing business, people want to know how to record Discord audio.

Apps to Record Discord Audio
We’re fans of apps that are easy to learn and use for a bunch of things. There are two apps that will work great to record audio on Discord that can also be used for anything from live streaming to studio-quality music production.
We’re talking about the free OBS (Open Broadcaster Software) and the proprietary Camtasia app.
How to Record Discord Audio With Camtasia
Camtasia is used by over 24 million people for screen recording and creating video tutorials, especially by educators, trainers, and teachers. Get a free 30-day trial of Camtasia before you invest in a license. At the time of writing, a personal license was about $250 and education licenses were about $170 each.
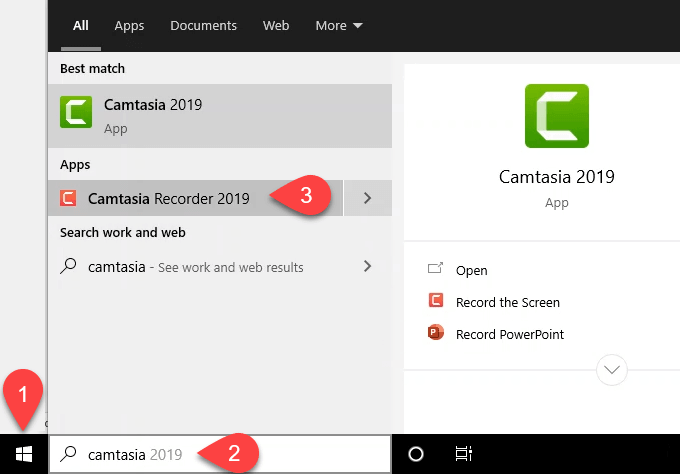
- Click on the Start button.
- Search on Camtasia.
- Select Camtasia Recorder. This is the quickest way to start recording.

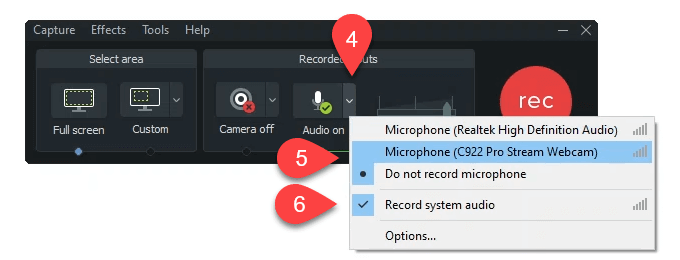
- In the Recording window, select on the down arrow on the Audio button.
- Choose to either record what you say through your microphone, or Do not record microphone if you don’t want your voice recorded.
- Ensure Record system audio has a checkmark next to it, to capture voices in Discord.

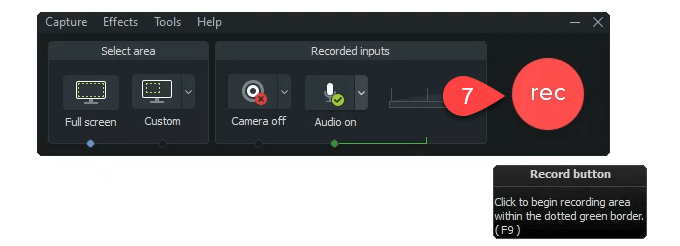
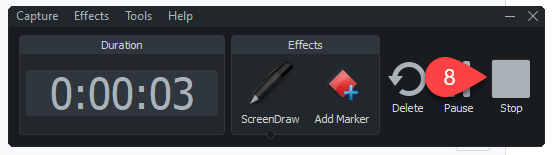
- Click the big red rec button to start recording or press F9.

- When you’re done recording, select Stop or press F10. Camtasia Studio will open and have the recording already staged.

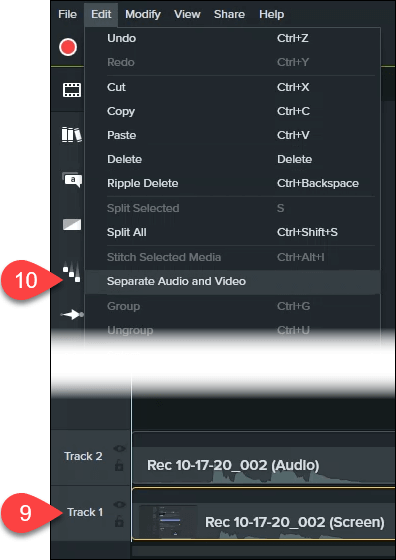
- Select Track 1, the one labeled Screen. It has the video and audio from Discord. Track 2 with the label Audio is the recording of your microphone.
- Select Edit > Separate Audio and Video to split out the audio from Track 1 – Screen.

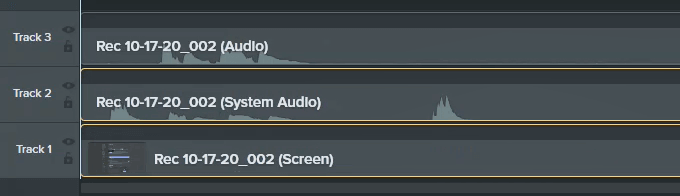
- You’ll now see three tracks that you can edit and save.

How to Record Discord Audio With OBS
OBS Studio made its reputation in the game streaming world on Twitch and YouTube. It’s a professional level free and open-source recording and streaming app.
You can download OBS for Windows, Mac, and Linux. If you love OBS, make a donation to them so they can continue being great. Check out the public OBS Discord server where you can learn more and ask questions.
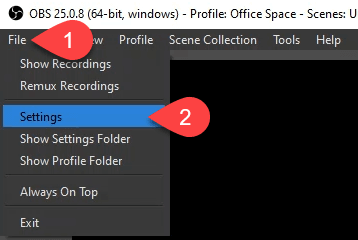
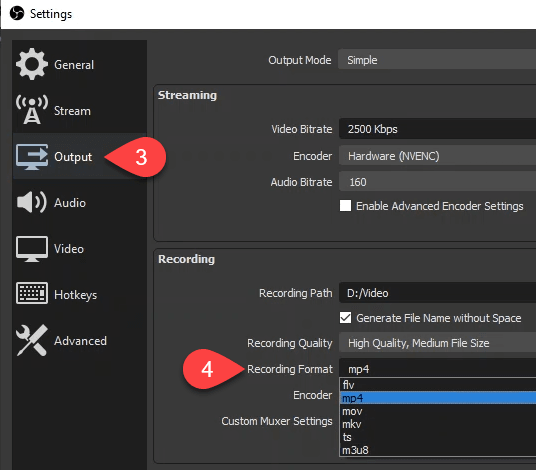
- You’ll want to ensure that the audio format is set to MP4. That will make it easier to work with audio in Audacity or your favorite audio studio. Select File.
- Select Settings.

- In the Settings window, select Output.
- In the Recording Format drop-down, select mp4 then select on the OK button.

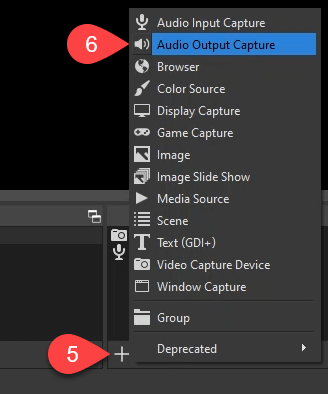
- To add the audio from Discord, go to the Sources area and select the plus (+) button.
- Select Audio Output Capture to create a new source.

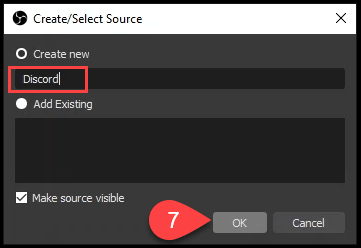
- It will default to Create new, you can rename it or leave the default name. Select OK to create it.

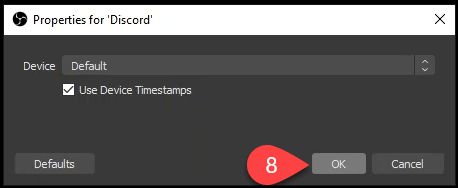
- In the Properties window that opens, the default settings are fine. Select OK.

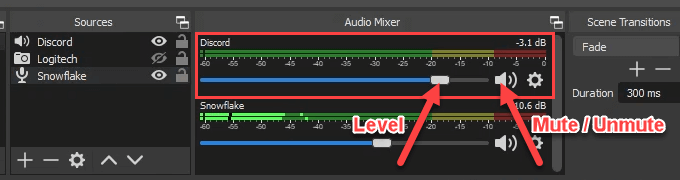
In the Audio Mixer you’ll see your new Discord source. Use the slider on the blue bar to adjust the recording volume level and the speaker icon to mute and unmute.

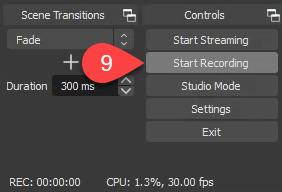
- Select Start Recording.

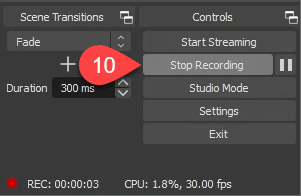
- Once you’re done, select Stop Recording, or use the pause button next to it.

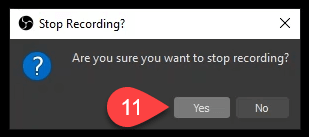
- A Stop Recording? window will open to confirm you really want to stop. Select Yes to stop or No to continue if you made a mistake.

How to Record Discord Audio on Android or iPhone
Recording Discord audio on a smartphone isn’t as easy as it sounds. At this time, smartphone screen recorders only record internal audio. They can’t also record the mic.
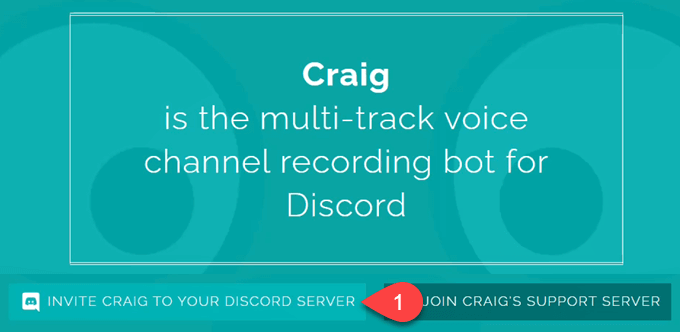
If you have your own Discord server, you can use the Craig Discord bot. It will record Discord audio on iPhone, Android, Windows, Mac, or Linux. Anywhere you can install Discord, Craig can be there. Craig will only record Discord audio on servers that you own.
- While signed in to Discord, open a web browser and go to craig.chat. Select Invite Craig to Your Discord Server.

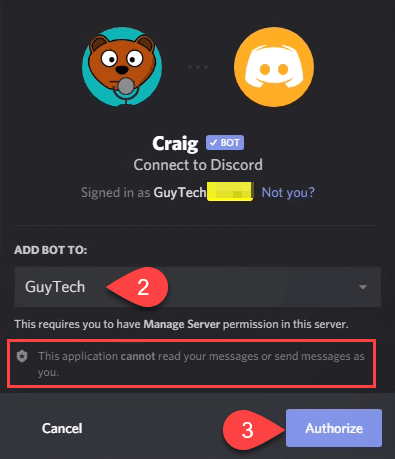
- Pick a server of yours to which you’d like to add the Craig bot. Note that Craig cannot read your messages or send messages as you.
- Select Authorize.

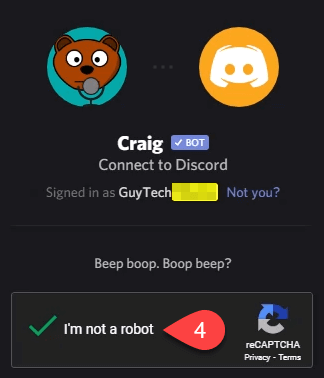
- Verify that you’re a sentient meat sac and not a robot.

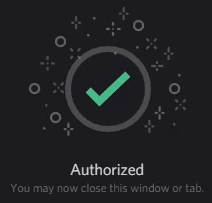
Once authorized, you’ll see the Authorized notice.

- Go back to Discord and into one of your text chat channels. Enter the emoji command :craig:, join Lounge where Lounge is the name of the voice channel you want to record.


Craig will pop up a message on Discord to let you know it’s recording and some other information.


- Go to your voice channel. Note that Craig is already there and, in big letters, it says RECORDING. Everyone in your voice channel will see this. No secret recording. Select Join Voice.


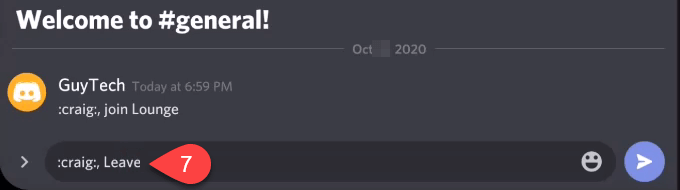
- When you want to stop Craig recording your Discord audio, go back to a text chat channel and enter the emoji command :craig:, Leave.

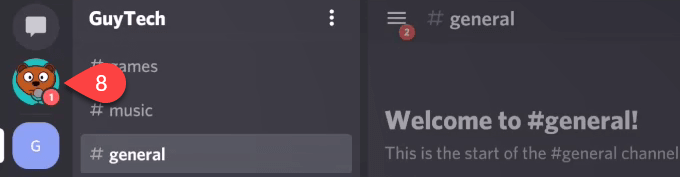
- You’ll see that Craig has slid into your DMs. Go read it.

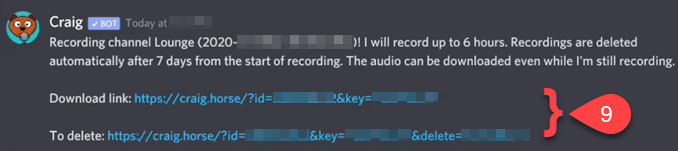
- Craig will give you links to either download or delete the recording. Select the one you want.

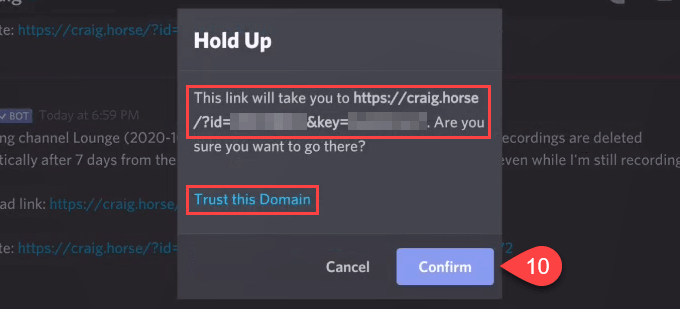
- You’ll be asked to confirm that you want to open that link. Note that it shows you the full URL it will use. Also note, that you can click on Trust this Domain, and future Craig links will open automatically. Select Confirm.

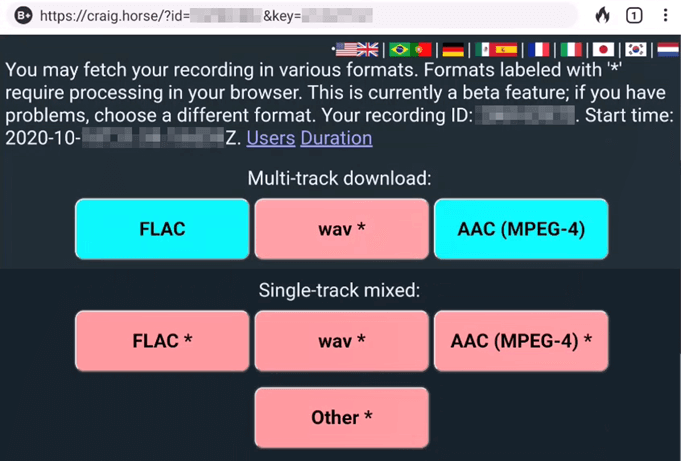
- Your web browser will open. There are several options for downloading your Discord recording. A multi-track will have a track for each participant. That can be helpful for editing out annoying people or isolating the audio you want. Single-track has everyone on the same track, making for smaller file sizes. Click on the audio format and track-type that you want, to download the recorded Discord audio session.

That’s all there is to recording audio on Discord for Windows, Mac, Linux, Android, or iPhone. Do you do it in a different way? We’d love to hear about it.