

Windows stores just about everything that makes it work in a hierarchal file-based database called the Windows Registry. The registry contains all the configuration settings for the operating system, programs, services, components and pretty much everything else. Everything from the size of the icons to the color of the taskbar is stored there.
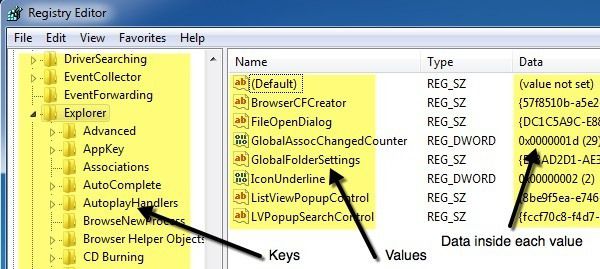
The registry is made up of millions of keys and values. You can think of keys as folders and values as the data stored inside the folders. In the registry editor, keys actually look like folders and values are what hold the actual settings. Each key in the registry can have more than one value, kind of like a folder can have more than one file stored inside.
Also, values can store data of different types including String, Binary, DWORD, QWORD, and more. You don’t really need to understand that level of detail, but hopefully you understand the structure of the registry.

In terms of backing up the registry, you really have two options: backup parts of the registry manually via export or backup the entire registry using System Restore. When you make a change to the registry, it’s always a good idea to create a restore point and then backup the edited section of the registry also.
There is a way to export the entire registry, but that’s not a good option for several reasons. Firstly, you’re going to get a large file that you have to store somewhere. Secondly, if you’re only changing one setting, trying to import back the entire registry later on may overwrite many other newer values that were written to other parts of the registry after the export. This can actually lead more problems and possible corruption. Lastly, you may not even be able to import back the entire registry because a lot of keys will be in use by Windows and therefore simply won’t be written.
The best option to backup and restore the entire registry is to use System Restore. So when making a change, create a restore point first and then backup the only edited section manually. If there is a problem, you can always reload the exported section by simply double-clicking on the .reg file in Windows.
If you can’t get into Windows anymore because the registry change messed something up more severely, then you can simply start up the Advanced Recovery Options and choose the previous restore point you had created. I’ll explain both methods in detail below.
Opening Registry Editor
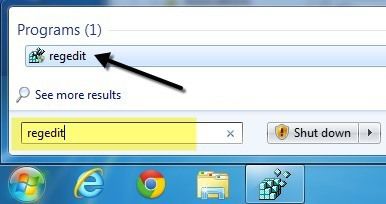
First, let’s talk about opening the registry editor. In just about every recent version of Windows, you can open the registry editor by clicking on the Start button and typing in regedit.

You probably already know how to do this considering you found this article while trying to learn how to backup the registry. Obviously, before you make any changes to the registry, you should always back it up. Now let’s get to the main point of this article on the different ways you can backup the Windows registry.
Backup Parts/Sections of the Registry
In many of my posts, I’ve mentioned tweaks or tips that require editing a key or value in the registry. If you’re going to be making a single change here and there, you don’t really need to backup the entire registry necessarily.
Let’s say you are editing a value stored at the following key:
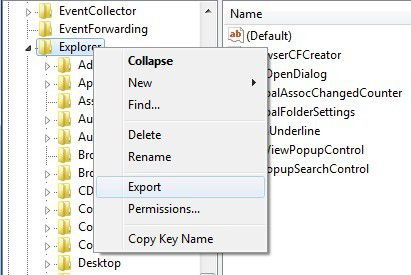
HKEY_LOCAL_MACHINE – SOFTWARE – Microsoft – Windows – CurrentVersion – Explorer
You can right-click on Explorer and choose Export to make a backup of the entire key along with all sub-keys and any of their values.

You’ll notice that there are quite a few other sub-keys under the main Explorer key. By default, only the selected branch along with sub-keys and values will get exported. If you want to export the entire registry, you have to choose All under Export Range when saving the .reg file.

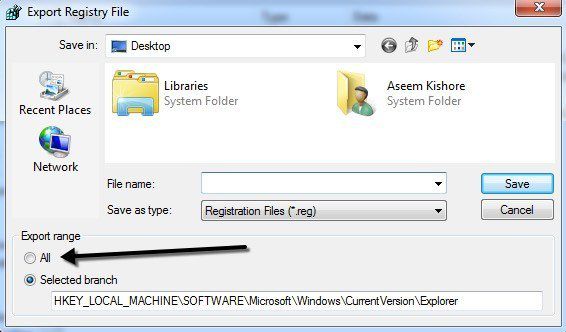
Again, I don’t recommend backing up the entire registry in this manner as you’ll end up getting a Cannot import error when trying to import the file back.


So stick with exporting only selected branches and you’ll have a better chance of being able to re-import the registry file later on. Now let’s talk about using System Restore to perform a full backup of the registry.
Backup Entire Registry via System Restore
Using System Restore, you won’t run into issues restoring to a previous state because Windows handles all the locked and in-use issues for you. You will always create a restore point while using Windows and it’s very simple to do.
Click on Start and type in Create restore point and click on the first result. You’ll be bought straight to the System Protection tab in the System Properties dialog.

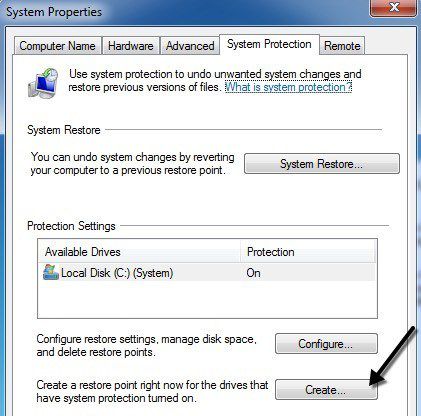
Click on the Create button at the bottom and another dialog will pop up asking for a description. Click the Create button and the restore point will be created.

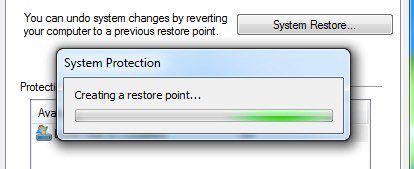
It should only take a few minutes to create the restore point. Once completed, you can restore a previously created restore point in two ways: via the same System Restore dialog in Windows or via the Advanced Recovery Options screen. I’ll show you both methods below.
Restore Registry via Windows
If you are still able to start Windows and log into the system, then you can try to restore the registry by opening System Restore. Click on Start and type in system restore and click on the first result.
When the System Restore dialog pops up, go ahead and click Next. On the following screen, you will see a list of all the different restore points currently on the system.

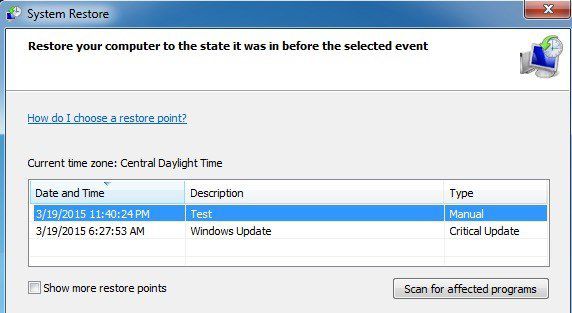
You will see the manually created restore points along with the automatically created ones too. You can check the Show more restore points box to see all the restore points stored on the system. If you click on the Scan for affected programs button, it will give you a list of any programs that were installed after the restore point was created since those will be removed. It will also tell you which programs were removed after the restore point was created that will be restored.
Click Next and Finish and that’s about it. The system will be reverted back to the previous restore point and you should be good to go. Note that System Restore does not alter any of your personal data when changing the state of the system. It only looks at the registry, programs and system files.
Restore Registry via Recovery Options
If you are not able to log into Windows, then you can still use system restore, but only via Advanced Boot Options in Windows 7 and Advanced Recovery Options in Windows 8 and Windows 10. The method is slightly different for all three operating systems, so I will explain them all below.
Windows 7 Recovery
For Windows 7, you have to restart your computer and then press the F8 key during the initial boot up. This will bring up the Advanced Boot Options screen and the first option there will be Repair Your Computer.

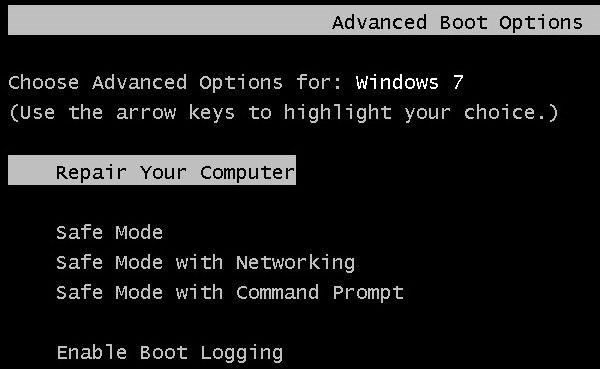
Select it and press Enter. This will load the System Recovery Options dialog and here you will need to choose System Restore.

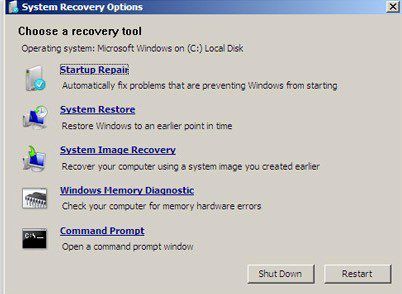
Again, you just choose the restore you want to revert back to and that’s it. Normally, if you are having problems loading Windows, the Advanced Boot Options screen will appear automatically.
Note that if you are unable to load the boot options using F8, you may have to use a System Repair Disc. You can create a repair disc on any Windows 7 PC by clicking on Start and typing in system repair disc.

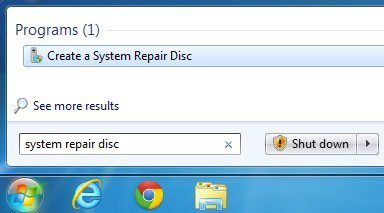
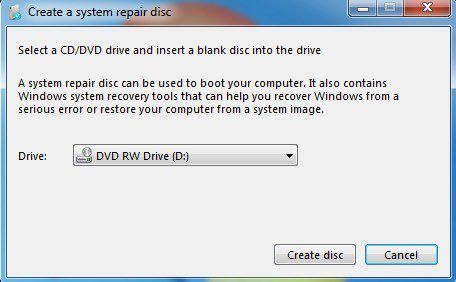
Pop in a CD or DVD and click the Create disc button. Once you have this disc, you can boot directly from it to get the system recovery options shown above. The only thing you need to ensure is that the boot order has the CD/DVD ROM drive listed first.

Windows 8 Recovery
In Windows 8, the entire recovery procedure and GUI is completely different. Instead of the boring DOS interface of before, you now have a fancy looking modern GUI, which makes things a lot easier.
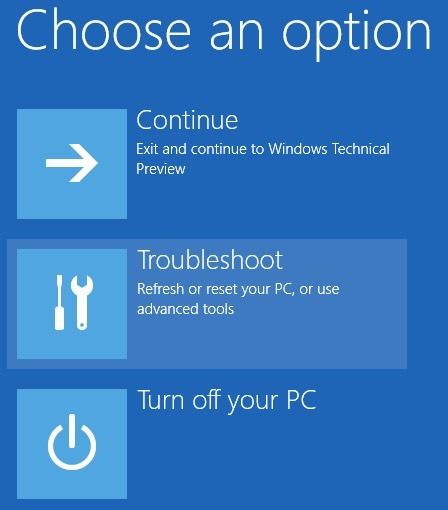
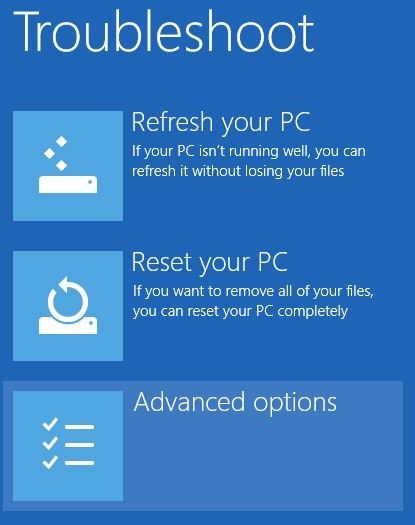
F8 no longer works when trying to get to this new interface. Luckily, I’ve already written a post about the different methods you can use to get to the advanced boot options screen in Windows 8. Once you have gotten to the main screen, click on Troubleshoot.

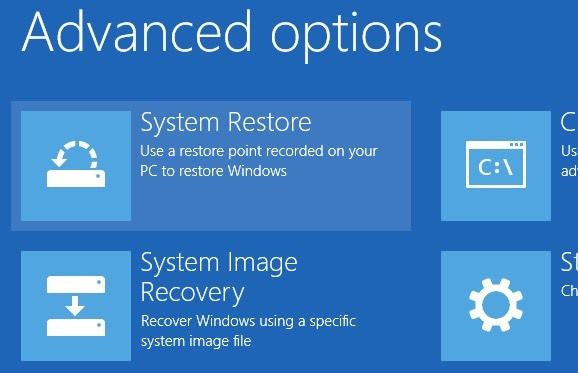
Under the Troubleshoot section, go ahead and click on Advanced options at the bottom.

Finally, click on System Restore on the last screen and you’ll get the familiar system restore dialog to pick the restore point you want to revert back to.

In Windows 8, you can create a system repair disc like in Windows 7 or you can create a USB recovery drive. To create a repair disc, click on Start and type in recdisc.exe and to create the recovery drive type in recovery drive.


Again, you only need to create these using a different computer if you are not able to load the recovery options on your current PC.
Windows 10 Recovery
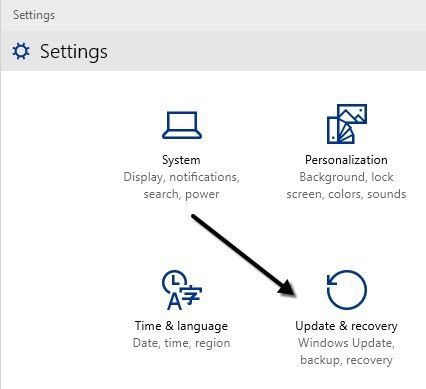
The procedure in Windows 10 is exactly the same once you get to the advanced boot options screen, but slightly different while in Windows. Since the Start Menu is back in full form in Windows 10, you can click on that and then click on Settings.


Next, click on Update and recovery in the Settings dialog. As you can see, the Settings dialog in Windows 10 is completely different than the one in Windows 8.

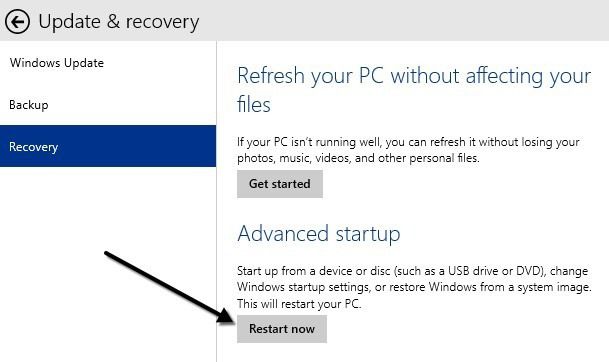
Finally, you’ll be able to click on the Restart now button under Advanced startup. This will get you to the same Choose an option screen where you will click Troubleshoot.

Hopefully, the detailed instructions above will allow you to safely and easily backup and restore your registry in Windows 7, Windows 8 and Windows 10. If you have any questions, feel free to post a comment. Enjoy!