
If you’re reading this article, you’ve probably deleted something important on your computer that you need to recover ASAP! Hopefully, the files or folders that are now gone were deleted only a short while ago because the more data that gets written to the disk, the more chance that the section of the hard drive that contained the data will be overwritten with new data, thereby making your recovery chances a lot lower.
Before we get into the different ways to recover deleted files, first make sure you check a couple of things:
1. Always check the recycle bin to make sure your files are not still in there. If so, just right click to restore them.
2. Make sure you close out of all other programs, even programs running in the taskbar.
3. Don’t create new files, move data, copy data or anything else.
For this article, we’re going to focus on recovering data from your computer hard drive. If you are trying to recover photos from an SD card or USB stick, check out the link to my other article. As with most simple data recovery, we always start out with data recovery software. That’s usually the cheapest option to start off with.
If free and paid software can’t get your data back, then you have to use more specialized data recovery companies that charge anywhere from $500 to $1500 to recover data directly from the hard disk platters. Here we will only talk about software. I’ll go through a couple that I have used and tested.
Recuva
Recuva is probably one of the more popular choices for data recovery and I’ve had very good results with this program myself. The freeware version lets you recover data without having to pay. Let’s see how we would use the program. Once you install it and run it, the wizard interface will start up. I would recommend using the wizard. Click Next and you’ll first be asked what type of files you are trying to recover.

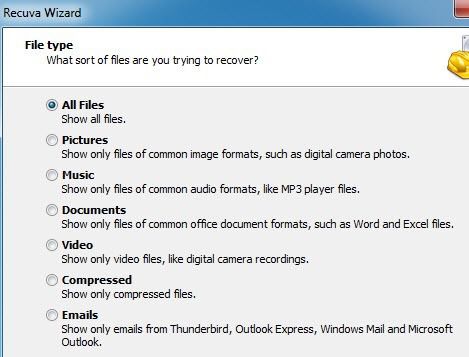
If you know exactly what you are trying to recover, then feel free to choose that type, otherwise just stick with All Files. Next, you’ll be asked where you want to search for the deleted files.

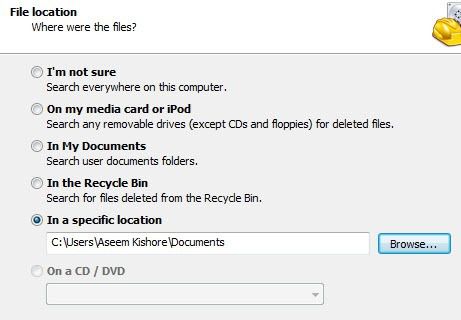
If you know the location of the deleted files, you can choose In a specific location and then click Next. However, if nothing is found in that location, it does not mean the files still can’t be recovered. In my test, I deleted a folder from My Documents and then emptied out the recycle bin, but chose the My Documents location for the search. Nothing came up and I decided to try to search the entire drive. Sure enough, the files were found, but in the hidden recycle bin folder on the drive. So you should always choose I’m not sure and let it search the entire drive also if the other locations were not successful.

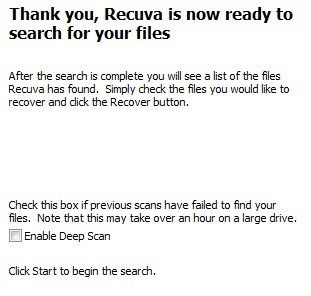
Finally, you can check whether or not you want to perform a Deep Scan or not. This will take longer, but you’ll have a better chance of recovering more data. Go ahead and click Search and Recuva will start scanning your hard drive.


By default, the program breaks the files down into categories like Documents, Music, Videos, etc and you can change that via the drop down box. You can also change the scan location and if you click on any of the files, you can get a preview. Click the top checkbox to select all the files and then click Recover. You’ll need to choose a location for the files, which should be on another drive other than the drive data is being restored from. If data is being recovered from your C drive and you have no other drive, then use a USB stick. Don’t restore to the same drive! The program will even give you a warning about that.
In my test, Recuva was able to recover 122 MB out of 128 MB of image, document and music files without deep scanning, so it’s definitely a good program to try first since it’s also free.
MiniTool Power Data Recovery
The next tool, MiniTool Power Data Recovery, is actually better than Recuva in terms of data recovery and features, but the free version only lets you recover up to 1 GB of data. After that, you have to purchase a personal license, which is $69. That’s a bit pricey, but it all depends on the importance of the data you have to recover. If they are precious family photos, $69 is nothing.
Once you install it, you need to choose what type of recovery you are looking to perform. For deleted files, you would choose Undelete Recovery. As you can see, you can also use the program to recovery from digital media, recover data from CDs/DVDs, etc.


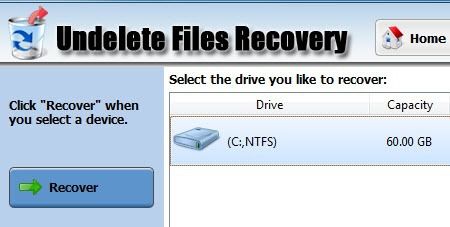
Choose the drive you want to recover data from and then click on the Recover button.

The scanning process is actually fairly fast and you will get a tree like view of the different files and folders that were recovered. You want to navigate to the folder where your files had been saved and see if that path exists.

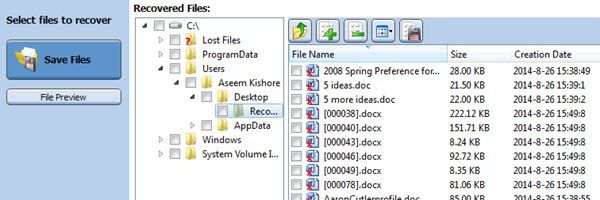
Then select the files via the checkboxes and click Save Files. Again, save the files on a different disk so that you don’t risk overwriting the deleted data while it’s being recovered.
TestDisk
One last program worth trying out is TestDisk, which is freeware. The program also comes bundled with PhotoRec, which is a program I talked about in my other post on recovering photos from SD cards. The TestDisk program is for recovering files on hard disks.
When you download the zip file, extract it and then run the testdisk_win application that is in the directory. You’ll see that a command prompt pops up and that’s actually how the program runs! It’s a bit intimidating, but it is actually really easy to use.
It’ll first ask you if you want to create a log file, append one or not use one at all. I would suggest just leaving it highlighted on Create and pressing Enter. Now you’ll be asked what disk you want to scan.

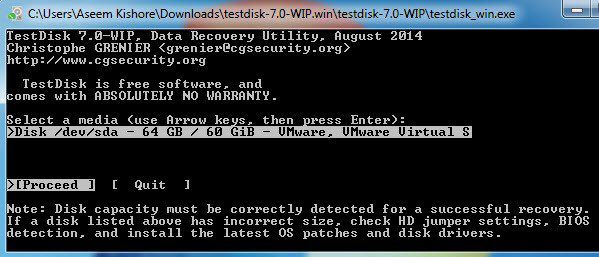
Use the arrow keys to select the disk and then make sure Proceed is selected before pressing Enter. Next it’ll ask you what type of disk you are using.

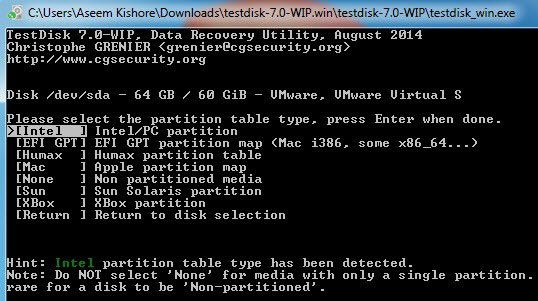
If your computer is running Windows with NTFS or FAT partitions, then leave it at Intel. They also have options for Mac formatted drive, Sun Solaris systems and even an XBox partition.


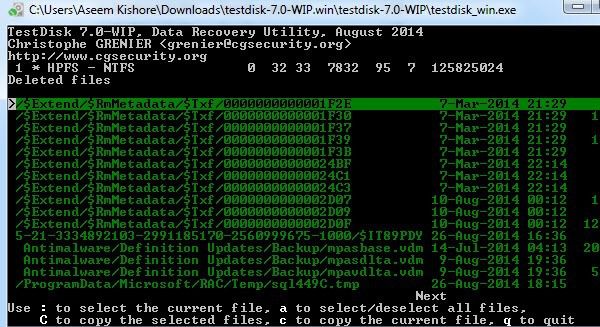
Finally, choose Advanced to get to the advanced file tools. Make sure you use the right arrow key to move to Undelete and then press Enter.

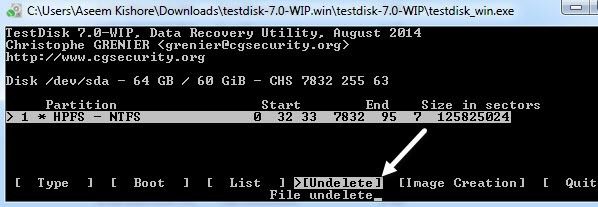
After a little bit, you will get a list of all the files that were found. You can either select individual files using the : or you can press A to select all files. When selected, the text will turn green. Then press C to copy the files.

Notice that if you have multiple files selected, you need to press uppercase C and not lowercase c. I didn’t realize this at first and kept only getting one file and couldn’t figure out why! Lastly, it will ask you for a destination, so make sure to choose a location off the disk with the deleted files.

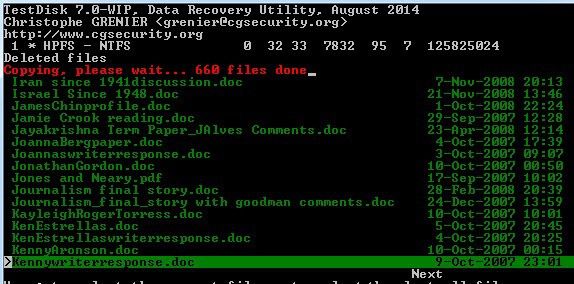
If you managed to get through all that, you should see a red line at the top telling you how many files have been copied. Once completed, you should hopefully have some or all of your data recovered.
So those are three really good programs you can use to recover files deleted on your PC. The main things to understand are time is of the essence, don’t use the computer at all, don’t install the recovery software on the same drive as the deleted files and don’t recover the files to the same drive. If you have any questions, let us know in the comments. Enjoy!