
Want to automatically log into your Windows 7 computer without typing a password? In earlier versions of Windows, you had to remove the password associated with your account in order to login without any prompts.
In Windows 7, you can configure your user accounts so that you can login automatically even if your account has a password. This is really useful for people who have their computers in secure locations or simply don’t care for all the extra security.
In this article, I’ll explain how to set this up for a computer at home and for a computer that is joined to a domain. If you’re on a domain, you have to hack the registry a little to get it to work.
Setup Auto-Login for Windows 7 Workgroup PC
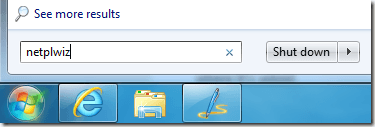
This is pretty straight-forward. Click on Start, then type the following into the command box and press Enter:
netplwiz

This will open the advanced user account properties dialog box. You can also get to this screen by typing run in the command box and then typing
control userpasswords2
in the run dialog box. Either way, you’ll get the same dialog box.

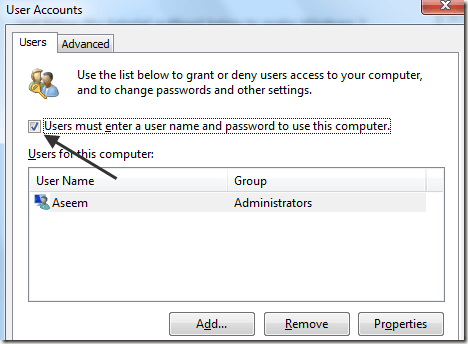
Go ahead and uncheck the box that says “Users must enter a user name and password to use this computer.”
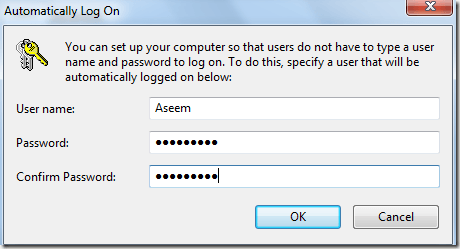
When you uncheck it and click OK, you will be prompted to enter your current password for the currently logged-in user account.

That’s it! Now restart your computer and you should be good to go. No more having to type in a password or having to click on one of those user icons. You’ll just be automatically logged into Windows 7.
Setup Auto-Login for Windows 7 Domain PC
If you are joined to a domain, you would follow the same steps, but you’ll quickly realize that the checkbox option is missing altogether! So how do you get it back? With a registry tweak.
Open the registry editor (Start, then type regedit) and go to the following key:
HKEY_LOCAL_MACHINESOFTWAREMicrosoftWindows NTCurrentVersionWinlogonAutoAdminLogon

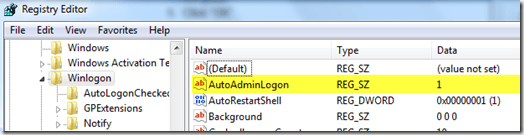
As you can see, the value should be set to 1. If it’s 0, the checkbox will not appear. Go ahead and change the value to 1 and restart your computer. Now open the dialog box and you should see the checkbox.
However, it might be unchecked. So you have to check the box, click OK and then go back into the dialog box and then uncheck it again. At this point, it’ll ask you for your login credentials and you should be good to go.
Extra Tip: If the above method for auto-login for Windows 7 domain didn’t work, you can try to get the auto-login to work by tweaking three more values in the same registry location mentioned above.
If they don’t exist already, you can add these three keys shown below under Winlogon:
DefaultDomainName (String)
DefaultUserName (String)
DefaultPassword (String)

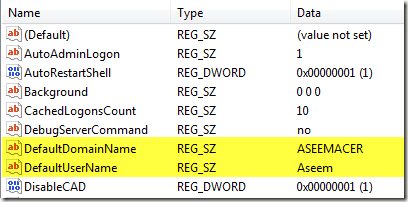
Set the keys to their appropriate values and restart your computer. This used to be the method to get a Windows XP computer joined to a domain to login automatically, but you can still use it for Windows 7! Enjoy!