
Are you looking for a way to track changes made to an Excel spreadsheet? There are many cases where you have to distribute a file to multiple people and keep track of what changes were made. You might want to track when the change was made, who made the change, what cell the change occurred in and what data was changed.
Excel has built-in tracking features that can handle all of the above cases. You can easily review all of the changes directly on the worksheet and you can also accept or reject each change. There are a few points to remember about the tracking features of Excel:
1. Turning on tracking does not mean that you can revert the spreadsheet back in time to a previous state by undoing the changes. It’s basically a log file that records everything and that’s it. You can manually go and see what data was deleted or added, but you’ll have to make the changes to the spreadsheet yourself.
2. Turning on tracking doesn’t mean every single change you make will be recorded. Any data stored in a cell is tracked, but other changes like formatting are not. Other changes that are not tracked include hiding/unhiding rows and columns, comments, and cell values that change to due a formula recalculation.
3. Change history is only kept for 30 days by default. If you make changes to an Excel worksheet and then open the workbook again 45 days later, then you’ll be able to see the change history for all 45 days until you close the workbook. When you close it, any change history older than 30 days will be gone. That means the next time you open it, you won’t be able to see that change you had made 45 days earlier.
4. Whenever your turn on tracking, the workbook becomes a shared workbook. This means that multiple users will be making changes to the document.
Now that you know some basics of how tracking works in Excel, let’s talk about how to enable it, change settings and keep track of changes!
Enabling Tracking
Let’s go ahead and turn on tracking first. Open Excel and click on the Review tab on the ribbon. At the far right, you should see an option called Track Changes under the Changes section.

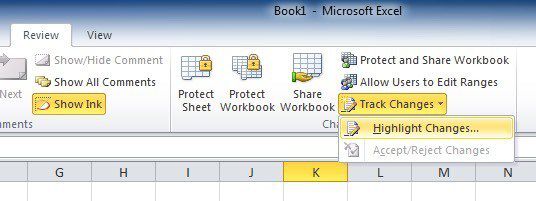
Click the button and choose Highlight Changes. You’ll get a dialog box where you now need to check off the option “Track changes while editing. This also shares your workbook”.

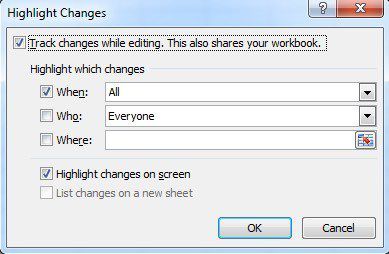
You have several options here including When, Who, and Where. For When, All means every change will be highlighted. You also have the option of highlighting changes from the last time you saved the document, since a specific date, or changes that have not yet been reviewed.
If you check Who, you can choose to track changes made by anyone or changes made by everyone except you. The Where option allows you to track changes only for a specific portion of the spreadsheet. Just click the button at the right and select the range of cells you want to keep track of.
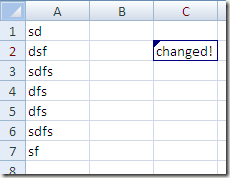
Finally, you can un-check the Highlight changes on screen option if you do not want others to know you are tracking changes. By default, once you start tracking and this option is selected, any changed cell will show a small arrow at the top left to indicate it was changed.

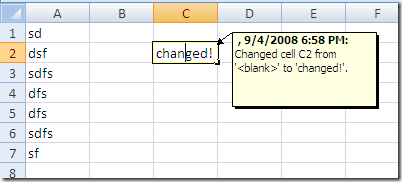
Also, if you click on a changed cell (with Highlight changes on screen turned on), you’ll get a little popup window showing what the value was changed from and changed to and at what time. If you deselect the Highlight changes on screen option, that little black triangle won’t show up.

So what you can do, for example, is hide the changes on the screen by not checking the box, send out your file to everyone who has to make changes to it, and when you get it back, just go to Track Changes and recheck the box.
Configure Tracking
The next step is to take a look at the settings for tracking and adjust them to fit your needs. To do this, click on the Share Workbook button that is directly to the left of the Track Changes button. Click on the Advanced tab when the Share Workbook dialog pops up.

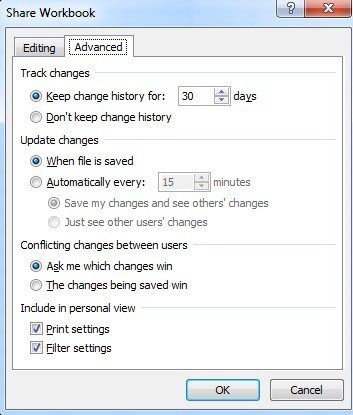
Here you can change the number of days for keeping change history to something other than 30 days. By default, changes are updated when the file is saved, but you can make it so that it is automatically done every few minutes. Lastly, you can choose how you want to deal with conflicts: either by being asked or simply letting the last change when saving the file win.
Viewing Changes
Once you have enabled tracking and made a few changes, you can click on the Track Changes button again, click on Highlight Changes and you’ll notice that the List changes on a new sheet box is no longer grayed out.

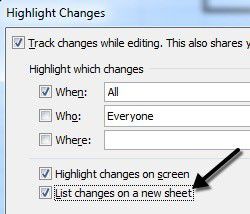
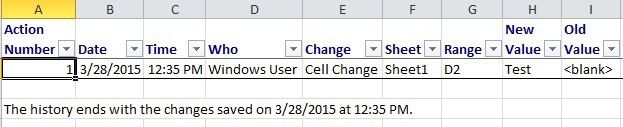
Check that and click OK. A new worksheet called History will be added that will let you view all the changes that have been made to that workbook.

At some point you’ll need to either approve or reject the changes. You can review all the changes and then pick and choose which ones you want to keep or discard.
Simply click on Track Changes again and choose Accept/Reject Changes. Select the options to choose which changes you want to accept or reject. If you want to review all changes, just leave When checked and make sure it is set to Not Reviewed.
Click OK and Excel will begin to show you each change that was made and give you the option to Accept or Reject. You can also Accept All or Reject All changes if you like.


If you reject a change, it will immediately revert back to what was originally in that cell. It’s worth noting that if another cell references the contents of the rejected cell, then that value will also change when the referenced cell value reverts back. This can cause formulas to break, etc, so be careful.
That’s it! Now you can track any changes made to your Excel spreadsheet easily by using this built-in feature. If you have any questions, post a comment. Enjoy!