
NFC stands for Near Field Communication and it allows two devices held closely to communicate with each other. An NFC tag is a paper-like tag that can be programmed to do your tasks using the NFC technology.
If you haven’t heard of this technology before, the above might sound a bit too technical to you, but it’s not. Once you’ve learned the basics of programming an NFC tag, you’ll find that you can use it to automate a number of your tasks that you may be doing manually every day.


Getting an NFC tag and programming it doesn’t require any special skills. As long as you know how to use an app on your Android device, you can program an NFC tag to do your specified tasks. Also, these NFC tags are inexpensive and available on all the major websites including Amazon. You can get a few of these for you so they can perform various tasks for you.
Requirements For Programming An NFC Tag
In order to program NFC tags, there are certain things, or requirements that you must meet. These are basic ones and as long as you use modern gadgets, you should be just fine.
You must have:
- An NFC tag which can be bought very cheaply on Amazon.
- An Android device with NFC compatibility. Check your phone’s specifications to confirm.
- An app to program your tags. There’s a free app on the Play Store so you don’t need to worry about it.
Once you’ve confirmed you meet the minimum requirements, head onto the following section to start writing data to your NFC tag.
Writing Data To An NFC Tag Using Your Android Device
Programming an NFC tag basically means writing the actions you want to perform to your tag. This is done using a free app from the Play Store that you can download and use on your device.
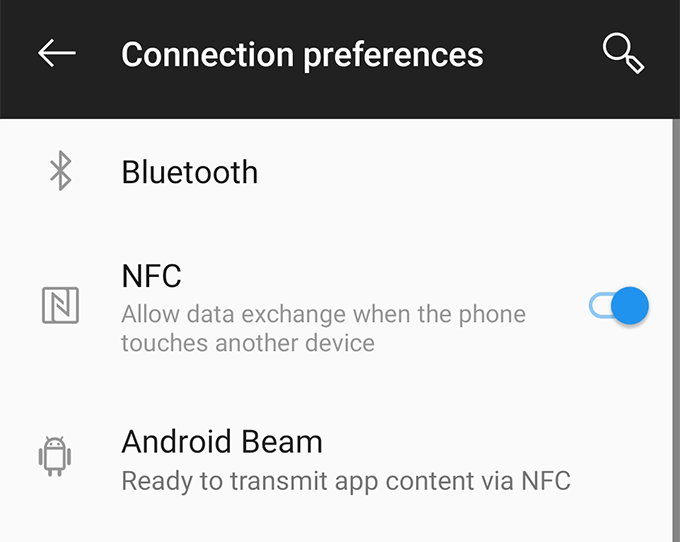
- The first thing you’ll need to do is enable the NFC option on your device. To do it, open the Settings app, tap on Bluetooth & device connection, select Connection preferences, and finally turn the toggle for NFC to the ON position.
If you don’t find the option in the exact menu shown above, you might want to look inside other menus to see if it’s there. The location of the option varies by the device you use.

- When NFC is enabled, launch the Google Play Store on your device, search for the app named Trigger, and install the app on your device.
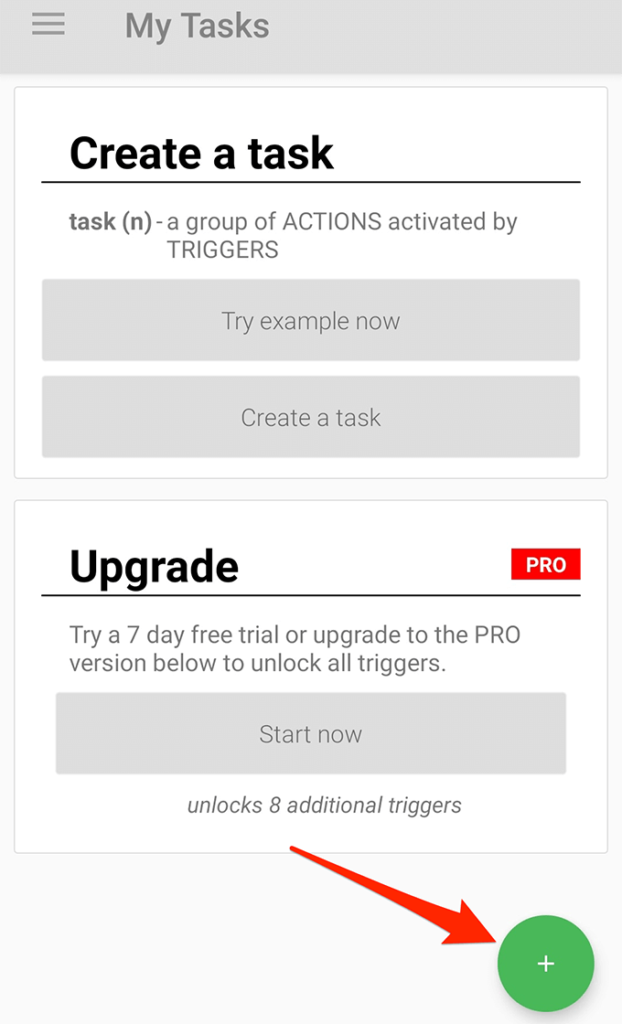
- Launch the newly installed app. When it opens, you’ll need to first create a new trigger. This can be done by tapping on the + (plus) sign at the bottom-right corner.

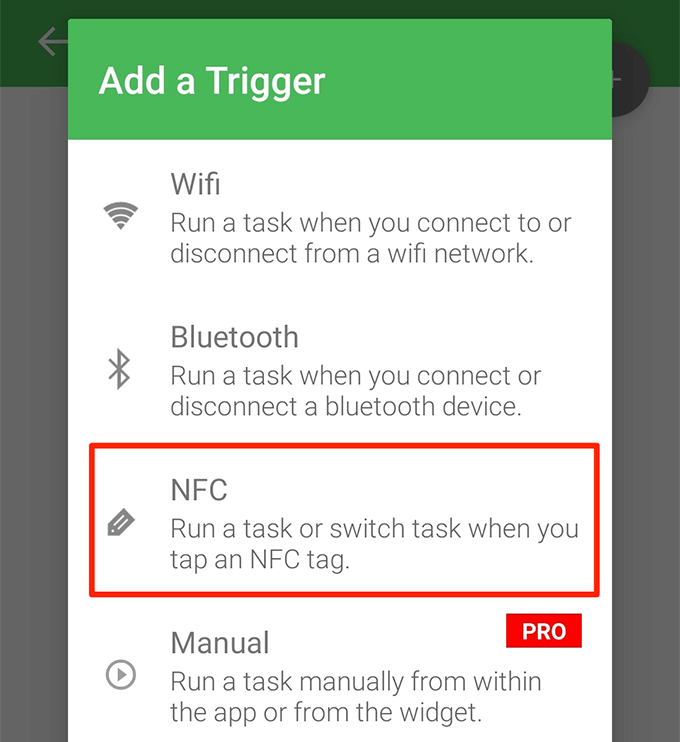
- On the following screen, you’ll find the options you can create triggers for. The option you need to tap on is called NFC as this is what allows you to perform an action when an NFC tag is tapped.

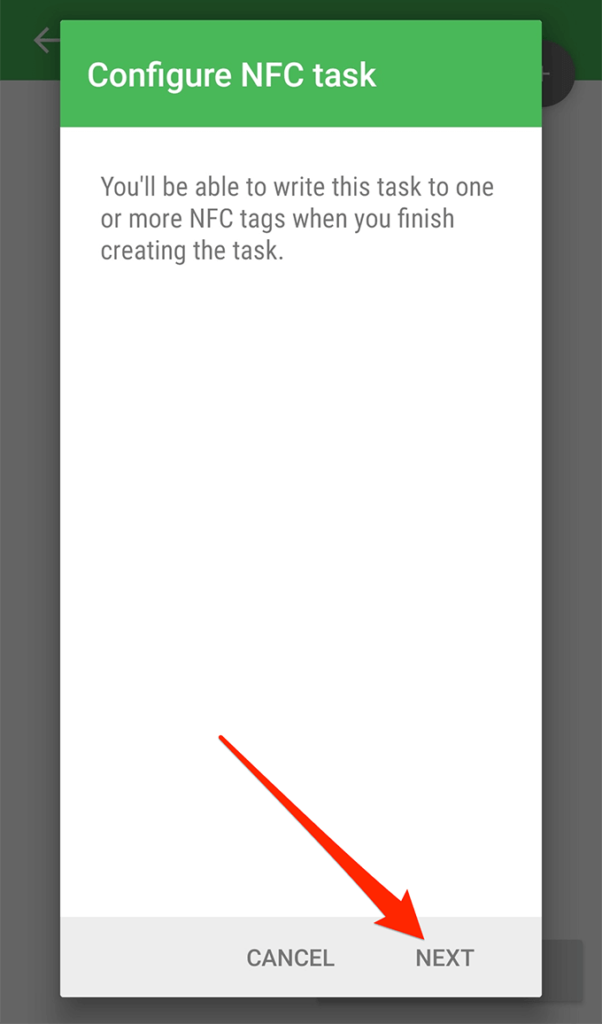
- After tapping NFC, tap on Next on the following screen to continue to program your tag.

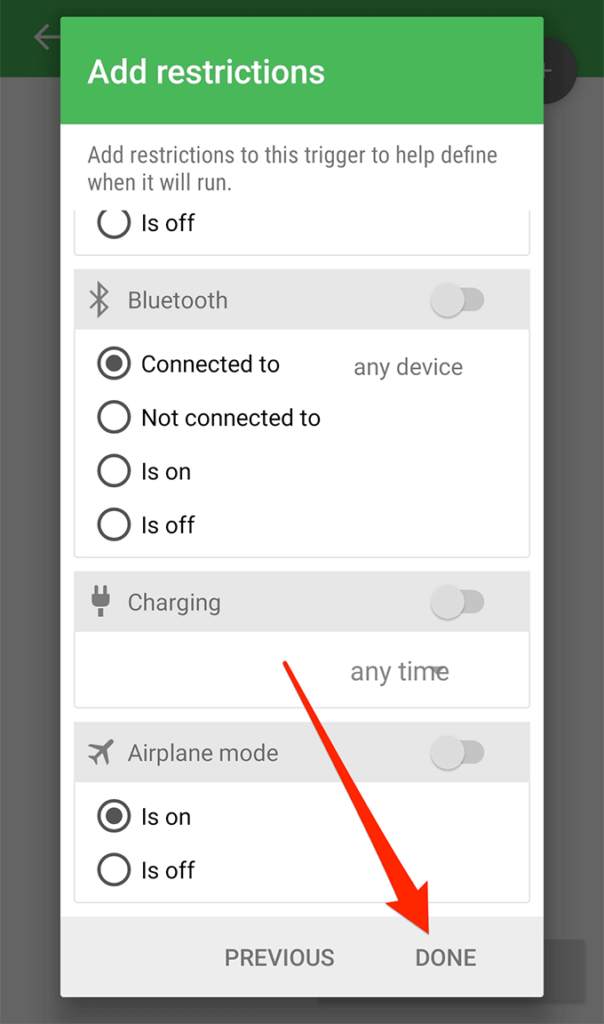
- The screen that follows lets you add restrictions to your tag. Here you can define the conditions when your tag is allowed to run. Tap on Done when you’ve specified the options.

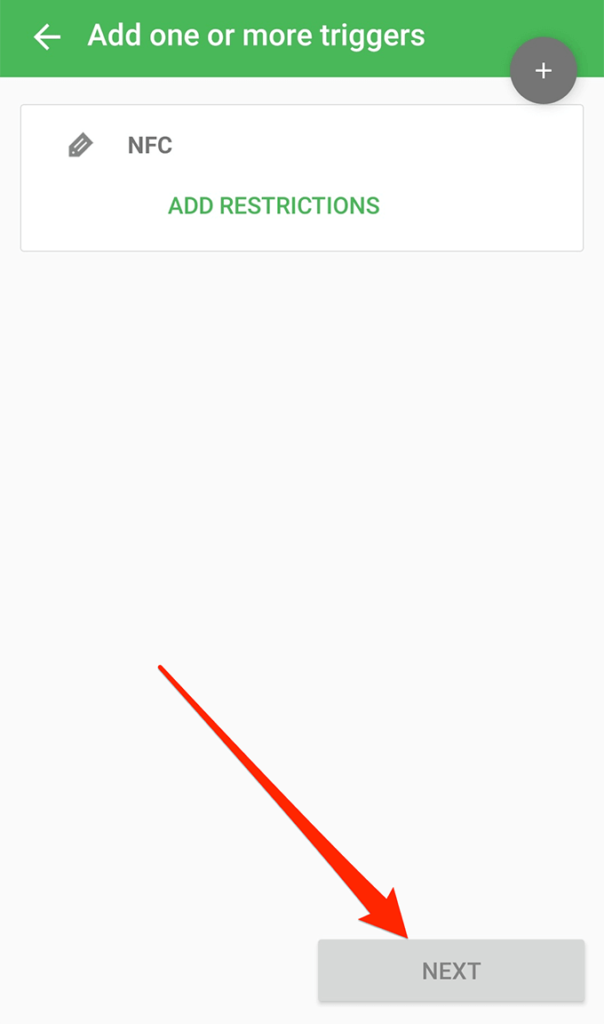
- Your NFC trigger is now ready. You now need to add an action to it so that your tag performs your chosen action when it’s tapped. Tap on Next to do it.

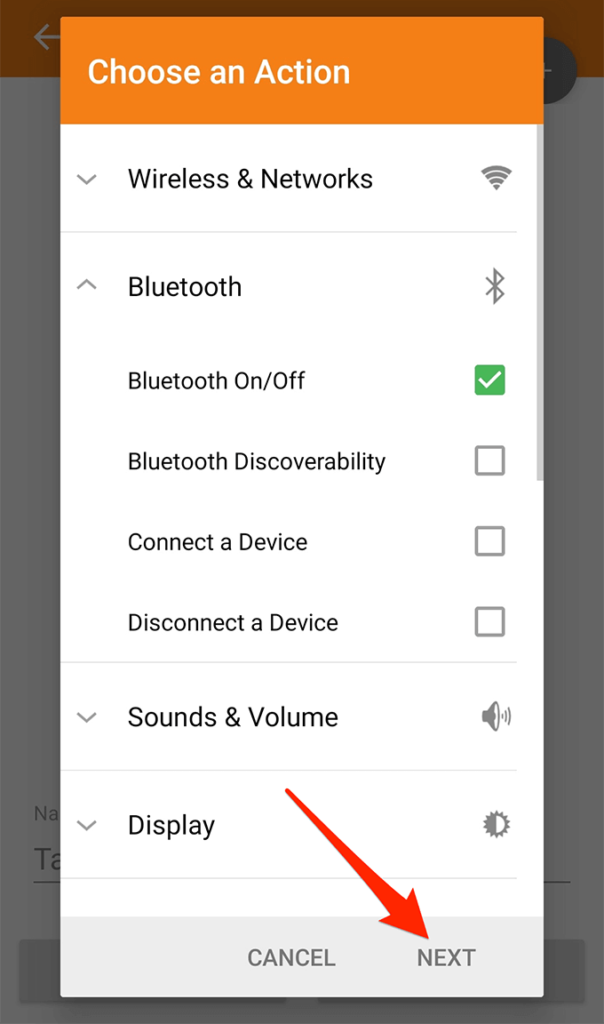
- You’ll find various actions you can add to your tag for it to perform. As an example, we’ll be using the Bluetooth toggle option so that Bluetooth is turned on/off when the tag is tapped. Hit Next when you’re done.

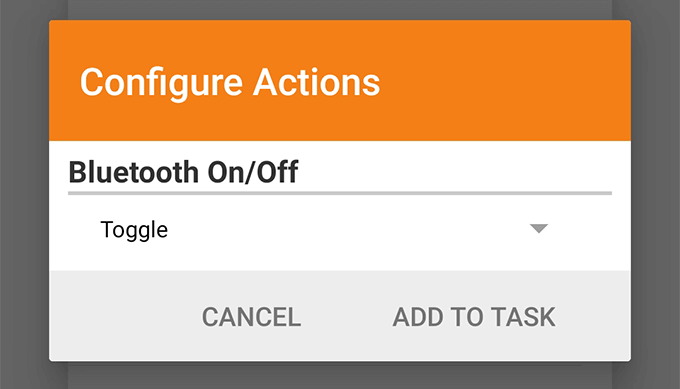
- You can customize the action even further on the following screen. Since we want to toggle Bluetooth, we’ll choose Toggle from the dropdown menu and tap on Add to Task.

- You can now see all the actions you’ve added to the list. If you want, you can more actions by tapping the + (plus) sign at the top. This’ll make your tag do more than one task at a time. Then tap on Next to continue.

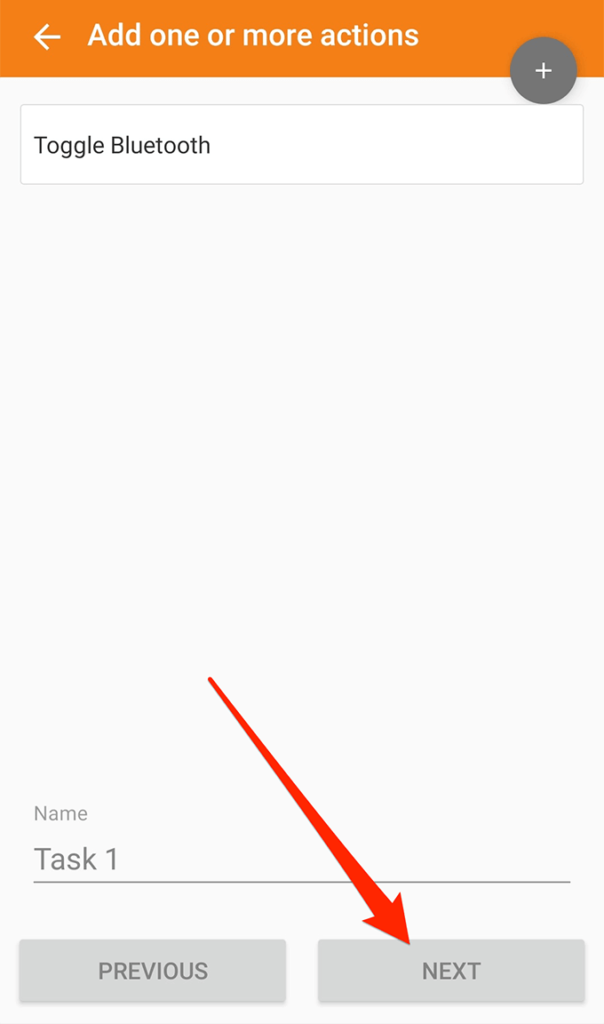
- Tap on Done on the following screen.
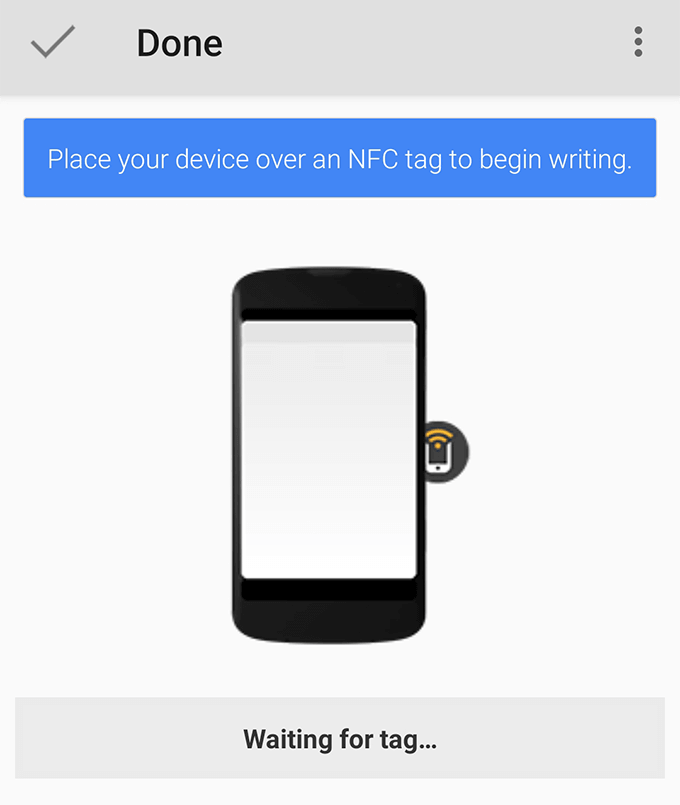
- Here comes the main part where you actually write the data to your tag. Place your NFC tag near the NFC location (usually near the rear camera) and the app will automatically write your actions to your tag.

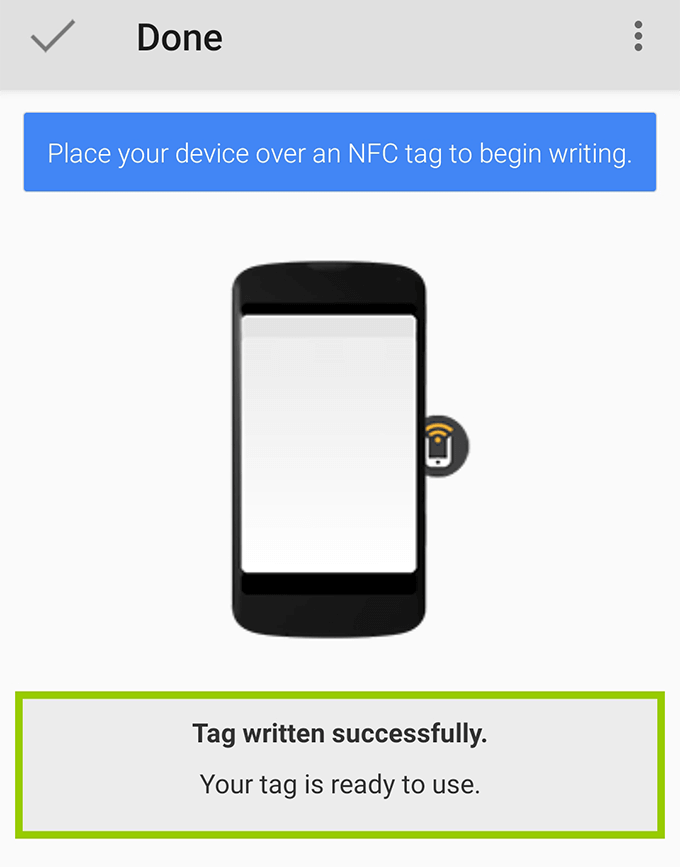
- You’ll get a success message when the tag is successfully programmed.

From now on, whenever you tap your phone to your NFC tag, it’ll perform the predefined actions on your device. In our case above, it’ll toggle the Bluetooth functionality on our phone.
You can even stick these tags somewhere convenient and then all you need to do is tap your phone at them to run your tasks.
How To Erase An NFC Tag On Android
If you want to use your tag for any other task, you can do so by erasing the existing data on it. You can program NFC tags as many times as you want and it’s pretty easy to get them formatted if you wish to do it.
- Enable the NFC option on your device and launch the Trigger app.
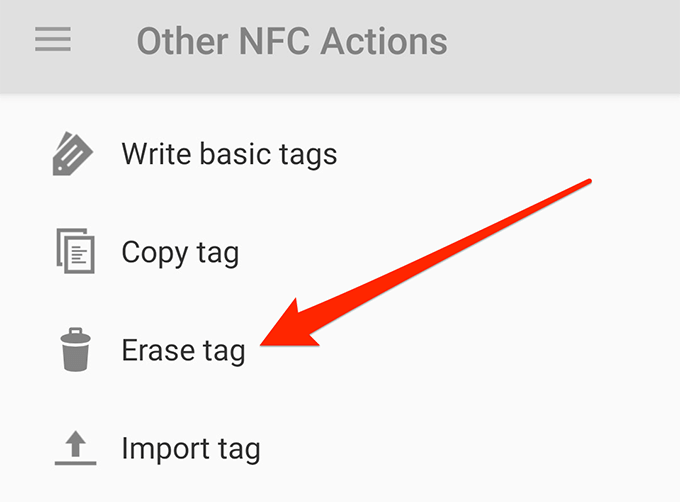
- Tap on the three horizontal-lines at the top-left corner and select Other NFC Actions.


- On the following screen, you’ll find an option that says Erase tag. Tap on it to select it.

- Place your NFC tag on your phone like you did when you were programming it.


You’ll get a notification when your tag is erased. It’s instant in most cases.
Uses Of a Programmable NFC Tag
If this is your first time using NFC tags, we know you’ll appreciate some suggestions as to what to use them for
- Create a WiFi NFC tag that lets your guests automatically connect to your WiFi.
- Create an NFC tag for an alarm so you don’t need to mess with the alarm app.
- Make a tag for your conference room that puts people’s devices in silent mode.
- Program a tag to call someone specific in your contacts