
Starting with Windows 7, Microsoft has included the ability to burn CDs, DVDs and Blu-ray discs directly from Windows Explorer. So if your PC comes with a CD, DVD or Blu-ray disc burner, you really don’t need any third-party disc-burning software.
In this post, I’ll walk you through the steps for burning a disc and the different options you have when burning. If your drive supports it, Windows can actually burn a disc that acts like a USB drive, meaning you can add and delete stuff from the disc.
Burning Discs in Windows 7, 8, 10
The easiest way to start the process for burning a disc in Windows is to pop in a CD, DVD or Blu-ray disc into your drive. Windows should automatically popup a dialog asking what you want to do with the disc.


Note that if you put in a CD, you’ll see the extra option to burn an audio CD also. If you put in a DVD or Blu-ray disc, you’ll only see the option to burn files to disc.
Burn Audio CD
If you want to burn an audio CD, select the Burn an audio CD option, which will use Windows Media Player to get the job done. If the popup dialog doesn’t appear, just click on Start, type in Windows Media Player to open it and then click on Blank Disc in the left hand menu.

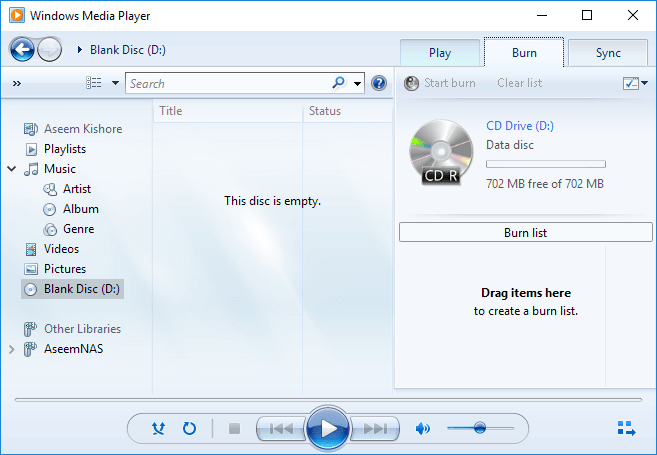
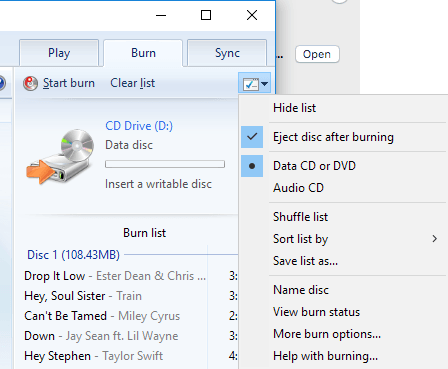
On the right hand side, click on the Burn tab and then simply drag and drop your audio files into the section that says Drag items here to start creating your audio CD. Note that it is very important to check whether you are burning a Data disc or an Audio disc. A data disc will let you burn hundreds of audio files, but may not be playable by normal CD players.
An audio disc will be playable by any CD player, but will be limited to only 80 minutes of audio. You can change the setting in Windows Media Player by clicking on the burn options dropdown that is to the right of the Start burn button.

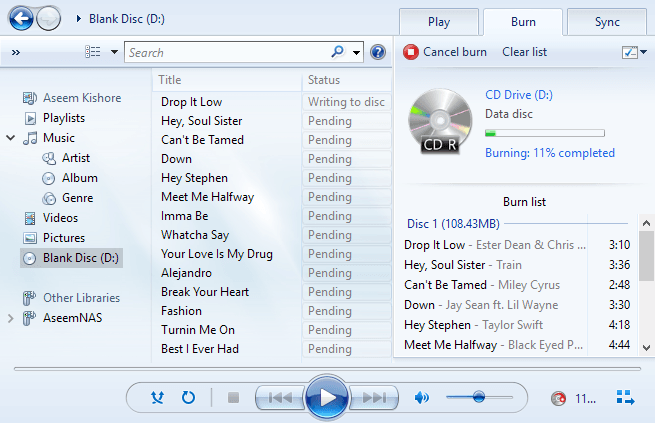
Once you have chosen your setting and added all your files, go ahead and click the Start burn button and the burning process will begin.

That’s about it for burning audio CDs. Make sure to check out my previous post on ripping audio CDs using Windows Media Player also.
Burn Data Disc
If you chose the Burn files to disc option instead of Burn an audio CD option, you’ll get another pop up window asking you to choose how you want to use the disc: Like a USB flash drive or With a CD/DVD player.

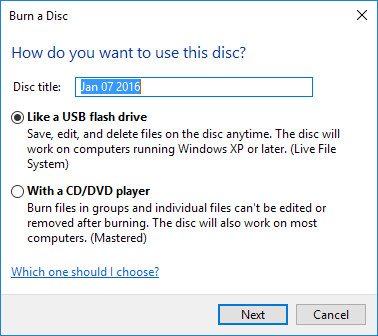
If you choose the first option, you can add, edit and delete files from the disc, but you can only use the disc on computers running Windows XP and later that support Live File System. Also, it depends on whether or not your drive supports the feature or not. Lastly, the disc itself has to be a rewriteable disc. If you have a CD-R or DVD-R only disc, then you won’t be able to use this option.
There doesn’t seem to be any clear indication as to whether a drive will support the feature or not, so you basically just have to try it and see if it works. When you click Next, it will format the disc and then you’ll get another popup indicating it’s now ready for use.


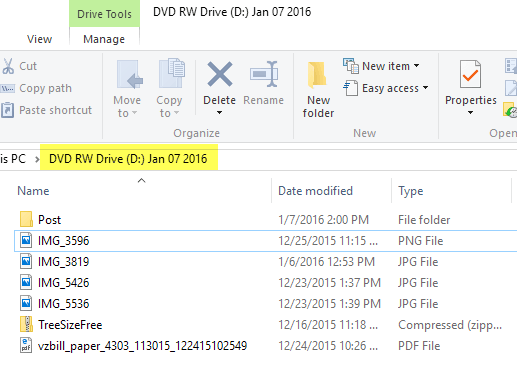
Now simply drag and drop files and folders onto the disc like you would a normal USB flash drive. The only difference here is that you’ll see it takes a bit of time when adding, deleting, or editing files on the disc.

At this point, your disc is not ready. If you try to eject it, you’ll get a message saying Preparing to eject – Please wait while this session is closed so the disc can be used on other computers.

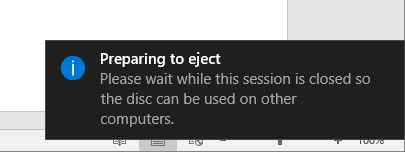
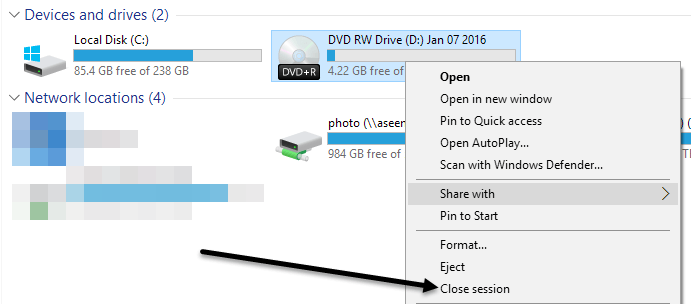
Closing the session means that Windows has to burn any added files and remove anything that you deleted, etc. In order to avoid this, you can also just go to Explorer, click on This PC and then right-click on the CD/DVD/Blu-ray drive and choose Close Session after you make any changes to the content on the disc.

If you were to choose the With a CD/DVD player option when the How do you want to use this disc dialog came up, a new Explorer window will pop up where you can start to drag and drop files to your disc.

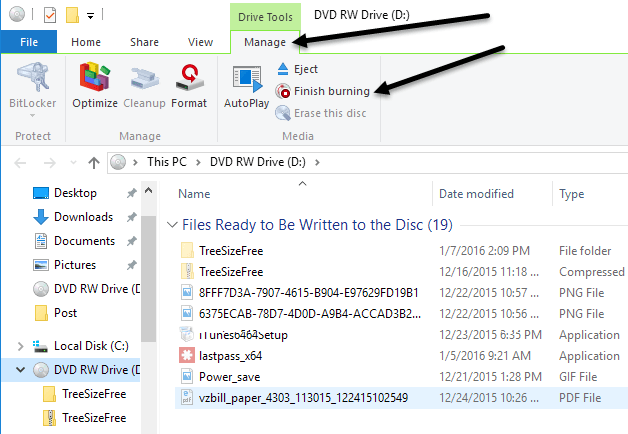
When you have added all the data you want to the disc, click the Finish burning button that will be located under Drive Tools – Manage. Note that this will burn the disc and finalize it, meaning you can’t delete or edit the data once it is burned to the disc. You can, however, still add more data to the disc at a later point.

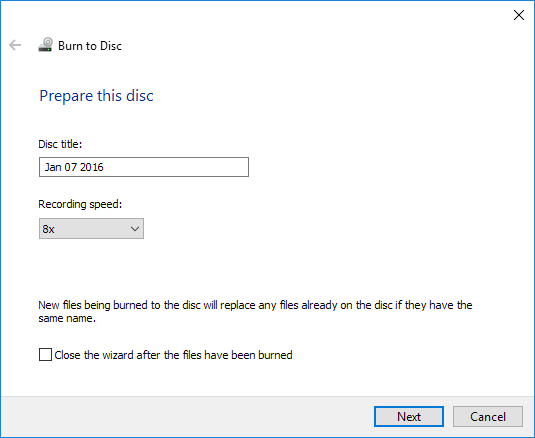
The Burn to Disc wizard will popup where you can give the disc a title and choose the recording speed. Click Next and the burn process will begin. The time will depend on how much data you are burning and the recording speed.
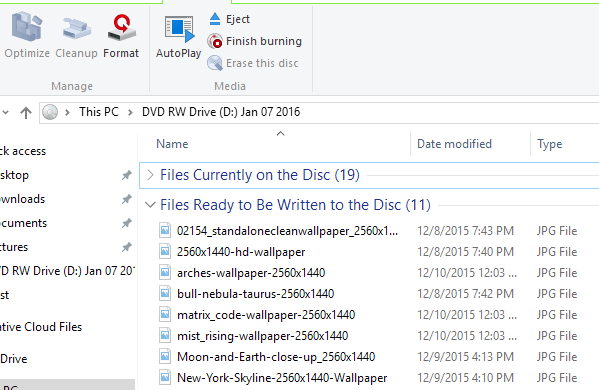
When you pop in the disc again, you can add more files and you’ll see two sections in Explorer: current files on disc and files to be written to disc. Click Finish burning to add the new files to the disc.

Burn Video DVD
Lastly, you might want to burn a video DVD in Windows, which you can do, but it requires using another tool. If you are using Windows 7, you can simply use the Windows DVD Maker program to burn videos to DVD. Windows 8 and Windows 10 removed Windows DVD Maker, so you have to use a third-party program like DVD Flick, which I also wrote about in the linked article.
You can also read my previous article on how to burn photo slideshows to DVD using DVD Maker for Windows 7 and another tool for Windows 8/10. Also, if you are on a Mac, be sure to check out my article on how to burn DVDs in OS X. If you have any questions, feel free to post a comment. Enjoy!