


If you play video games on your PC, even casually, then you’ve probably seen the swath of video settings in the options menu. You may not however, understand what they all mean. We’re here to help.
Some of the options are pretty self-explanatory, while others are just straight up confusing (Bloom? Ambient occlusion?). You may not like the idea of fiddling with settings, and these days, most games will automatically set it to something decent the first time you start them up. But if you really want the best balance of performance and graphics quality, digging into those settings yourself can go a long way. Turning everything up is rarely the best option, since it will make the game run very slowly.
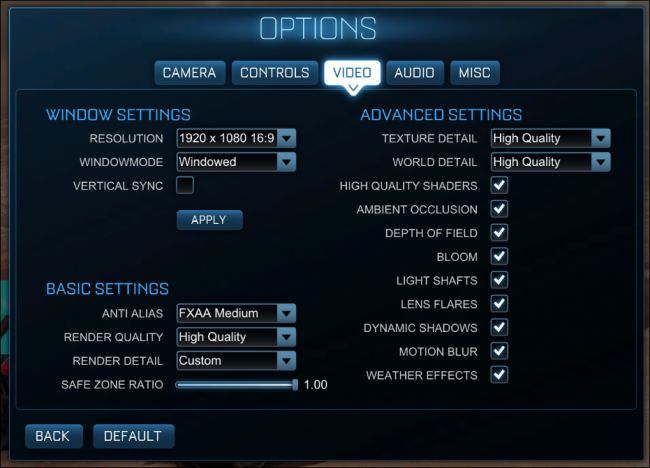
The video options for Rocket League give you a good idea of what to expect in most other video games.
Today we want to briefly explain to you what all these settings do and whether or not you truly need them for maximum gaming fun. We’ll use Rocket League and Borderlands 2 as our example games, since they’re fairly popular and between them do a good job of representing the video settings you’re likely encounter in many other games. Some games may have more, while others have less, but for the most part, you should be able to take this knowledge and use it on just about every other game in your library.
Resolution and Window Settings
First, to access your game’s video options, you’ll have to open the game’s settings menu. This may be labeled as either “Settings” or “Options”. Either way, that’s where you’re likely to be able to make adjustments to your video settings.
Let’s start with the basics. The game’s resolution settings are fairly simple to understand. Setting the resolution will allow you to adjust the size of the viewable area of the game, as well as make the game look sharper.
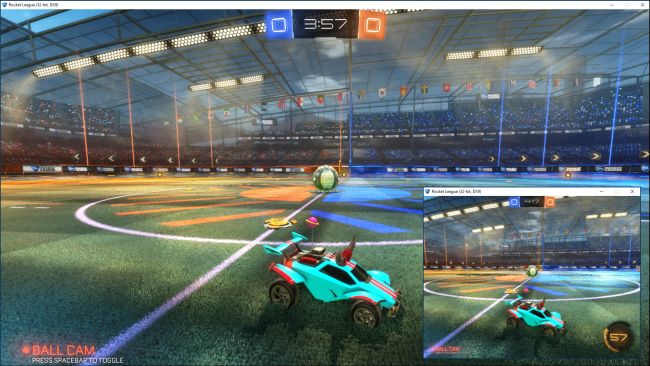
For example, in the following screenshot, we see how Rocket League looks running at our monitor’s native resolution 1920×1080, and then we’ve inset an example of the game running at 640 x 480. It’s much smaller, and if you were to blow that up to full screen, it would look much lower quality (like comparing a DVD to a Blu-Ray).
Ideally, you should try to run your game at the highest resolution possible for your monitor–so, if you have a 1920×1080 monitor, for example, you’d want to run the game at 1920×1080. Playing the game at a substantially lower resolution might help it run more smoothly, but it’s going to look terrible. You can always turn off other features in the options to help increase the game’s performance.
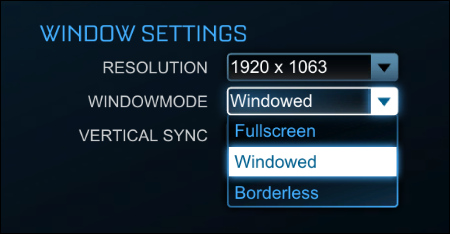
In addition, you’ll notice also that our game screenshots have windowed borders. This is simply because we’ve elected to run the game in windowed mode. Running the game in full-screen mode means that the game will fill the entire screen–which is better for performance and imersiveness. You can usually press the Windows key to access the desktop if you need to, though it depends on the game–some are more temperamental in full screen mode than others.
Many games, including Rocket League and Borderlands 2, also have an option to run the game in “borderless windowed” mode, which means the game will run in a window, but without any of the window chrome (borders, maximize and minimize buttons, etc.). This is useful if your game is temperamental in full screen and you need to access the desktop regularly–it’ll look like full screen, but act like a window.
Vertical Sync
Vertical sync, or “vsync”, syncs your graphics card with your monitor’s framerate. For example, if your monitor only refreshes at 60Mhz–60 times per second–but your graphics card is producing 100 frames per second, then your monitor won’t display those frames evenly, and you’ll see something known as screen tearing.
In this simulated example of screen tearing, you can see how it might look on your display. Note, everything in the top quarter of the image don’t line up with the rest.
Vertical sync fixes this by capping the frame rate of your game to your monitor’s refresh rate. The downside to this is, if you have a powerful computer that can give you a really fast, polished gaming experience, but your monitor can’t keep up, you’re not going to be seeing that game’s true potential.
The other thing to keep in mind is that vsync will only produce video at a framerate that is divisible into your monitor’s refresh rate. So if you have a 60Hz monitor, and your graphics card is capable of running your game at 60 frames per second or above, you’ll see great results. However, if your graphics card is trying to display something fairly intense and dips below 60 frames per second at all–even to 55 frames per second–then vsync will drop the refresh rate all the way to 30, which is a much choppier experience. If the framerate drops below 30, then vsync will only display 15, and so on.
Vsync is a very hotly debated topic among gamers. Some prefer to use it and avoid screen tearing, while others would rather deal with screen tearing than drops in framerate. If you do run vsync, you should set your other graphics settings to aim for a bit higher than 60 frames per second, so it never dips below that.
Basic Graphics Settings
With the technical stuff out of the way, now it’s time to get into the fun stuff–the settings that make your games look all pretty. Almost all games will have basic settings like anti-aliasing and render quality, though they may go by slightly different names. So what do they do?
Anti-Aliasing
Anti-aliasing is fairly easy to understand. Most graphics on a computer, when expanded, will appear jagged. Anti-aliasing fills in these jaggies with extra pixels so they appear smooth. In many games, you can set your AA to a certain multiplier such as 2x, 4x, or 8x.
Each level will increase the load on your computer. Higher end graphics cards will be able compensate for this, while older or less capable cards will see an appreciable slowdown. If this is the case for you, then we recommend setting AA to 2x or even off and seeing if you can live with that (and you just might have to). Higher levels of AA beyond 2x show higher diminishing returns, so unless you have a very beefy card, 2x is probably the best balance of performance-to-resource-usage.
In the following image, the difference is easy to make out. The top shows how things look with anti-aliasing applied (FXAA High) versus how it looks with anti-aliasing completely off.
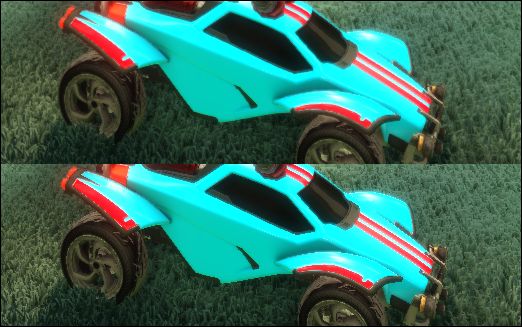
Note how the top image looks much smoother and more refined, while the bottom is jagged and rough.
There are quite a few different types of anti-aliasing, including MSAA, MLAA and FXAA.
Multisample Anti-Aliasing (MSAA) is one of the more common types of anti-aliasing. MSAA looks nice, but is computationally inefficient because supersampling is performed for every single pixel, even though you only notice a difference along the edges of an object. Also, this technique can be applied to transparent objects, or objects with textures, meaning you’re unlikely to notice a difference.
Fast Approximate Anti-Aliasing, or FXAA, is much lighter on resources, but doesn’t look as nice. It doesn’t so much perform true anti-aliasing as it does blur the edges of in-game objects. Therefore, you’re not as likely to see a huge performance hit, if any, as you would with another more graphics intensive AA technology–but your image will look a little blrury. Here’s a good comparison of the two technologies if you want to learn more.
Morphological Anti-Aliasing (MLAA) is applied after images are processed by your graphics card. This is similar to applying filter such as in Photoshop. Additionally, MLAA is applied to the whole image on the screen, so no matter where the object is, aliasing is reduced. It occupies a space in between MSAA and FXAA–it’s not quite as hard on your graphics card as MSAA is, but looks nicer than FXAA.
There are many other types of anti-aliasing, but these are some of the more common ones you’ll see.
What AA type you use is going to depend almost entirely upon the power of your PC and the options your game gives you. While FXAA will soften edges and make things look smoother, it might make things too blurry for many users. On the other hand, something like MSAA will definitely give you sharper lines but at a considerably higher cost in terms of performance.
The best course is to try out whatever type of AA your game offers and see what works for you, and if the performance hit is too hard, figure out what you can live with.
Rendering
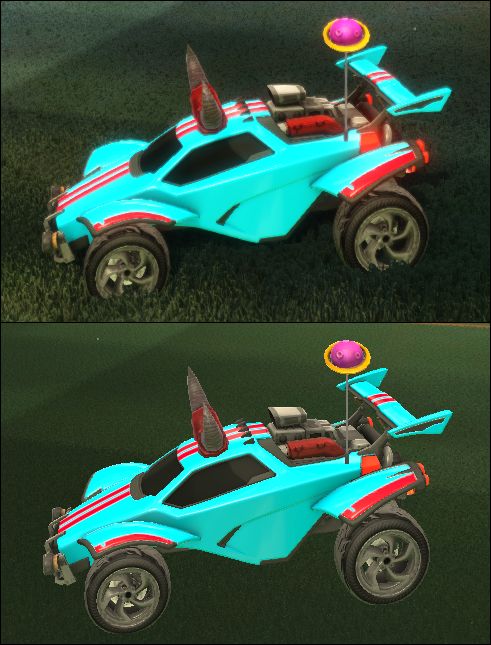
Let’s talk next about rendering. Rendering is how graphics–like the car above–are drawn on your screen. The higher the render quality, the better and more realistic the car will look, but it will also take more effort from the computer to draw it. If you have a new, faster performing computer, then it will obviously be able to render graphics at a much higher rate than a slower one.
Look at the images below. The render quality in the top image to “high quality”, while in the bottom image, it is set to “high performance” (aka “low quality”). The bottom image is jaggy and rough, while the top is considerably cleaner and more polished.
Even though we have anti-aliasing turned on in both images, lowering the rendering quality is going to lower graphics quality to the point where AA is a moot point.
In a game like Rocket League, setting the rendering to its lowest option is going to make objects, such as the car in the above images, look blurry and jaggy, so it won’t matter if you’ve applied AA or not. So you should use this setting as a baseline, and if High Quality isn’t sharp enough for you, you can apply AA afterwards.
In other games, like Borderlands 2, rendering will probably go by another name such as “Game Detail”. Whatever it is called, the higher you set it, the more crisp and clear things will look, but the greater the performance cost will be.
Advanced Quality Settings
Those are the big settings, but there are a lot of smaller graphics settings that add layers of quality and greater nuance to your gaming experience. Most of these settings are going to really tax older machines, and in some instances, the value to the game itself will be negligible. As always, your mileage will vary. If you like having everything turned on, and your machine can handle it, then by all means go for it.
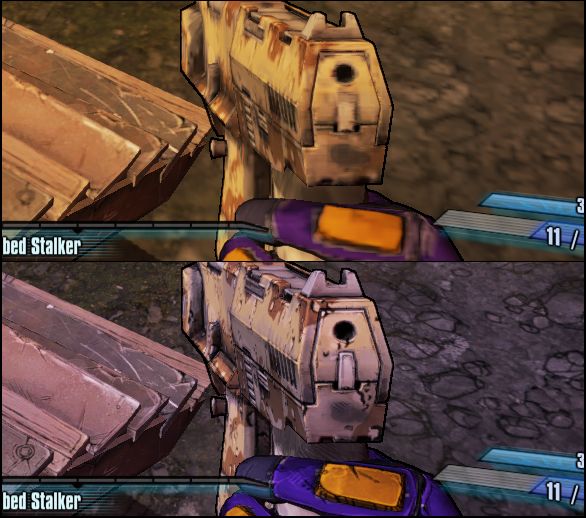
The first item is Texture Detail. Textures are the actual colors and details on the items in a game, rather than the shape of the items themselves. In game such as Borderlands 2, texture quality shows a marked improvement in the detail on the surface of the gun from low (top) to high (bottom). Obviously, higher detail will require more from your graphics card.
However, unlike most of the other graphics settings, Texture Detail has more to do with your graphics card’s VRAM, rather than its processing power. Even if your graphics card is pushing pretty hard, you should be able to turn up Texture Detail if you have VRAM free. If you have an older card with less VRAM, however, you’ll have to turn this setting down.
Similarly, Rocket League has a setting for World Detail, which affects the surrounding scenery. You can see the difference between “high performance” and “high quality” below: on the lower setting, grass doesn’t show individual blades, edges are more jagged, and so forth.
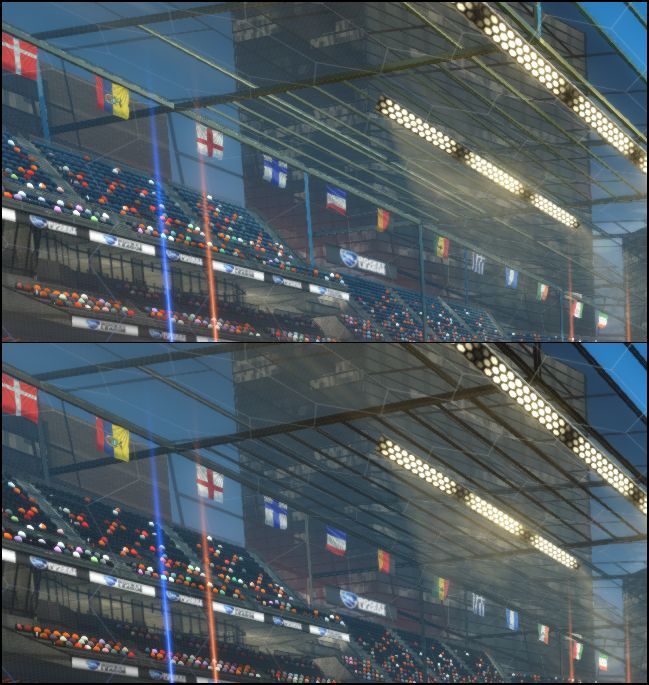
Below, we see the difference between having High Quality Shaders enabled in the top image, and disabling them in the bottom image. As you can see, the beams holding up the roof of the stadium don’t reflect light as realistically with the shaders off as with them on.
Ambient Occlusion is another setting that you can probably disable and not notice too much of a difference. Ambient occlusion basically allows the game to draw more realistic, softer shadows.
The effect is very subtle and likely to escape notice of most users. It’s just another effect that is going to add a little overhead to your graphics card so you probably don’t need it.

Ambient occlusion can be extremely subtle, adding just the tiniest bit more depth and richness to shadows. In the top image ambient occlusion is off while it is on in the bottom. You can just barely make it out along the bottom of the turret and windscreen.
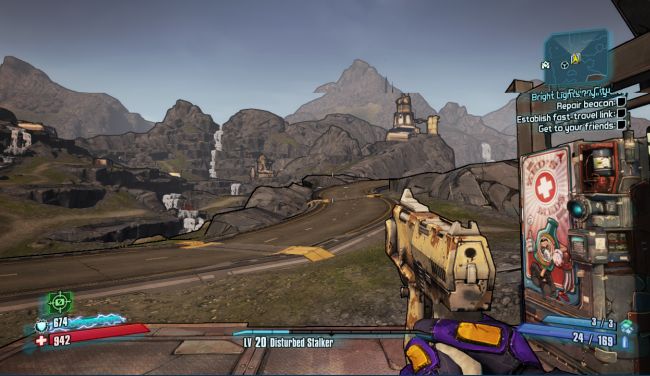
The next item, Depth of Field, is a bit more difficult to illustrate, but it’s fairly easy to explain. Turning this on causes items that are close to appear sharp and in focus, while things in the distance appear blurry and out of focus.
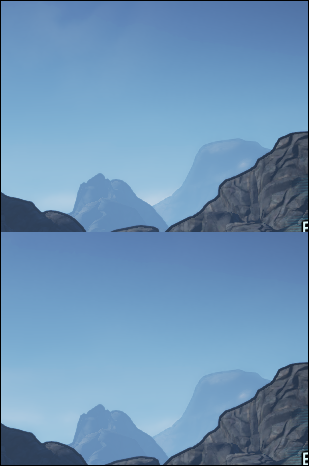
In the top image, Depth of Field is off and the mountain in the far distance is just bit more crisp while the clouds behind it are more pronounced. In the bottom image, the mountain is softer and the clouds are almost imperceptible.
Some swear by depth of field, and think it makes games look more realistic, while others hate it. In reality, it’s unlikely depth of field is going to make or break your video gaming experience, because you’re usually looking at the thing closest to you at all times. It’s all about your own personal preference, and it probably serves more of a purpose in games that display more distance, such as a horizon or landmarks (trees, mountain, etc.).
When you enable Bloom, light emitting from its source is distorted and bleeds beyond its boundaries, creating a bloom effect. In some video games, bloom is far more pronounced, particularly if you’re playing a game in darkened area and you come upon a bright light source. Bloom is another item that you can probably live without, though when employed well, it can considerably enrich a game.
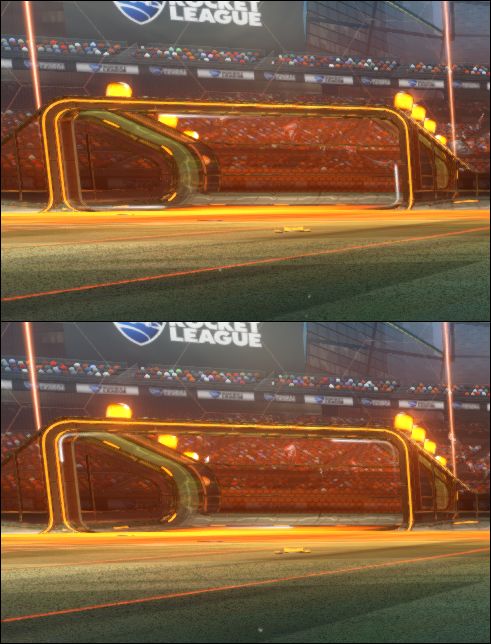
In the top image, bloom is off, while in the bottom it is on. The difference in this particular game is fairly discrete, which is actually nice. Too much bloom can be distracting and even unrealistic.
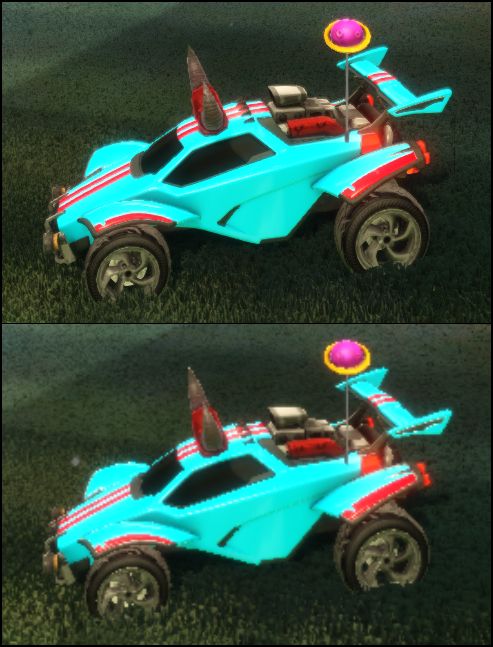
Dynamic Shadows cause shadows to change as an object moves. For example, looking at our trusty little car below, when dynamic shadows are enabled in the bottom shot, the shadow of the car will change as the car moves around the field. Dynamic shadows tend to consume a lot of graphics resources, so they’re a good thing to disable if you have a slower computer.

Motion Blur isn’t something we can easily show you in simple screenshots, but it’s pretty self-explanatory: to add more realism to games, objects will appear blurry when they’re moving quickly. For example, when you hit the soccer ball in Rocket League, it might appear as it is moving so fast that it is a blur. Turning this off isn’t likely to impact your gaming experience, and if you tend to get a little queasy when playing fast-moving games, turning it off might make you more comfortable.
Other games might employ different types of blur. Borderlands 2 has a setting for Ansiotropic Filtering, which aims to reduce motion blur and increase detail. It comes with a small performance hit, but not nearly as much as something like anti-aliasing, so set it to whatever your computer can handle.
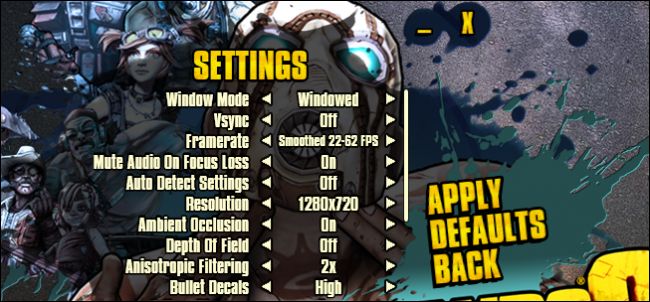
It’s important to note that some items in a game’s settings may be unique to that game. For example, in the case of Rocket League, weather effects do play a role, but in a game such as Borderlands 2, you’ll see effects unique to that game such as “Bullet Decals” and “Foliage Distance”. Often, these will be a bit more self-explanatory.
Still, as you can see there are still items that you’re likely to see in all games, including anti-aliasing, ambient occlusion, and so on.
In the end, what you want to see when you play and what you can actually do, will depend almost entirely upon your computer’s capabilities. If you use a laptop for the majority of your gaming, then it’s likely to be far more underpowered than a desktop computer with a dedicated graphics card. Moreover, in most desktops you can replace the graphics card while on a laptop you’re stuck with what you have.